Table of Contents
Advertisement
Quick Links
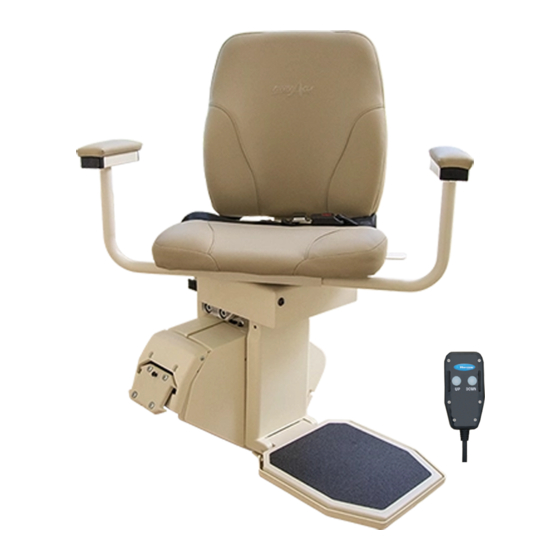
HEAVY DUTY STAIR LIFT SYSTEM
Installation and Service Manual
WARNING! STRICT ADHERENCE TO THESE INSTALLATION INSTRUCTIONS is required and will promote the safety of installers,
as well as those who will use the lift for its intended purpose. Any deviation from these instructions will void the LIMITED
WARRANTY that accompanies the product. Additionally, any party installing the product who deviates from the INSTALLATION
INSTRUCTIONS shall be taken to agree to INDEMNIFY, SAVE AND HOLD HARMLESS the manufacturer from any and all loss,
liability or damage, including attorney fees, that might arise out of or in connection with such deviation.
Advertisement
Table of Contents

Summary of Contents for Harmar Mobility Pinnacle
- Page 1 HEAVY DUTY STAIR LIFT SYSTEM Installation and Service Manual WARNING! STRICT ADHERENCE TO THESE INSTALLATION INSTRUCTIONS is required and will promote the safety of installers, as well as those who will use the lift for its intended purpose. Any deviation from these instructions will void the LIMITED WARRANTY that accompanies the product.
-
Page 2: Table Of Contents
Important! It is imperative that this manual be read and understood prior to attempting installation of the stair lift. Please observe all cautions and warnings in this manual, and on equipment labels. Pinnacle HD Stair Lift Manual | | www.Harmar.com | 866-351-2776... -
Page 3: Preliminary Checks
• Extra plastic racks (2 or 3) • Seat Belt • Top limit cam Footrest Box: • Footrest complete with: • Swivel Slide Rails • Swivel Pin bracket • Rear Seat Support 866-351-2776 | www.Harmar.com | | Pinnacle HD Stair Lift Manual P/N: 75403 RevB 72618... -
Page 4: Installation Procedures
DO NOT cut the end of the rail that contains the joint holes. Remove the charger strips and wire harness before cutting. Extension 7" 9" 11" 13" 3.9" 5" 6.1" 7.2" Horizontal intrusion on top landing Pinnacle HD Stair Lift Manual | | www.Harmar.com | 866-351-2776 P/N: 75403 RevB 72618... -
Page 5: Rail Installation
Step 6: Turn over joined rails and install the remaining two (2) joint fasteners and firmly tighten with 3/16" Allen wrench. Then slide rack pieces down to cover joint. 866-351-2776 | www.Harmar.com | | Pinnacle HD Stair Lift Manual P/N: 75403 RevB 72618... - Page 6 The edge of the track needs to be 7" from the wall or any obstruction. Pinnacle HD Stair Lift Manual | | www.Harmar.com | 866-351-2776...
-
Page 7: Chassis Installation
(2) feet down the rail, pushing gently on the chassis to ensure the chassis does not pull any rack to the top. CAUTION! Do not ride on the chassis or lift until the install is complete. 866-351-2776 | www.Harmar.com | | Pinnacle HD Stair Lift Manual P/N: 75403 RevB 72618... -
Page 8: Final Rail Installation
T30 Torx bit. TIP! Too much torque applied to these screws may result in damage. Take your time and apply grease to threads. Pinnacle HD Stair Lift Manual | | www.Harmar.com | 866-351-2776 P/N: 75403 RevB 72618... -
Page 9: Footrest And Seat Installation
Step 3: Position the footrest onto the two (2) seat-leveling bolts on the outside of the chassis by aligning the large opening at the slot ends of the footrest. Step 4: Ensure the footrest is fully engaged. 866-351-2776 | www.Harmar.com | | Pinnacle HD Stair Lift Manual P/N: 75403 RevB 72618... - Page 10 When the 6-pin footrest and the 8-pin chair cables are both connected to the chas- sis, the black installation switch on the chassis is disabled and will not function. Pinnacle HD Stair Lift Manual | | www.Harmar.com | 866-351-2776 P/N: 75403 RevB 72618...
- Page 11 (2) hex head bolts and washers. Ensure that one of the swivel pins is engaged into the slot in the swivel cam. Step 10: Connect the seat cable to the 8-pin connector on the chassis. 866-351-2776 | www.Harmar.com | | Pinnacle HD Stair Lift Manual P/N: 75403 RevB 72618...
- Page 12 If the LED indicator light is still not green after testing sensors, turn the unit off and recheck all wire plugs. Turn the unit on again and recheck the LED indicator light cycle. When the LED indicator light remains green the lift is ready to operate. Pinnacle HD Stair Lift Manual | | www.Harmar.com | 866-351-2776 P/N: 75403 RevB 72618...
-
Page 13: Remote Call/Send Control Operation
Connect the 6-pin footrest and 8-pin chair wire harnesses to the chassis and then turn the red “ON/OFF” switch to the “ON” position (I). Test each remote control in both the up and down directions. 866-351-2776 | www.Harmar.com | | Pinnacle HD Stair Lift Manual P/N: 75403 RevB 72618... -
Page 14: Completion Procedures
STEP 3: Use a 5/64" Allen wrench to loosen the set screw in the limit cam. Adjust the limit cam up or down and retighten the set screws. Repeat the above steps until the lift stops in the desired position. Pinnacle HD Stair Lift Manual | | www.Harmar.com | 866-351-2776... -
Page 15: Test Safety Stop Switches
DO NOT USE THE LIFT. 866-351-2776 | www.Harmar.com | | Pinnacle HD Stair Lift Manual P/N: 75403 RevB 72618... -
Page 16: Additional System Checks
STEP 6: Drive to the top or bottom and check the battery charging light. If the light is orange or red, the batteries are being charged. THE LIFT IS NOW READY FOR USE. Pinnacle HD Stair Lift Manual | | www.Harmar.com | 866-351-2776 P/N: 75403 RevB 72618...


Need help?
Do you have a question about the Pinnacle and is the answer not in the manual?
Questions and answers