Table of Contents
Advertisement
Advertisement
Table of Contents

Related Manuals for Icom IC-A16


Summary of Contents for Icom IC-A16
- Page 1 FULL MANUAL INTRODUCTION 1 ACCESSORIES ATTACHMENTS 2 PANEL DESCRIPTION 3 BATTERY CHARGING 4 BASIC OPERATION VHF AIR BAND TRANSCEIVERS 5 SCAN OPERATION iA16 6 MEMORY OPERATION iA16E 7 OTHER FUNCTIONS 8 HEADSET CONNECTION 9 SET MODE 10 SPECIFICATIONS AND OPTIONS 11 TROUBLESHOOTING INDEX...
-
Page 2: Table Of Contents
■ Using a Weather channel ......11 ■ Using the Duplex function ......11 Icom, Icom Inc. and the Icom logo are registered trademarks of Icom Incorporated (Japan) in Japan, the United States, the United Kingdom, Germany, France, Spain, Russia, Australia, New Zealand and/or other countries. -
Page 3: Accessories Attachments
ACCESSORIES ATTACHMENTS Supplied accessories Antenna Battery pack Belt clip Handstrap Battery charger* Power adapter* * May not be supplied, or the shape may be different, depending on the transceiver version. Attaching accessories D Antenna Connect the supplied antenna to the antenna connector. - Page 4 ACCESSORIES ATTACHMENTS Attaching accessories (Continued) D Battery pack/Battery case Battery sliding locks CAUTION: DO NOT attach or detach the battery pack or the battery case when the transceiver is wet or soiled. This may result in water or dust getting into the transceiver, battery pack, or battery case and may damage them.
- Page 5 ACCESSORIES ATTACHMENTS Attaching accessories (Continued) D Belt clip To attach: Belt clip 1. Remove the battery pack from the transceiver, if it is attached. 2. Slide the belt clip in the direction of the arrow until the belt clip is locked and makes a ‘click’ sound. To detach: Lift the tab up (1), and slide the belt clip in the direction of the arrow (2).
-
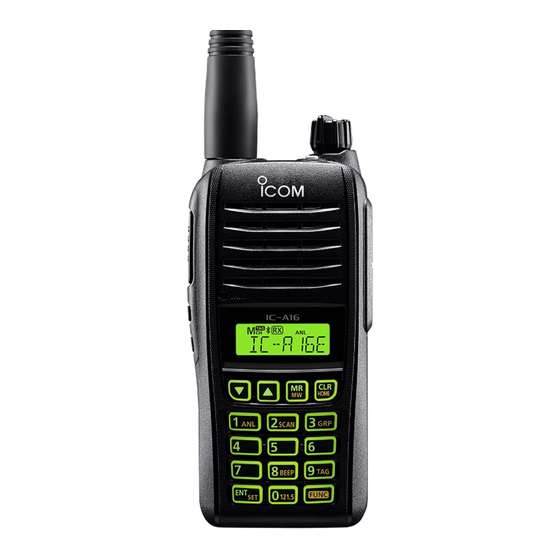
Page 6: Panel Description
PANEL DESCRIPTION Front, top, and side panels Keypad z Push to set the frequency, select a Memory channel, and so on. z Push [FUNC], and then push or hold down another key within 3 seconds to use the secondary functions listed below. -
Page 7: Function Display
PANEL DESCRIPTION Function display 1 FUNCTION ICON Displayed for 3 seconds when you push [FUNC], to use secondary functions assigned to a key. 2 MEMORY CHANNEL ICON Displayed when a Memory channel is selected. (p. 7) 3 TAG ICON Displayed when a tagged Memory channel is selected. (p. 8) 4 BLUETOOTH ICON (For only the transceiver with the built-in Bluetooth unit) Displayed when a Bluetooth headset is connected. -
Page 8: Battery Charging
BATTERY CHARGING Battery charger NOTE: Before attaching or detaching a battery pack, BE SURE to turn OFF the transceiver by rotating [VOL] fully counter clockwise until it makes a “click” sound. Otherwise, a transceiver malfunction could occur. D Supplied battery charger D Optional BC-214 MULTI CHARGER Charging time: Charging time:... -
Page 9: Basic Operation
BASIC OPERATION Receiving and transmitting Selecting the 121.5 MHz emergency frequency D Setting the frequency In case of an emergency, you can immediately select L If the transceiver is in the Memory mode, push the 121.5 MHz emergency frequency. [CLR]/[HOME] to exit the Memory mode. z Push [FUNC], and then push [121.5] to select the z Use the keypad to set the frequency. -
Page 10: Scan Operation
SCAN OPERATION Using the Scan function TAG setting z Push [FUNC], and then push [2]/[SCAN] to start a Select whether or not to tag selected channels for scan. scanning. Untagged channels are skipped during a L Push [▲] or [▼] to change the scanning direction. scan. -
Page 11: Memory Operation
MEMORY OPERATION Description The transceiver has 200 memory channels to save often-used frequencies. The frequency and channel name can be saved into each memory channel. NOTE: • Editing Memory channels may be disabled, depending on the transceiver’s presetting. Ask your dealer for details. - Page 12 MEMORY OPERATION Editing memory channels (Continued) D Copying a frequency from a Memory channel You can copy the selected channelʼs frequency to the VFO mode. The function is useful to search signals around the selected channelʼs frequency. 1. Push [MR]/[MW] to enter the Memory mode. 2.
-
Page 13: Other Functions
OTHER FUNCTIONS Using the Home function Using the Duplex function (For only the USA version) The Home function resets the Set mode settings to default. The duplex function enables you to call a flight service z Hold down [CLR]/[HOME] for 2 seconds to reset the station while receiving on a VOR frequency. -
Page 14: Headset Connection
HEADSET CONNECTION Using a Bluetooth ® headset (For only transceivers with the built-in Bluetooth unit) Transceivers with the built-in Bluetooth unit can 2. Entering the VS-3 Pairing mode operate with Bluetooth headsets. Refer to the VS-3’s instruction manual for details. The communication range of Bluetooth is approximately 10 meters (33 ft). -
Page 15: Using A Wired Headset
HEADSET CONNECTION Using a wired headset Connect your headset through the optional OPC-2401 headset adapter. PTT switch (User supplied, if necessary) Use a PTT switch with a 3.5 mm (1/8 inch) plug. Headset (User supplied) OPC-2401... -
Page 16: Set Mode
SET MODE Using the Set mode You can use the Set mode to set infrequently changed values or function settings. 1. Push [FUNC], and then hold down [ENT]/[SET] for 1 second. L Set mode item is displayed. 2. Push [MR]/[MW] to select an item. L Push [ENT]/[SET] to go to the next tree level, go back a level by pushing [CLR]/[HOME]. - Page 17 SET MODE Set mode items (Continued) ■ Bluetooth settings “ ” (For only the transceiver with built-in Bluetooth unit) Icom headset “ ” Power save “ ”: D Bluetooth “ ” Select whether or not to operate in the Bluetooth Turn the Bluetooth function ON or OFF.
-
Page 18: Specifications And Options
• Weight (approximate): 257 g, 9.1 oz with BP-280 D Transmitter • Output power: 6.0 W (PEP), 1.8 W (CW) • Modulation limiting (IC-A16): 70 ~ 100% • Modulation depth (IC-A16E): • Audio harmonic distortion: IC-A16 Less than 10% (at 60% modulation) -
Page 19: Options
The Bluetooth headset with a [PTT] switch. About the third party Bluetooth headsets: Icom has checked the PTT operation with some 3M Peltor headsets, such as the WS Headset XP, WS ProTac XP and WS Alert XP. (Compatibility not guaranteed.) Some options may not be available in some countries. -
Page 20: Troubleshooting
TROUBLESHOOTING Troubleshooting PROBLEM POSSIBLE CAUSE SOLUTION REF. The transceiver does • The battery is exhausted. • Recharge the battery pack. p. 6 not turn ON. • The battery pack is not correctly attached. • Correctly reattach the battery pack. p. 2 •... -
Page 21: Index
INDEX Accessories, supplied ............................1 Auto connect................................15 Automatic noise limiter ............................7 Backlight ................................14 Battery charging ..............................6 Bluetooth headset Bluetooth settings .............................. 15 Disconnecting ..............................12 Electromagnetic Interference ..........................12 Pairing ................................12 Unpairing ................................12 CPU version ................................15 Emergency frequency............................ - Page 22 A7497-3EX 1-1-32 Kamiminami, Hirano-ku, Osaka 547-0003, Japan © 2019 Icom Inc. Jan.2019...
Need help?
Do you have a question about the IC-A16 and is the answer not in the manual?
Questions and answers