Icom IC-A110 Instruction Manual
Vhf air band transceiver
Hide thumbs
Also See for IC-A110:
- Service manual (38 pages) ,
- Instruction manual (24 pages) ,
- Price list (158 pages)

Related Manuals for Icom IC-A110


Summary of Contents for Icom IC-A110
- Page 1 INSTRUCTION MANUAL VHF AIR BAND TRANSCEIVER iA110 This device complies with Part 15 of the FCC Rules. Operation is subject to the condition that this device does not cause harmful interference.
-
Page 2: Foreword
If disregarded, inconvenience only. No risk NOTE of personal injury, re or electric shock. FCC caution: Changes or modifications to this transceiver, not expressly approved by Icom Inc., could void your authority to operate this transceiver under FCC regulations. CAUTIONS R WARNING! NEVER carefully and completely headset or other audio accessories at high volume levels. -
Page 3: Table Of Contents
DO NOT place unit in a non-secure place to avoid inad- vertent use by children. DO NOT push the PTT when not actually desiring to trans- mit.. AVOID using or placing the transceiver in direct sunlight or in areas with temperatures below –30°C (–22°F) or above +60°C (+140°F). -
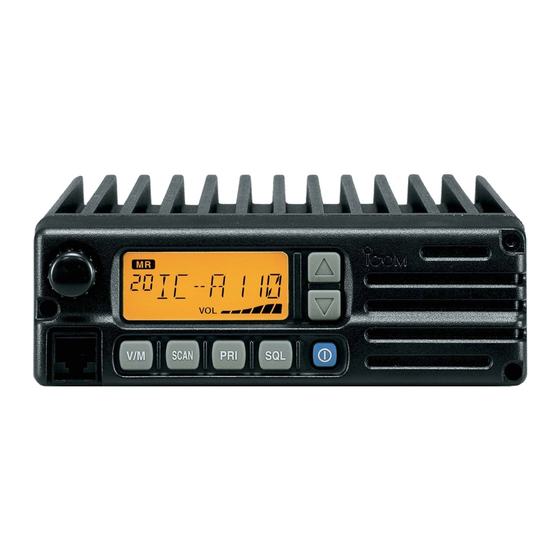
Page 4: Panel Description
PANEL DESCRIPTION I Panel description q TUNING [DIAL(TS)] ➥ Changes the operating frequency; memory channel in memory mode; set mode contents in set mode, etc. ➥ Push to toggle the dimmer control OFF, Low and High. ➥ Push and hold for 1 sec. to select the Tuning Step [TS]; 1 MHz or 10 kHz are available. - Page 5 y SQL SWITCH [SQL] ➥ Push to turn on the squelch adjust mode. (p. 6) ➥ Push and hold this switch for 1 sec. to turn ON/OFF the ex- ternal speaker output. (p. 4) u PRIORITY SWITCH [PRI] Push to select priority channel. (p. 11) •...
-
Page 6: I Function Display
PANEL DESCRIPTION I Function display q MEMORY MODE INDICATOR (p. 5) Appears when memory mode is selected. w DUALWATCH INDICATOR (p. 7) Indicates when the dualwatch function is activated. e SCAN INDICATOR (p. 8) Indicates when the scan function is selected. r BUSY INDICATOR (p. -
Page 7: Basic Operation
I Power ON q Push [POWER] to turn power ON. w Operate the transceiver as indicated in the following sec- tions. e Select the desired memory channel (or VFO frequency) with the [V/M] keys. • When receiving a signal, appears and audio is emit- ted from the speaker. -
Page 8: I Squelch Function
BASIC OPERATION I Squelch function The transceiver has a noise squelch circuit to mute undesired noise while receiving no signal. D Setting the squelch level q Push [SQL] to turn the level adjusting mode ON. w Turn the tuning [DIAL] to select the squelch level. ‘SQ 01’... -
Page 9: Scan Operation
I Scan operation q Push [V/M] to select memory mode or VFO mode, if nec- essary. • “ ” appears on the memory mode. w Make sure the squelch level is set to the threshold point. • Set a squelch level (01 to 25) where the noise is muted. e Push [SCAN] to start scan. -
Page 10: I On-Hook Scan
SCAN OPERATION I On–hook scan On–hook scan (Hanger scan) is available when taking the mi- crophone from its hanger (off–hook) and /or returning it into the hanger (on–hook). q Push [SCAN] to start scanning. w When receiving a signal, scan pauses until the signal dis- appears. -
Page 11: Memory Programming
I Programming a memory channel The transceiver has 20 memory channels for storage of often -used frequencies. q Push [V/M] to select VFO mode, if necessary. w Turns the [DIAL] to select the desired frequency. • Push [DIAL/TS] one or more times to use the dial select function, if desired. -
Page 12: I Memory Names
MEMORY PROGRAMMING I Memory names ï Programming memory names q Select the memory channel to be programmed: ➥ Push [V/M] to select memory mode. ➥ Turns [DIAL] to select the memory channel. w Push [V/M] for 5 sec. to enter memory name writing mode. •... -
Page 13: Other Functions
I Initial set mode Initial set mode is accessed at power ON and allows you to set seldom-changed settings. In this way you can “customize” transceiver operations to suit your preferences and operating style. D Entering initial set mode q While pushing and holding [V/M] + [TS(DIAL)], push [POWER] sw to turn power ON. -
Page 14: Priority Channel
OTHER FUNCTION D Priority channel The priority channel is used to store your most often-used channel for quick recall. In addition the priority channel is monitored during priority scan modes. The default setting for the priority channel will differ depending on pre-programming. ➥... -
Page 15: Connection And Installation
I Rear panel and connections fi OPC-871 HEADSET ADAPTER (Option) q Connects to an antenna Ask your dealer about antenna selection and best installa- tion location. (Standard 50 Ω antenna with a SWR <3.0) w MICROPHONE HANGER Connect the supplied microphone hanger to the vehicle’s ground for hanger scan function when hanging or releas- ing the microphone. -
Page 16: I Mounting
CONNECTION AND INSTALLATION I Mounting Flat washer Spring washer When using self-tapping screws The universal mounting bracket supplied with your transceiver allows overhead or dashboard mounting. Please read the fol- lowing instructions carefully. • Mount the transceiver securely with the 4 supplied screws (M5 ×... -
Page 17: Cloning
D Data cloning Cloning allows you to quickly and easily transfer the programmed contents from one transceiver to another transceiver, or, data from PC to a transceiver using the optional CS-A110 cloning software. D Transceiver to transceiver cloning q Connect the OPC-591 with adapter plugs to CLONING CABLE the [MIC] jack of the master and slave transceivers. -
Page 18: Specifications
SPECIFICATIONS D General • Frequency coverage : 118 to 136.975 MHz • Channel spacing : 25 kHz or 25/8.33* kHz • Mode : AM (6K00A3E) • Number of memory channels : 20 • Acceptable power supply : 13.75* V or 27.5* V DC (negative ground) •... -
Page 19: Specifications
• Channel spacing: 25 kHz (Actual frequency is displayed.) Operating Freq. Channel spacing Channel ID (MHz) (kHz) (Displayed Freq.) 118.0000 118.000 118.0250 118.025 118.0500 118.050 118.0750 118.075 118.1000 118.100 • Channel spacing: 8.33* kHz Operating Freq. Channel spacing Channel ID (MHz) (kHz) (Displayed Freq.) -
Page 20: Opc-871 Headset Adapter
OPC-871 I OPC-871 Headset adapter When using an optional headset, such as those from the David Clark Co. via the adapter transmitted voice to the headset for monitoring. (pgs. 5, 10) D Connection HEADSET (Must be purchased separately.) HEADSET ADAPTER D D Installation The optional OPC-871 HEADSET ADAPTER install as follows. - Page 21 OPC-871 • Use the upper side mounting hole. • You can mount the attachment on either side of the transceiver. • Bent the plastic dust cover before install the strain relief into the notch. Fig. 3 Fig. 2...
-
Page 22: Options
OPTIONS D Other options OPC-871 HEADSET ADAPTER (See pgs. 17-18) CS-A110 CLONING SOFTWARE Provides quick and easy programming of items, including pri- vate channels, scan settings, etc., via an IBM ® ® (Microsoft Windows 95/98) to transceiver. OPC-478 CLONING CABLE OPC-592 CLONING CABLE ADAPTOR These three components work as one set and provide a quick... - Page 24 A-5616H-1EX-q Printed in Japan 1-1-32 Kamiminami, Hirano-ku, Osaka 547-0003 Japan © 1999 Icom Inc.
Need help?
Do you have a question about the IC-A110 and is the answer not in the manual?
Questions and answers