Table of Contents
Advertisement
Quick Links
Advertisement
Table of Contents

Related Manuals for Zebex Z-2050


Summary of Contents for Zebex Z-2050
- Page 1 Z-2050 Mobile Data Collector (@ ) T A B User Manual...
-
Page 3: Table Of Contents
Inserting the battery ....................9 Inserting an SD card ....................11 Connecting to a PC....................13 Connecting via the COM1 port ..............13 Connecting via USB ..................14 Connecting the Z-2050 directly via USB ............15 About the Product ....................16 Features .......................16 Applications and uses: ..................16 Getting Started............17 Turning on for the First Time..................17... - Page 4 Inputting Data......................61 Using the On-Screen Keyboard ..............61 Using the Alphanumeric Keypad ..............61 Using Handwritten Input ................61 Network Connections.....................64 Creating a new Dial-Up Connection .............66 Creating a new LAN Connection ..............67 Creating a new WLAN Connection ...............68 Network Connect Screen ................69 Data Backup / Restore...................71 Backing Up Data ...................71 Technical Information..........
-
Page 5: Preface
Preface About This Manual Thank you for your purchase of the Zebex Z-2050 mobile data collector. This product is at the forefront of portable data terminal technology and this manual will provide information on the many and varied options available to you, the user. -
Page 6: Copyright
Zebex Industries Inc. will be under no liability in respect of any defect arising from fair wear and tear, wilful damage, negligence, abnormal working conditions, failure to follow the instructions and warnings, or misuse or alteration or repair of the products without written approval. - Page 7 15.105(b) This equipment has been tested and found to comply with the limits for a Class B digital device, pursuant to part 15 of the FCC rules. These limits are designed to provide reasonable protection against harmful interference in a residential installation. This equipment generates, uses and can radiate radio frequency energy and, if not installed and used in the accordance with the instructions, may cause harmful interference to radio communications.
-
Page 8: Safe Operation
Safe Operation WARNING • Be careful when using the Z-2050; do not drop or knock the device as irreversible damage to the unit may occur. • Keep the Z-2050 away from water or any other liquids. • Do not operate the Z-2050 under extreme temperatures. -
Page 9: Overview
50 MB free HDD space COM1 port USB ports WLAN transmitter (optional) Bluetooth transmitter/receiver (optional) Unpacking The Z-2050 package should contain the following: Z-2050 Bar Mobile Data Collector Docking cradle 1 Stylus 1 AC Mains power cable 1 USB cable (Scanner to USB) - Page 10 (@ ) T A B Docking Cradle Z-2050 Mobile Data Collector AC Mains power adapter RS-232 / COM1 cable USB cable (Scanner to USB) Stylus Pen USB cable (Cradle to USB)
-
Page 11: Charging The Battery
Charging the battery The Li-ion 3.7V rechargable battery can be charged whilst inserted in the device itself or independently via the recharging slot at the back of the cradle. AC Power USB Interface Adapter Jack In RS232/COM1 Interface Connector Cradle - rear view Left LED Right LED Cradle - front view... -
Page 12: Charging The Battery Separately In The Cradle
Charging the battery separately in the cradle 1. Insert the battery into the compartment at the rear of the cradle. 2. Connect the AC mains adapter power jack to the cradle and the other to mains power. NOTES • When charging the battery for the first time, charge for at least 12 hours prior to use. -
Page 13: Inserting The Battery
Inserting the battery When inserting the battery for the first time, follow these directions: 1. Slide the lock latch to the left to open the battery compartment. 2. Push up to open the battery compartment cover. 3. Insert the battery as shown. Inserting the battery - 9... - Page 14 4. Push down the compartment cover until it clicks into place. 5. Lock the battery compartment by sliding the latch to the right until it locks into place. 10 - Inserting the battery...
-
Page 15: Inserting An Sd Card
Inserting an SD card The Z-2050’s internal storage capacity can be expanded with the use of an SD card. To insert the SD card, follow these directions: 1. Slide the lock latch to the left to open the battery compartment. - Page 16 4. Slide the SD upwards into the card slot. 5. Replace the battery and close the compartment door. 6. Lock the battery compartment by sliding the latch to the right until it locks into place 12 - Inserting an SD card...
-
Page 17: Connecting To A Pc
Connecting to a PC In order to use the software supplied with the Z-2050, the mobile data collector must be connected to a PC. Connecting via the COM1 port In order for the sync software to work properly, the cradle must be connected to your computer’s COM1 port. -
Page 18: Connecting Via Usb
Connecting via USB The cradle must also be connected via one of your PC’s USB ports.Attach one end of the cable to the USB interface on the cradle and the other to your PC. 14 - Connecting to a PC... -
Page 19: Connecting The Z-2050 Directly Via Usb
Connecting the Z-2050 directly via USB You can connect the Z-2050 directly to your PC, without the need for the cradle, using the USB cable, attaching it to the port on the left hand side of the device. Connecting to a PC - 15... -
Page 20: About The Product
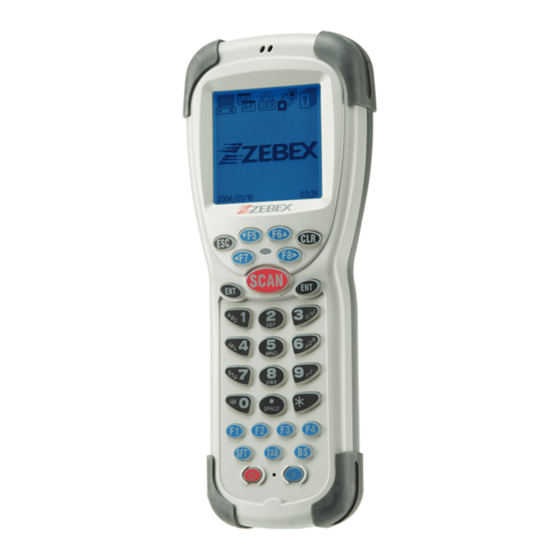
About the Product The Z-2050 is a compact, ergonomic and durable portable data termi- nal. It is designed with an integrated wireless communication and 1D/ 2D with optional barcode data capture, touch screen and 30-key keypad. The design is ideal for the mobile worker as it simple and easy to use anywhere along a supply chain. -
Page 21: Getting Started
Getting Started Turning on for the First Time Once a full battery charge is completed, insert the battery as shown in “Charging the battery” on page 7. 1. Press the power on button. 2. You will be prompted to configure the touch screen. 3. -
Page 22: Key Functions
Key Functions Name Function Escape Press to leave the current screen. Scan Press and hold to scan a barcode. SCAN Clear Press to clear any data from the screen. Favorite/Arrow Press these to move around the keys 5-8 screen or to access favorites numbered 5-8. -
Page 23: Software Installation
Software Installation To configure the Penbex Desktop program, use the software cd that came with the device. Insert the CD and the setup program will run automatically. 1. Click Next to begin installation. Click Yes to agree to the license terms and conditions. - Page 24 6. A confirmation window will appear upon successful installation. Click Finish to exit. 20 - Software Installation...
-
Page 25: Using The Software For The First Time
Using the software for the first time When using the software for the first time, certain settings that need must be configured. 1. Double click the Penbex Desktop icon on your desktop. You will be prompted to select a user. As this is the first time the program has been run, click New to enter one or more users. -
Page 26: Directsync
COM port you wish to use from the drop down menu. Download Click to download files from your PC onto the Z-2050. 1. Select your user name from the list that appears. 2. Click Add to add the files you wish to download. -
Page 27: Software Development Kit (Sdk)
Software Development Kit (SDK) The Penbex OS that is the core of the Z-2050 features a unique modu- lar system architecture that allows you to develop and add your own custom-built applications to get the most out of the device. - Page 28 Development Features of the SDK The SDK allows you to use both UI and GUI objects to build new appli- cations that can be used with the Z-2050. UI (User Interface) objects are the simple building blocks of the system and include: •...
- Page 29 The UI objects are divided into the following categories: • Label • Button • List • Table • Toolbar • Whiteboard • Progress Bar • Menu Bar • Keyboard • Message Box • Scroll Bar • Combo Box • Tree •...
-
Page 30: Scanning Barcodes
Scanning Barcodes The Z-2050 is a highly versatile tool that can scan a wide range of bar- codes (see “Barcode Settings and Symbologies” on page 59 for more details) but it is imperative that it is used in the correct manner. -
Page 31: System Reset
System Reset Using the Cold Reset Function Cold reset allows you to return the scanner to the default factory set- tings, wiping all data from the memory. To use cold reset: 1. Remove the black cap on the stylus to reveal the needle. 2. -
Page 32: Using The Warm Reset Function
“Turning on for the First Time” on page 17. NOTE Following a cold or warm reset, you will be asked whether you want to format the Z-2050’s flash disk or not. Formatting the disk will erase ALL data. 28 - System Reset... -
Page 33: Using The Scanner
Using the Scanner Desktop Features The Z-2050 Mobile Data Collector is equipped with a multi-function desktop program manager that helps you to utilize the collected data with ease. The Desktop tool bar contains the Desktop menu icon, power indica- tor, Date/Time, and the Group drop down list. -
Page 34: Application
Application The Application menu enables you to download, delete, group the applications or receive applications via IrDa function. Application System Info Download... Delete... Group... Beam... Change Icon Set My Card Path... 30 - Desktop Features... - Page 35 Downloading applications or files You can download applications from PC to the Z-2050 for enhanced performance. To install an application on the Z-2050, do the following: 1. Go to the Start menu and select All Programs/Applications/Com- munications/Hyperterminal. 2. Create a new connection.
- Page 36 6. Select Send file from the Transfer menu. The Send File dialog box appears. 7. Select the file you want to upload to the Z-2050 and select Ymo- dem as protocol. Click Send to continue. A file send progress screen appears. You will be notified upon success- ful file transfer.
- Page 37 You can delete the applications that you have downloaded from the Z- 2050. Note: Built-in applications on the Z-2050 cannot be deleted To delete an application, do the following: 1. Select Delete in the Application drop down menu. A window dis- playing the applications installed on the Z-2050 appears.
- Page 38 Editing Groups You can add, delete, rename groups or merge applications from Unfiled Group to a chosen group in the Edit Group function. 1. Select Edit Group from the Application Edit Group menu. 2. The editing screen appears. Main Adding Groups 1.
- Page 39 ? Cancel Beam Application Programs The Beam option enables you to transfer FileMgr A:\DATABASE\ application programs that are downloaded to your Z-2050 to another Z-2050 Mobile Data FileName Size Date Collector device via IrDa. DEMO.DBF 02/17/0. PASSWORD.INI 02/17/0.
- Page 40 Backup Bluetooth Set My Card path The Z-2050 is equipped with an expansion memory card slot that enables you to expand memory for additional software applications and back up your data. When an expansion card is inserted into the Z-2050, it automatically creates a new group called My Card for the *.pbx files stored in the...
-
Page 41: System Information
4. Tap a specific drive to view its contents. Free: 4.71 M Cancel OS Version Select this option to display OS version infor- Main 05:53 mation for the Z-2050. Penbex OS Version FileMgr v2.2 Beta 1.17.00-1021 Console Network ID: 0-0201-2-2-1.06... - Page 42 Display color : Gray Scale Display Horizontal Pixels : Serial number Select this option to view the hardware serial number for the Z-2050. About Desktop Select this option to view the desktop information for the Z-2050 OS. 38 - Desktop Features...
-
Page 43: Using The Filemgr Tool Bar
Using the FileMgr Tool Bar The File Manager displays the current contents of your local disks. It is equipped with a quick access tool bar which enables you to manage the data saved on the Z-2050 with the following functions: FileMgr drop down menu... - Page 44 Copy To To copy a file to a selected folder, do the following: 1. Tap the file you want to copy. FileMgr FileName Size Date PASSWORD.INI 02/17/0. 2. Tap on the options bar, the following Copy to screen appear. Name A: Free: 4.72 M Cancel 3.
- Page 45 Rename To specify a new name for a existing file, do the following: 1. Tap the file you want to rename. FileMgr FileName Size Date /DATABASE 02/17/0. /DOWNLOAD 02/15/0. /PENBEX 02/15/0. PASSWORD.INI 02/17/0. 2. Tap on the options bar. A warning FileMgr dialog appears to confirm renaming of the folder.
- Page 46 Tap OK to confirm. FileName Size Date /DATABASE 02/17/0. The selected file is now deleted from the /DOWNLOAD 02/15/0. 02/15/0. /PENBEX Z-2050. 02/17/0. PASSWORD.INI Rename Are you sure ? CANCEL 42 - Desktop Features...
- Page 47 Move To To move a file to a selected folder, do the following: 1. Tap the file you want to move. FileMgr FileName Size Date PASSWORD.INI 02/17/0. 2. Tap icon on the options bar, the fol- FileMgr lowing screen appear. FileName Size Date /DATABASE...
- Page 48 Disk info To view the disk information of the current drive, do the following: 1. Tap on the options bar, the following Disk Info screen appears. Disk: Disk Type: Ram Disk 2. The screen displays the information of Total Size: 5,156,864 Bytes the disk drive, disk type, total disk size, Used Size:...
- Page 49 Upload files The Z-2050 enables you to upload data to a notebook or PC via Hyper- Terminal program with Ymodem protocol. For instructions on how to configure the Z-2050 and Hyperterminal on your PC, refer to “Downloading applications or files” on page 31.
-
Page 50: File Manager Menus
File Manager Menus In addition, tapping the File Manager icon on the upper left corner of the screen displays the drop down menus for File, System, and Option. File The File menu enables you to manage the files on the database by cre- ating a new folder, copying, renaming, deleting, moving, uploading or downloading files. - Page 51 Run AP Select this option to run an application you have downloaded onto your Z-2050. 1. Select the application you wish to run from the file manager. 2. Select Run AP from the System menu. Disk Info See “Disk info” on page 44.
- Page 52 Defrag Disk A: Select this option to defragment disk A. FileMgr 1. A warning dialog appears. FileName Size Date 2. Tap OK to defragment the disk. /DATABASE 02/17/0. /DOWNLOAD 02/17/0. 02/17/0. /PENBEX PASSWORD.INI 02/17/0. Defrag Disk A: Are you sure ? CANCEL 3.
- Page 53 Option The Option menu allows you to view the set receive path, File Man- ager help file and File Manager version information. File System Option Receive Path Help FileName Size Date About FileMgr /DATABASE 02/17/0. /DOWNLOAD 02/15/0. 02/15/0. /PENBEX Receive Path This screen displays the folder in which Receive Path received files will be stored.
-
Page 54: Console
Console The Console application enables you to configure settings for the Z- 2050. Tap the Console icon to enter Console application. Tap the main bar to and the drop down menu appears. Console -- General General Mail 19 : 35 Owner 2004.02.17 Sound... - Page 55 4 MIN Unlock 5 MIN Calibration 1. Tap the Calibration field to re-calibrate the Z-2050. 2. Tap each of the cross-hairs as they appear (as described in “Turning on for the First Time” on page 17). Password 1. Tap the Password field to adjust pass- word settings.
- Page 56 1. Tap the arrow in the Lock Device field to Console -- General enter the drop down menu. 2. Select Lock or Unlock to lock or unlock 05 : 49 2006.03.06 the Z-2050. 6 MIN Calibration 3. Press to return to the main Console --Assigned-- screen.
- Page 57 LCD Settings Select LCD from the drop down menu to enter the LCD settings screen. Light Gray Console -- LCD Hold and drag the slider to adjust the light gray level. Dark Gray Light Gray Hold and drag the slider to adjust the dark Dark Gray gray level Cursor...
- Page 58 Owner Settings Select Owner from the drop down menu to Console -- Owner enter the owner settings screen. 1. Enter any information about the owner in the text field. 2. Press to return to the main Console screen. Sound Settings Select Sound from the drop down menu to enter the sound settings screen.
- Page 59 Alarm Music 1. Tap the arrow in the Alarm Music field to Console -- Sound enter the drop down menu. System Sound 2. Select the alarm music from Alarm 1 - 5. Alarm Sound 5 Sec Level 3 Sound Volume 3.
- Page 60 Pen Settings Select Pen from the drop down menu to enter the pen settings screen. Pen Width 1. Tap the arrow in the Pen Width field to Console -- Pen Writing enter the drop down menu. 2 Pixels Pen Width : 2.
- Page 61 Bluetooth Settings Select Bluetooth from the drop down menu to enter the bluetooth settings screen. 1. Tap the check box to enable the blue- Console -- Bluetooth Setting tooth function. Bluetooth Enabled 2. Click ADD to enter the bluetooth BDA. Click DEL to delete a previous BDA.
- Page 62 USB Device Settings 1. Select USB Device from the drop down Console -- USB Device Setting menu to enter the USB device settings screen. Disk A USB Device 2. Tap the arrow in the USB Device field to Console -- USB Device Setting enter the drop down menu.
- Page 63 Codabar Enabled ITF 2 of 5 Enabled Code 128 Enabled Code 93 Enabled MSI Enabled RSS Enabled Code ID Enabled Pre/Suffix The Z-2050 can be configured to enable the following: • EAN/UPC • Code 39 • Codabar • ITF2 of 5 •...
- Page 64 EAN/UPC Settings When EAN/UPC is enabled and you click Set, a second screen will appear. Here you can configure EAN/UPC settings in more detail. EAN UPC Setting UPC-A EAN-8 UPC-E EAN-13 UPC-E1 Bookland EAN UPC-A Check UPC-E Check UPC-E1 Check UPC-E to EAN UPC-E1 to EAN Supplementals...
-
Page 65: Inputting Data
Inputting Data Using the On-Screen Keyboard The quickest way to enter data into the Z-2050 is via the on screen keyboard. Use the stylus to input data and then tap the check box in the top right hand corner of the screen to confirm. - Page 66 As soon as the stylus is lifted from the screen, the Z-2050 will interpret and enter that letter into the text field. You must familiarize and practice the following script style.
- Page 67 Change language Use the English/Chinese stroke to change between languages. Symbol shift The symbol shift stroke is used to write a whole range of symbols: Symbol shift= Symbol shift= Symbol shift= Accents See the following table for strokes when using accents: Accentstrokes: write the stroke below, then the letter.
-
Page 68: Network Connections
Creating a Network Connection for the First Time In order to connect to local or remote networks, you must create sep- arate connections on the Z-2050. 1. Tap Network from the main desktop screen. 2. The network wizard will ask if you want Network--Connect to create a new connection. - Page 69 Viewing Connection Settings The second menu in the Network Connect screen provides information on your Dial-up and LAN settings. 1. Tap Network from the main desktop screen. 2. Tap to enter the drop down menu. Network--Connect 3. Select Lan Settings or WLAN Settings to Lan Settings view details.
-
Page 70: Creating A New Dial-Up Connection
Creating a new Dial-Up Connection Select New Dial-up from the network wizard screen or New Dial-up from the drop down menu. The New Dial-up screen appears. 1. Enter your ISP name. New Dial-up 2. Enter your account details (the login Name: details provided to you by your Internet Account :... -
Page 71: Creating A New Lan Connection
The New LAN screen appears. LAN Settings using DHCP 1. Enter an name for the LAN setting. New LAN 2. Tap the DHCP check box. The system will Name: Zebex LAN automatically scan and configure all set- DHCP tings automatically. IP Address : Subnet Mask : 3. -
Page 72: Creating A New Wlan Connection
NOTE When Mode is set to 802.11 AdHoc, the Channel field becomes active. Select from Channels 1-11 to adjust channels should you experience communication problems between the Z-2050 and your WLAN transmitter. To disable your WLAN connection, do the following: 1. -
Page 73: Network Connect Screen
Network from the main desktop screen. Instead the Network--Connect screen appears. Here you can modify options related to your connections. Network--Connect Profile: Zebex WLAN: Default Status: Not connected Set as default Connect... - Page 74 Option Tap the top left hand corner to enter the network connect drop down menu. Two options are available here. Option Auto Disconnect About Network ex WLAN: Default Status: Not connected Set as default Connect Auto Disconnect Select this option to set the system idle time after which the connec- tion will be terminated.
-
Page 75: Data Backup / Restore
Data Backup / Restore The Z-2050 features a data backup system which allows you to backup all data, including system settings and AP data, to an external mem- ory card. You can also restore any previously backed-up data from a memory card using this function. - Page 76 Restoring Data 1. Tap Backup from the main desktop screen. 2. Ensure you have the memory card Restore Backup Restore inserted and tap Restore. Disk System Download Select0 Size0 Start Size Record Date 3. The Backup list appears. Select which Backup list backup file you wish to restore.
- Page 77 Backup Option Menu Tap the top left hand corner of the main backup screen to enter the backup menu. Option Select All Disk Select None System Card Info Download View Log Help About Backup Select0 Size0 Start Size Record Date Select All Select this option to select all of the folders in the list.
- Page 78 74 - Data Backup / Restore...
-
Page 79: Technical Information
Technical Information Z-2050 Specifications System MOTOROLA MC68VZ 33MHz 8 MB SDRAM 4 MB for core flash memory 64 MB for data flash memory LCD Display FSTN 2.5”, 160 X 160 with touch panel Back Light Green EL back light Operating System... - Page 80 Z-2050 Specifications Environmental Operating Temp. 0°C ~ 50°C Storage Temp. -10°C ~ 60°C Operating Humidity 10% ~ 70% (non-condensing) Storage Humidity 5% ~ 70% (non-condensing) Regulatory Approvals CE & FCC Part 15B, 15 C Cradle Single slot USB / RS-232 charging cradle with spare battery slot Software &...
Need help?
Do you have a question about the Z-2050 and is the answer not in the manual?
Questions and answers