Table of Contents
Advertisement
Advertisement
Table of Contents

Subscribe to Our Youtube Channel
Related Manuals for Wassermann Wapo-Ex 12 II


Summary of Contents for Wassermann Wapo-Ex 12 II
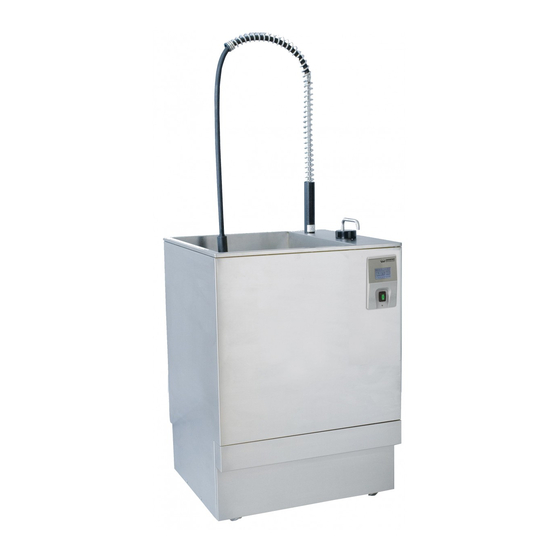
- Page 1 Boil Out Unit Wapo-Ex 12 II USER MANUAL...
- Page 2 Dear customer, Thank you for choosing a product from the Wassermann range. Wassermann Dental- Maschinen incorporates the highest standards of quality and the latest technology. In order to enjoy maximum performance and years of trouble-free operation, please read this user manual carefully before you connect this device and start work, and operate the device according to the recommended guidelines.
-
Page 3: Table Of Contents
Contents 1 Features............................4 2 Safety Symbols used in this Manual.....................5 3 Safety Guidelines......................... 5 4 Responsibility for Operation or Damage..................6 5 Application............................ 6 6 Before Starting..........................6 6.1 Transport............................6 6.2 Installation............................7 6.3 Storage............................7 7 Installation/ Start-up/ Menu Functions..................8 7.1 Water Supply...........................8 7.2 Fitting the Spray Gallows........................8 7.3 Preparation............................9 7.4 Start-up............................10... -
Page 4: Features
Features The Wapo-Ex 12 II combines all-round skill, years of experience and the latest technology to produce an outstanding product. This well-designed free standing unit with integrated spray gallows scalds up to 12 flask halves simultaneously and fully automatically. The innovative multifunction touch-screen terminal offers diverse functions and reproducible procedures by simple programming. -
Page 5: Safety Symbols Used In This Manual
Disconnect the power plug before starting any maintenance work. Make sure that the equipment is connected to the correct power source. Use heat-resistant gloves when working with the Wapo-Ex 12 II. Risk of scalding! Do not hold the manual spray head by the rose or hose. -
Page 6: Responsibility For Operation Or Damage
Wassermann Dental-Maschinen GmbH are not extended by these instructions. Application The Wapo-Ex 12 II is suitable for scalding wax for up to 12 flask halves and also for scalding smaller parts in the deeper cover by using the manual spray head. -
Page 7: Installation
Installation Open the box, remove the packing materials, and carefully lift out the device and accessories. Check the included accessories. The device has to stand horizontally on a steady and even surface. Set the unit up close to a water supply tap with ¾” external thread and a water drain. Install the device in a place where it will not block the working area and the functionality (take the dimensions into account): Height with spray gallows: 1600 mm... -
Page 8: Installation/ Start-Up/ Menu Functions
Installation/ Start-up/ Menu Functions Before starting the unit, connect up the following: Water Supply Insert the supplied feeder hose gasket in its seat. Connect the hose to the tap. Connect the drain hose with the help of a hose clamp to the outlet on the unit. ... -
Page 9: Preparation
Preparation As well as connecting the unit correctly, the following tasks need to be carried out before you start-up: Remove both sliding covers; Remove the flasks, fence for small parts and scalding channel; Swing the spray arm up and remove; ... -
Page 10: Start-Up
Start-up Prior to initial operation, attach and check the feeder and drain hoses! Firmly clamp the supplied drainage hose to the device and ensure there is a suitable drainage facility. 7.4.1 The Selector Lever The following functions can be set using the selector lever: Automatic Pump down scalding... - Page 11 Water fills the container to the working level and is heated to the operating temperature automatically (approximately 1.5 hours). The default setting for this is 85 °C/185 °F. Add wax remover once the operating temperature (nominal temperature display 85 °C) has been reached.
- Page 12 Define the unit's main parameters before switching it on. These settings are performed in the set-up menu . Familiarize yourself with the system's various options before starting the scalding process. This particularly applies to functions The start menu Marking Set-point temperature To the setup menu 17 18 Heater, inlet or roller on/off...
- Page 13 Set-up menu page 2 °C/°F Date and time Forward at menu Work mode Information Back to start menu Set-up menu page 3 Parameter roller Parameter inlet Forward at menu Water supply in manual operation Back to start menu...
- Page 14 Specification of the operation 5 – 19 Menu manual spray head Heater The manual spray process is started by pressing the symbol. The symbol is inverted. The process is stopped by pressing the inverted symbol. This function is available from 66 °C. If the temperature falls below 66 °C the process is canceled and the heating symbol appears.
- Page 15 Preheating temperature / Standby temperature Defines the target temperature once the main switch has been activated. The pre-heat temperature also applies to waiting times and rest periods. Default: 85 °C If the program temperature selected is higher, the temperature reverts back to this value when the program ends.
- Page 16 Definition of calibration method Only necessary for start-up with deviating water quality! This calibration [CAL] is only required if your Wapo-Ex 12 II boil out unit does not correctly detect the water level. Important information: At first check and clean the combi sensor v.2!
- Page 17 Selection of temperature (Fahrenheit or Celsius) Pictogram for the time and date function cycle Selection of work mode Defines whether the scalding time should start immediately or only after the heating value has been reached. (a) Unit heats up to the temperature programmed under plus tolerance to compensate for heat loss through the conveying pump.
- Page 18 Please note that, owing to the scalding process, the temperature can fall by several degrees. The higher the set temperature, the higher the deviation. Information Here the parameters from the touch screen, sensors, hardware and software are displayed. „Back to start menu“ Automatic wax removal The automatic wax removal process is conducted before or after the scalding process once a minimum temperature of 80 °C has been reached.
- Page 19 Automatic water supply The automatic water supply is different in program flow than in the stand-by mode. During waxscalding the function „Filling during waxscalding“ decides about refilling. During the stand-by mode the function „Filling at Power-On“ decides about the ...
- Page 20 Function: Filling at Program end Allows refilling after waxscalding. Filling at Program end Default: ON Function: Filling before entering sleep Allows refilling before entering sleep. Filling before entering Sleep Default: ON Function: Filling during waxscalding Allows refilling during waxscalding. ...
- Page 21 Filling time limit The inlet can be done in adjustable intervals or constant. The programming can happen through variable times of inlet, interval times and the total time of all inlet times. The activated water supply can be recognized through the symbol CONST (a) Default: 30s ON / 90s OFF / 120s = sum of all ON times (b) Manually: 10s-59s ON / 0s-199s OFF / 10s-199s = sum of all ON times...
- Page 22 Pump down / drain Unlock the selector lever by pulling up and moving the selector lever to the pump out symbol. Now this symbol appears on the display. Tap to now start or interrupt the pumping process. End the process as soon as the container is empty. The next water supply has to be confirmed by tap the symbol Operating the pump without water may cause the pump to fail.
-
Page 23: Operation
The Wapo-Ex 12 II is protected against running dry if the water is too low. A warning signal also sounds if the water level is too low. An additional safeguard protects the heater against overheating;... -
Page 24: Operation
Operation Switch on the main switch (green rocker switch). The water supply takes place if the automatic water supply is activated. Othervise press to activate the water supply Place prepared cuvettes into the unit's clamp. Unlock the selector lever and set to automatic for automatic scalding. ... -
Page 25: Troubleshooting
This is a new function since version V0143. Fault Cause Solution Wapo-Ex 12 II does not Combi sensor v.2 is dirty Clean the combi sensor v.2 heat Wapo-Ex 12 II does not Start-up with deviating Please contact our service. - Page 26 Touch on at last. Touchscreen Calibrate the touch display Switch on the unit. While the logo malfunction of Wassermann appears please contact the touch display two times. Then you will reach the self- explanatory touch panel-calibration (Fig. 1-2). Screen protector damaged? Please contact our service.
-
Page 27: Care And Maintenance
Clean the outside of the unit with a sponge or soft cloth and mild detergent. The WAPO-Ex 12 II with the combi sensor v.2 comes with an internal cleaning nozzle for the sensor. For cleaning the sensor, please follow the steps of these instruction on page 29. -
Page 28: Cleaning The Wax Container (At Least 1X Per Week, According To Requirements)
10.1.1 Cleaning the Wax Container (at least 1x per week, according to requirements) Remove cover. If more than ¾ full, the waste wax container has to be emptied. This can be reused for less high-quality work. Reinsert container and replace cover. ... -
Page 29: Cleaning Procedure Of The Combi Sensor V.2
10.1.3 Cleaning Procedure of the Combi Sensor v.2 (at least every 6 weeks, according to requirements) The system should be filled with water and wax remover as usual. • Be sure that the system is heated to 90°C (194°F) or more. •... -
Page 30: Dismount And Cleaning Of The Combi Sensor V.2 (If It Is Very Dirty, According To Requirements)
10.1.4 Dismount and Cleaning of the Combi Sensor v.2 (if it is very dirty, according to requirements) The combi-sensor v.2 (REF 170323) (4x M5) unscrew the nuts is located below the cleaning roller (slightly off to the right). Remove the combi sensor v.2 Pull off the sensor plug (6-pin) - Page 31 Disconnect the power plug before starting any maintenance work. Before dismounting, it is necessary to clean the unit. Dismount the side cover or open the door in the side cover. Dismount the combi sensor v.2. Use hot steam for cleaning. ...
-
Page 32: Lime Removal (At Least 6-Monthly, According To Requirements)
10.1.5 Lime Removal (at least 6-monthly, according to requirements) Intermediate lime removal may be needed, depending on the build-up. Up to 500 ccm depending on instrument condition Drain water containing too much wax dissolver Mix Kalk-Ex in cold water ... -
Page 33: Scope Of Delivery/ Accessories
10.6 Scope of Delivery/ Accessories Wapo-Ex 12 II (supply line EU) Item no.: 170970 Wapo-Ex 12 II (supply line USA) Item no.: 170971 Included parts Item no.: Spray gallows 830145 Service set (1 L lime remover and 2 L wax remover) -
Page 34: Technical Data
Technical Data Wapo-Ex 12 II (supply line EU) Item No.: 170970 Wapo-Ex 12 II (supply line USA) Item No.: 170971 Voltage 220–240 V / 50/60 Hz Power consumption 12 A Output max. 3300 W W x H (without spray gallows) x D... -
Page 35: Eu Declaration Of Conformity
Boil Out Unit for Dental-Maschinen GmbH dental Rudorffweg 15-17 applications 21031 Hamburg Germany Model: Wapo-Ex 12 II (supply line EU) Item no. 170970 Wapo-Ex 12 II (supply line USA) Item no. 170971 Applicable DIN EN 61010-1 standards: DIN EN 60335-1 EN 55011 (2009) + A1 (2010) Störspannung/interference voltage (EN 55011 Class A)
Need help?
Do you have a question about the Wapo-Ex 12 II and is the answer not in the manual?
Questions and answers