Table of Contents
Advertisement
Quick Links
Advertisement
Table of Contents

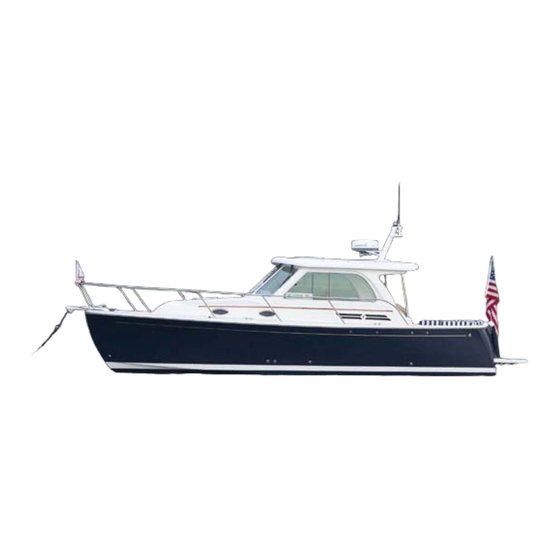
Summary of Contents for Back Cove Yachts Back Cove 30
- Page 1 Back Cove 30 Owner’s Manual...
- Page 2 Phone: 207-594-8844 Email: sales@backcoveyachts.com PO Box 548 23 Merrill Drive Rockland, Maine 04841...
- Page 3 WELCOME The entire team at Back Cove Yachts is pleased that you have selected a Back Cove 30. Your boat has been designed, engineered and built with care to assure you of many years of safe and rewarding boating. The information in this owner’s manual has been compiled to allow you to gain the greatest understanding possible of your boat.
- Page 4 T a b l e o f C o n t e n t s 1.0 Manual Safety Information 2.0 Vessel Information 3.0 Delivery Owner’s Responsibilities Information Sources Dealer’s Responsibilities Warranty and Registration Commissioning 4.0 General Boating Safety Getting Underway Emergency Gear Equipment Routine Systems Checks...
- Page 5 Driveline Steering, Maneuvering and Trim Anchors and Anchoring Exhaust and Cooling Systems 6.10 Climate Control (HVAC) 6.11 Helm 6.12 General Below Deck Deck Helm Deck Galley Cabin Head Swim Platform 7.0 Operations Engine Hatch Lift System and Engine Access Engine Before Starting Starting After Starting...
- Page 6 Fresh Water Water Tank Water Heater Water Pump Sanitation and Bilge Marine Sanitation Device (MSD) Holding Tank Shower Sump Box Sink Drains Fuel Fuel Tank Fuel Tank Vent System and Shut-off Valves Fuel Filter Fuel Fill Deck Plate Fueling Safety Checklist Fuel Return Driveline Engine Alignment...
- Page 7 8.0 Procedures General Maintenance Thru-Hulls/ Sea-Valves Bilge Fire Extinguisher Exterior Maintenance Gelcoat Crazing Gelcoat Repair Gelcoat Blistering Below Waterline Bottom Painting Hatches Deck Hardware Hull to Deck Joint Winterizing Hauling Bottom/ Hull Cutlass Bearing Freshwater System Marine Sanitation Devices Engine / Generator Fuel System Batteries Sea Valves...
- Page 8 1 . 0 M a n u a l S a f e t y I n f o r m a t i o n This Owner’s Manual includes numerous instructions and cautions that should be kept in mind to assure the safe operation of the boat.
- Page 9 Water Tank Capacity Holding Tank Capacity ENGINE/TRANSMISSION Engine Make Engine Serial Number Transmission Make Transmission Serial Number PROPELLER Make Diameter/Pitch DEALER Name Address Phone Service Manager OTHER NECESSARY INFORMATION Refer to Section 5.4 for an overview of the Back Cove 30 particulars.
- Page 10 • Registration: In addition to the registration • Commissioning the boat following the Back requirements for your Back Cove 30 in the state Cove Commissioning Checklist. The dealer must where it is used most frequently, many states...
- Page 11 Static Trim to the boat any product literature on them should be The Back Cove 30 is designed to float correctly on added to those supplied. A complete file will greatly her lines, under normal conditions, when she is on assist the owner, should service be required.
- Page 12 (12) months after the date the yacht is commissioned for the first retail purchaser. b) Back Cove Yachts warrants the hull to be free from structural defects which would make the yacht unfit for the use intended, under normal use and maintenance, for five (5) years from the date the yacht is commissioned for the first retail purchaser.
- Page 13 No claim or breach of warranty shall be cause for cancellation or rescission of the contract of sale for any yacht. An Authorized Back Cove Yachts Dealer or Service Agent is not an agent for Back Cove Yachts...
- Page 14 BACK COVE Dealer Commissioning Checklist DEALER ____________________________________________________________________ HULL IDENTIFICATION NUMBER ________________________________________________ ENGINE MODEL ______________________________________________________________ ENGINE SERIAL NUMBER _____________________________________________________ The following checklist should be followed as part of the dealer commissioning procedure. All work should be carried out in accordance with American Boat and Yacht Council standards, U.S.
- Page 15 1. Inventory Inventory all equipment and report all shortages. 2. Helm Seat Check installation of seat and pedestal. 3. 12V DC Systems Turn “ON” Ship’s service (house) battery ON/OFF switch located on the starboard face of the companionway. Check the voltage of the Ship’s service (house) batteries using the voltmeter at the 12V DC electrical distribution panel (meter position 2) located on the bulkhead aft of the Galley on the starboard side.
-
Page 16: Sling Locations
4. Engine Wiring Check Turn “ON” the Engine Start Battery On / Off Switch. (The switch is located on the starboard face of the companionway.) Check the voltage of the engine start batteries using the voltmeter in the 12V DC the electrical distribution panel (meter position 1). - Page 17 Do not paint any sacrificial zinc. Bottom paint interferes with their effectiveness. Paint trim tabs to manufacturer’s instructions. Check action of all sea valves Check action of rudder. Install any other thru-hull fittings and/or sending units for depth sounders, fish finders or knot meters.
-
Page 18: Starting The Engine
Open engine fuel shut-OFF valve. (Located in the lazarette at the tank.) 8. Starting the Engine Connect manual discharge to fire extinguishing system. (contact Back Cove Yachts with questions regarding this procedure) To prevent accidental discharge during the build, the boat is shipped from factory without the manual pull cable connected to the extinguisher. - Page 19 Check again for leaks: Re-inspect engine raw water cooling system for leaks. Re-inspect engine fresh water cooling system for leaks. Inspect exhaust system for leaks. Re-inspect fuel system for leaks. Re-inspect propeller shaft seal after 15-20 minutes of engine operation. Stop engine.
-
Page 20: Fresh Water System
12. Generator (Optional) Read the generator owner's manual. Open and check generator sea valves (raw water inlet and exhaust outlet) and intake strainer. Open generator fuel shut-OFF valve. (Located in the lazarette at the tank.) Turn “ON” the Generator Start Battery On / Off Switch. The switch is located on the starboard face of the companionway. - Page 21 Run engine up to operating temperature. Check engine coolant level and add, if low. Check that water hoses heat up and carry flow to the heater. Check to see that water in the heater heats up. Check full water system for leaks. Note: Systems shipped in cold weather months will have non-toxic antifreeze in the fresh water system.
-
Page 22: Bonding System
17. Bonding System Note: Proper galvanic protection or “zincing” of the boat can vary due to salinity, temperature, pollution, and flow of water. To assure correct galvanic protection, test the boats bonding system after it has been in the water for 24 hours or more. Check for sacrificial zincs on trim tabs, transom, and rudder. - Page 23 Please sign and return to Back Cove Yachts with Warranty Registration information. I HEREBY CERTIFY THAT THE DEALER COMMISSIONING CHECKLIST HAS BEEN SATISFACTORILY COMPLETED: DEALER SIGNATURE: ______________________________________________________ DATE: ______/______/______ BOAT OWNER SIGNATURE: ______________________________________________________ DATE: ______/______/______ Page 10 of 10...
- Page 24 Please complete, sign and return to Back Cove Yachts for activation of your Warranty (please make a copy for your records) Model: ______________________ Hull #: __________________________ OWNER Name: ______________________________________________________________________________________ Street: ______________________________________________________________________________________ City: _____________________________________ State: ____________________________ Zip: _____________ Home: e-mail: ______________________________________________ Phone: ___________________________...
- Page 25 • Spare Parts waterproof container in a dry location. • Lube Oil • One (1) whistle or horn. The Back Cove 30 factory mounted ships whistle Always Keep Your Owner’s Manual Onboard along standard, but it is good practice to carry an with the engine and accessories manuals.
-
Page 26: Fire Extinguishing System
Float coats, fishing vests, and vests designed with features suitable for various sports activities are examples of this type of PFD The Back Cove 30 is equipped with an automatic fire extinguisher system, located engine Throwable Devices (Type IV) –... -
Page 27: Carbon Monoxide Monitor
IMMEDIATELY OPEN ENGINE COMPARTMENT! THIS FEEDS OXYGEN TO THE FIRE AND THE FIRE COULD RESTART. Wait at least fifteen (15) minutes before opening the Your Back Cove 30 has a carbon monoxide (CO) engine compartment. This permits fire monitor mounted in the cabin. The CO monitor is an extinguishing vapor to “soak”... -
Page 28: Rules Of The Road
4.7 Rules of the Road The captain of your Back Cove 30 is responsible to know and understand the USCG “Navigational Rules” Shut engine off if an object is struck or if you run that apply to the vessel aground. - Page 29 Addressing the myriad of potential emergencies TO AVOID HARM: encountered at sea is clearly beyond the scope of this manual. Back Cove Yachts encourages each - Keep away from engine, generator, and cooking captain and crew to be well informed, cautious fuel exhaust fumes.
- Page 30 5 . 0 V e s s e l O v e r v i e w...
- Page 40 6 . 0 S y s t e m s I n f o r m a t i o n 6.1 Engine Engine Engine Mount Fig_6.1-1 Fig_6.1-2 Engine Sea Valve Generator (optional) Sea Valve and Engine Water Strainer Strainer Fig_6.1-3 Fig_6.1-4 Engine Hatch Lift Cylinder...
- Page 41 6.2 Electrical Start/Engine Batteries House/Ships Batteries Fig_6.2-1 Fig_6.2-2 House/Ships Switch Battery Parallel / ACR Start/Engine Switch Generator Switch Bow Thruster Switch (optional) Stern Thruster Switch (optional) Fig_6.2-3 CD / Stereo Carbon Monoxide Detector Generator Control Panel (optional) AC / DC Distribution Panel Battery Management Panel Fig_6.2-4...
- Page 42 AC / DC Distribution Panel – 1 Shore AC / DC Distribution Panel – 2 Shore Fig_6.2-5a Fig_6.2-5b AC / DC Distribution Panel – 1 Shore and AC / DC Distribution Panel – 2 Shore and Generator Generator Fig_6.2-5c Fig_6.2-5d AC Sub Panel Helm Instrument Panel Fig_6.2-6...
- Page 43 Battery Charger Shore Power Hookup Fig_6.2-8 Fig_6.2-9 Generator (optional) Inverter (optional) Fig_6.2-10 Fig_6.2-11 120V AC Outlet 12V DC Outlet Overhead Switched Lights Fig_6.2-12 Fig_6.2-13...
- Page 44 Helm Deck Light Switch / Light Reading Light Fig_6.2-14 Fig_6.2-15 Cable TV Hookup Courtesy Light Switch at Transom Engine Room Light Door Fig_6.2-16 Fig_6.2-17 ELCI / RCBO Breaker Zinc Anode Galvanic Isolator Fig_6.2-18 Fig_6.2-19...
- Page 45 6.3 Fresh Water Water Deck Fill Plate Hot Water Heater Fig_6.3-1 Fig_6.3-2 Water Pump Water Tank (starboard) Fig_6.3-3 Fig_6.3-4 Fresh Water Filter Fig_6.3-5...
- Page 46 6.4 Sanitation and Bilge Head Fan Switch Tank Full Indicator Waste Pump-out Deck Plate MSD Flush/Rinse Switches Fig_6.4-1 Fig_6.4-2 Waste Tank Vent Filter Waste Tank Macerator Pump Fig_6.4-3 Fig_6.4-4 Sump Box Aft Bilge Pump Aft Bilge Alarm Fig_6.4-5 Fig_6.4-6...
- Page 47 Forward Bilge Pump Bilge Alarm and Control Switch Forward Bilge Alarm Fig_6.4-7 Fig_6.4-8 Waste Discharge Sea Valve Fig_6.4-9...
- Page 48 6.5 Fuel Fuel Tank Fuel Fill Plate Fig_6.5-2 Fig_6.5-1 Engine Fuel Filter Generator (optional) Fuel Filter Fig_6.5-3 Fig_6.5-4 Tank Level Sender Engine Fuel Feed Generator (optional) Fuel Feed Fig_6.5-5...
- Page 49 6.6 Driveline Stainless Steel Ring Compression Bellows Water Injection Port Double Set Screw Shaft Thru Hull Graphite Face Shaft Seal Assembly Fig_6.6-1 Bronze Strut Shaft Coupling Fig_6.6-2 Fig_6.6-3 Propeller Nut (smaller) Propeller Jam Nut (larger) Cotter Pin Propeller Propeller Mounting Detail Fig_6.6-4...
- Page 50 6.7 Steering, Maneuvering and Trim Hydraulic Cylinder Stern Thruster (optional) Packing Nut Fig_6.7-1 Tiller Upper Rudder Shaft Hydraulic Cylinder Rudder Bearing Fig_6.7-2 Fig_6.7-3 Bow Thruster Single Joystick Thruster Control Fig_6.7-4 Fig_6.7-5...
- Page 51 Stern Thruster (optional) Double Joystick Thruster Control (optional) Fig_6.7-6 Fig_6.7-7 Trim Tab Control Switches Trim Tab Fig_6.7-9 Fig_6.7-8...
- Page 52 6.8 Anchors and Anchoring Bow Sprit (optional) Forward Cleat Windlass (optional) Anchor Locker Windlass Foot Switches (optional) Fig_6.8-1 Anchor Locker (open) Bow Roller (optional) Fig_6.8-2 Fig_6.8-3 Helm Windlass Control (optional) Windlass Foot Switch – open (optional) Fig_6.8-4 Fig_6.8-5...
- Page 53 6.9 Exhaust and Cooling Systems Exhaust Riser Exhaust Mixing Elbow Exhaust Support Sea Water Inlet Fig_6.9-1 Exhaust Hose Exhaust Elbow Exhaust Port Fig_6.9-2 Fig_6.9-3 Engine Muffler Fig_6.9-4...
- Page 54 6.10 Climate Control (HVAC) A/C Raw Water A/C Raw Water Strainer (optional) Thru-Hull (optional) A/C Raw Water Pump Fwd Cabin A/C Unit (optional) (optional) Return Air Grill Fig_6.10-1 Fig_6.10-2 A/C Controller (optional) Helm A/C Unit (optional) Return Air Grill Fig_6.10-3 Fig_6.10-4 Head Fan A/C Vent (optional)
- Page 55 (vent position) Cabin Hatch (closed position) Cabin Hatch (closed) Fig_6.10-7 Fig_6.10-8 Side Window (opening) Windshield Hatch (open) Fig_6.10-9 Fig_6.10-10 Set Screw Portlight Adjustable Quick Dog Fig_6.10-11...
- Page 56 6.11 Helm Compass Alarm Panel Engine Ignition Instrument Panel Controls Throttle Control Thrusters Control Trim Tabs Control Engine Display Switches Screen Stereo Remote Windlass ON/OFF and Up/Down Switch (optional) Bilge Pump Switches / Alarms Fireboy Control Emergency Fireboy Discharge Fig_6.11-1 Tilt Helm Wheel Fig_6.11-2...
- Page 57 6.12 General A. Below Deck Fireboy Inverter (optional) Hot Water Heater Water Tank Engine (stbd) Fig_6.12a-1 Seal Guard Fireboy Extinguisher Shaft Brush Fig_6.12a-2 Fig_6.12a-3...
- Page 58 B. Deck Spring Cleat Navigation Light Cabin Hatches Forward Portlight Fig_6.12b-1 Fig_6.12b-2 Transom Pop-up Cleats Cockpit Seat Storage (starboard) Fig_6.12b-3 Fig_6.12b-4 Cockpit Seat (starboard) Side Deck Steps and Drink Holder Fig_6.12b-5 Fig_6.12b-6...
- Page 59 Door Latch Transom Door Cockpit Shower Light Switch Coaxial Cable Hook-Up Cockpit Hatch Shore Power Inlet(s) Fig_6.12b-7 Transom Door Latch Cockpit Shower Fig_6.12b-8 Fig_6.12b-9...
- Page 60 C. Helm Deck Helm Deck Overview Starboard Settee / Lounge Fig_6.12c-1 Fig_6.12c-2 Port Settee and Mate Seat Configured for Port Settee and Mate Seat Configured for Cruising Lounging Fig_6.12c-3 Fig_6.12c-4 Cup Holder Chart Tray Port Settee and Mate Seat Configured for Grab Rail Berth Fig_6.12c-5...
- Page 61 Mate Seat Footrests Companionway Fig_6.12c-7 Fig_6.12c-8 Companionway Catch(s) Fig_6.12c-9...
- Page 62 D. Galley Galley Overview Fig_6.12d-1 Emergency Cut-Off Switch Sink Cook Top Fig_6.12d-2 Fig_6.12d-3 Microwave Trash Bin Fig_6.12d-4 Fig_6.12d-5...
- Page 63 Refrigerator Lower Galley Storage Drawers (aft) Fig_6.12d-6 Fig_6.12d-7 (unlocked) Drawer Latch (locked) Fig_6.12d-8...
- Page 64 E. Cabin Cabin Overview Configured for Lounging Cabin Overview Configured for Berth Fig_6.12e-1 Fig_6.12e-2 Hanging Locker Hanging Locker (open) Fig_6.12e-3 Fig_6.12e-4 Drawer Locker V-Berth Storage Fig_6.12e-5 Fig_6.12e-6...
- Page 65 Bilge Access Shelf Fig_6.12e-7 Fig_6.12e-8 Companionway Steps with Integrated Galley Drawers Fig_6.12e-9...
- Page 66 F. Head Portlight with Shade Medicine Cabinet Access Door Sink Fig_6.12f-1 Forward Bulkhead with Mirror Pull-out Faucet / Shower Fig_6.12f-2 Fig_6.12f-3...
- Page 67 G. Swim Platform Swim Ladder Platform Grab Bar Fig_6.12g-1 Fig_6.12g-2 Platform Pop-up Cleats Platform Support Bracket Fig_6.12g-3 Fig_6.12g-4...
- Page 68 Depress the “UP” part of the switch to raise the hatch and the “DOWN” part of the switch Your Back Cove 30 has been designed to provide to lower it. The lifter operates on 12V DC power.
- Page 69 Running at approximately 80% to 90% of maximum RPM is good practice. The The Back Cove 30 is equipped with a diesel engine. Engine Owner’s Manual has RPM recommendations. Because of the variety of engines available on your Cruising speed is a function of bottom condition, Back Cove 30, refer to your Engine Owner’s Manual,...
- Page 70 Shift the transmission to neutral and secure the vessel. Idle for at least five minutes to cool the engine. To stop your Back Cove 30 engine, refer to the instructions in the Engine Owner’s Manual, found in (Fig_6.1-6) the accessory manual packet.
- Page 71 Your Back Cove 30 has two battery banks: DISCHARGE OF OIL PROHIBITED The Federal Water Pollution Control Act prohibits 1. Engine or “Start” bank comprised of two 12V the discharge of oil or oily waste into or upon the...
- Page 72 Low batteries will affect the starting of the engine, and the operation of other 12V The Back Cove 30 is equipped with an automatic DC systems. Batteries should never be allowed to charging relay switch. (see Fig_6.2-3) Should the...
- Page 73 feeds the Helm breaker panel. Helm circuits are then controlled from switches and circuit breakers. (see Individually switched lights are spread throughout the Fig_6.2-7) engine room (see Fig_6.2-16). The lights are on one circuit, Engine Room Lights, located on the DC distribution panel (see Fig_6.2-5).
- Page 74 J. 120V AC Power AC Electrical Sub Panel There are three power sources for the Back Cove 30 The AC sub panel distributes power to the helm deck standard 120V, 60Hz, alternating current (AC) power AC outlets, cabin AC outlets and microwave oven.
- Page 75 The inverter is located on the starboard side of the O. Bonding System engine room. (see Fig_6.2-11) The Back Cove 30 has a bonding system designed to The “AC Sub Panel” circuits are powered by the minimize the differences in electrical potential inverter.
-
Page 76: Fresh Water
P. Bonding System Maintenance The sacrificial zinc anodes on the hull, trim tabs, and rudder (and prop shaft, if installed) should be inspected periodically, replaced as necessary and never painted. It is normal for the sacrificial zinc anodes to appear “corroded” and decrease in size over time. - Page 77 A. Marine Sanitation Device (MSD) the level indicator reads “FULL”. Leaks in the waste system could develop if the waste system continues The MSD on the Back Cove 30 is a fresh water, to be used after the “FULL” indicator goes on. Follow electrically...
- Page 78 A dependable supply of clean diesel fuel is necessary in order to ensure satisfactory operation of the The fuel system in the Back Cove 30 has been engine. Cleanliness and care in all fuel handling engineered with attention to safety and ease of operation.
- Page 79 • accumulation of excess water. This water may be Check below decks and in the bilge for fumes drawn off through a valve on the bottom of the filter. and fuel prior to restarting engine. The fuel/water separator also contains a filtering element which removes dirt and other contaminants F.
- Page 80 Propeller Installation - Thoroughly check the inside of the propeller hub, shaft, key way, and key for dirt, corrosion, and other conditions which may interfere with proper seating. - Slide the propeller onto the shaft without the key (Fig_6.6-2) and mark the position of the propeller on the shaft with a non-graphite marker.
- Page 81 (see Fig_6.12a-2) to minimize the effect of this. 7.8 Steering, Maneuvering and Trim The steering system on the Back Cove 30 is helm pump driven, hydraulic. The captain should be fully (Fig_6.7-8) acquainted with the information contained in the...
- Page 82 D. Bow Thruster (Fig_6.7-7) (Fig_6.7-4) The bow thruster (see Fig_6.7-4) is electrically driven. The bow thruster enhances maneuverability Do not operate thrusters with the vessel out of of the bow when docking or performing other the water. Doing so will likely damage the maneuvers which requires...
- Page 83 Hot exhaust gasses are a by product of operating The windlass is equipped with switches to operate diesel combustion engines. Your Back Cove 30 uses from both the helm (see Fig_6.11-1 and Fig_6.8-4) a wet exhaust system which cools and muffles the and the foredeck (see Fig_6.8-1 and Fig_6.8-5).
- Page 84 Remove pump cover plate, replace pump Back Cove is of the size and capacity best suited for impeller and cover gasket. the size of your boat. The Back Cove 30 A/C systems Air in system are available as options. Bleed-off air.
- Page 85 (Fig_6.10-1) The system is cooled to maintain optimal operating temperature by a raw water pump. The pump draws water through a seacock in the bilge and filters it through a sea water strainer (see Fig_6.10-1). (The sea water strainer should be inspected and cleaned frequently.) The water passes through the air conditioning/heating unit, and then flows overboard above...
-
Page 86: General Maintenance
Before launching, and each The Back Cove 30 is built with a combination of time the boat is used, each sea valve should be materials and laminating techniques which are most... - Page 87 While Back Cove Yachts does not sanction the practice of polycarbonate is impact resistant it tends to scratch storing a boat in the water in freezing climates. Doing easily.
- Page 88 Empty fuel tanks encourage the formation of condensation. A biocide Cover the Back Cove 30 during storage to prevent and water absorber should be added to the fuel tanks excessive weathering. Ventilation between the winter for winter storage.
- Page 89 Back Cove 30 Wire Number Identification AWC, 19Nov10 (E011 fwd) 12 VOLT DC CABLES 120 VOLT AC 1 Courtesy Lights 68 Generator 2 Cabin Lights 3 Engine Room Lights 70 Shore Power #1 4 Pilot House Lights 71 Shore Power #2...