Table of Contents
Advertisement
Advertisement
Table of Contents
Troubleshooting

Subscribe to Our Youtube Channel
Related Manuals for Emerson Network Power MPH2


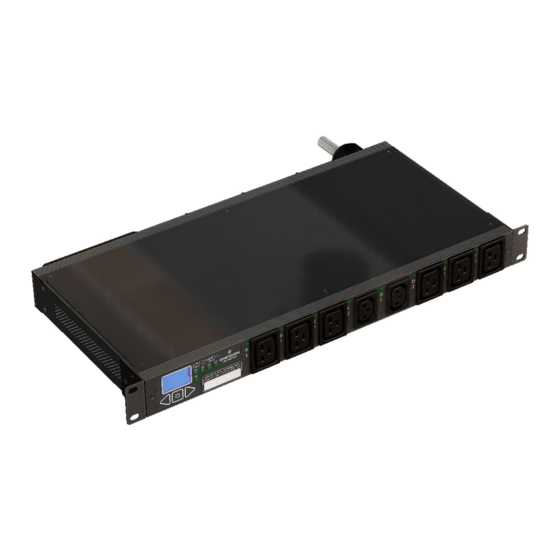
Summary of Contents for Emerson Network Power MPH2
- Page 1 Emerson Network Power MPH2™ Rack PDU ® User Manual...
-
Page 2: Table Of Contents
® 2.3 Installing a MPH2 in an Emerson Rack........15 2.3.1 Mounting Hardware and Tools Required . - Page 3 3.8 Opening and Closing Circuit Breakers ........40 ® 4.0 Emerson MPH2 Rack PDU Specifications..... . . 41 5.0 Troubleshooting .
- Page 4 Figure 2-5: Installing horizontal MPH2 in an Emerson rack ....... .
- Page 5 Table 5-3: Active Line LEDs and Branch Voltage Phasing by Plug Type ....... . 44 ® ™ Emerson MPH2 User Manual...
-
Page 6: Important Safety Instructions
• Refer any unexpected behavior or unusual fault conditions to your local dealer, Emerson representative or Emerson Network Power Applications Engineering. • Emerson recommends powering only devices with safety agency approval from the MPH2 Rack PDU. • For permanently connected MPH2 Rack PDUs (hard-wired versions), a readily accessible disconnect device must be incorporated external to the equipment. - Page 7 (WEEE). For information regarding the scrapping of this equipment, go to http://www.eu.emersonnetworkpower.com (“Products session” or “Contact us” session) or call Emerson’s worldwide technical support at: • 00 80011554499 (toll free number) • +39 0298250222 (toll number based in Italy)
-
Page 8: Safety Symbols
Power Off Indicates the principal On/Off switch is in the Off position. Protective Grounding Terminal Indicates a terminal that must be connected to earth ground before any other connections to the equipment may be made. ® ™ Emerson MPH2 User Manual... -
Page 9: Introduction
Do not interconnect RPC-1000 with RPC2 Rack PDUs in an array. They are incompatible and will not interoperate. NOTE Refer to the RPC2 communications module user manual, SL-20841, for detailed instructions on installing and using the RPC2 module. The document is available at Emerson’s Web site: http://www.emersonnetworkpower.com ® ™... -
Page 10: Figure 1-1 Vertical Mph2 Rack Pdu Configuration
Multiple MPH2 Rack PDUs can be managed with these software applications: • Avocent ® Rack Power Manager software • Avocent DSView ™ management software • Emerson’s Trellis ™ Real-Time Infrastructure Optimization platform software • Liebert ® Nform ® , which adds group-based receptacle management •... -
Page 11: General Characteristics
• Input voltages include 100-120 VAC, 120/208 VAC, 200-240/415 VAC. • Receptacle types include NEMA 5-20, IEC 60320 C13 and IEC 60320 C19 • Input connection supports a highly flexible fixed power cord or hard-wired connection to user accessible terminal block. ® ™ Emerson MPH2 User Manual... -
Page 12: Model Types
This manual presents information about the MPH2’s functions and features. For details on operating the MPH2 through the RPC2 communications module, refer to the RPC2 user manual, SL-20841. The document is available at Emerson’s Web site: http://www.emersonnetworkpower.com The RPC2 is installed near the middle of the MPH2 Rack PDU. The central location eases connections whichever orientation is required for network cabling. -
Page 13: Led Indicators
1.3.3 On-board LCD Controls and Indicators Emerson’s MPH2 has an integrated, on-board LCD that can be used to view information about the rack PDU. The information available depends on the type of MPH2. For additional information about the on-board LCD, refer to 3.0 - Operation. -
Page 14: Branch Overcurrent Protection
Receptacles on Branch A are protected by the circuit breaker labeled A. Three-phase PDUs may also have labeling showing the phase associated with each circuit breaker. NOTE The branch circuit breaker is not designed to be used as a disconnect device for the connected load. ® ™ Emerson MPH2 User Manual... -
Page 15: Hard-Wired Connection Features
1.3.5 Hard-Wired Connection Features Emerson’s MPH2 Rack PDU may be equipped with either a factory-installed input power cord or hard-wired connections. The hard-wired connection will be at one end of the unit. A terminal block in the hard-wired connection compartment is coded to aid in making the connections. A collar secures the input wire, keeping the strain off the terminal block connections. -
Page 16: Installation
2.0 Installation An MPH2 Rack PDU can be installed in an Emerson rack on the frame members using factory-supplied hardware. The unit can be installed on the face or the side of frame members. The unit can be mounted so that the power cord exits either the top or bottom of the rack. -
Page 17: Attaching Input-Power Cords With Conduit
9. Install the cover plate, by either sliding it on or snapping it into place and pressing it against the cover plate. 10. Attach the metal end plate to the MPH2 with four screws provided in the kit. ® ™ Emerson MPH2 User Manual... -
Page 18: Figure 2-2 Re-Assembly To Install An Input Power Cable In Conduit
Plastic Sleeve, Maximum Conductor Cross-Section Stranded, with Ferrule ² ² 0.25 mm 0.5 mm with Plastic Sleeve, Minimum Conductor Cross-Section Stranded, with Ferrule ² ² 4 mm 10 mm with Plastic Sleeve, Maximum ® ™ Emerson MPH2 User Manual... -
Page 19: Tool-Less Mounting
For tool-less mounting, attach the mounts to the rear of the MPH2 Rack PDU, then hang it in the rack as shown in Figure 2-3. Torque the screw attaching the mounting button 17 lb-in. (2 Nm). NOTE Brackets are not supplied. A range of brackets for Emerson and other manufacturers’ racks are available as accessories. Figure 2-3 Tool-less mounting... -
Page 20: Installing A Mph2 In An Emerson Rack
Mounting the Vertical MPH2 The vertical MPH2 can be installed on a vertical or horizontal frame member in the rack. 1. Determine where in the Emerson rack the PDU will be installed. 2. Attach a bracket to each end of the PDU. -
Page 21: Mounting The Horizontal Mph2
6. Tighten the screws, applying 46 lb-in (5.2 Nm). 7. Repeat Steps 4 through 6 for the lower bracket on the lower end of the PDU. Figure 2-4 Installing vertical MPH2 in an Emerson rack 2.3.3 Mounting the Horizontal MPH2 The horizontal MPH2 is installed on a vertical frame member in the rack. -
Page 22: Mounting Horizontal Mph2 On Vertical Frame Member With Aluminum Extrusions
5. Insert screws and use a Torx T30 screwdriver to tighten all of them, Figure 2-6. Leave the screws slightly loose for the time being. 6. Once all the screws are installed, tighten them completely using 35.4 lb-in (5.2 Nm). Figure 2-6 Installing horizontal MPH2 in a rack with aluminum extrusions ® ™ Emerson MPH2 User Manual... -
Page 23: Rack Grounding Strap
NOTE Ensure that the safety-earth connection at the input-power-source receptacle is made before any equipment is connected to Emerson’s MPH2 Rack PDU. Units with factory-attached input-power cords have an grounding conductor internal to the case. The rack grounding strap establishes the same ground reference between the MPH2 Rack PDU and the rack. -
Page 24: Figure 2-7 Rack Grounding-Strap Connection
Installation Figure 2-7 Rack grounding-strap connection Number Description Number Description Ground-wire connection screw, M6 x 12 Lock washer Ground-wire connection on MPH2 Washer (location may vary) Ground-wire connector (to MPH2) Ground-wire connector (to rack) ® ™ Emerson MPH2 User Manual... -
Page 25: Recommended Electrical-Backup Protection
63 A (EU, WW) 2.4 Connecting Rack Equipment NOTE Circuit breakers on Emerson’s MPH2 Rack PDU are opened at the factory. The open circuit breakers help protect against high inrush current when input power is first connected. To mitigate in-rush currents: •... -
Page 26: Installing Optional Items
All C13 and C19 receptacles on MPH2 Rack PDUs are locking receptacles. Locking requires use of special power cords, which may be factory-installed on the equipment or is available from Emerson. If non-locking power cords are used, the power cords should be secured through other methods to prevent unintended power interruption. -
Page 27: Figure 2-8 Rpc Bdm
5. Hang the RPC BDM on the screw with the hooded mounting slot on the back of the RPC BDM. 6. Connect the RPC BDM to the RPC2 with an Ethernet cable. 7. Be certain to connect the cable to the correct port on the RPC2. ® ™ Emerson MPH2 User Manual... -
Page 28: Temperature/Humidity Sensor Installation
4. Hold the sensor bracket on a T-slot on the Emerson rack frame where the sensor will be placed. 5. Insert the included quarter-turn fastener through the rectangular hole in the sensor bracket base and into the T-slot. -
Page 29: Operation
Operation 3.0 Operation Emerson’s MPH2 Rack PDU may be monitored and managed by the factory-installed RPC2 communications module. This manual presents information about the MPH2’s functions and features. Refer to the RPC2 user manual, SL-20841, for details on using the RPC2 communications module to monitor and manage the MPH2. -
Page 30: View Input-Level Information
Input-level metered information icon Receptacle icon Bar graph of input current Sensor icon Link icon Alarm icon Input voltage % Amperes used until alarm threshold. Voltage phase Unit identification (always shows unit 1) Information icon ® ™ Emerson MPH2 User Manual... -
Page 31: Communication Link With Rpc2
When configuration changes (such as turning-on/off a receptacle) require that the LCD screen update, the configuration wheel appears and spins, Figure 3-3, to indicate that navigation is unavailable while configuration is in-progress. Figure 3-3 Configuration in-progress wheel Number Description Configuration wheel ® ™ Emerson MPH2 User Manual... -
Page 32: View Mph2 System Information
On the system-information screen is a menu of icons that provides access to further system options, network information, and LCD-screen options, Figure 3-5. Figure 3-5 System-info and Screen-option icons Number Description Reboot/Restore-defaults icon Flip screen orientation icon Adjust screen contrast icon System network icon Up-to-previous-level icon ® ™ Emerson MPH2 User Manual... -
Page 33: Reboot The On-Board Lcd
4. Use the arrow keys to highlight the play button, , and press The Reboot? confirmation displays. 5. Use the arrow keys to highlight an up/down arrow, and press to highlight Yes / Reboot Now. 6. Press The system reboots. ® ™ Emerson MPH2 User Manual... -
Page 34: Restore System Defaults
The Restore Defaults? confirmation displays, Figure 3-8. 5. Use the arrow keys to highlight an up/down arrow, and press to highlight Yes/ Reboot to Default. 6. Press The system-default settings are restored. Figure 3-8 Restore Defaults? confirmation ® ™ Emerson MPH2 User Manual... -
Page 35: Table 3-1 Factory-Default Settings
“Restore to Factory Defaults” is initiated via RPC2 clients. NOTE For detailed information about settings and about network- and protocol- related default settings for RPC2, see SL-20841. The document is available at Emerson’s Web site: http://www.emersonnetworkpower.com Table 3-1 Factory-default settings... - Page 36 • Array = affects all PDUs regardless of temperature sensor that triggered SWOTP. Affects power control when a member of Criticality Critical — a receptacle group. Affects authorization to manage power Locked/Unlocked Unlocked — control and behavior of SWOCP. ® ™ Emerson MPH2 User Manual...
-
Page 37: Determine Ip Address, Mac Address And Firmware Version
The IP address, MAC address, firmware, date and time display, Figure 3-9. Figure 3-9 IP address, MAC address, and firmware information Number Description IP address MAC address Agent firmware type and version NOTE The firmware version and other information in the figure are examples only. ® ™ Emerson MPH2 User Manual... -
Page 38: Adjust The Contrast Of The On-Board Lcd
Refer to the pattern, Figure 3-10, to determine when the contrast is acceptable. 5. When the contrast is satisfactory, highlight and press to return to the system-information screen. NOTE These steps also apply to the RPC BDM. Figure 3-10 Adjust LCD contrast ® ™ Emerson MPH2 User Manual... -
Page 39: Adjust The Orientation Of The On-Board Lcd
Silence an Audible Alarm To silence an audible alarm, press any of the three navigation keys below the LCD. See 5.0 - Troubleshooting for details about how the LED interface signifies events and alarms. ® ™ Emerson MPH2 User Manual... -
Page 40: View Branch-Level Information
• To return to the previous level view, highlight and press Figure 3-12 Branch information Number Description Branch-level information icon Branch circuit-breaker status icon I = closed circuit breaker O = open circuit breaker Branches (two shown, A and B) ® ™ Emerson MPH2 User Manual... -
Page 41: View Receptacle-Level Information
4. To view a different receptacle, highlight the number of the receptacle, and press • To display more details about the selected receptacle, highlight the information icon, , and press • To return to the previous level view, highlight and press ® ™ Emerson MPH2 User Manual... -
Page 42: Figure 3-14 Receptacle Information
Operation Figure 3-14 Receptacle information Number Description Receptacle-level information icon Receptacle identification: 1 = MPH2 #1 A = Branch A 1 = Receptacle #1 Receptacle list (receptacle #1 of 5 is selected) ® ™ Emerson MPH2 User Manual... -
Page 43: View Sensor Information
Sensors connected to the MPH2. (two temperature sensors and one humidity sensor in the example) 2. Use the arrow keys to highlight an up/down arrow at the bottom-left, and press to highlight a receptacle. ® ™ Emerson MPH2 User Manual... -
Page 44: Figure 3-16 Sensor Information
• Percentage and severity of humidity. • Sensor identification and label (serial number). NOTE The default label is the sensor’s serial number, but can be changed through the Web interface. Figure 3-16 Sensor information ® ™ Emerson MPH2 User Manual... -
Page 45: Opening And Closing Circuit Breakers
Low-profile breaker switch Standard-profile breaker switch Flat-blade screw driver. To trip breaker (low- or standard-profile), press screw driver into slot. Press here to reset low-profile breaker. Push top of breaker switch in to reset standard-profile breaker. ® ™ Emerson MPH2 User Manual... -
Page 46: Emerson ® Mph2 Rack Pdu Specifications
® Emerson MPH2 Rack PDU Specifications ® 4.0 Emerson MPH2 Rack PDU Specifications Input Power Configurations; Vary by Model and Region Single-Phase Input; CE-Mark 240 VAC, 16 A; also UL-listed 3.7 kW 230 V, 32 A 7.3 kW Three-Phase Input; CE-Mark... -
Page 47: Troubleshooting
Check for changing load conditions. Slow — Branch Overcurrent Warning (All LEDs) Check overcurrent warning threshold settings. Check for changing load conditions. Fast Branch Overcurrent Alarm (All LEDs) Check overcurrent alarm threshold settings. ® ™ Emerson MPH2 User Manual... -
Page 48: Table 5-2: Line Led Troubleshooting
Undercurrent Alarm Check undercurrent alarm threshold settings. Firmware updated in-progress. LCD does not display Green/Red Fast — Firmware Update information. If the update fails or aborts, the indication continues until firmware update is successful. ® ™ Emerson MPH2 User Manual... -
Page 49: Additional Troubleshooting By Plug Type
L1-N L2-N L3-N IEC 60309 3P5W 32A 3P5W L1-N L2-N L3-N L1-N L2-N L3-N IEC 60309 3P4W 60A 3P4W L1-L2 L2-L3 L3-L1 L1-L2 L2-L3 L3-L1 ® ™ Emerson MPH2 User Manual... - Page 51 All rights reserved throughout the world. Specifications subject to changewithout notice. ® Liebert is a registered trademark of Liebert Corporation. All names referred to are trademarks or registered trademarks of their respective owners. SL-20860_REV4_4-16 590-1330-501C Emerson Network Power Liebert www.emersonnetworkpower.com...
Need help?
Do you have a question about the Network Power MPH2 and is the answer not in the manual?
Questions and answers