
Related Manuals for Emerson Network Poewr MPH2


Summary of Contents for Emerson Network Poewr MPH2
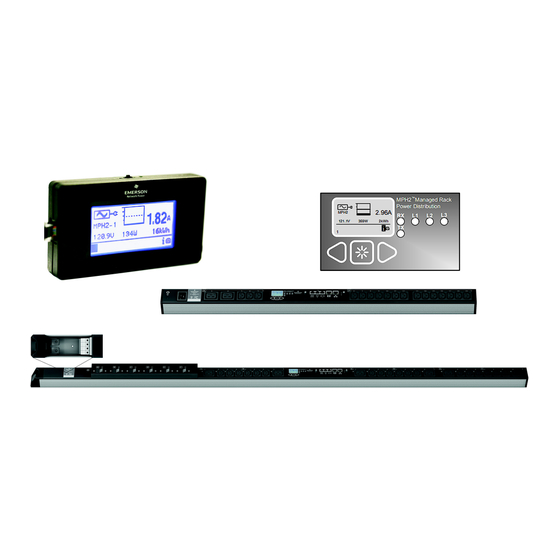
- Page 1 Emerson Network Power MPH2 Rack PDU ® ™ User Manual ™ MPH2 Managed Rack Power Distribution 2.96A MPH2 121.1V 359W 2kWh...
-
Page 3: Table Of Contents
® Installing an MPH2 in an Emerson Rack ........13 2.3.1... - Page 4 Figure 11 Installing in an Emerson rack ........
-
Page 5: Important Safety Instructions
• The MPH2 rack PDU has no user-serviceable parts. Under no circumstances attempt to gain internal access due to the risk of electric shock or burn. • Refer any unexpected behavior or unusual fault conditions to your local dealer, Emerson representative or Emerson Network Power Applications Engineering. - Page 6 (WEEE). For information regarding the scrapping of this equipment, go to http://www.eu.emersonnetworkpower.com (“Products session” or “Contact us” session) or call Emerson’s worldwide technical support at: • 00 80011554499 (toll free number) • +39 0298250222 (toll number based in Italy)
-
Page 7: Safety Symbols
Indicates the principal On/Off switch is in the On position. Power Off Indicates the principal On/Off switch is in the Off position. Protective Grounding Terminal Indicates a terminal that must be connected to earth ground before any other connections to the equipment may be made. ® ™ Emerson MPH2... -
Page 8: Introduction
NOTE Refer to the RPC2 communications module user manual, SL-20841, for detailed instructions on installing and using the RPC2 module. The document is available at Emerson’s Web site: http://www.emersonnetworkpower.com A rack PDU can be monitored locally through its onboard LCD, through a Web interface or through an optional display module, either the RPC BDM (Part# RPCBDM-1000). -
Page 9: General Characteristics
• Type C—Rack PDU Metered, Outlet Switched: Supports metering of the overall input and of individual branches and supports individual On/Off control of each outlet. • Type B—Rack PDU Metered: Provides basic power distribution and supports metering of the overall input and of the individual branches. ® ™ Emerson MPH2... -
Page 10: Appearance And Components
1.3.3 Controls and Indicators—Onboard LCD Emerson’s MPH2 has an integrated, onboard LCD that can be used to view information about the rack PDU. The information available depends on the type of MPH2. For additional information about the onboard LCD, refer to 3.1.1 - Getting Information Through the Onboard LCD. -
Page 11: Power Components
Branch Identification Outlet Identification Figure 5 Branch and outlet identification—Units with individually monitored and managed outlets Type C, R and M Models Outlet Branch Branch Outlet Identification Identification Identification Identification LED’s at Each Outlet (Denote Outlet Status) ® ™ Emerson MPH2... -
Page 12: Hard-Wired Connection Features
1.3.5 Hard-Wired Connection Features Emerson’s MPH2 rack PDU may be equipped with either a factory-installed input power cord or hard-wired connections. The hard-wired connection will be at one end of the unit. A terminal block in the hard-wired connection compartment is coded to aid in making the connections. A collar secures the input wire, keeping the strain off the terminal block connections. -
Page 13: Installation
Installation NSTALLATION An MPH2 rack PDU can be installed in an Emerson rack on the frame members using field-supplied hardware. The unit can be installed on the face or the side of frame members. The unit can be mounted so that the power cord exits either the top or bottom of the rack. -
Page 14: Attaching Input Power Cords-Hard-Wired Models Only
Figure 7 Hard-wired connections Terminal Blocks Strain-Relief Terminal Block Screws Collar Labels Phillips Head Screws Hard-Wired Connections Nuts Attaching Cable (Faceplate and End Cap Removed) Clamp Assembly: 4 Terminal Blocks Input Power Wiring Entry Through End Faceplate ® ™ Emerson MPH2... -
Page 15: Attaching Input Power Cords With Conduit
End Cap; attaches with two screws Figure 9 Disassembling the MPH2 for installing an input power cable in conduit Cover Plate Spacer Cover Plate Conduit Connector (field-supplied) End Cover (4 screws) Conduit (Cable Not Shown) ® ™ Emerson MPH2... -
Page 16: Tool-Less Mounting
For tool-less mounting, attach the mounts to the rear of the MPH2 rack PDU, then hang it in the rack as shown in Figure 10. Torque the screw attaching the mounting button 17 lb-in (2Nm). NOTE Brackets are not supplied. A range of brackets for Emerson and other manufacturers’ racks are available as accessories. Figure 10 Tool-less mounting... -
Page 17: Installing An Mph2 In An Emerson ® Rack
• Spring nuts (supplied with Emerson rack) • Phillips #2 screwdriver Determine where in the Emerson rack the PDU will be installed and follow the instructions below. Installation requires attaching two brackets to the PDU, inserting four spring nuts into the rack and using the brackets to attach the PDU to the rack. -
Page 18: Safety Earth Ground Connection
2.3.2 Safety Earth Ground Connection Ensure that the safety earth connection is made before any equipment is connected to Emerson’s MPH2 rack PDU. Units with factory-attached input power cords have an internal grounding conductor. The ground wire establishes the same ground reference between the MPH2 rack PDU and the rack. -
Page 19: Recommended Electrical Backup Protection
The external circuit breaker serves as the primary input power disconnect for the MPH2. Table 3 Upstream circuit breaker rating Maximum Input Rated Current Current Per Pole of Upstream CB 20A (North America) 16A (EU, WW) 30A (NA) 32A (EU, WW) 50A (NA) 60A (NA) 63A (EU, WW) ® ™ Emerson MPH2... -
Page 20: Connecting Rack Equipment
Installation Connecting Rack Equipment NOTE Circuit breakers on Emerson’s MPH2 rack PDU are opened at the factory. The open circuit breakers help protect against damage to the connected load from high inrush current when input power is connected. The circuit breakers must be closed before the unit will supply power to the connected load. Do not close the breakers until after all rack equipment is connected to the MPH2 rack PDU. -
Page 21: Installing Optional Items
Included Hardware • RPC BDM, 1 • Spring Nut M5, 1 • Spacer Sleeve, 1 • Mounting Button, 1 • M5 Screw, 1 • Cable Clip, 1 Figure 13 RPC BDM Scan-Switch RJ-45 Input ® ™ Emerson MPH2... -
Page 22: Temperature/Humidity Sensor
That location helps determine extreme conditions that can cause equipment damage. 4. Hold the sensor bracket on a T-slot on the Emerson rack frame where the sensor will be placed. 5. Insert the included quarter-turn fastener through the rectangular hole in the sensor bracket base and into the T-slot. -
Page 23: Operation
Operation PERATION Emerson’s MPH2 rack PDU may be monitored and managed by the factory-installed RPC2 communications module. This manual presents information about the MPH2’s functions and features. Refer to the RPC2 user manual, SL-20841, for details on using the RPC2 communications module to monitor and manage the MPH2. -
Page 24: Getting Information Through The Onboard Lcd
MPH2 121.1V 359W 2kWh Phase or Energy used in kWh Line Voltage Link to Receptacle Level MPH2 Unit Identification (Always shows numeral 1) MPH2 Rack PDU Power Consumption Alarm Indication Information by Connected Load in Watts ® ™ Emerson MPH2... -
Page 25: Adjusting The Onboard Lcd's Contrast
4. Use the Right or Left arrow key to highlight the Up or Down contrast icon (each is an arrow). Use the pattern to determine when the contrast is acceptable. 5. Press Select until the screen’s contrast is satisfactory NOTE The same steps apply to the RPC BDM. Figure 17 Adjust LCD contrast ® ™ Emerson MPH2... -
Page 26: Adjusting The Onboard Lcd's Orientation
See Figure 19. After 5 minutes of no activity (no key pressed), the onboard LCD returns to the main screen. Figure 19 MPH2 rack PDU information screen Model: MPHM3141 S/N: 4FEB030033 MPHM3 FW Ver: 0.4.1.2 Ratings: 1P3W 120V 16A Receptacles: 16 ® ™ Emerson MPH2... -
Page 27: Determine Ip Or Mac Address
The input level is the main screen shown by the onboard LCD. The LCD will show the input level screen if the cursor and arrow keys are not used for 5 minutes. The input screen is shown in Figure 21. Figure 21 Input level screen 1.98 MPH2 119.7V 204W 0kWh ® ™ Emerson MPH2... -
Page 28: View Active Alarms
5. Moving the cursor to an alarm and pressing the select key displays information about the alarm. Figure 23 Alarm list screen Low Humidity Sensor The most-recent alarms will be at the top of the list. ® ™ Emerson MPH2... -
Page 29: View Branch Level Information
Figure 25 Outlet level information screen Outlet Level 1.98 1-A-7 Outlet Identification: MPH2 #1 Branch A 119.7V 203W 237VA Outlet #7 (Cursor is over Outlet #7 at bottom of screen) 1 2 3 4 5 6 Cursor over Outlet #7 ® ™ Emerson MPH2... -
Page 30: 3.1.10 View Sensor List
33.8% : High and severity followed by identification and label ID: 8A000095173G6B62 Humidity (serial number). The sensor triggers default label is the Label: 8A000095173G6B62 high humidity sensor’s serial number. alarm This can be changed through the Web interface. ® ™ Emerson MPH2... -
Page 31: 3.1.12 Opening And Closing Circuit Breakers
Figure 29 Turning Off or resetting a circuit breaker Low-Profile Push top of Breaker Switch breaker in to reset this breaker Press here Standard-Profile to reset the breaker Breaker Switch Press flat-blade screwdriver into slot to trip breaker ® ™ Emerson MPH2... -
Page 32: 3.1.13 Silence An Alarm
5.0 - Troubleshooting tells how the LED interface signifies events and alarms. NOTE During a firmware upgrade, the Line Input Status LED’s on the MPH2 will flash red and green, but the rack PDU will continue receiving and distributing power without interruption. ® ™ Emerson MPH2... -
Page 33: Emerson ® Mph2 Rack Pdu Specifications
® Emerson MPH2 Rack PDU Specifications ® MPH2 R PDU S MERSON PECIFICATIONS Input Power Configurations; Vary by Model and Region Single-Phase Input; CE-Mark 240VAC, 16A; also UL-listed 3.7kW 230V, 32A 7.3kW Three-Phase Input; CE-Mark 230/400V, 16A 11kW 230/400V, 32A 22kW Single-Phase Input;... -
Page 34: Troubleshooting
Branch Overcurrent Check for changing load conditions. (All Receptacle Slow — Warning Check overcurrent warning threshold settings. LED’s) Branch Overcurrent Check for changing load conditions. ✔ (All Receptacle Fast Alarm Check overcurrent alarm threshold settings. LED’s) ® ™ Emerson MPH2... - Page 36 Philippines ® Liebert is a registered trademark of Liebert Corporation. +63 2 687 6615 All names referred to are trademarks Fax: +63 2 730 9572 or registered trademarks of their respective owners. SL-20860_REV2_06-15 Emerson Network Power Liebert www.emerson.com...
Need help?
Do you have a question about the Network Poewr MPH2 and is the answer not in the manual?
Questions and answers