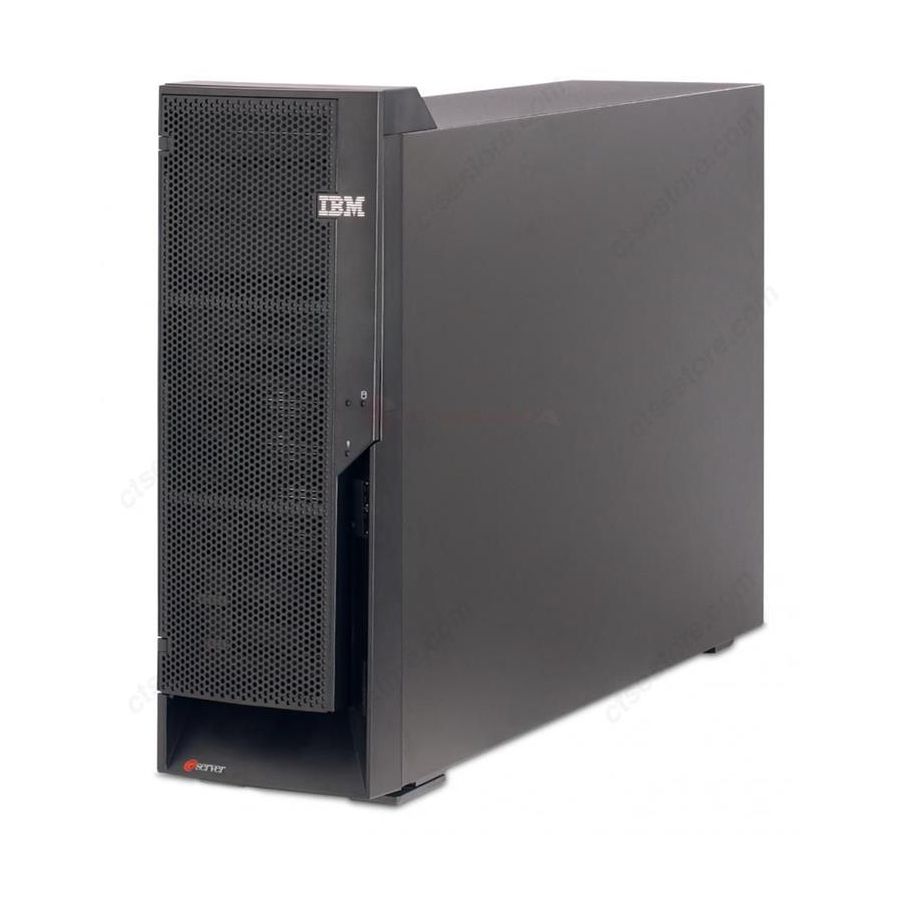
IBM xSeries 225 8647 Installation Manual
Hide thumbs
Also See for xSeries 225 8647:
- Maintenance and troubleshooting manual (182 pages) ,
- Installation manual (112 pages) ,
- Installation manual (108 pages)
Table of Contents
Advertisement
Quick Links
Download this manual
See also:
Installation Manual
Advertisement
Table of Contents

Related Manuals for IBM xSeries 225 8647


Summary of Contents for IBM xSeries 225 8647
- Page 1 ERserver IBM xSeries 225 Type 8647 Option Installation Guide...
- Page 3 ERserver IBM xSeries 225 Type 8647 Option Installation Guide...
- Page 4 Before using this information and the product it supports, read the general information in “Notices”, on page 49. Second Edition (August 2003) © Copyright International Business Machines Corporation 2003. All rights reserved. US Government Users Restricted Rights – Use, duplication or disclosure restricted by GSA ADP Schedule Contract with IBM Corp.
-
Page 5: Table Of Contents
Ethernet (RJ-45) connector ....44 Keyboard connector ..... . . 44 © Copyright IBM Corp. 2003... - Page 6 Power cords ......53 Index ......57 IBM xSeries 225 Type 8647: Option Installation Guide...
-
Page 7: Safety
Vor der Installation dieses Produkts die Sicherheitshinweise lesen. Prima di installare questo prodotto, leggere le Informazioni sulla Sicurezza. Les sikkerhetsinformasjonen (Safety Information) før du installerer dette produktet. Antes de instalar este produto, leia as Informações sobre Segurança. © Copyright IBM Corp. 2003... - Page 8 2. First, remove power cords from outlet. 3. Attach signal cables to connectors. 3. Remove signal cables from connectors. 4. Attach power cords to outlet. 4. Remove all cables from devices. 5. Turn device ON. IBM xSeries 225 Type 8647: Option Installation Guide...
- Page 9 Statement 2: CAUTION: When replacing the lithium battery, use only IBM Part Number 33F8354 or an equivalent type battery recommended by the manufacturer. If your system has a module containing a lithium battery, replace it only with the same module type made by the same manufacturer.
- Page 10 The device also might have more than one power cord. To remove all electrical current from the device, ensure that all power cords are disconnected from the power source. viii IBM xSeries 225 Type 8647: Option Installation Guide...
- Page 11 Statement 8: CAUTION: Never remove the cover on a power supply or any part that has the following label attached. Hazardous voltage, current, and energy levels are present inside any component that has this label attached. There are no serviceable parts inside these components.
- Page 12 Do not place any object weighing more than 50 kg (110 lb) on top of rack-mounted devices. >50 kg (110 lb) Declaración 23 PRECAUCIÓN: No coloque ningún objeto que pese más de 50 kg (110 libras) encima de los dispositivos montados en bastidor. >50 kg (110 libras) IBM xSeries 225 Type 8647: Option Installation Guide...
- Page 13 Hinweis 23 ACHTUNG: Keine Gegenstände, die mehr als 50 kg wiegen, auf Rack-Einheiten ablegen. >50 kg Notice nø 23 ATTENTION: Ne posez pas d’objet dont le poids dépasse 50 kg sur les unités montées en armoire. >50 kg Varningsmeddelande 23 VARNING: Placera inte något föremål som väger mer än 50 kg ovanpå...
- Page 14 Plaats geen objecten die meer dan 50 kg wegen op apparaten die in het rek zijn gemonteerd. >50 kg Forskrift 23 Pas på!: Anbring ikke genstande, der vejer mere end 50 kg, oven på enheder, der er monteret i rack. >50 kg IBM xSeries 225 Type 8647: Option Installation Guide...
- Page 15 Instrução 23 CUIDADO: Não coloque nenhum objeto com peso superior a 50 kg (110 lbs.) sobre dispositivos montados em rack. >50 kg (110 lbs) xiii Safety...
- Page 16 · IBM xSeries 225 Type 8647: Option Installation Guide...
- Page 17 > 50 Kg Safety...
- Page 18 IBM xSeries 225 Type 8647: Option Installation Guide...
- Page 19 xvii Safety...
- Page 20 California de los Estados Unidos está considerado como un causante de cancer y de defectos congénitos, además de otros riesgos reproductivos. Lávese las manos después de usar el producto. xviii IBM xSeries 225 Type 8647: Option Installation Guide...
-
Page 21: Chapter 1. Introduction
These updates are available from the IBM Web site. Complete the following steps to check for updated documentation and technical updates: 1. -
Page 22: Major Components Of The Xseries 225 Type 8647 Server
Note: The illustrations in this publication might differ slightly from your hardware. Cover Air baffle Filler EMC shield panels Rear adapter- retaining bracket Adapter airflow guide Microprocessor Large hot-swap drive cage Heatsink Bezel Bezel Front adapter- door support bracket Memory module Frame-support bracket IBM xSeries 225 Type 8647: Option Installation Guide... -
Page 23: System-Board Option Connectors
System-board option connectors The following illustration shows the system-board connectors for user-installable options. DIMM 1 Microprocessor 1 DIMM 2 (CPU1) DIMM 3 Microprocessor 2 DIMM 4 (CPU2) AGP Pro slot Battery PCI slot 1 (PCI1) PCI-X slot 2 (PCI2) Video adapter PCI-X slot 3 Mini-PCI... -
Page 24: System-Board External Connectors
Rear fan 2 (SYSFAN2) CD audio (JCD1) Front panel switch/LEDs (JFP1) SCSI channel A (SCSI1) SCSI channel B (SCSI2) PCI fan (SYSFAN5) SCSI LED Wake-on-LAN Center fan (J18) (JWL) (SYSFAN4) - some models IBM xSeries 225 Type 8647: Option Installation Guide... - Page 25 Table 1. Error LEDs Without optional Remote With optional Remote Error LED Supervisor Adapter Supervisor Adapter DIMM error (D26, D27, D28, Memory problem (also turns Memory problem (also turns D29) on system error LED on the on system error LED on the front bezel) front bezel) Microprocessor 2 error (D32) Microprocessor 2 problem...
- Page 26 IBM xSeries 225 Type 8647: Option Installation Guide...
-
Page 27: Chapter 2. Installing Options
For a list of supported options for your server, go to http://www.ibm.com/pc/us/compat/ on the World Wide Web. System reliability considerations To help ensure proper system cooling and system reliability, make sure that: v Each of the drive bays has a drive or a filler panel and electromagnetic compatibility (EMC) shield installed. -
Page 28: Handling Static-Sensitive Devices
Remote Supervisor Adapter user interface. v If an optional Remote Supervisor Adapter is installed in the server, the server can be turned on from the Remote Supervisor Adapter user interface. IBM xSeries 225 Type 8647: Option Installation Guide... -
Page 29: Turning Off The Server
® v When you plug in your server for the first time, the Wake on LAN feature can turn on the server. If your server was previously turned on, it must be properly turned off for the Wake on LAN feature to turn on the server. Note: When 4 GB or more of memory (physical or logical) is installed, some memory is reserved for various system resources and is unavailable to the operating system. -
Page 30: Removing The Side Cover
Cover-release latch Key lock Attention: For proper cooling and airflow, replace the cover before turning on the server. Operating the server with the cover removed might damage server components. IBM xSeries 225 Type 8647: Option Installation Guide... -
Page 31: Removing The Bezel
Removing the bezel When working with some devices, such as additional optical drives, you must first remove the bezel to access the device. Complete the following steps to remove the bezel: 1. Remove the side cover (“Removing the bezel”). 2. For hot-swap hard disk drive models: a. -
Page 32: Removing And Installing The Support Bracket
Pull out on the rear end of the support bracket at a 45° angle. b. Disengage the front end of the support bracket from the server and set the bracket aside. IBM xSeries 225 Type 8647: Option Installation Guide... -
Page 33: Working With Adapters
4. If your server comes with a support bracket that has a fan and a fan bracket attachment that looks like the bracket in the following illustration, complete the following steps: a. Disconnect the fan cable from the fan connector on the system board before removing the support bracket. -
Page 34: Installing An Adapter
SCSI controller with RAID capabilities and forces PCI-X slots 4 and 5 to 66 MHz. v The optional IBM Remote Supervisor Adapter can be installed only in PCI slot 1. Use the ribbon cable that comes with this adapter to connect it to the Remote Supervisor Adapter connector (JMGT1) on the system board. - Page 35 If the slot is empty, remove the expansion-slot cover. From the rear of the server, press on the slot cover. Grasp it and pull it out of the expansion slot. Store it in a safe place for future use. Attention: Expansion-slot covers must be installed on all vacant slots.
- Page 36 12). 17. Replace the side cover (see “Replacing the side cover” on page 40). 18. Reconnect the external cables and power cords; then, turn on the attached devices and the server. IBM xSeries 225 Type 8647: Option Installation Guide...
-
Page 37: Cabling An Optional Scsi Adapter
Cabling an optional SCSI adapter You can install an optional SCSI adapter in your server to control the internal hard disk drives. With a SCSI adapter installed, you can configure the internal hard disk drives into disk arrays. You can also cable a SCSI adapter to external hard disk drives. -
Page 38: Installing Internal Drives
7. Server with hot-swap hard disk drives Bay 1 Bay 2 Bay 3 Bay 4 Bay 5 Bay 6 Bay 7 Bay 8 Bay 9 IBM xSeries 225 Type 8647: Option Installation Guide... - Page 39 DLT, SDLT, LTO, and TR7 drives. For a list of supported options for your server, go to http://www.ibm.com/pc/us/compat/ on the World Wide Web. To install a 3.5-in. drive in a 5.25-in. bay, you must use the 5.25-in. conversion kit, supplied with the option.
-
Page 40: Working With Hot-Swap Drives
The drive must have a Single Connector Attachment (SCA) connector. Hot-swap-drive trays come with hot-swap drives. Each hot-swap drive has two indicator LEDs (see the User’s Guide on the IBM xSeries Documentation CD). If the amber hard disk drive status LED for a drive is lit continuously, that drive is faulty and requires replacement. - Page 41 Installing a hot-swap hard disk drive The following illustration shows how to install a hot-swap hard disk drive. Filler panel Drive-tray assembly Drive tray-handle (in open position) Hot-swap lock bar Complete the following steps to install a drive in a hot-swap bay. Attention: To maintain proper system cooling, do not operate the server for more than 10 minutes without either a drive or a filler panel installed in each bay.
-
Page 42: Installing Non-Hot-Swap Hard Disk Drives
RAID capabilities or an optional ServeRAID controller, you might need to reconfigure your disk arrays after installing hard disk drives. See the ServeRAID documentation on the IBM ServeRAID Support CD for additional information about RAID operation and complete instructions for using ServeRAID Manager. - Page 43 3. Disconnect all power cords; then disconnect all external cables. 4. Remove the side cover (see “Removing the side cover” on page 10). 5. Remove the support bracket (see “Removing and installing the support bracket” on page 12). 6. Press the drive cage release lever down and then rotate the cage out of the server until the drive-cage retention tab locks into place and the open ends of the drive slots and installed drives are facing you.
- Page 44 12). 15. Replace the side cover (see “Replacing the bezel” on page 39). 16. Reconnect the external cables and power cords; then, turn on the attached devices and the server. IBM xSeries 225 Type 8647: Option Installation Guide...
-
Page 45: Installing A 5.25-Inch Removable-Media Drive
Installing a 5.25-inch removable-media drive Your server comes with one integrated drive electronics (IDE) CD-ROM drive. The CD-ROM drive bay supports a 5.25-inch, half-high, removable-media drive. You can install an additional 5.25-inch, half-high, removable-media drive in bay 2. A three-drop power cable comes with your server. Use this cable to connect power to the removable-media drives. - Page 46 12. Route the signal cable so that it does not block the airflow to the rear of the drives or over the microprocessor and memory. 13. Connect the power cable to the back of the drive. The connectors are keyed and can be inserted only one way. IBM xSeries 225 Type 8647: Option Installation Guide...
-
Page 47: Power And Signal Cables For Internal Drives
14. If you have other options to install or remove, do so now. 15. Replace the support bracket (see “Removing and installing the support bracket” on page 12). 16. Replace the bezel (see “Replacing the bezel” on page 39). 17. Replace the side cover (see “Replacing the bezel” on page 39). 18. -
Page 48: Installing Memory Modules
PC2100, registered synchronous dynamic random-access memory (SDRAM) with error correcting code (ECC) DIMMs. These DIMMs must be compatible with the latest PC2100 SDRAM Registered DIMM specification. For a list of supported options for your server, go to http://www.ibm.com/us/compat/ on the World Wide Web. ™... -
Page 49: Installing An Additional Microprocessor
5. Open the retaining clips and, if necessary, remove any existing DIMM. 6. Touch the static-protective package containing the DIMM to any unpainted metal surface on the server. Then remove the new DIMM from the package. 7. Gently open the retaining clip on each end of the DIMM slot. Turn the DIMM so that the pins align correctly with the connector. -
Page 50: Configuring The Operating System
Thoroughly review the documentation that comes with the microprocessor to determine the required BIOS update. The latest level of BIOS code for your server is available from the World Wide Web. See the User’s Guide on the IBM xSeries Documentation CD for the World Wide Web addresses. -
Page 51: Installing The Additional Microprocessor
10. If the configuration shown in the wizard is satisfactory, click Next to save the configuration. 11. Click Finish to complete the process. 12. Click Yes to restart the server. 13. Continue with step 1 of “Installing the additional microprocessor”. Installing the additional microprocessor The following illustration shows how to install an additional microprocessor. - Page 52 Touching the thermal grease will contaminate it. If the thermal grease on the microprocessor or heat sink becomes contaminated, contact your service technician. IBM xSeries 225 Type 8647: Option Installation Guide...
- Page 53 12. Install the heat sink on the microprocessor. Thermal grease Heat sink a. Remove the plastic cover from the bottom of the heat sink. b. Align and place the heat sink on top of the microprocessor, grease side down, in the retention bracket. Press firmly on the heat sink. Attention: Alternate the tightening of the two captive screws to prevent damage to the microprocessor.
-
Page 54: Installing A Security Rope Clip
Rope clip 5. If you have other options to install or remove, do so now; otherwise, go to “Completing the option installation” on page 39. IBM xSeries 225 Type 8647: Option Installation Guide... -
Page 55: Replacing A Hot-Swap Power Supply
Replacing a hot-swap power supply Some models of your server come with two hot-swap power supplies. You do not need to turn off the server to replace a hot-swap power supply, but you must replace only one power supply at a time. If you install or remove a power supply, observe the following precautions. - Page 56 4. If the server is not on, turn on the server. 5. Verify that the dc power LED and the ac power LED on the power supply are lit, indicating that the power supply is operating properly. IBM xSeries 225 Type 8647: Option Installation Guide...
-
Page 57: Replacing The Battery
Replacing the battery IBM has designed this product with your safety in mind. The lithium battery must be handled correctly to avoid possible danger. If you replace the battery, you must adhere to the following instructions. Note: In the U. S., call 1-800-IBM-4333 for information about battery disposal. - Page 58 13. Connect all external cables; then, connect the power cords. 14. Turn on the server. 15. Start the Configuration/Setup Utility program and set configuration parameters as needed. See the User’s Guide on the IBM xSeries Documentation CD. IBM xSeries 225 Type 8647: Option Installation Guide...
-
Page 59: Completing The Option Installation
Completing the option installation To complete installation of an option, you must reinstall the bezel, reinstall the server cover, reconnect all the cables that you disconnected earlier and, for certain options, run the Configuration/Setup Utility program. Follow the instructions in this section. -
Page 60: Replacing The Side Cover
When you start your server for the first time after you add or remove an internal option or an external SCSI device, you might see a message telling you that the configuration has changed. The Configuration/Setup Utility program automatically IBM xSeries 225 Type 8647: Option Installation Guide... -
Page 61: Connecting External Options
If your server has a RAID configuration using the integrated SCSI controller with RAID capabilities or has a ServeRAID controller installed and you have installed or removed a hard disk drive, see the ServeRAID documentation on the IBM ServeRAID Support CD for information about configuring your disk arrays. - Page 62 IBM xSeries 225 Type 8647: Option Installation Guide...
-
Page 63: Chapter 3. Input/Output Ports
Supervisor Adapter for more information about the ASM Interconnect network. Audio connectors Use the audio connectors to connect external audio equipment to the server. The following illustration shows the audio connectors. Line out (green) Line in (blue) Mic (pink) © Copyright IBM Corp. 2003... -
Page 64: Line In
Use this connector to connect a PS/2 (non-USB) keyboard. The following illustration shows a keyboard connector. If you attach a keyboard to this connector, USB ports and devices are disabled during the power-on self-test (POST). IBM xSeries 225 Type 8647: Option Installation Guide... -
Page 65: Parallel Connector
Parallel connector Use this connector to connect a parallel device. The following illustration shows a parallel connector. The parallel connector supports three standard Institute of Electrical and Electronics Engineers (IEEE) 1284 modes of operation: Standard Parallel Port (SPP), Enhanced Parallel Port (EPP), and Extended Capability Port (ECP). If you configure the parallel port to operate in bidirectional mode, it supports the ECP and EPP modes of operation. -
Page 66: Scsi Cabling Requirements
To select and order the correct cables for use with external devices, contact your IBM reseller or IBM marketing representative. When using an optional SCSI adapter, you must also connect the SCSI adapter to the SCSI LED (J18) connector on the system board receive an indication of SCSI hard-disk drive activity. -
Page 67: Video Connector
illustration shows a USB connector. Use a 4-pin cable to connect a device to a USB connector. If you need to connect more USB devices than the server has USB connectors for, use a USB hub to connect additional devices. If you connect a PS/2 (non-USB) keyboard to the keyboard connector, USB ports and devices are disabled during POST. - Page 68 IBM xSeries 225 Type 8647: Option Installation Guide...
-
Page 69: Appendix. Notices
Web sites. The materials at those Web sites are not part of the materials for this IBM product, and use of those Web sites is at your own risk. IBM may use or distribute any of the information you supply in any way it believes appropriate without incurring any obligation to you. -
Page 70: Trademarks
Predictive Failure Analysis Lotus, Lotus Notes, SmartSuite, and Domino are trademarks of Lotus Development Corporation and/or IBM Corporation in the United States, other countries, or both. ActionMedia, LANDesk, MMX, Pentium, and ProShare are trademarks of Intel Corporation in the United States, other countries, or both. -
Page 71: Product Recycling And Disposal
IBM makes no representations or warranties with respect to non-IBM products. Support (if any) for the non-IBM products is provided by the third party, not IBM. Some software may differ from its retail version (if available), and may not include user manuals or all program functionality. -
Page 72: Industry Canada Class A Emission Compliance Statement
Properly shielded and grounded cables and connectors must be used in order to meet FCC emission limits. Properly shielded and grounded cables and connectors must be used in order to meet FCC emission limits.IBM is not responsible for any radio or television interference causedby using other than recommended cables and connectors or by using other than recommended cables and connectors or by unauthorized changes or modifications to this equipment. -
Page 73: Taiwanese Class A Warning Statement
Japanese Voluntary Control Council for Interference (VCCI) statement Power cords For your safety, IBM provides a power cord with a grounded attachment plug to use with this IBM product. To avoid electrical shock, always use the power cord and plug with a properly grounded outlet. - Page 74 The cord set should have the appropriate safety approvals for the country in which the equipment will be installed. IBM power cords for a specific country or region are usually available only in that country or region.
- Page 75 IBM power cord part number Used in these countries and regions 36L8880 Argentina, Paraguay, Uruguay 49P2078 India 49P2110 Brazil 6952300 Antigua and Barbuda, Aruba, Bahamas, Barbados, Belize, Bermuda, Bolivia, Caicos Islands, Canada, Cayman Islands, Colombia, Costa Rica, Cuba, Dominican Republic, Ecuador, El...
- Page 76 IBM xSeries 225 Type 8647: Option Installation Guide...
-
Page 77: Index
Class A electronic emission notice 51 pin-number assignment 44 components port 44 major 2 expansion bays system board 3 location 18 configuration type 18 parallel port 45 external devices, connecting 41 configuration, updating 40 external SCSI connector 45 © Copyright IBM Corp. 2003... - Page 78 1 major components 2 reliability, system 7 memory removable-media drive, installing 25 installing 28 removing modules 28 bezel 11 memory module support bracket 12 order of installation 28 supported 28 IBM xSeries 225 Type 8647: Option Installation Guide...
- Page 79 replace battery 37 Web site bezel 39 compatible options 7, 19 cover 40 DIMM specification 28 hot-swap power supply 35 retaining clips, DIMM 29 safety information laser 25 SCSI backplane, configuration 20 SCSI connector description 46 external 45 location 3 SCSI controller cabling 17 SCSI IDs 22 security U-bolt 34...
- Page 80 IBM xSeries 225 Type 8647: Option Installation Guide...
- Page 82 Part Number: 88P9295 Printed in U.S.A. (1P) P/N: 88P9295...
Need help?
Do you have a question about the xSeries 225 8647 and is the answer not in the manual?
Questions and answers