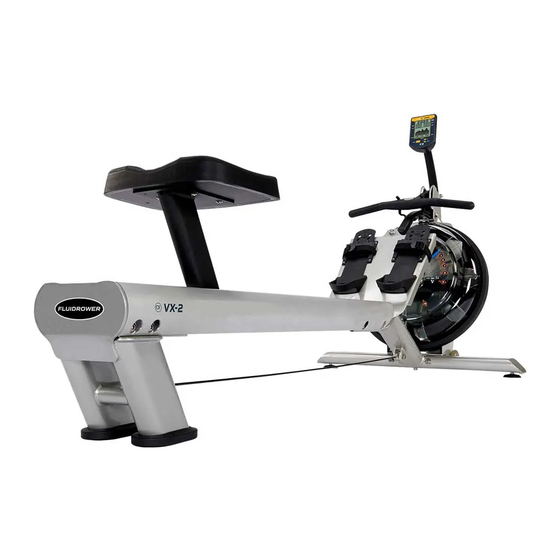
First Degree Fitness VX-2 Fluid Rower Owner's Manual
Fluid rower
Hide thumbs
Also See for VX-2 Fluid Rower:
- User manual (56 pages) ,
- Owner's manual (29 pages) ,
- User manual (32 pages)
Table of Contents
Advertisement
Advertisement
Table of Contents

Related Manuals for First Degree Fitness VX-2 Fluid Rower


Summary of Contents for First Degree Fitness VX-2 Fluid Rower
-
Page 1: Owners Manual
Owners Manual... -
Page 2: Table Of Contents
Contents 1. Contents of VX-2 Pack. 2. VX-2 Assembly Instructions. 3. Tank Filling and Water Treatment. 4. How to Row. 5. Long Term Water Treatment and Basic Operation. 6. Maintenance Chart. 7. Troubleshooting Guide. 8. The VX-2 Rower Ergometer with Optional USB Function 9. -
Page 3: Box Contents
Box Contents: Item Description Item Description Upper Mainframe and Tank 4mm Hex Key Lower Mainframe 6mm Hex Key Footplate Bolt M10 x 40 Frame Tension Cable Washer M10 Rower seat Washer M6 S-bend bar handle catch Curved Washer M10 Rear leg Nut M10 Seat Rail Left Plastic Washer M10... - Page 4 VX-2 Assembly: Attaching Upper/Lower Frame Step 1: Open box and remove contents. Lie Upper Frame on it’s back as shown here. In the bolt pack, locate 2x M10x140mm bolts and curved washers along with 1x M10x65mm dome head bolt and washer. Connect the Lower Frame to Upper using M10x140mm bolts first and do not tighten before installing the third M10x65mm bolt as shown lower right.
-
Page 5: Vx-2 Assembly Instructions
VX-2 Assembly Instructions Attaching Footplate to Mainframe Footplate Step 1: Using 2x 170mm bolts, 4x standard washers and 2x Nylock nuts, attach the Footplate to the Mainframe of the rower as shown. Align bolt holes here Mainframe Note: Tighten bolts securely before moving on to next stage of assembly. - Page 6 Attaching Seat Rails to Mainframe Seat Rails Seat Rail M6x20mm bolt and M6 washer Mainframe Assembly Footplate M10x47.5mm bolt Step 1: Install Seat Rail onto Footplate/ Mainframe Assembly using 4x M10x47.5mm bolts (no washers) and 4x M6x20mm bolts with M6 washers. Step 2: Install the right Seat Rail.
-
Page 7: Rower Seat
Rower Seat Assembly 4x M6x20mm bolts and Rower Seat Frame 4x M6 washers Rower Seat Install the Rower Seat onto the Rower Frame using 4x M6x20mm bolts and 4x M6 washers. Indentation Indentation Completed Rower Seat. The Seat must be mounted exactly as shown. -
Page 8: Rear Leg
Installing the Rear Leg Using the Rear Leg, 4x 10x47.5mm bolts, 4x M6x20mm bolts and M6 washers, mount the Rear Leg onto Seat Rails and secure as shown below. Tip: Install all M10x47.5 bolts first from the outside to hold the Rear Leg in position before securing from the inside with the M6x20mm bolts and M6... - Page 9 Installing the S-bend and Frame Tension Cable Carefully lower the rower to its normal operating position to complete assembly with S-bend installation and Frame Tension Cable. Step 1. Install rear of S-bend onto the Upper Frame using M10x80 mm bolt, M10 Nylock and 2 x M10 washers. Step 2.
-
Page 10: Tank Filling And Water Treatment
Tank Filling and Water Treatment Fill tank as shown left. Use the yellow plug only for filling. Fill with adjuster handle at level 16 only. Once filling is complete, use a coin or large blade screwdriver to tighten tank plug into place. Siphon valve Warning: Do not for any reason insert fingers into the tank! -
Page 11: How To Row
How to Row? 1. Begin the stroke comfortably forward and push strongly back with your legs while keeping your arms and back straight. 2. Begin to pull your arms back as they pass over your knees and continue the stroke through to com- pletion rocking slightly back over your pelvis. -
Page 12: Long Term Water Treatment And Basic Operation
Long Term Water Treatment: Do not use any water treatment other than the tablets supplied with this machine. For replacement tablets, contact your local First Degree Fitness distributor. Water treatment schedules for the VX-2 will vary according to the fluid tanks exposure to sunlight, but expect 8-12 months near a bright, sunlit window and 2 years or more for a darker location. -
Page 13: Maintenance Chart
“fuzz” is perfectly normal in the “Changing the Dyneema for Dyneema Cable and Cable” service section of the will not affect performance First Degree Fitness website at or longevity in any way. www.firstdegreefitness.com Frame Tension Check regularly for proper Tighten until taut. See Basic Cable tension. -
Page 14: Troubleshooting Guide
Troubleshooting Guide Fault Probable Cause Solution Water changes color or be- Rower is in direct Change rower location to reduce direct ex- comes cloudy. sunlight or has not had posure to sunlight. Add water treatment water treatment. and blue dye or change tank water as di- rected in the water treatment section of this manual. - Page 15 The VX-2 Rower Ergometer Quick start: Provides instant workout information. Just start training to activate. You can choose to change UNITS displayed UNITS: Displays WATTS, SPM, HR, 500/m LEVEL: Adjustable from 1-16. Match LEVEL number with resistance level on the Fluid tank. SET: Changes Time, Distance parameters Note: For complete operational instructions, please refer to the...
- Page 16 Using the First Degree Fitness USB Interface Description: The USB connectivity now built in to all new models of FDF Console and IPM allow you to en- hance your exercise experience by connecting to your home PC or Laptop. Using FDF's own sample applications you can exercise while enjoying your favorite movies.
- Page 17 Replacing the VX-2 Bungee Shock Cord Step 1. Remove the Perspex Step 2. Move the rowing handle Step 3. Unwrap the cover from rear of upper frame. from the S-Bend handle catch to a Bungee Cord from all point where it is resting on top of the of the Bungee Pulleys.
- Page 18 Replacing the VX-2 Bungee Shock Cord Step 5. After removing the magnetic ring, the Bungee Cord will be accessible. Pull through the Rope/Bungee Pulley and remove. Note that the rower handle should be resting on top of the tank (as shown in step 2) for the bungee hole to line up. Thread new Bungee Cord through and pull until knotted end is held securely in the slot.
- Page 19 Replacing the VX-2 Bungee Shock Cord Bungee wrapping in order: 1. Rope/Bungee Pulley to upper rear right Bungee Pulley. 2. Upper rear right to lower rear right and left rear Pulleys. 3. Lower left rear to upper left rear Pulley. 4.
- Page 20 Exploded Diagram...
-
Page 21: Bolt M10 X 140
Parts list Description Description 10016 C Clip STW-25 60130 Frame Rubber Bumper Adjuster Handle Shaft 10027 65953 Bolt M8x45-B Stainless 0.8mm Backing Plate Magnetic Ring & Rare Earth Magnet 10028 70315 #70319 70321 Tank Plug Black 10030 Adjuster PP Tank Ring 358x10 Screw M3x20 SUS 71018 10036... - Page 22 Metal Frame – 10 Year Limited Warranty First Degree Fitness will repair or replace the metal Main Frame of the Rower should it fail due to any defect in materials or workmanship within 10 years of the original purchase. Warranty does not apply to frame coating.
Need help?
Do you have a question about the VX-2 Fluid Rower and is the answer not in the manual?
Questions and answers