
Related Manuals for Conductix-Wampfler 0815 Series


Summary of Contents for Conductix-Wampfler 0815 Series
- Page 1 Conductor Bar 0815 Series Manual MV0815-0007-US | 01.08.19 CONDUCTOR BAR 0815 SERIES MANUAL...
- Page 2 Seller and shall defend any suit or action which might arise there from in Buyer’s name - provided that Seller shall have the right to elect to defend any such suit or action for the account of Buyer. The foregoing shall be the exclusive remedies of the Buyer and all persons and entitles claiming through the Buyer. 01.08.19 | MV0815-0007-US CONDUCTOR BAR 0815 SERIES MANUAL...
- Page 3 Annual Service contracts Installation Commissioning Installation supervision to ensure your installers avoid common mistakes. Troubleshooting to get you up and running. Pre-planned inspections to complement your preventive maintenance program. Call 1-800-521-4888 for further details. MV0815-0007-US | 01.08.19 CONDUCTOR BAR 0815 SERIES MANUAL...
-
Page 4: Table Of Contents
SECTION 3 - ASSEMBLY Safety Providing additional protection against accidental contact at the conductor-rail end Procedure Required tools Customizing components Assembling the conductor rail system Installing the current collector Additional documents CONDUCTIX-WAMPFLER FIELD SERVICE NOTES 01.08.19 | MV0815-0007-US CONDUCTOR BAR 0815 SERIES MANUAL... -
Page 5: Section 1 - Safety
WARNING indicates unsafe actions or situations that have the potential to cause severe injury, death, and/or major equipment or property damage. NOTE NOTE is used to alert you to installation, operation, programming, or maintenance information that is important, but not hazard related. MV0815-0007-US | 01.08.19 CONDUCTOR BAR 0815 SERIES MANUAL... -
Page 6: Section 2 - System Description
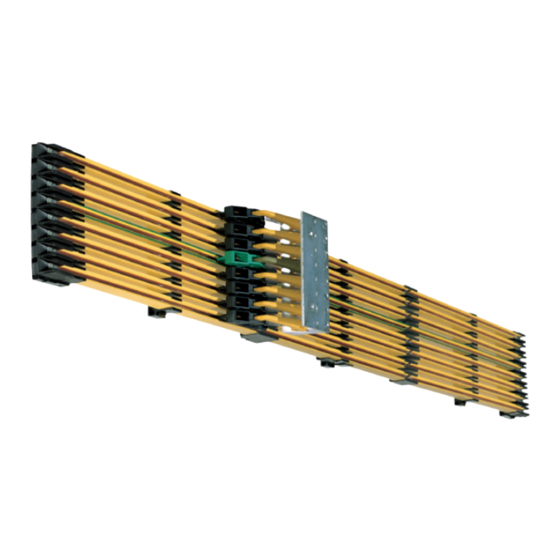
SECTION 2 - SYSTEM DESCRIPTION 01.08.19 | MV0815-0007-US CONDUCTOR BAR 0815 SERIES MANUAL... -
Page 7: Section 3 - Assembly
• The system operator must take this into account accordingly when planning and take the appropriate protective measures. • The building must be evacuated immediately. • The fire brigade must be informed. MV0815-0007-US | 01.08.19 CONDUCTOR BAR 0815 SERIES MANUAL... - Page 8 On sharp edges of the general components. • On sharp edges of the conductor-rails. • On cut edges when trimming the conductor-rails. • On packaging materials (cartons, tapes, etc.) • Use personal protective equipment! 01.08.19 | MV0815-0007-US CONDUCTOR BAR 0815 SERIES MANUAL...
- Page 9 The system must be designed and operated in accordance with the prevailing ambient conditions! WARNING Secure conductor-rails against falling • In application areas with personnel traffic and at an installation height of 3 m or more, conductor-rails must be secured against falling! MV0815-0007-US | 01.08.19 CONDUCTOR BAR 0815 SERIES MANUAL...
-
Page 10: Providing Additional Protection Against Accidental Contact At The Conductor-Rail End
Also fit a contact guard that will safely cover the collector brush if it leaves the conductor rail! CAUTION Alert personnel to the hazard! • Attach a sign saying “Risk of death by electrocution” with the relevant hazard symbol in all areas with live components. 01.08.19 | MV0815-0007-US CONDUCTOR BAR 0815 SERIES MANUAL... -
Page 11: Procedure
CAUTION Sharp edges and burrs result in increased wear of the collector brushes! A sharp edge and/or burr can rapidly wear away the carbon of the collector brushes. MV0815-0007-US | 01.08.19 CONDUCTOR BAR 0815 SERIES MANUAL... - Page 12 SECTION 3 - ASSEMBLY • Clean the profile well and remove sawing debris Figure 3-2: Deburr the conductor rail with smooth file Figure 3-3: PEplus rail without end machining 01.08.19 | MV0815-0007-US CONDUCTOR BAR 0815 SERIES MANUAL...
- Page 13 You can find additional information on the making a bend in a conductor-rail in BAL0800-0004. Conductor-rail bends can be fabricated in the factory or on site. They are prepared using the bending device 081091. For large installations, electrically driven bending devices available upon request. MV0815-0007-US | 01.08.19 CONDUCTOR BAR 0815 SERIES MANUAL...
- Page 14 All subsequent rail sections that are to be formed to the same radius can now be bent using the existing setting. • The rollers are designed for the various bends (horizontal/vertical, see BAL0800-0004 for the bending device for product ranges 0811 and 0815). 01.08.19 | MV0815-0007-US CONDUCTOR BAR 0815 SERIES MANUAL...
-
Page 15: Assembling The Conductor Rail System
Figure 3-9: Rail side clearance of at least 4 mm Procedure during installation: It makes sense to start the assembly at one end cap and to assemble the conductor-rail along the route. MV0815-0007-US | 01.08.19 CONDUCTOR BAR 0815 SERIES MANUAL... - Page 16 Frequently, the hanger clamps only become firmly seated in the EMS rail when the conductor-rails have been installed. • Provide additional fixing for clip-in hanger clamps that do not remain in their positions. 01.08.19 | MV0815-0007-US CONDUCTOR BAR 0815 SERIES MANUAL...
- Page 17 SECTION 3 - ASSEMBLY Figure 3-10: Hanger clamp in EMS rail Figure 3-11: Distance from hanger clamp to end cap MV0815-0007-US | 01.08.19 CONDUCTOR BAR 0815 SERIES MANUAL...
- Page 18 SECTION 3 - ASSEMBLY Figure 3-12: Comparison of correctly- and incorrectly-engaged rail Figure 3-13: Clip hanger clamp into conductor rail 01.08.19 | MV0815-0007-US CONDUCTOR BAR 0815 SERIES MANUAL...
- Page 19 • Put the insulating cap on from the back, engage it and check for secure hold. • Push the conductor-rail into the hanger clamp next to the connection point until it engages. MV0815-0007-US | 01.08.19 CONDUCTOR BAR 0815 SERIES MANUAL...
- Page 20 Make sure that the connector cap is completely engaged on both sides of the insulating profile! • Attach the connector cap centrally from behind clip it into the insulating profile. • Engage the conductor-rails in the hanger clamps (see Figure 3-18). 01.08.19 | MV0815-0007-US CONDUCTOR BAR 0815 SERIES MANUAL...
- Page 21 During installation, it can happen that a conductor-rail has to be taken out of a hanger clamp again. There is a dismantling tool for this (order no.: 081092). This is used to dismantle the conductor-rail fixed in the hanger clamp and end caps bars (see Figure 3-20 and 3-21); see chapter 11.2 in BAL0815-0002-EN). MV0815-0007-US | 01.08.19 CONDUCTOR BAR 0815 SERIES MANUAL...
- Page 22 The section power feed is installed instead of a connector. Here, a different clamping part and a power feed cap with room for a con- necting cable to run out of it are used. Figure 3-22: Correct/incorrect position of clamping unit 01.08.19 | MV0815-0007-US CONDUCTOR BAR 0815 SERIES MANUAL...
- Page 23 Slide the contact-preventing power feed cap over the pre-assembled rail connector. Make sure that the square nut is aligned in the recess of the connector cap. Engage the power feed cap on both sides of the insulating profile (see Figure 3-24). MV0815-0007-US | 01.08.19 CONDUCTOR BAR 0815 SERIES MANUAL...
- Page 24 If the power feed cover cannot rest on the guideway profile, hanger clamps must be placed at maximum distances of 200 mm on both sides of the power feed position. ATTENTION Pre-assembled power feed cables with clamping units installed can be ordered as a unit! 01.08.19 | MV0815-0007-US CONDUCTOR BAR 0815 SERIES MANUAL...
- Page 25 Push the clamping unit of the end cap into the conductor-rail such the contact part sits in the interior of the conductor-rail and the clamping part engages between the conductor-rail and the rear insulation (see Figure 3-27). MV0815-0007-US | 01.08.19 CONDUCTOR BAR 0815 SERIES MANUAL...
- Page 26 For power feed with pre-assembled cable part, push the clamping unit onto the end of the rail. Possibly loosen the clamping screw somewhat and push the end cap onto the clamping part and the conductor-rail. ATTENTION It is recommended that the conductor-rail is not yet engaged in the adjacent hanger clamp! 01.08.19 | MV0815-0007-US CONDUCTOR BAR 0815 SERIES MANUAL...
- Page 27 Put the fixed-point cap on the conductor-rail as a drilling jig and drill a 3-mm hole through the insulation and copper profile on one side. • Remove the fixed-point cap and replace it after rotating through 180° and insert an engagement cam into the hole. MV0815-0007-US | 01.08.19 CONDUCTOR BAR 0815 SERIES MANUAL...
- Page 28 Additional fixing of the hanger clamp is required for clip-in hanger clamps! For clip-in hanger clamps, the hanger clamp that is to be used as the fixed point must be additionally secured to the support/building structure with a screw. 01.08.19 | MV0815-0007-US CONDUCTOR BAR 0815 SERIES MANUAL...
-
Page 29: Installing The Current Collector
SECTION 3 - ASSEMBLY Installing the current collector Different current collectors are used for existing and new systems: Figure 3-33: Single current collector Figure 3-34: Dual current collector MV0815-0007-US | 01.08.19 CONDUCTOR BAR 0815 SERIES MANUAL... - Page 30 SECTION 3 - ASSEMBLY Figure 3-35: EMS current collector The single current collectors are mounted on base plates: Figure 3-36: Mount the single current collector (081506…, 081507…, 081508…, 081509…) on base plate 01.08.19 | MV0815-0007-US CONDUCTOR BAR 0815 SERIES MANUAL...
- Page 31 For types without an integrated cable guide, take care with the selection of the connecting cable and ensure the connecting cables are installed without tensile or directional forces: • Only use highly flexible Conductix-Wampfler cables! • For phases, doubly insulated connecting cables must be provided for voltages > 48 V.
- Page 32 The protective cap is supplied pre-installed on the current collector. A replacement protective cap can be ordered as a packing unit with material number 08-A025-0080! Install all current-collector cables highly flexibly and without tensile or directional forces! Figure 3-39: Comparison of the correct and incorrect position of the socket sleeve 01.08.19 | MV0815-0007-US CONDUCTOR BAR 0815 SERIES MANUAL...
-
Page 33: Additional Documents
MV0815-0005 Expansion module and expansion element • MV0815-0006 Transitions • MV0815-0007 Installation instructions for conductor-rail system 0815 • BAL0815-0001 Carbon-brush sensor unit • BAL0800-0004 Bending device for product ranges 0811 and 0815 MV0815-0007-US | 01.08.19 CONDUCTOR BAR 0815 SERIES MANUAL... - Page 34 01.08.19 | MV0815-0007-US CONDUCTOR BAR 0815 SERIES MANUAL...
- Page 35 MV0815-0007-US | 01.08.19 CONDUCTOR BAR 0815 SERIES MANUAL...
- Page 36 01.08.19 | MV0815-0007-US CONDUCTOR BAR 0815 SERIES MANUAL...
- Page 37 MV0815-0007-US | 01.08.19 CONDUCTOR BAR 0815 SERIES MANUAL...
-
Page 38: Conductix-Wampfler Field Service
Installation supervision to ensure your installers avoid common mistakes. • Troubleshooting to get you up and running. • Pre-planned inspections to complement your preventive maintenance program. Call 1-800-521-4888 for further details. 01.08.19 | MV0815-0007-US CONDUCTOR BAR 0815 SERIES MANUAL... -
Page 39: Notes
NOTES MV0815-0007-US | 01.08.19 CONDUCTOR BAR 0815 SERIES MANUAL... - Page 40 (+52 81) 1090 9025 (+52 81) 1090 9013 Phone +1-402-339-9300 Phone +1-450-565-9900 +1-402-339-9627 +1-450-951-8591 (+52 81) 1090 9014 Fax (+55 11) 4813 7357 info.us@conductix.com info.ca@conductix.com info.mx@conductix.com info.br@conductix.com latinamerica@conductix.com Contact us for our Global Sales Offices CONDUCTOR BAR 0815 SERIES MANUAL 01.08.19 | MV0815-0007-US...
Need help?
Do you have a question about the 0815 Series and is the answer not in the manual?
Questions and answers