Table of Contents
Advertisement
Quick Links
October 1, 2018
Lit. No. 70692, Rev. 01
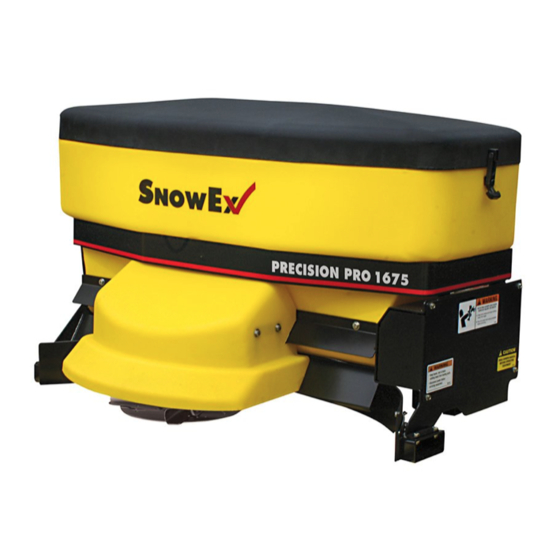
Precision Pro Spreader
SP-1675
Installation Instructions
CAUTION
Read this document before installing or
operating the spreader.
These Installation Instructions are for SP-1675 Precision Pro spreaders
with serial numbers X4-100000 to X4-999999,
and serial numbers beginning with 150918 and higher.
This manual supersedes all editions with an earlier date.
Advertisement
Table of Contents

Summary of Contents for SnowEx SP-1675
- Page 1 CAUTION Read this document before installing or operating the spreader. These Installation Instructions are for SP-1675 Precision Pro spreaders with serial numbers X4-100000 to X4-999999, and serial numbers beginning with 150918 and higher. This manual supersedes all editions with an earlier date.
-
Page 2: Safety Definitions
NOTE: Indicates a situation or action that can lead to damage to your spreader and vehicle or other property. Other useful information can also be described. F51217 74" D6229-74 [SP-1675] Lit. No. 70692, Rev. 01 October 1, 2018... - Page 3 SAFETY SERIAL NUMBER LABEL (PLATE) Madison Heights, MI 48071 U.S.A. 1-800-725-8377 trynexfactory.com Code Defi nition Model No. SP-1675 2-Digit Year 2-Digit Month 2-Digit Day Serial No. YYMMDDLLXXXXZZZZZZ 2-Digit Location Code XXXX 4-Digit Sequential Number Manuf. 2017 ZZZZZ 5–7-Digit Assembly Part Number SERIAL NUMBER LABEL (CONTROL) Lit.
-
Page 4: Safety Precautions
SAFETY SAFETY PRECAUTIONS CAUTION During the hopper spreader installation we Improper installation and operation could cause recommend the addition of an OSHA compliant personal injury and/or equipment and property damage. Backup Alarm. This alarm is required for Read and understand labels and the Owner's Manual OSHA governed employers. - Page 5 SAFETY PERSONAL SAFETY VENTILATION WARNING • Remove ignition key and put the vehicle in PARK or in gear to prevent others from starting the Vehicle exhaust contains lethal fumes. vehicle during installation or service. Breathing these fumes, even in low concentrations, can cause death.
-
Page 6: Torque Chart
SAFETY TORQUE CHART CAUTION Read instructions before assembling. Fasteners should be fi nger tight until instructed to tighten according to torque chart. Use standard methods and practices when attaching spreader, including proper personal protective safety equipment. Recommended Fastener Torque Chart Inch Fasteners Grade 5 and Grade 8 Torque (ft-lb) Torque (ft-lb) -
Page 7: Material Weights
(in) (in) (lb) (in) (in) SP-1675 49-1/2 Leave the screen in the hopper when loading the spreader to prevent large chunks of material and large objects from entering the hopper and damaging the spreader. Lit. No. 70692, Rev. 01 October 1, 2018... -
Page 8: Wiring Instructions
PICK-UP TRUCK These instructions are only applicable if you are using Vehicle Control Harness Installation the SP-1675 spreader with the TPR-020/TPR-020-1 Receiver Adapter. 1. When laying out a path for routing the vehicle control harness from its attachment point on the 1. - Page 9 WIRING AND HARNESS INSTRUCTIONS TRACTOR 8. Work from the control to the rear of the truck, securing the harness with cable ties. Stop at the gas tank. 1. Find a convenient location in the cab to mount 9. Mount the harness plug to the bumper of the the control.
- Page 10 (You can make your own These instructions are only applicable if you are using bracket to mount the plug.) Mount the plug angled the SP-1675 spreader with the TPR-020/TPR-020-1 downward so that water will not collect in the plug. Receiver Adapter.
-
Page 11: Mounting The Spreader
MOUNTING THE SPREADER ATTACHING TO UTV OR PICK-UP TRUCK ATTACHING TO TRACTOR To attach the spreader to a tractor's 3-point hitch, NOTE: Periodically throughout the snow and ice attach the hitch in accordance with the kit's Installation control season, verify that mounting devices Instructions. -
Page 12: Vehicle Harness Diagram
ELECTRICAL COMPONENTS VEHICLE HARNESS DIAGRAM Lit. No. 70692, Rev. 01 October 1, 2018... -
Page 13: Final Adjustments
FINAL ADJUSTMENTS FINAL CHECKLIST Verify that the auger and spinner turn freely. Verify that dielectric grease is applied to all electrical connections. Verify that wire harnesses and battery cables are properly secured away from hot or moving parts. ... - Page 14 Do not exceed vehicle ratings with a spreader. TrynEx International offers a limited warranty for all spreaders and accessories. See separately printed page for this important information. The following is a registered ( ® ) trademark of Douglas Dynamics, LLC: SnowEx ® Printed in U.S.A. Lit. No. 70692, Rev. 01...


Need help?
Do you have a question about the SP-1675 and is the answer not in the manual?
Questions and answers