Page 1
SP-1575-1, SP-1875-1 Owner's Manual CAUTION Read this manual before installing or operating the spreader. This manual is for SnowEx Bulk Pro spreaders with serial numbers ® beginning with 160501 and higher. This document supersedes all editions with an earlier date.
TABLE OF CONTENTS INTRODUCTION ............5 OPERATING THE SPREADER ........ 13 Owner's Information Form ........5 Driving and Spreading on Snow and Ice .... 13 SAFETY INFORMATION ..........6 Powering the Control .......... 14 Safety Defi nitions ..........6 Starting and Stopping Spreader ......14 Warning/Caution Labels ........
Warranty Registration This manual has been prepared to acquaint you with the safety information, operation and maintenance of your new tailgate spreader. Please read this manual Follow the directions on the SnowEx ® Warranty carefully and follow all recommendations. This will Registration and Customer Survey form included in help ensure profi...
SAFETY INFORMATION SAFETY DEFINITIONS WARNING/CAUTION LABELS Please become familiar with the Warning and Caution WARNING labels on the spreader. Indicates a potentially hazardous situation that, if not avoided, could result in death or NOTE: If labels are missing or cannot be read, see serious personal injury.
SAFETY INFORMATION SERIAL NUMBER LABEL Code Defi nition 2-Digit Year 2-Digit Month 2-Digit Day 2-Digit Location Code XXXX 4-Digit Sequential Number ZZZZZZ 5−7-Digit Assembly Part Number Lit. No. 70440, Rev. 00
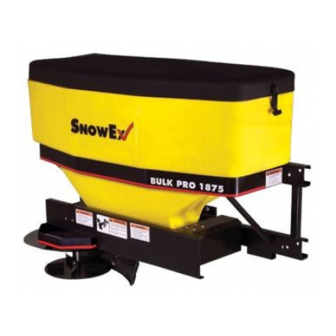
 April 1, 2016...
SAFETY INFORMATION SAFETY PRECAUTIONS CAUTION • Do not operate a spreader in need of Improper installation and operation could cause maintenance. personal injury and/or equipment and property • Before operating the spreader, reassemble damage. Read and understand labels and the any parts or hardware removed for cleaning Owner's Manual before installing, operating or making or adjusting.
SAFETY INFORMATION FIRE AND EXPLOSION FUSES The spreader electrical system contains several WARNING blade-style automotive fuses. If a problem should Gasoline is highly fl ammable and gasoline occur and fuse replacement is necessary, the vapor is explosive. Never smoke while replacement fuse must be of the same type and working on vehicle.
LOADING APPROXIMATE MATERIAL WEIGHTS This Manual covers vehicles which have been recommended for carrying the spreader. Please see your local dealer for proper vehicle applications. WARNING CERTIFICATION Overloading could result in an accident or damage. Do not exceed GVWR or GAWR as found on the driver-side cornerpost of WARNING vehicle.
MOUNTING THE SPREADER MODEL 1875 CAUTION During removal or mounting, securely grip Mounts are sold separately for the model 1875 spreader to avoid dropping. spreader. Refer to the instructions packed with the selected mount. The spreader shall be installed according to instructions supplied.
MOUNTING THE SPREADER LICENSE PLATE INSTALLATION (IF REQUIRED) Install the license plate to the mounting holes in the frame using two 1/4" x 1/2" machine screws and two 1/4" locknuts. License Plate Mounting Holes Model 1575 Model 1875 (2 Options) Lit.
OPERATING THE SPREADER DRIVING AND SPREADING ON SNOW Here are some tips for driving in these conditions: AND ICE • Drive defensively. • Do not drink, then drive or spread ice-control CAUTION materials. Drinking and then driving or spreading is •...
OPERATING THE SPREADER – CAB CONTROL If any button is pressed on the control, it will wake and WARNING check again for spreader connection. If no spreader is Never operate equipment when under the detected, it will act as described above. If a spreader infl...
OPERATING THE SPREADER – CAB CONTROL CONTROLLING MATERIAL APPLICATION Ready Mode The material application settings can be adjusted Vehicle ignition is set to ACC or ON; cab control is OFF. while spreader is ON or OFF. Settings are shown by Control has power.
OPERATING THE SPREADER – CAB CONTROL CAB CONTROL CODES Setup Codes Code Defi nition Procedure Calibrate the Empty Hopper setting. With control in ON mode, press and hold the left control knob until the Cb code displays. Calibration cycle is automatic.* Clear calibration data for Empty Hopper Press the right control knob to clear all calibration data during the setting;...
Page 17
OPERATING THE SPREADER – CAB CONTROL CAB CONTROL CODES continued Error Codes – Spreader Operation Stopped – continued Code Defi nition Possible Cause Suggested Solution Not applicable to tailgate Not applicable to tailgate Reset the control by pressing the ON/OFF spreaders.
OPERATING THE SPREADER – CAB CONTROL SETUP PROCEDURES Adjust LED Brightness Level (LS and SL Codes) Calibrate the Empty Hopper Setting The brightness setting of the cab control lights can be (Cb and EH Codes) adjusted from 1 to 16. The factory default setting is 8. Calibrating the empty hopper setting enables the cab 1.
OPERATING THE SPREADER AUTO-REVERSE (Ar) FEATURE CONTROLLING FLOW OF MATERIAL The spreader, after initial setup, is automatically able The factory installed material baffl e in the spreader to sense and clear material jams. stops fi ne materials from free fl owing. When dense or damp material is being spread, or when more fl...
MAINTENANCE AFTER EACH USE WARNING Never remove the spreader with material in CAUTION the hopper. DO NOT leave unused material in hopper. Material can freeze or solidify, CAUTION causing unit to not work properly. Disconnect electric power at spreader Empty and clean after each use. electrical wiring harness connection and tag out if required before servicing or performing •...
HARNESS WIRING DIAGRAM Cab Control 18 ga Red 4-Way Connector To Vehicle Switched Accessory To Vehicle CHMSL Signal Vehicle Control Harness (tap located in cab) Connectors 18 ga Shielded Twisted-Pair Cable 6 ga Red 50 Amp Fuse 6 ga Red 12 ga Black 6 ga Black Vehicle...
TROUBLESHOOTING GUIDE Please see your distributor for service. The troubleshooting reference table below may guide you in diagnosing the issue. For a reference table of the cab control error codes, see the "Operating the Spreader – Cab Control" section of this manual.
Page 23
TROUBLESHOOTING GUIDE Problem Possible Cause Suggested Solution Unplug the spreader harness and tag out, if required, before performing any of the following repairs. 1. Open access cover and check motor, 1. Electrical connections are loose. harness and module connections. Motor does not run. 2.
Page 24
Do not exceed vehicle ratings with a spreader. Patent pending. TrynEx International offers a limited warranty for all spreaders and accessories. See separately printed page for this important information. The following are registered ( ® or unregistered (™) trademarks of Douglas Dynamics, LLC: Bulk Pro™, SnowEx ® Printed in U.S.A.
Need help?
Do you have a question about the Bulk Pro 1575 and is the answer not in the manual?
Questions and answers