Advertisement
Quick Links
April 15, 2017
Lit. No. 76519, Rev. 00
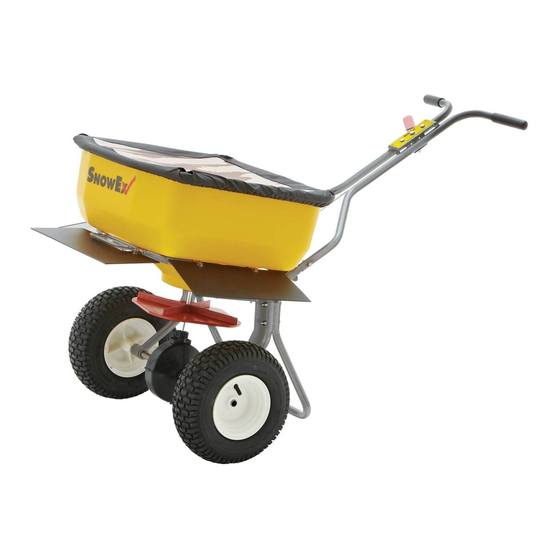
Walk-Behind Broadcast Spreader
SP-65
Owner's Manual and Installation Instructions
Original Instructions
CAUTION
Read this document before operating or
servicing the spreader.
This document is for SnowEx
SP-65 walk-behind broadcast spreaders with
®
serial numbers PA-201033 – PA-204133, and
serial numbers beginning with 140724 and higher.
This document supersedes all editions with an earlier date.
Advertisement

Related Manuals for SnowEx SP-65


Summary of Contents for SnowEx SP-65
- Page 1 CAUTION Read this document before operating or servicing the spreader. This document is for SnowEx SP-65 walk-behind broadcast spreaders with ® serial numbers PA-201033 – PA-204133, and serial numbers beginning with 140724 and higher. This document supersedes all editions with an earlier date.
- Page 2 Lit. No. 76519, Rev. 00 April 15, 2017...
-
Page 3: Table Of Contents
TABLE OF CONTENTS PREFACE .................................. 5 Owner's Information ............................5 LOADING .................................. 7 SAFETY INFORMATION ............................8 ASSEMBLY ................................10 MAINTENANCE ..............................14 Lit. No. 76519, Rev. 00 April 15, 2017... - Page 4 Lit. No. 76519, Rev. 00 April 15, 2017...
-
Page 5: Preface
PREFACE This manual has been prepared to acquaint you with When service is necessary, bring your walk-behind the safety information, operation and maintenance spreader to your distributor. They know your spreader of your new walk-behind spreader. Please read this best and are interested in your complete satisfaction. manual carefully and follow all recommendations. - Page 6 Lit. No. 76519, Rev. 00 April 15, 2017...
-
Page 7: Loading
LOADING LOADING YOUR SPREADER WARNING Never remove spreader from vehicle with WARNING material in it as this could cause damage to the frame assembly. Do not overload spreader. Use chart below to calculate weight of material. Weights of material are an average for dry materials. CAUTION DO NOT leave unused material in Material Weights... -
Page 8: Safety Information
NOTE: Indicates a situation or action that can lead 2-Digit Location Code to damage to your spreader and vehicle or other #### 4-Digit Sequential Number property. Other useful information can also be SP-65 Model Number described. Serial Number Label ON/OFF Label www.snowexproducts.com Lit. - Page 9 SAFETY SAFETY PRECAUTIONS NOTE: Lubricate grease fi ttings after each use. Use a good quality multipurpose grease. Improper installation and operation could cause personal injury and/or equipment and property PERSONAL SAFETY damage. Read and understand labels and this Owner's Manual before installing, operating or making •...
-
Page 10: Assembly
ASSEMBLY ASSEMBLY INSTRUCTIONS 3. Install left side drive wheel. Slide the 2" cotter pin through both the wheel and axle. 1. Remove the axle/spinner assembly. Slide the shaft collars from the hardware kit onto the axle, one on 2" Cotter each side of the gearbox. - Page 11 ASSEMBLY 4. Install the other wheel. Slide the 1-1/2" cotter pin 5. Install the frame stand. Attach it to the hopper through the axle, outside the wheel. Be sure to frame assemblies using four 2-1/4" x 1/4" cap form the legs of the cotter pin tightly to the axle so screws and four 1/4"...
- Page 12 ASSEMBLY 8. Fasten the cable to both handles using 10. Place the handle assembly onto the frame. Insert #10 x 2-1/2" cap screws and #10 locknuts. It 1/4" x 1-3/8" cap screws and hand tighten. should be positioned so the cable points toward the base of the handle and will be to the operator's left.
- Page 13 ASSEMBLY 12. Put the cable lever into the OFF position. Pull the 13. Install the cable clip to the cable bracket. gate as far back as possible. Attach the cable to the gate. Pull gate back as far as possible. Cable Clip Attach cable to gate.
-
Page 14: Maintenance
MAINTENANCE LUBRICATION MAINTENANCE To keep the spreader running smoothly, observe the NOTE: After fi ve to ten hours of spreader usage, following recommendations: retighten all fasteners. Remove the gear housing and apply chain lube spray lubricant. Lubricate both fittings with a good quality multipurpose grease. - Page 15 Lit. No. 76519, Rev. 00 Lit. No. 76519, Rev. 00 April 15, 2017 April 15, 2017...
- Page 16 TrynEx International may require or recommend optional equipment for spreaders. TrynEx International offers a limited warranty for all spreaders and accessories. See separately printed page for this important information. The following are registered ( ) trademarks of Douglas Dynamics, LLC: SnowEx , TrynEx ®...
Need help?
Do you have a question about the SP-65 and is the answer not in the manual?
Questions and answers