Table of Contents
Advertisement
Quick Links
Advertisement
Table of Contents

Related Manuals for V-ZUG DSDSR12


Summary of Contents for V-ZUG DSDSR12
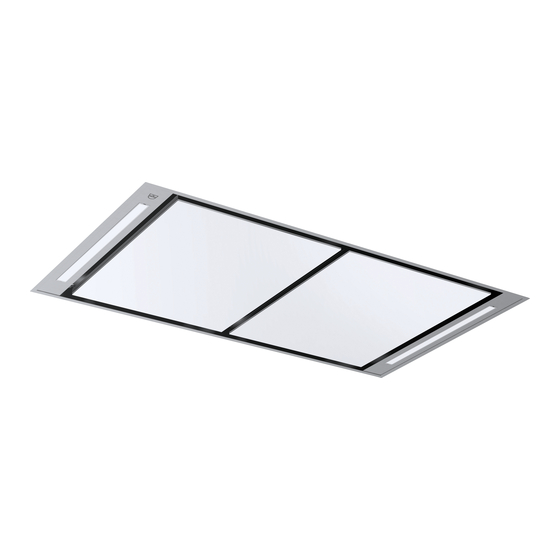
- Page 1 Operating instructions Ceiling hood DSDSR12 Range hood...
- Page 2 The product family (model number) corresponds to the first alphanumerics on the identification plate. These operating instructions apply to: Type Product family Size system DSDSR12 64003 Variations depending on the model are noted in the text. © V-ZUG Ltd, CH-6301 Zug, 2016...
-
Page 3: Table Of Contents
Table of contents 1 Safety precautions 5 Symbols used ..................... 5 General safety precautions .............. 6 Before using for the first time .............. 7 Correct use.................... 7 Children in the home ................. 7 Note on use.................... 8 2 Disposal 10 3 Appliance description 11 Extraction model.................. 11 Recirculation model with recirculation box ........ - Page 4 9 Index 27 10 Notes 29 11 Service & Support 31...
-
Page 5: Safety Precautions
Safety precautions Symbols used Denotes important safety precautions. Failure to observe said precautions can result in injury or in dam- age to the appliance or fittings! Information and precautions that should be observed. Information on disposal Information about the operating instructions ▸... -
Page 6: General Safety Precautions
1 Safety precautions General safety precautions ▪ Read the operating instructions before using the appliance for the first time! ▪ This appliance can be used by children aged 8 and above and by persons with reduced physical, sensory or mental cap- abilities, or lack of experience and/or knowledge, provided they are supervised or have been instructed on the safe use of the appliance and have understood the hazards involved. -
Page 7: Before Using For The First Time
1 Safety precautions Before using for the first time ▪ The appliance must be installed and connected to the electricity supply in accordance with the separate installation instructions. Have a qualified fitter/ electrician carry out the necessary work. ▪ Dispose of the packaging material in accordance with local regulations. Correct use ▪... -
Page 8: Note On Use
1 Safety precautions Note on use ▪ If the appliance is visibly damaged, do not use it. Contact our Customer Services. ▪ If the appliance is not functioning properly, disconnect it from the power supply immediately. ▪ If the mains cable of the appliance is damaged, it must be replaced by Cus- tomer Services in order to avoid hazard. - Page 9 1 Safety precautions ▪ When carrying out maintenance work on the appliance, including replacing the light bulb, cut off the electricity supply to the appliance: remove the screw fuse from the holder or switch the circuit breaker off, or disconnect from the mains supply.
-
Page 10: Disposal
Disposal Packaging ▪ All packaging materials (cardboard, plastic film (PE) and polystyrene (EPS)) are marked and should, if possible, be collected for recycling and disposed of in an environmentally friendly way. Disconnection ▪ Disconnect the appliance from the mains. With a fixed appliance, this is to be carried out by a qualified electrician! Safety ▪... -
Page 11: Appliance Description
Appliance description The appliance is designed for use in the home for extracting cooking fumes and smells from above the cooking surface. The appliance is used in extraction mode. Extraction model A fan draws cooking fumes and smells from above the cooking area. The metal grease filters clean the extracted air, which is passed through a connect- ing pipe fitted with an integrated non-return valve and through the air duct to the outside. -
Page 12: Construction
3 Appliance description Construction Operating and display elements Metal grease filters Folding panel Illumination... -
Page 13: Operating And Display Elements
3 Appliance description Operating and display elements Infrared port for remote control Switches the illumination on/off and changes the light intensity Switches power level 1 and remote control on/off Switches power level 2 on/off Switches power level 3 on/off Switches intensive power level on and resets the saturation indicator Saturation indicator for metal grease filters Depending on the model and features, the specification of the appliance may differ from the standard specification described here. -
Page 14: Remote Control
3 Appliance description Remote control This appliance can be controlled by remote control, which requires standard 1.5 V LR03-AAA alkali zinc-carbon batteries (not supplied). Do not place the remote control near heat sources. Please dispose of the batteries according to the applicable regulations. Operating and display elements Switches the illumination on/off and changes the light intensity Switches the appliance on/off... -
Page 15: Operation
Operation Activating/deactivating the remote control The appliance can be operated using the operating and display elements on the appliance or using the remote control. We recommend operating the appliance using the remote control. ▸ When the appliance is switched off, hold the button depressed for five seconds. -
Page 16: Switching The Illumination On/Off
4 Operation Switching the illumination on/off ▸ Press the button. – The illumination switches on at maximum intensity. ▸ Press the button again. – The illumination switches off at maximum intensity. Changing the light intensity ▸ When the illumination is switched on, hold the button depressed for two seconds. -
Page 17: Switching The After-Running Time On / Off Before Time
4 Operation ▪ If a power level had been running beforehand, then the appliance will auto- matically revert to this power level after six minutes have elapsed. ▪ If the appliance had not been switched on beforehand, then the appliance will automatically switch off after six minutes have elapsed. -
Page 18: Switching The Cleanair Function On / Off Before Time
4 Operation Switching the CleanAir function on / off before time The air extraction is switched on every hour for ten minutes at power level 1. After 24 hours, the CleanAir function switches off. The CleanAir function can only be selected using the remote control. ▸... -
Page 19: Operation Using The Operating And Display Elements
4 Operation 4.10 Operation using the operating and display elements Switching the appliance on/off ▸ Press the button. – The LED on the corresponding button is illuminated. – The corresponding power level switches on. ▸ Press the button again. – The appliance switches off. Switching the illumination on/off ▸... - Page 20 4 Operation – The LED on the button is illuminated. ▪ If a power level had been running beforehand, then the appliance will auto- matically revert to this power level after six minutes have elapsed. ▪ If the appliance had not been switched on beforehand, then the appliance will automatically switch off after six minutes have elapsed.
-
Page 21: Care And Maintenance
Care and maintenance Cleaning the housing Ensure that no water gets into the housing of the appliance! If wa- ter gets into the housing, it can cause damage. Do not use abrasive cleaners, scouring pads, steel wool, etc. for cleaning as the surface could otherwise be damaged. Remove the screw fuse or switch off the circuit breaker. -
Page 22: Cleaning The Metal Grease Filters
5 Care and maintenance Cleaning the metal grease filters The grease filters can be cleaned. Select an «intensive» – or «heavy» – dishwasher programme with a warm pre-wash. Cleaning may cause the grease filter to become dis- coloured. This will not affect the functioning of the filter in any way. Removing ▸... - Page 23 5 Care and maintenance Cleaning The metal grease filters must be cleaned at least every two months with nor- mal use or whenever the saturation indicator is switched on. If properly cared for, the service life of the metal grease filters is the same as the service life of the hood.
-
Page 24: Trouble-Shooting
Trouble-shooting What to do if ... … the illumination is not working Possible cause Solution ▪ Fuse or automatic circuit ▸ Replace the fuse. breaker for electrical in- ▸ Reset the automatic circuit breaker. stallations in the home is defective. ▪... -
Page 25: Accessories And Spare Parts
Accessories and spare parts Please give product family of the appliance and exact designation of the ac- cessory or spare part when ordering parts. Metal grease filter Activated charcoal filter for the recircu- lation box... -
Page 26: Technical Data
Technical data Electrical connection ▸ See identification plate. ▸ Remove the metal grease filters. – The identification plate is located on the inside of the appliance. - Page 27 Index Appliance is not extracting enough air 24 Accessories ..........25 Illumination not working .... 24 Activated charcoal filter ......11 Metal grease filter After-running time........17 Cleaning .......... 22 Appliance, switching on/off Installing .......... 22 Hood ............ 19 Removing.......... 22 Remote control ........
- Page 28 Service & Support........31 Service agreement........31 Spare parts ..........25 Symbols ............5 Technical data .......... 26 Type............... 2 Validity............2 What to do if The illumination is not working .. 24 What to do if … The appliance is not extracting enough air ........
- Page 29 Notes...
- Page 31 Your repair order Call the free service number 0800 850 850 to contact your nearest V-ZUG service centre. You can arrange an onsite visit by us by phone if you wish. General queries, accessories and service agreement V-ZUG will be happy to help you with any general administrative or technical queries, to accept your orders for accessories and spare parts and to inform you about our progress- ive service agreements.
- Page 32 Reduces the power level step by step Increases the power level step by step Switches the intensive level on/off before time Switches the after-running time and CleanAir function on/off before time J64003013-R03 V-ZUG Ltd, Industriestrasse 66, CH-6301 Zug info@vzug.com, www.vzug.com...
Need help?
Do you have a question about the DSDSR12 and is the answer not in the manual?
Questions and answers