Table of Contents
Advertisement
Quick Links
- 1 Sram Etap Axs Hydraulic Brake Systems
- 2 Disc Brake Pad Advancement Procedure
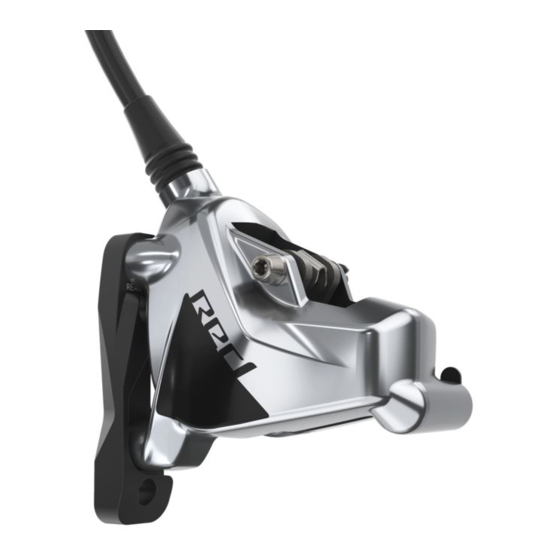
- 3 Etap Axs Hrd Caliper Exploded View
- 4 Sram Etap Axs Hrd Hose Replacement
- 5 Electronic Subassembly Replacement
- 6 Electronic Subassembly Exploded View
- 7 Electronic Subassembly Installation
- Download this manual
See also:
User Manual
Advertisement
Table of Contents

Related Manuals for SRAM eTap AXS


Summary of Contents for SRAM eTap AXS
- Page 1 AXS HRD Caliper/Hose Replacement/ Electronic Subassembly Replacement SERVICE MANUAL GEN.0000000005964 Rev A © 2019 SRAM, LLC...
- Page 2 LIMITATIONS OF LIABILITY To the extent allowed by local law, except for the obligations specifically set forth in this warranty statement, in no event shall SRAM or its third party suppliers be liable for direct, indirect, special, incidental, or consequential damages.
- Page 3 SAFETY FIRST! We care about YOU. Please, always wear your safety glasses and protective gloves when servicing SRAM products. Protect yourself! Wear your safety gear!
-
Page 4: Table Of Contents
ETAP AXS HRD CALIPER EXPLODED VIEW ......................................9 CALIPER BRAKE PAD REMOVAL ..........................................10 CALIPER PISTON REMOVAL ............................................11 CALIPER PISTON INSTALLATION ..........................................15 SRAM ETAP AXS HRD HOSE REPLACEMENT .............................. 17 PARTS, TOOLS AND SUPPLIES ..........................................17 HOSE REMOVAL ................................................17 HOSE INSTALLATION ..............................................20 ELECTRONIC SUBASSEMBLY REPLACEMENT ............................ -
Page 5: Sram Etap Axs Hydraulic Brake Systems
SRAM brake systems need to be serviced periodically to optimize braking function. If brake fluid is leaking from any area of the brake there may be damage or wear and tear to the internal moving parts. -
Page 6: Troubleshooting
T r o u b l e s h o o t i n g D i s c B r a k e P a d A d v a n c e m e n t P r o c e d u r e If your brakes have excessive brake lever throw, it may be a result of the pistons sticking in the caliper. - Page 7 Remove the pad spreader. Use a plastic tire lever to push the pistons back into the caliper bores. Tire lever Repeat steps 3-5 until both pistons contact the spreader at nearly the same time. Tire lever Reinstall the brake pads and install the wheel according to the manufacturer's instructions.
- Page 8 Loosen the caliper bolts. Squeeze the brake lever several times to position the brake pads to the proper distance from the rotor. Center the caliper on the rotor, and tighten. 5 N·m (44 in-lb) Spin the wheel and check the brake function. The pistons should move freely and there should not be excessive brake lever throw.
-
Page 9: Sram Etap Axs Hrd Caliper Service
• Digital caliper • Isopropyl alcohol • Pick • SRAM DOT 5.1 Fluid If SRAM fluid is not available, only use DOT 5.1 or 4 fluid • Torque wrench • SRAM DOT assembly grease • Soft rubber or piece of inner tube SRAM Tools •... -
Page 10: Caliper Brake Pad Removal
C a l i p e r B r a k e P a d R e m o v a l Remove the caliper from the frame, then remove the mounting bracket and the hardware from the caliper. Set them aside in the order that they were removed. -
Page 11: Caliper Piston Removal
C a l i p e r P i s t o n R e m o v a l N OTIC E DOT fluid will damage painted surfaces. If any fluid comes in contact with a painted surface (e.g. your frame) or printing on the brakes, wipe it off immediately and clean it with isopropyl alcohol or water. - Page 12 Remove the pad retainer bolt, then remove the piston and the piston removal tool from the caliper. 2.5 mm Piston removal tool Piston removal tool Insert the piston plug so that it fits snugly into the empty piston bore and is flush with the inside of the caliper. Piston plug Insert the piston removal tool so that it will capture the still-installed 2.5 mm...
- Page 13 Firmly press a rubber-tipped air chuck nozzle into the banjo port. Hold the caliper securely against a rubber surface and force air into the banjo port to dislodge the piston from the caliper. ⚠ CAUTIO N - E YE HAZARD Wear safety glasses.
- Page 14 (e.g. the brake-shift lever, caliper, and hose) will need to be replaced. For the best braking performance, use only SRAM DOT 5.1 fluid. If SRAM fluid is not available, use only DOT 5.1 fluid or 4 fluid. Caliper Piston Removal...
-
Page 15: Caliper Piston Installation
NOTI CE For the best braking performance, use only SRAM DOT 5.1 fluid. If SRAM fluid is not available, use only DOT 5.1 or 4 fluid. Do not use grease. Grease will prevent the pistons from fully retracting into the caliper bores which will reduce braking performance. - Page 16 ⚠ CAUTION Servicing your brakes removes all of the brake fluid from the system. You must bleed your brakes after you service the brake caliper. Consult the eTap AXS HRD Hose Shortening and Bleed Manual at www.sram.com/service. Caliper Piston Installation...
-
Page 17: Sram Etap Axs Hrd Hose Replacement
S R A M e T a p A X S H R D H o s e R e p l a c e m e n t Perform the hose replacement service if the hose needs to be replaced. For hose shortening instructions, consult the eTap AXS HRD Hose Shortening and Bleed Manual at www.sram.com/service. - Page 18 Remove the brake pads from the caliper. NOTI CE Brake pads must be replaced if the total thickness of the backing plate and pad friction material is less than 3 mm. Digital caliper Install the Monoblock bleed block into the caliper, then install the pad 2.5 mm retention bolt.
- Page 19 Loosen and remove the compression nut and hose from the valve body. Flare nut wrench: 8 mm Open end wrench: 10 mm Loosen and remove the banjo bolt and the hose from the caliper. NOTI CE Fluid will drip. Place an oil pan and/or shop towel under the caliper. Remove the hose from the frame, according to your frame manufacturer's instructions.
-
Page 20: Hose Installation
H o s e I n s t a l l a t i o n Internally routed frames: Insert the hose and route it through the frame or fork. Externally routed frames: Loosely connect the hose to the frame or fork. - Page 21 Apply grease to the hose barb threads. DOT grease Thread the hose barb into the hose until it is flush with the end of the hose. Install the compression nut onto the hose. NOTI CE Do not overtighten the hose barb. Overtightening may cause damage to the hose liner.
- Page 22 10 mm ⚠ CAUTION Hydraulic hose replacement removes all of the fluid from the system. You must bleed your brakes after you service the brake caliper. Consult the eTap AXS HRD Hose Shortening and Bleed Manual at www.sram.com/service. Hose Installation...
-
Page 23: Electronic Subassembly Replacement
P a r t s , T o o l s a n d S u p p l i e s Parts Common Tools • SRAM RED eTap AXS Hydraulic Road Brake Lever Assembly - Left or • (2) 2.5 mm hex wrenches Right •... -
Page 24: Electronic Subassembly Removal
If the hood cover has been damaged, remove the hood cover for easier access to the electronic subassembly. Install a new cover after the service is complete. Fold the hood cover forward and remove the SRAM eTap AXS Blips or seal plugs from the electronic subassembly. - Page 25 Rotate the reach adjust bolt clockwise to unthread the lever from the hood. The reach adjust bolt is reverse-threaded. 2.5 mm Remove the second auxiliary connector cover screw, then remove the auxiliary connector cover from the hood assembly. Remove the battery box screws. Electronic Subassembly Removal...
- Page 26 Remove the lever and the battery box from the hood assembly, then remove the auxiliary connectors from the hood assembly. Electronic Subassembly Removal...
-
Page 27: Electronic Subassembly Installation
E l e c t r o n i c S u b a s s e m b l y I n s t a l l a t i o n Install the auxiliary connectors into the hood so the auxiliary connector with the longer wire is in the top slot. - Page 28 Insert the lever into the hood assembly. Insert a 2.5 mm hex wrench 2.5 mm into the reach adjust bolt hole in the lever and align the wrench with the pull rod. Push the lever into the hood assembly, and rotate the bolt counter-clockwise to tighten the bolt to hand tight.
- Page 29 Do not use SRAMAXS shifters without Blip or Clic wires or seal plugs installed. Moisture will damage the electronic components. Your eTap AXS system must be paired before riding. Consult the Quick Start Guide Road eTap AXS Systems or the eTap AXS Systems User Manual for pairing information at www.sram.com/service.
- Page 30 Seeker™, Sektor™, SHIFT™, ShiftGuide™, Shorty™, Showstopper™, Side Swap™, Signal Gear Technology™, SL™, SL-70™, SL-70 Aero™, SL-70 Ergo™, SL-80™, Sl-88™, SLC2™, SL SPEED™, SL Sprint™, Smart Connect™, Solo Air™, Solo Spoke™, SpeedBall™, Speed Metal™, SRAM APEX 1™, SRAM Force 1™, SRAM RIVAL 1™, S-series™, Stealth-a-majig™, StealthRing™, Super-9™, Supercork™, Super Deluxe™, Super Deluxe Coil™, SwingLink™, TaperCore™, Timing Port Closure™, Tool-free Reach Adjust™, Top Loading Pads™, Torque Caps™, TRX™, Turnkey™, TwistLoc™, Tyrewiz™, VCLC™, Vivid™, Vivid...
- Page 31 ASIAN HEADQUARTERS WORLD HEADQUARTERS EUROPEAN HEADQUARTERS SRAM Taiwan SRAM LLC SRAM Europe No. 1598-8 Chung Shan Road 1000 W. Fulton Market, 4th Floor Paasbosweg 14-16 Shen Kang Hsiang, Taichung City Chicago, Illinois 60607 3862ZS Nijkerk Taiwan R.O.C. U.S.A. The Netherlands...
Need help?
Do you have a question about the eTap AXS and is the answer not in the manual?
Questions and answers