Advertisement
Quick Links
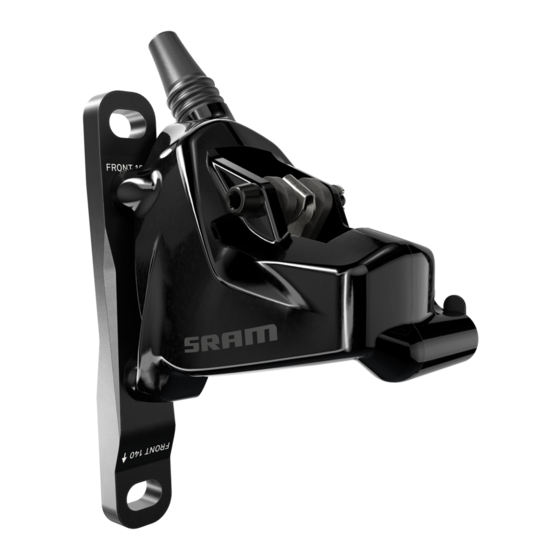
S-900 Aero HRD
S-900 Aero HRD
User Manual
Podręcznik użytkownika
S-900 Aero HRD
Brugervejledning til
S-900 Aero HRD
Příručka pro uživatele brzd
S-900 Aero HRD
Manual de utilizare
S-900 Aero HRD
Εγχειρίδιο χρήστη
S-900 Aero HRD
95-5018-021-100 Rev B
© 2018 SRAM, LLC
Advertisement

Related Manuals for SRAM SRAM S-900 Aero HRD


Summary of Contents for SRAM SRAM S-900 Aero HRD
- Page 1 S-900 Aero HRD Brugervejledning til Manual de utilizare User Manual S-900 Aero HRD S-900 Aero HRD Podręcznik użytkownika Příručka pro uživatele brzd Εγχειρίδιο χρήστη S-900 Aero HRD S-900 Aero HRD S-900 Aero HRD 95-5018-021-100 Rev B © 2018 SRAM, LLC...
-
Page 2: Hose Preparation
Tools and Supplies Narzędzia i materiały Værktøjer og midler Scule şi materiale eksploatacyjne Nástroje a pomůcky Εργαλεία και παρεχόμενα Front Flat Mount Caliper Zacisk przedni montowany Forreste Flat Mount kaliber Etrier faţă tip Flat Mount na płasko Uchycení předního třmenu Μπροστινή... -
Page 3: Reach Adjustment
Bleed Instructions Wskazówki dotyczące Instruktion til bleeding (udluftning) Instrucţiuni de aerisire odpowietrzania Postup odvzdušnění Οδηγίες εξαέρωσης Prepare the Syringes Przygotowanie strzykawek Gør sprøjterne klar Pregătirea seringilor Příprava stříkaček Προετοιμασία των συρίγγων Prepare the Lever Przygotowanie dźwigni Gør grebet klar Pregătirea manetei Příprava brzdové... -
Page 4: Troubleshooting
Troubleshooting Rozwiązywanie problemów Fejlfinding Depanarea Odstraňování potíží Αντιμετώπιση προβλημάτων Disc Brake Pad Advancement Przesunięcie płytki ciernej Bremseklodserne stikker ud Poziționarea plăcuțelor de hamulca tarczowego Zajištění volného pohybu frână destiček kotoučových brzd Προώθηση τακακιών δισκόφρενων... - Page 5 SRAM-dele. Vi anbefaler, at du får en Recomandăm ca montarea componentelor a qualified bicycle mechanic install your kvalificeret cykelmekaniker til at montere SRAM să se facă de un mecanic de biciclete SRAM components. dine SRAM-dele. calificat. Do montażu komponentów SRAM wymaga K montáži součástí...
- Page 6 Tento dokument je τοποθέτηση των εξαρτημάτων αυτών, rowerowym. Dokument jest również rovněž k dispozici na webových stránkách συμβουλευτείτε έναν επαγγελματία dostępny na stronie www.sram.com. www.sram.com. μηχανικό ποδηλάτων. Το έγγραφο αυτό είναι επίσης διαθέσιμο στη διεύθυνση www. sram.com.
- Page 7 Do not use mineral oil. Use only DOT 4 or Brug ikke mineralolie. Brug kun DOT 4 Nu utilizați ulei mineral. Pentru frânele DOT 5.1 fluids with SRAM hydraulic brakes. eller DOT 5.1 bremsevæske med SRAM hidraulice SRAM folosiţi numai lichide DOT 4 Do not use any other fluid, it will damage hydrauliske bremser.
- Page 8 Rotor Installation Montering af skiven Montarea rotorului Montaż tarczy Montáž kotouče Τοποθέτηση ρότορα Tighten the rotor bolts one turn in an Spænd skiftevist de enkelte bolte til Strângeţi şuruburile rotorului 1 tură în alternating sequence until a torque of skiven 1 omgang, indtil hver bolt har et secvenţă...
- Page 9 Front Flat Mount Caliper Forreste Flat Mount kaliber Etrier faţă tip Flat Mount Zacisk przedni montowany Uchycení předního třmenu Μπροστινή δαγκάνα Flat Mount na płasko naplocho (Flat Mount) 140 mm Front Rotor mm forskive Rotor faţă de 140 Przednia tarcza hamulcowa 140 Přední...
- Page 10 Install the Caliper Montering af kalibren Montarea etrierului Zamontuj zacisk Instalace brzdového třmenu Τοποθέτηση της δαγκάνας Loosely install the caliper Monter kalibren løst på Montați etrierul pe furcă onto the fork. Tighten the forgaflen. Spænd kalibren, fără a-l strânge. Strângeți caliper after the brake efter at bremsegrebet etrierul după...
- Page 11 Rear Flat Mount Caliper Bagerste Flat Mount kaliber Etrier spate tip Flat Mount Zacisk tylny montowany na płasko Uchycení zadního třmenu naplocho Πίσω δαγκάνα Flat Mount (Flat Mount) Choose the bolts that protrude Vælg de bolte, der rager 5-7 mm op fra Alegeţi şuruburile cu şaibe care să...
- Page 12 140 mm Rear Rotor 140 mm bagskive Rotor spate de 140 mm Tylna tarcza hamulcowa 140 Zadní kotouč o průměru 140 Πίσω ρότορας 140 mm Loosely install the caliper Monter kalibren løst på Montați etrierul pe cadru onto the frame. Tighten rammen.
- Page 13 160 mm Rear Rotor 160 mm bagskive Rotor spate de 160 mm Tylna tarcza hamulcowa 160 Zadní kotouč o průměru 160 Πίσω ρότορας 160 mm 4,8-5,2 N·m Loosely install the caliper Monter kalibren løst på Montați etrierul pe cadru onto the frame.
- Page 14 Hose Preparation Forberedelse af slangen Pregătirea furtunului Przygotowanie przewodu Příprava hadiček Προετοιμασία εύκαμπτου σωλήνα Remove the wheels from the bicycle Tag hjulet af cyklen efter anvisningerne fra Demontați roțile în conformitate cu according to the wheel manufacturer's producenten af hjulet. instrucțiunile fabricantului.
- Page 15 The calipers should be installed with the Kalibrene bør være monteret, så slangen er Etrierele trebuie montate astfel încât furtunul hose properly routed and secured to or ført korrekt gennem rammen og aerobar’en să fie dispus şi fixat corect pe sau prin cadru through the frame and aerobar.
- Page 16 20 mm To determine where to cut the hose, measure For at afgøre hvor slangen skal skæres Pentru a determina locul de tăiere 20 mm from the end of the aerobar. Use over, skal man måle af 20 mm fra enden af a furtunului măsurați 20 mm de la capătul a hydraulic hose cutter to cut the excess aerobar’en.
- Page 17 Stealth-a-majig Hose Installation Montering af kabel til Montarea furtunului Stealth-a-majig Stealth-a-majig Montaż przewodu Montáž hadičky Τοποθέτηση εύκαμπτου σωλήνα Stealth-a-majig Stealth-a-majig Stealth-a-majig ⚠WARNING ⚠ADVARSEL ⚠AVERTIZARE Only use Stealth-a-majig hose barbs and Brug kun Stealth-a-majig kabelstop og Utilizați numai conectori şi mufe Stealth- compression fittings.
- Page 18 Thread the compression Skru kompressionsfatningen Înşurubaţi mufa pe racord, fitting over the hose barb, ned over kabelspidsen, mod prin rotire spre stânga, counter-clockwise, until it is uret til den stopper. până ajunge la același flush or slightly lower than nivel cu racordul sau puțin Kompressionsfatningen har the hose barb.
- Page 19 S-900 Aero HRD. SRAM® recommends to bleed your brakes at SRAM anbefaler, at bremser Bleedes SRAM recomandă să aerisiţi frânele cel least once a year to ensure optimal braking (udluftes) mindst en gang om året for at...
- Page 20 Prepare the Syringes Gør sprøjterne klar Pregătirea seringilor Przygotowanie strzykawek Příprava stříkaček Προετοιμασία των συρίγγων Lever syringe To assemble a syringe for the brake lever, For at samle sprøjten til bremsegrebet, Pentru a asambla o seringă pentru maneta thread the bleed clamp assembly onto one skal udluftningsklampen skrues på...
- Page 21 Close the clamp on the Luk klemmen på sprøjten til Închideţi clema de pe syringe for the lever. grebet. seringa manetei. Zamknij zacisk na Zavřete svorku na stříkačce Κλείστε το σφιγκτήρα στη strzykawce do dźwigni. pro páku. σύριγγα για τη μανέτα. Bleeding Edge™...
- Page 22 Fill the syringe for the brake Fyld sprøjten til Umpleţi seringa pentru caliper with a small amount bremsekalibren med en lille etrier cu o cantitate mică de of DOT fluid. mængde DOT-væske. lichid DOT. Hold the syringe upright, Hold sprøjten opad, dæk Ţineţi seringa vertical, cover the tip with a rag, and spidsen med en klud, og...
- Page 23 Prepare the Lever Gør grebet klar Pregătirea manetei Przygotowanie dźwigni Příprava brzdové páky Προετοιμασία της μανέτας Remove the wheel from the bicycle according Tag hjulet af cyklen efter anvisningerne fra Demontaţi roata în conformitate cu to the wheel manufacturer's instructions. producenten af hjulet.
- Page 24 Use a T10 TORX® wrench Fjern bleed-skruen fra Folosiţi o cheie TORX T10 to remove the bleed screw grebet ved hjælp af en pentru a demonta şurubul from the lever. T10 TORX. de aerisire de la manetă. Fluid will drip out of the Der vil komme væske ud Din orificiul de aerisire va bleed port.
- Page 25 Prepare the Caliper Gør kaliberen klar Pregătirea etrierului Przygotowanie zacisku Příprava třmenu Προετοιμασία της δαγκάνας Remove/Loosen Fjern/løsn Demontare/slăbire Install Monter Montare Demontuj/Poluzuj Odmontovat/ Αφαίρεση/Χαλάρωση Montuj Namontovat Τοποθέτηση 분리/풀기 설치 uvolnit...
- Page 26 Remove the bleed port cover. Use a Fjern dækslet til bleed-hullet. Brug en 4 mm Îndepărtați capacul orificiului pentru aerisire. 4 mm hex wrench to loosen the bleed port unbraconøgle til at løsne ventilen til bleed- Desfaceți supapa de aerisire 1/4 de rotație valve 1/4 turn, then gently re-tighten the hullet 1/4 omgang, spænd derefter bleed- cu cheia inbus de 4 mm, apoi strângeți-o...
- Page 27 Rotate the Bleeding Edge tool attachment Drej Bleeding-kantværktøjet en hel omgang Rotiţi adaptorul sculei de aerisit spre stânga counter-clockwise one complete rotation to mod uret for at åbne systemet. cu o rotaţie completă pentru a deschide open the system. sistemul. Drej ikke mere end to hele omgange.
- Page 28 Bleed the System Bleed (udluft) systemet Aerisirea sistemului Odpowietrzanie układu Odvzdušnění soustavy Εξαέρωση του συστήματος Open the clamp on the Åbn klemmen på sprøjten Deschideţi clema de pe syringe at the lever. ved grebet. seringa manetei. Otwórz zacisk na Otevřete svorku na Ανοίξτε...
- Page 29 Hold the syringe at the caliper vertically Hold sprøjten ved kaliberen lodret, mens Ţineţi seringa de la etrier vertical şi while slowly pulling the syringe plunger du langsomt trækker stemplet ved grebet ridicaţi încet pistonul seringii de la at the lever upward to draw fluid from the opad for at trække væske fra sprøjten ved manetă...
- Page 30 Rotate the Drej Bleeding- Rotiţi adaptorul Bleeding Edge kantværktøjet med pentru etrier al tool attachment uret, til det stopper sculei de aerisit clockwise until it og lukker systemet. spre dreapta până stops to close the se opreşte, pentru system. a închide sistemul. Aby zamknąć...
- Page 31 Hold the syringe at the lever Hold sprøjten lodret ved Ţineţi seringa de la manetă vertically. Firmly pull on the grebet. Træk kraftigt vertical. Trageţi ferm plunger to create a vacuum, i stemplet for at danne et pistonul seringii pentru then compress the plunger vakuum, pres derefter på...
- Page 32 Close the clamp on the Luk klemmen på sprøjten Închideți clema de pe syringe at the lever. ved grebet. seringa de la manetă. Zamknij zacisk na Uzavřete svorku na Κλείστε το σφιγκτήρα στη strzykawce na dźwigni. stříkačce na páčce. σύριγγα της μανέτας. Remove the syringe at the Tag sprøjten på...
- Page 33 Remove the syringe with the Bleeding Edge Fjern sprøjten med Bleeding-kantværktøjet Trageţi direct de adaptorul pentru etrier tool attachment from the bleed port by fra bleed-hullet ved at trækkke Bleeding- pentru a-l scoate din orificiul de aerisire şi pulling the Bleeding Edge tool straight from kantværktøjet lige ud af kaliberen.
- Page 34 Use a 4 mm hex wrench to Brug en 4 mm unbraconøgle Strângeți aerisitorul la tighten the bleed port to til at spænde bleed-hullet til 1,5 – 1,7 N·m cu ajutorul 1.5-1.7 N·m (13-15 in-lb). 1,5-1,7 N·m. cheii inbus de 4 mm. Użyj klucza sześciokątnego Pomocí...
- Page 35 Install the Brake Pads Monter bremseklodserne Montarea plăcuțelor de frână Zamontuj płytki cierne hamulca Montáž brzdových destiček Τοποθέτηση τακακιών των φρένων 1,0-1,2 N·m Install the wheel according to the wheel Sæt hjulet på efter anvisningerne fra Montaţi roata în conformitate cu manufacturer's instructions.
- Page 36 Prin aceasta procedura de aerisire a frânelor SRAM® S-900 Aero HRD brakes. For new bleeding (udluftning) af SRAM S-900 Aero SRAM S-900 Aero HRD este încheiată. Dacă brake pads and rotors, complete the HRD -bremser. For nye bremseklodser plăcuţele şi discurile de frână sunt noi urmaţi Bed-in procedure.
-
Page 37: Brake Lever Installation
Brake Lever Installation Montering af bremsegreb Montarea manetei de frână Montaż dźwigni hamulca Montáž brzdové páky Τοποθέτηση μανέτας φρένων 2,5-3,0 N·m Install Monter Montare Torque Spænd Cuplu de strângere Wartość momentu Utahovací moment Ροπή Montuj Namontovat Τοποθέτηση 설치 토크... - Page 38 Reach Adjustment Justering af vandring Reglarea distanţei Regulator zasięgu Nastavení dosahu Ρύθμιση απλώματος χεριών Adjust Juster Reglare Reguluj Nastavit Προσαρμογή 조정...
- Page 39 Caliper Centering and Torque Centrering af kaliber og Centrarea etrierului și cuplul de spændingsmoment strângere Wyśrodkowywanie i moment Vystředění třmenu a utahovací Κεντράρισμα δαγκάνας και ροπή zacisku moment στρέψης 4,8-5,2 N·m Squeeze the brake lever three times and Pres bremsegrebet tre gange og hold det Strângeți maneta de frână...
- Page 40 Hose Angle Adjustment Justering af vinkel på slangen Reglarea unghiului furtunului Regulacja kąta przewodu Nastavení úhlu hadičky Ρύθμιση γωνίας εύκαμπτου hamulcowego σωλήνα 4,4-5,4 N·m Use a T25 TORX® wrench to loosen the Brug en T25 TORX-nøgler for at løsne Slăbiți șurubul banjo o jumătate de banjo bolt a half turn, adjust the hose to the banjobolten en halv omgang, justere rotație cu cheia T25 TORX, ajustați...
- Page 41 Tilkøringsprocedure Procedura de rodare Bed-in Procedure Proces docierania hamulców Postup usazení Διαδικασία στρωσίματος All new brake pads and rotors should be put through a wear-in process called 'bed-in'. The bed-in procedure, which should be performed prior to your first ride, ensures the most consistent and powerful braking feel along with the quietest braking in most riding conditions. The bed-in process heats up the brake pads and rotors, which deposits an even layer of brake pad material (transfer layer) to the braking surface of the rotor.
- Page 42 Všechny nové brzdové destičky a kotouče by měly projít procesem záběhu, který se označuje výrazem „usazení“. Postup usazení, který byste měli provést před první jízdou, zajišťuje maximální stejnoměrnost, maximální výkon a minimální hluk při brzdění ve většině podmínek jízdy. Během procesu usazení...
- Page 43 Syringe Storage Opbevaring af sprøjten Depozitarea seringii Przechowywanie strzykawki Uskladnění stříkačky Φύλαξη σύριγγας NOTICE BEMÆRK NOTĂ Store used bleed syringes with DOT fluid Opbevar sprøjter, som er blevet brugt Depozitați seringile pentru aerisit cu lichid in the syringe hose and the clamp open to til udluftning (bleeding) med DOT-væske DOT folosite în furtunul pentru seringă, cu extend the life of the syringe hose.
- Page 44 Maintenance Vedligeholdelse Întreţinerea Συντήρηση Konserwacja Údržba NOTICE BEMÆRK NOTĂ Inspect disc brake pads for wear every Efterse bremseklodser til skivebremser for Verificaţi lunar uzura plăcuţelor de frână month. When the thickness of the backing slid hver måned. Når tykkelsen af bagplade disc.
- Page 45 Troubleshooting Fejlfinding Depanarea Rozwiązywanie problemów Odstraňování potíží Αντιμετώπιση προβλημάτων Disc Brake Pad Advancement Bremseklodserne stikker ud Poziționarea plăcuțelor de frână Przesunięcie płytki ciernej hamulca Zajištění volného pohybu destiček Προώθηση τακακιών tarczowego kotoučových brzd δισκόφρενων If your brakes feel sticky and exhibit slow brake pad return and/or excessive brake lever throw, it may be a result of the pistons sticking in the caliper.
- Page 46 Hvis dine beremser føles, som om de hænger lidt fast og er langsomme til at komme tilbage, og/eller grebet skal presse hårdt, kan det være fordi stemplerne stikker ud i kalibren. Før systemet afluftes, eller bleedes, kan du prøve at løsne de fastsiddende stempler på følgende måde: Spænd cyklen fast med en klampe på...
- Page 47 Αν τα φρένα σας μοιάζουν να κολλάνε και παρουσιάζουν αργή επαναφορά των τακακιών των φρένων ή/και υπερβολικό τίναγμα της μανέτας των φρένων, ενδέχεται να είναι αποτέλεσμα κολλήματος των εμβόλων στη δαγκάνα. Πριν εξαερώσετε το σύστημα, μπορείτε να προσπαθήσετε να χαλαρώσετε το έμβολο που κολλάει εκτελώντας τα παρακάτω βήματα: Στερεώστε...
- Page 48 12.1.2016 www.sram.com ASIAN HEADQUARTERS WORLD HEADQUARTERS EUROPEAN HEADQUARTERS SRAM Taiwan SRAM LLC SRAM Europe No. 1598-8 Chung Shan Road 1000 W. Fulton Market, 4th Floor Paasbosweg 14-16 Shen Kang Hsiang, Taichung City Chicago, Illinois 60607 3862ZS Nijkerk Taiwan R.O.C.
Need help?
Do you have a question about the SRAM S-900 Aero HRD and is the answer not in the manual?
Questions and answers