Table of Contents
Advertisement
Quick Links
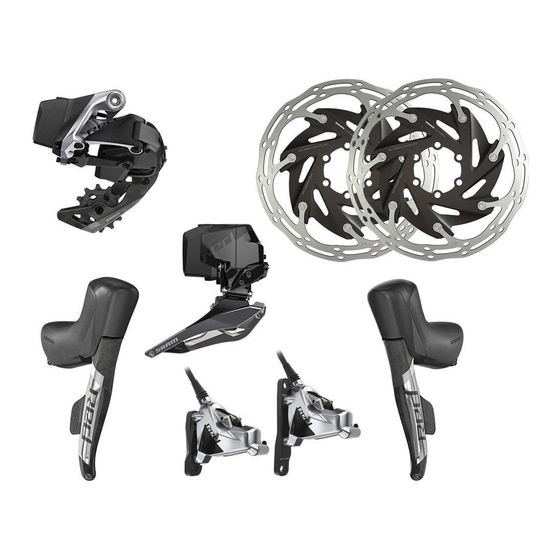
eTap® HRD Systems
eTap HRD Systems
User Manual
Podręcznik użytkownika sys-
temów eTap HRD
eTap HRD 시스템 사용자
설명서
Brugervejledning til
eTap HRD-systemer
Uživatelská příručka k sys-
témům eTap HRD
Manual de utilizare sisteme
eTap HRD
Εγχειρίδιο χρήστη
συστημάτων eTap HRD
95-7918-009-100 Rev G
© 2020 SRAM, LLC
Advertisement
Table of Contents

Related Manuals for SRAM eTap HRD Series


Summary of Contents for SRAM eTap HRD Series
- Page 1 Brugervejledning til Manual de utilizare sisteme User Manual eTap HRD-systemer eTap HRD Podręcznik użytkownika sys- Uživatelská příručka k sys- Εγχειρίδιο χρήστη temów eTap HRD témům eTap HRD συστημάτων eTap HRD eTap HRD 시스템 사용자 설명서 95-7918-009-100 Rev G © 2020 SRAM, LLC...
- Page 2 Tools and Supplies Function Button Shifting Narzędzia i materiały eksploatacyjne Zmiany biegów przyciskiem funkcyjnym 설치 도구 Function 버튼 변속 Værktøj og materialer Skift med funktionsknappen Nástroje a pomůcky Řazení s použitím tlačítka funkce Scule şi accesorii Schimbarea vitezelor de la butonul Function Εργαλεία...
- Page 3 Caliper Centering and Torque 160 mm Rear Rotor Wyśrodkowywanie i moment zacisku Tylna tarcza hamulcowa 160 mm 캘리퍼 가운데 맞춤 및 토크 160mm 리어 로터 Centrering af kaliber og spændingsmoment 160 mm bagskive Vystředění třmenu a utahovací moment Zadní kotouč o průměru 160 mm Centrarea etrierului și cuplul de strângere Rotor spate de 160 mm Κεντράρισμα...
-
Page 4: Table Of Contents
Clamp Mount A2 Rear Derailleur Adjustments Obejma mocująca Regulacje przerzutki tylnej A2 클램프 장착 리어 A2 디레일러 조정 Klampebolt Justering af A2-bagskifter Montáž s použitím svorky Seřízení zadního měniče A2 Montarea cu colier Reglarea deraiorului din spate A2 Στερέωση σφιγκτήρα Προσαρμογές... - Page 5 Shifter Battery Status Status akumulatora manetki 쉬프터 배터리 상태 Status for batteri til gearskifter Stav akumulátoru ovladače řazení Starea bateriei schimbătorului Κατάσταση μπαταρίας χειριστηρίου ταχυτήτων Shifter Battery Replacement Wymiana akumulatora manetki 쉬프터 배터리 교체 Udskiftning af batteri til gearskifter Výměna akumulátoru ovladače řazení Înlocuirea bateriei schimbătorului Αντικατάσταση...
- Page 6 SRAM-dele. Vi anbefaler, at du får en Recomandăm ca montarea componentelor a qualified bicycle mechanic install your kvalificeret cykelmekaniker til at montere SRAM să se facă de un mecanic de biciclete SRAM components. dine SRAM-dele. calificat. Do montażu komponentów SRAM wymaga K montáži součástí...
- Page 7 Tento dokument je τοποθέτηση των εξαρτημάτων αυτών, συμβουλευτείτε έναν επαγγελματία rowerowym. Dokument ten jest również rovněž k dispozici na webových stránkách dostępny na stronie www.sram.com. www.sram.com. μηχανικό ποδηλάτων. Το έγγραφο αυτό είναι επίσης διαθέσιμο στη διεύθυνση www.sram.com.
- Page 8 Χρησιμοποιείτε υγρά φρένων μόνο DOT 4 wyłącznie płyny hamulcowe DOT 4 lub brzdovou kapalinu DOT 4 nebo DOT 5.1. ή DOT 5.1 με τα υδραυλικά φρένα SRAM. DOT 5.1. Nie stosuj jakiegokolwiek innego Nepoužívejte žádnou jinou kapalinu, došlo Μην χρησιμοποιείτε οποιαδήποτε άλλα...
- Page 9 For opdatering af software og Pentru actualizări software şi informaţii related to your products, please register informationer relateret til dine produkter legate de produsele noastre înregistraţi-vă online at www.sram.com/registration. bedes du registrere dig online på online la www.sram.com/registration. www.sram.com/registration. Για ενημερώσεις λογισμικού και...
- Page 10 Tag batterilåget af batteriet og oplad Îndepărtaţi capacul bateriei şi încărcaţi and charge the battery. batteriet. bateria. Consult the SRAM Battery and Charger Se brugervejledningen for SRAM-batteri og Pentru instrucţiuni privind încărcarea şi manual for charging instructions and oplader for at få instruktioner til opladning întreţinerea bateriei consultaţi manualul...
- Page 11 Battery Installation Montering af batteri Instalarea bateriei Montaż akumulatora Montáž akumulátoru Τοποθέτηση μπαταρίας 배터리 설치 NOTICE BEMÆRK NOTĂ Do not discard the derailleur battery Smid ikke batteriblokkene på bagskifteren Nu aruncaţi blocurile pentru baterie ale blocks (A) or the battery covers (B). (A) eller batterilågene (B) ud.
- Page 12 The rear derailleur and front derailleur Batterier til bagskifter og forskifter monteres Bateriile deraioarelor din faţă şi din spate batteries install the same way and can på samme måde og kan bruges begge se montează în mod similar şi pot fi be used interchangeably.
- Page 13 System Pairing Parring af system Asocierea sistemului Δημιουργία ζεύγους συστήματος Parowanie systemu Párování systému 시스템 페어링 Each eTap™ component must be paired Alle dele til eTap skal parres med Fiecare componentă eTap trebuie with the rear derailleur. Pairing allows each bagskifteren.
- Page 14 Steps 2-4 can be done in any order. Trin 2-4 kan gøres til tilfældig rækkefølge. Etapele 2-4 pot fi parcurse în orice ordine. Kroki 2-4 mogą być wykonane Kroky 2–4 lze provádět v libovolném pořadí. Τα βήματα 2-4 μπορούν να εκτελεστούν με w dowolnej kolejności.
- Page 15 Press and release the Tryk og slip Apăsaţi şi eliberaţi butonul function button on the rear funktionsknappen på Function al deraiorului derailleur to end the pairing bagskifteren for at slutte din spate pentru a încheia session, or wait 30 seconds parringen, eller vent sesiunea de asociere sau for the pairing session to...
- Page 16 (e-Bike/Pedelec). υποβοηθούνται με πετάλια (e-Bike/ dodatkowym napędem (e-Bike/Pedelec). Pedelec). V systémech SRAM eTap je funkce Multi- Funkcja wielokrotnej zmiany przełożenia shift zapnutá. V systémech SRAM eTap Η λειτουργία πολλαπλής αλλαγής (multi-shift) jest domyślnie aktywowana namontovaných na kolech typu e-Bike/...
- Page 17 Shifting Gearskift Schimbarea vitezelor Zmiana przełożeń Řazení Αλλαγή ταχυτήτων 변속 Verify the system is paired by shifting the Godkend, at systemet er parret ved at Verificaţi asocierea sistemului prin derailleurs in both directions. The derailleur skifte gear op og ned. LED-lamperne på schimbarea vitezelor de la deraioare în LED lights will blink when a command bagskifteren vil blinke, når der er modtaget...
- Page 18 Press the right shifter paddle to move the Tryk på det højre greb for at flytte Apăsaţi padela din dreapta pentru a deplasa rear derailleur outboard to a smaller cog. bagskifteren udad til et mindre tandhjul. deraiorul din spate spre exterior. Pentru Press and hold the paddle for Tryk grebet og hold det inde for at skifte schimbări multiple apăsaţi şi menţineţi...
- Page 19 Function Button Shifting Skift med funktionsknappen Schimbarea vitezelor de la butonul Function Αλλαγή ταχυτήτων με κουμπί Zmiany biegów przyciskiem Řazení s použitím tlačítka funkce λειτουργίας funkcyjnym Function 버튼 변속 Press the function button Tryk en gang på Apăsaţi butonul Function al on the rear derailleur once funktionsknappen på...
- Page 20 Shifter Installation Montering af gearskifter Montarea Schimbătorului Montaż manetki Montáž ovladače řazení Τοποθέτηση χειριστηρίου αλλαγής ταχυτήτων 쉬프터 설치 Install the Monter gear- Montaţi maneta shift-brake lever bremsegrebet på de schimbare onto the handlebar styret, og sæt det a vitezelor / frână pe and set it to your i den ønskede ghidon şi reglaţi-o în...
- Page 21 Recommended Road Rotor Size Oversigt over anbefalet størrelse af Tabelul Dimensiuni recomandate and Brake Pad Chart bremseskive og bremseklodser ale rotoarelor și plăcuțelor de frână pentru șosea. Tabela zalecanych rozmiarów Tabulka doporučených rozměrů Διάγραμμα Συνιστώμενων tarcz szosowych i klocków kotoučů a brzdových destiček μεγεθών...
- Page 22 Kørestil Cykelcross / tidskørsel Landevej / grusvej - Generelt Landevej / grusvej - Alpint Organise eller sintrede Organiske Organiske < 140 lbs (63 kg) 0140 mm 0140 mm 140 - 160 lbs (63 - 73 kg) 0140 mm 0160 mm / 0140 mm² 160 - 180 lbs (73 - 82 kg) 0160 mm / 0140 mm²...
- Page 23 Modul de utilizare Ciclocros / probe contra Șosea / pietriș - general Șosea / pietriș - alpin cronometru Organice sau sinterizate Organice Organice < 140 lbs (63 kg) 0140 mm 0140 mm 140 - 160 lbs (63 - 73 kg) 0140 mm 0160 mm / 0140 mm²...
- Page 24 Rotor Installation Montering af skiven Montarea rotorului Montaż tarczy Montáž kotouče Τοποθέτηση ρότορα 로터 장착 Tighten the rotor bolts one turn in an Spænd skiftevist de enkelte bolte til Strângeţi şuruburile rotorului 1 tură în alternating sequence until a torque of skiven 1 omgang, indtil hver bolt har et secvenţă...
- Page 25 συμβουλευτείτε τις Προδιαγραφές mocowania zacisku hamulca tarczowego www.sram.com/service v části Disc Brake στερέωσης δαγκάνας φρένων στη διεύθυνση www.sram.com/service. pod adresem www.sram.com/service. Caliper Mounting Specifications (Technické specifikace pro třmeny kotoučových brzd). 캘리퍼 마운팅 구성에 대해서는 에서 디스크 브레이크 www.sram.com/service 캘리퍼 장착 사양 을 참조하십시오.
- Page 26 Post Mount Caliper Montering af kaliber på rammen Etrierul pe tijă Zacisk do montowania na słupku Montáž třmenů v konfiguraci Post Δαγκάνα Post Mount Mount 포스트 마운트 캘리퍼 9-13 mm ⚠ ⚠ WARNING - CRASH HAZARD ⚠ ⚠ ADVARSEL – RISIKO FOR STYRT ⚠...
- Page 27 Caliper Centering and Torque Centrering af kaliber og Centrarea etrierului și cuplul de spændingsmoment strângere Wyśrodkowywanie i moment zacisku Vystředění třmenu a utahovací moment Κεντράρισμα δαγκάνας και ροπή στρέψης 캘리퍼 가운데 맞춤 및 토크 6 N·m ( 53 in-lb) Loosely install the caliper onto the frame or Monter kalibren løst på...
- Page 28 Front Flat Mount Caliper Forreste Flat Mount kaliper Etrier faţă tip Flat Mount Zacisk przedni montowany Uchycení předního třmenu Μπροστινή δαγκάνα Flat Mount na płasko naplocho (Flat Mount) 프런트 플랫 마운트 캘리퍼 140 mm forskive 140 mm Front Rotor Rotor faţă de 140 mm Przednia tarcza hamulcowa 140 mm Přední...
- Page 29 Caliper Centering and Torque Centrering af kaliber og Centrarea etrierului și cuplul de spændingsmoment strângere Wyśrodkowywanie i moment Vystředění třmenu a utahovací moment Κεντράρισμα δαγκάνας και ροπή zacisku στρέψης 캘리퍼 가운데 맞춤 및 토크 5 N·m (44 in-lb) Loosely install the caliper onto the frame or Monter kalibren løst på...
- Page 30 Rear Flat Mount Caliper Bagerste Flat Mount kaliper Etrier spate tip Flat Mount (cu frână pe disc) Zacisk tylny montowany na płasko Uchycení zadního třmenu Πίσω δαγκάνα Flat Mount naplocho (Flat Mount) 리어 플랫 마운트 캘리퍼 Choose the bolts that protrude Vælg de bolte, der rager 5-7 mm op fra Alegeţi şuruburile cu şaibe care să...
- Page 31 140 mm Rear Rotor 140 mm bagskive Rotor spate de 140 mm Tylna tarcza hamulcowa 140 mm Zadní kotouč o průměru 140 mm Πίσω ρότορας 140 mm 140mm 리어 로터 5 N·m (44 in-lb) Loosely install the caliper onto the frame or Monter kalibren løst på...
- Page 32 160 mm Rear Rotor 160 mm bagskive Rotor spate de 160 mm Tylna tarcza hamulcowa 160 mm Πίσω ρότορας 160 mm Zadní kotouč o průměru 160 mm 160mm 리어 로터 5 N·m (44 in-lb) Install the 160 mm bracket onto the caliper, Monter 160 mm-beslaget på...
- Page 33 5 N·m (44 in-lb) Squeeze the brake lever three times and Pres bremsegrebet tre gange og hold det Strângeți maneta de frână de trei ori şi apoi hold to advance the pistons and center the inde for at få stemplerne frem og centrere țineți-o strânsă...
- Page 34 Hose Angle Adjustment Justering af vinkel på slangen Reglarea unghiului furtunului Regulacja kąta przewodu Nastavení úhlu hadičky Ρύθμιση γωνίας εύκαμπτου hamulcowego σωλήνα 호스 각도 조정 5 N·m (44 in-lb) Use a T25 TORX® wrench to loosen the Brug en T25 TORX-nøgler for at løsne Slăbiți șurubul banjo o jumătate de banjo bolt a half turn, adjust the hose to the banjobolten en halv omgang, justere...
- Page 35 Reach and Contact Point Justering af vandring og Ajustarea cursei și a punctului kontaktpunkt contact Adjustment Regulacja zasięgu i punktu Seřízení dosahu a bodu dotyku Ρύθμιση σημείου επαφής και kontaktowego απλώματος χεριών 도달점 및 접촉점 조정 Use a 2.5 mm hex Juster vandringen Folosiţi o cheie wrench to adjust...
- Page 36 Pentru scurtarea furtunului și aerisirea consult the eTap HRD Hose Cutting and (ufluftning) se eTap HRD Hose frânelor consultați eTap HRD, Manual Bleed Manual on www.sram.com/service. Shortening and Bleed Manual på pentru scurtarea furtunurilor și aerisirea www.sram.com/service. frânelor, la www.sram.com/service.
- Page 37 Bed-in Procedure Tilkøringsprocedure Procedura de rodare Διαδικασία στρωσίματος Proces docierania płytek ciernych Postup usazení brzd 베드 인 절차 All new brake pads and rotors should be put through a wear-in process called 'bed-in'. The bed-in procedure, which should be performed prior to your first ride, ensures the most consistent and powerful braking feel along with the quietest braking in most riding conditions.
- Page 38 Všechny nové brzdové destičky a kotouče by měly projít procesem záběhu, který se označuje výrazem „usazení“. Postup usazení, který byste měli provést před první jízdou, zajišťuje maximální stejnoměrnost, maximální výkon a minimální hluk při brzdění ve většině podmínek jízdy. Během procesu usazení...
- Page 39 새 브레이크 패드와 로터는 모두 '베드 인'이라는 길들이기 절차를 수행해야 합니다. 첫 번째 주행 전에 베드 인 절차를 수행하면 대부분의 주행 환경에서 제동 소음이 거의 없는 일관되고 강력한 제동 성능을 확보할 수 있습니다. 베드 인 절차는 브레이크 패드와 로터의 온도를 충분히 올려서 로터의 제동 표면에...
- Page 40 Front Derailleur Installation Montering af forskifter Montarea deraiorului din faţă Montaż przerzutki przedniej Montáž přesmykače Τοποθέτηση εμπρόσθιου εκτροχιαστή 프런트트 디레일러 설치 NOTICE BEMÆRK NOTĂ The derailleur must be in Bagskifteren skal være Pentru a începe montarea the outboard position to i yderste position, når deraiorul trebuie să...
- Page 41 Braze-on Mount Montering på beslag Montarea cu suport fix Mocowanie braze-on Montáž na připájený díl Στερέωση σε Braze-on 브레이즈 온(Braze-on) 장착 Position the front derailleur onto the Monter forskifteren på beslaget, monter Poziţionaţi deraiorul din faţă pe suport, apoi braze-on, then install the washer and the derefter spændskive og bolt.
-
Page 42: Clamp Mount Obejma Mocująca
Clamp Mount Klampebolt Montarea cu colier Obejma mocująca Montáž s použitím svorky Στερέωση σφιγκτήρα 클램프 장착 6 N·m (53 in-lb) Apply friction paste to the clamp. Smør friktionsmiddel på klampen. Aplicaţi pastă de fricţiune pe colier. Position the clamp onto the frame, and use Placer klampen på... -
Page 43: Regulacja 조정
Adjustments Justeringer Reglaje Προσαρμογές Regulacja Úpravy nastavení 조정 Adjust the derailleur so Juster gearskifteren, Vârful celui mai înalt dinte that the tip of the tallest så spidserne på tænderne al foii de angrenaj trebuie chainring tooth appears af den midterste klinge er să... - Page 44 Measure the space between Mål mellemrummet Măsuraţi spaţiul dintre the tallest tooth of the large mellem den højeste dintele cel mai înalt al foii chainring and bottom edge tand på den største pedaliere mari şi muchia of the outer cage plate. klinge og den nederste de la bază...
- Page 45 6 N·m (53 in-lb) Once the final height of the front derailleur Når den endelige højde for forskifteren af După ce a fost determinată înălţimea finală is determined and the cage is correctly afgjort, og kædeboksen er korrekt rettet a deraiorului din faţă şi colivia este aliniată aligned with the large chainring, use a 4 mm ind efter den største klinge, skal bolten til corect cu foaia pedalieră...
-
Page 46: Rear Derailleur Installation Montaż Przerzutki Tylnej
Rear Derailleur Installation Montering af baggearskifter Montarea deraiorului din spate Montaż przerzutki tylnej Montáž přehazovačky Τοποθέτηση οπίσθιου εκτροχιαστή 리어 디레일러 설치 Apply a thin layer of grease Put et tyndt lag smørefedt Aplicaţi un strat subţire de to the derailleur hanger på... - Page 47 Install the rear derailleur Monter baggearskifteren Montaţi deraiorul din onto the derailleur hanger. på studsen på gearskiftet. spate pe suport. Folosiţi 6 N·m Use a 5 mm hex wrench to Spænd boltene til o cheie inbus de 5 mm (53 in-lb) tighten the derailleur bolt to gearskiftet til 6 N•m med en pentru a strânge şurubul...
-
Page 48: Short Cage Rear Derailleur Adjustments
Short Cage Rear Derailleur Justeringer af baggearskifter med kort Reglajele deraiorului din spate cu kasse carcasă scurtă Adjustments Regulacje przerzutki z krótkim Seřízení zadního měniče s krátkým Ρυθμίσεις οπίσθιου εκτροχιαστή wózkiem vodítkem κοντού κλωβού 쇼트 케이지 리어 디레일러 조정 Align the pulley wheel with the center of Ret pulley-hjulet ind efter midten af det Ajustaţi deraiorul pentru a alinia rotiţa de largest cog by adjusting the rear derailleur. - Page 49 6-8 mm Use a 2.5 mm hex wrench to adjust the Juster B-justeringsskruen med en 2,5 mm Reglaţi şurubul B cu o cheie inbus de B-adjust screw so there is 6-8 mm between unbraconøgle, så der er 6-8 mm mellem 2,5 mm astfel încât să...
- Page 50 Press and hold the right shift paddle to shift Tryk på højre geargreb og hold det inde for Comutaţi deraiorul din spate în poziţia the rear derailleur until it is fully outboard. at flytte gearskiftet helt ud. extremă spre exterior apăsând şi menţinând apăsată...
- Page 51 Use a 2.5 mm hex wrench Juster skruen til justering Reglaţi şurubul pentru limita to adjust the high limit af højeste grænse med en superioară cu cheia inbus screw until it lightly touches 2,5 mm unbraconøgle, så de 2,5 mm astfel încât să the inner link of the rear der lige akkurat er kontakt atingă...
-
Page 52: Chain Installation Montaż Łańcucha
Chain Installation Montering af kæde Montarea lanţului Montaż łańcucha Montáž řetězu Τοποθέτηση αλυσίδας 체인 설치 Wrap the chain around the large chainring Vikl kæden rundt om den største klinge Înfăşuraţi lanţul pe foaia pedalieră cea and largest cassette cog. Add one inner link og det største tandhjul i kassetten. - Page 53 Pull each end of the chain together and Træk begge ender af kæden sammen og Apropiaţi capetele lanţului şi montaţi install the PowerLock. Press the PowerLock monter PowerLock’en. Pres PowerLock- conectorul PowerLock. Strângeţi zalele connector links together. forbindelsesledet sammen. conectorului PowerLock. NOTICE BEMÆRK NOTĂ...
- Page 54 Check that the two halves of the PowerLock™ Tjek, at de to halvdele af PowerLock’en er Verificați dacă cele două părți ale zalei are properly aligned. rettet ordentligt ind. PowerLock sunt aliniate corect. Apply the rear brake and firmly push the Træk i bagbremsen og pres pedalkarmen Strângeţi frâna din spate şi apăsaţi ferm crank arm down to lock the PowerLock.
-
Page 55: Wifli™ Mid Cage Rear Derailleur Adjustments
WiFLi™ Mid Cage Rear Derailleur Justeringer af WiFLi baggearskifter Reglajele deraiorului din spate cu Adjustments med mellemstor kasse carcasă medie WiFLi Regulacje przerzutki ze średnim Seřízení zadního měniče WiFLi s Ρυθμίσεις οπίσθιου εκτροχιαστή wózkiem WiFLi krátkým vodítkem μέσου κλωβού WiFLi WiFLi 미드... - Page 56 11-28 & 11-32 11-26 4-6 mm 4-6 mm B-Adjust Screw Use a 2.5 mm hex wrench to adjust the Juster B-justeringsskruen med en 2,5 mm Reglați șurubul B cu o cheie inbus de B-adjust screw so there is 4-6 mm between unbraconøgle, så...
- Page 57 11-26 cassettes only: Press and hold the left Kun for 11-26 kassetter: Tryk det venstre Numai la casetele 11 - 26: Apăsați și shift paddle to shift the rear derailleur fully geargreb og hold det inde for at flytte mențineți apăsată padela din stânga pentru inboard.
- Page 58 Use a 2.5 mm hex wrench Juster skruen til justering Reglaţi şurubul pentru limita to adjust the low limit af nederste grænse med inferioară cu cheia inbus screw so that it lightly en 2,5 mm unbraconøgle, de 2,5 mm astfel încât să contacts the inner link of så...
- Page 59 The pulley wheel must be aligned with Pulley-hjulet skal være rettet ind efter Roata de ghidare trebuie să fie aliniată cu midten af det mindste tandhjul. Hvis de ikke centrul pinionului cel mai mic. Dacă nu sunt the center of the small cog. If they are not er rettet ind, så...
- Page 60 Use a 2.5 mm hex wrench Juster skruen til justering Reglaţi şurubul pentru limita to adjust the high limit af højeste grænse med en superioară cu cheia inbus screw until it lightly touches 2,5 mm unbraconøgle, så de 2,5 mm astfel încât să the inner link of the rear der lige akkurat er kontakt atingă...
-
Page 61: A2 Rear Derailleur Adjustments Regulacje Przerzutki Tylnej A2
A2 Rear Derailleur Adjustments Justering af A2-bagskifter Reglarea deraiorului din spate A2 Regulacje przerzutki tylnej A2 Seřízení zadního měniče A2 Προσαρμογές πίσω εκτροχιαστή Α2 리어 A2 디레일러 조정 Shift the rear derailleur inboard to the Skift bagskifteren indad til det største Comutați deraiorul din spate spre interior, pe largest cog. - Page 62 25T Cog 16 mm 26T Cog 14 mm 28T Cog 10 mm 30T Cog 8 mm 32T Cog 8 mm Rotate the B-Adjust screw until the Drej B-justeringsskruen, indtil afstanden Rotiți șurubul de reglare A până când obțineți appropriate gap between the upper pulley mellem øverste pulley-hjul og de højeste spațiul corect între rotița de sus și dintele cel and the tallest teeth of the largest cog is...
- Page 63 0.25 mm Align the pulley wheel with the center of Ret pulley-hjulet ind efter midten af det Ajustaţi deraiorul pentru a alinia rotiţa de largest cog by adjusting the rear derailleur. største tandhjul ved at justere bagskifteren. ghidare cu centrul pinionului cel mai mare. Press and hold the shifter function button Tryk på...
- Page 64 Use a 2.5 mm hex wrench Juster skruen til justering Reglaţi şurubul pentru limita to adjust the low limit af nederste grænse med inferioară cu cheia inbus screw so that it lightly en 2,5 mm unbraconøgle, de 2,5 mm astfel încât să contacts the inner link of så...
-
Page 65: Front Derailleur Adjustment
Front Derailleur Adjustment Justering af forgearskifter Reglarea deraiorului din faţă Προσαρμογή εμπρόσθιου Regulacja przerzutki przedniej RSeřízení přesmykače εκτροχιαστή 앞 디레일러 조정 NOTICE BEMÆRK NOTĂ The front deraileur must be in the outboard Forgearskifteren skal være i yderste position Pentru a regla şurubul pentru limita position to set the high limit screw. - Page 66 0.5 mm-1 mm Shift the chain to the small chainring and Skift kæden til den mindste klinge og det Treceţi lanţul pe foaia pedalieră cea mai the large cassette cog. Use a 2.5 mm hex største tandhjul på kassetten. Drej skruen til mică...
-
Page 67: Wedge Selection Wybór Klina
Wedge Selection Valg af kile Selectarea penei Wybór klina Výběr klínu Επιλογή σφήνας 웨지 선택 The wedge provides additional support for Kilen giver ekstra støtte til forskiftere Pana oferă un sprijin suplimentar pentru braze-on mounted front derailleurs and is monteret på beslag og er nødvendigt for, deraioarele montate pe suport fix şi este necessary for proper shifting function. - Page 68 Place the labeled side of each wedge Placer den mærkede side på hver kile ind Ţineţi pana cu partea cu eticheta spre against the front derailleur and slide the mod forskifteren og skub kilen fremad, deraiorul din faţă şi împingeţi-o până când wedge forward until it lightly contacts the til den har let kontakt med rammen eller atinge uşor cadrul sau suportul fix.
-
Page 69: Wedge Installation Montaż Klina
Wedge Installation Montering af kile Montarea penei Montaż klina Montáž klínu Τοποθέτηση σφήνας 웨지 설치 Use a 2 mm hex wrench to loosely install the Monter kilen og gearskifteren ved at skrue Montaţi şurubul şi pana pe deraior, fără wedge bolt and the wedge to the derailleur, kilebolten løst i med en 2 mm unbraconøgle;... -
Page 70: Fine Tuning
Fine Tuning Finindstilling Reglajul fin Ostateczna regulacja Jemné nastavení Βελτιστοποίηση 미세조정 0.25 mm Similar to a barrel adjuster on mechanical Ligesom med en kabeljustering på În mod similar cu reglarea manşonului de la systems, unwanted rasping sounds can be mekaniske systemer kan uønskede, sistemele mecanice, zgomotele de frecare elimiated by fine-tuning the rear derailleur hårde lyde elimineres ved at finindstille... - Page 71 0.25 mm To micro-adjust from a smaller cog to For at mikrojustere fra et mindre til et Pentru a modifica reglajul fin dinspre un a larger cog, press the left shifter function større tandhjul, skal man trykke på højre pinion mai mare spre unul mai mic apăsaţi button while simultaneously pressing the funktionsknappen på...
-
Page 72: Battery Overview Omówienie Akumulatora
Consult the SRAM Battery and resterende cykeltid. Se brugervejledningen rămas. Pentru instrucţiuni privind încărcarea Charger manual for charging instructions. til SRAM-batteri og oplader på instruktion til bateriei consultaţi manualul Bateria şi opladning. încărcătorul SRAM. Η λυχνία LED ανάβει όταν εκτελείται μια... - Page 73 Shifter Battery Status Status for batteri til gearskifter Starea bateriei schimbătorului Status akumulatora manetki Stav akumulátoru ovladače řazení Κατάσταση μπαταρίας χειριστηρίου ταχυτήτων 쉬프터 배터리 상태 6-24 months 6-24 måneder 6-24 luni 6-24 miesięcy 6 až 24 měsíců 6-24 μήνες 6-24 개월 1-6 months 1-6 måneder 1-6 luni...
- Page 74 Shifter Battery Replacement Udskiftning af batteri til gearskifter Înlocuirea bateriei schimbătorului Wymiana akumulatora manetki Výměna akumulátoru ovladače řazení Αντικατάσταση μπαταρίας χειριστηρίου ταχυτήτων 쉬프터 배터리 교체 ⚠ ⚠ WARNING ⚠ ⚠ ADVARSEL ⚠ ⚠ AVERTIZARE Consult the battery manufacturer for safe Kontakt producenten af batteriet for at få...
- Page 75 Fold the hood cover forward, then use Fold hættekappen fremad, brug derefter Pliați carcasa de protecție spre înainte, apoi a Phillips #1 screwdriver to remove the four en stjerneskruetrækker for at fjerne de fire scoateți cele patru șuruburi ale capacului battery hatch screws. Remove the battery skruer til batterirummet.
- Page 76 Install a new CR2032 Sæt et nyt CR2032- Montați o baterie CR2032 battery with the positive + knapcellebatteri i med den nouă cu semnul + spre sign facing outward, then positive + -markering indad, în afară, apoi capacul și install battery hatch and sæt så...
- Page 77 Gå til www.sram.com/registration for at la actualizări ale firmware-ului mergeţi la drivers. registrere dig til at få meddelelser om www.sram.com/registration. Dacă există Go to www.sram.com/registration to register opdateringer til firmware. Hvis der findes en o actualizare descărcaţi software-ul de for firmware update notifications. If an tilgængelig opdatering, skal du downloade...
- Page 78 SRAM-gearskifterne og monter electronice. Înainte de curăţare scoateţi bateriile derailleur battery blocks before cleaning. batteriblokkkene før rengøring. SRAM şi deraioare şi montaţi blocurile de baterii în deraioare. Do not clean the components with a power Rengør ikke delene med en højtryksvasker. Brug washer.
- Page 79 NOTICE BEMÆRK NOTĂ Check the battery level of each eTap® component Tjek batteriniveauet for hver eTap®-del før og Verificaţi înainte şi după fiecare utilizare nivelul de before and after each use. efter hver brug. încărcare al bateriei la fiecare componentă eTap®. Avoid using or storing your eTap components in Undgå...
- Page 80 NOTICE BEMÆRK NOTĂ SRAM™ recommends to bleed your brakes at SRAM anbefaler, at bremserne afluftes SRAM recomandă să aerisiți frânele cel puțin least once a year to ensure optimal braking (bleedes) mindst en gang om året for at o dată pe an pentru a asigura performanțe de performance.
- Page 81 재활용 및 환경 규정 준수에 관한 사항은 https://www.sram.com/en/company/about/ environmental-policy-and-recycling.를 참조하십시오. 디레일러 배터리는 정품 SRAM 교체용 배터리로만 교체하십시오. 쉬프터 배터리는 CR2032 코인 셀 배터리로만 교체하십시오. 배터리 유지 보수 및 사양은 SRAM 배터리 및 충전기 설명서를 참조하십시오. ⚠ ⚠ 경고 절대로 배터리를 소각하지 마십시오.
- Page 82 ASIAN HEADQUARTERS WORLD HEADQUARTERS EUROPEAN HEADQUARTERS SRAM Taiwan SRAM LLC SRAM Europe No. 1598-8 Chung Shan Road 1000 W. Fulton Market, 4th Floor Paasbosweg 14-16 Shen Kang Hsiang, Taichung City Chicago, Illinois 60607 3862ZS Nijkerk Taiwan R.O.C. The Netherlands...
Need help?
Do you have a question about the eTap HRD Series and is the answer not in the manual?
Questions and answers