Table of Contents
Advertisement
Quick Links
Download this manual
See also:
User Manual
Advertisement
Table of Contents

Related Manuals for AIC SB302-LB


Summary of Contents for AIC SB302-LB
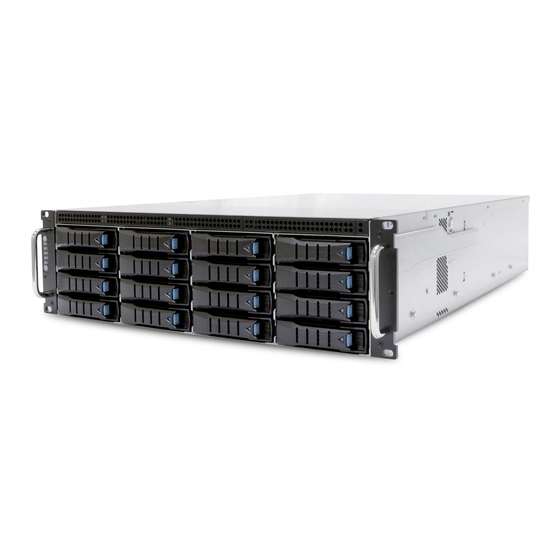
- Page 1 SB302-LB Storage Server Barebone User's Manual UM_SB302-LB_v3_062918...
-
Page 2: Table Of Contents
Chapter 3. Motherboard Settings ..........37 3.1 Motherboard Block Diagram ............37 3.2 Motherboard Layout ................38 3.3 Motherboard Content List ..............39 3.4 Internal Connectors/Jumpers ............40 3.5 System LEDs ..................50 Chapter 4. BIOS Configuration Settings ........52 4.1 Updating BIOS ...................54 Chapter 5. BMC Configuration Settings ........56 5.1 Method 1 (Use the BIOS Setup) ............56 5.2 Method 2 (Use a Dos Tool - Syscheck) ..........59 5.3 Connect to BMC ................61... -
Page 3: Chapter 3. Motherboard Settings
Chapter 3 Motherboard Settings Chapter 3. Motherboard Settings This section describes the jumpers, internal connectors, and internal LEDs setting on Libra motherboard. Motherboard layout and important jumper settings are listed below. 3.1 Motherboard Block Diagram SB302-LB User's Manual... -
Page 4: Motherboard Layout
PCIe slot3 JBAT JSGPIO SATA2 SATA1 JSSGPIO JCMOS JPCH_GPIO SATA4 SATA3 JNTB PCIe slot2 JLPC_DP SATA6 SATA5 I210 I217 JSPKR1 SATA8 SATA7 PCIe slot1 JUSB_INT JNGFF JBMC_RST JBMC_DIS JBMC_DP JFRNT_SSI JLAN1 JLAN2 JLAN2 JCOM4 JLCM JINTRUDER JBMC_I2C1 SB302-LB User's Manual... -
Page 5: Motherboard Content List
Chapter 3 Motherboard Settings 3.3 Motherboard Content List SB302-LB User's Manual... -
Page 6: Internal Connectors/Jumpers
JDIMMD0 JDIMMC1 JDIMMC0 JPG_LOOK1 JSPI JBUZZER JDOM_PWR JPWR3 JBMC_GPIO JTPM JSGPIO JSSGPIO JCMOS JPCH_GPIO JNTB JLPC_DP JUSB_INT JSPKR1 JNGFF JUSB_INT JFRNT_SSI JBMC_RST JBMC_DIS JBMC_DP JFRNT_SSI JLAN1 JLAN2 JCOM4 JLCM JINTRUDER JBMC_I2C1 JPMBUS PWM4 FAN7_TACH +12V HM_TD7- HM_TD7+ SB302-LB User's Manual... - Page 7 Chapter 3 Motherboard Settings JPG_LOOK1 JDOM_PWR JPWR3 JUSB_INT JFRNT_SSI SB302-LB User's Manual...
- Page 8 JBAT JSGPIO SATA2 SATA1 JSSGPIO JCMOS JPCH_GPIO SATA4 SATA3 JNTB JLPC_DP SATA6 SATA5 JSPKR1 SATA8 SATA7 JNGFF JUSB_INT JBMC_RST JBMC_DIS JBMC_DP JFRNT_SSI JLAN1 JLAN2 JCOM4 JLCM JINTRUDER JBMC_I2C1 JTPM JSGPIO JSSGPIO JCMOS JNTB JSPKR1 JLAN1 JLAN2 SB302-LB User's Manual JCOM4...
- Page 9 Chapter 3 Motherboard Settings JTPM JSGPIO JSSGPIO +3.3V PCH_SPI_MISO PCH_SPI_MOSI PCH_SPI_CLK PCH_GPIO23 PCH_SPI_CS1_N PCH_LDRQ0_N PCH_SPI_CS2_N RST_PLTRST_N JSPKR1 JLAN2 JLAN1 JCOM4 SB302-LB User's Manual...
- Page 10 JDOM_PWR JPWR3 JBMC_GPIO JTPM JBAT JSGPIO SATA2 SATA1 JSSGPIO JCMOS JPCH_GPIO SATA4 SATA3 JNTB JLPC_DP SATA6 SATA5 JSPKR1 SATA8 SATA7 JNGFF JUSB_INT JBMC_RST JBMC_DIS JBMC_DP JFRNT_SSI JLAN1 JLAN2 JCOM4 JLCM JINTRUDER JBMC_I2C1 JPCH_GPIO JLPC_DP JNGFF JBMC_DP JLCM SB302-LB User's Manual...
- Page 11 Chapter 3 Motherboard Settings JLPC_DP PCH_GPIO21 JPCH_GPIO PCH_GPIO27 JBMC_DP JLCM SB302-LB User's Manual...
- Page 12 Chapter 3 Motherboard Settings SB302-LB User's Manual...
- Page 13 Chapter 3 Motherboard Settings JNGFF SB302-LB User's Manual...
- Page 14 JBMC_I2C10 JBUZZER JPWR3 JDOM_PWR PCIe slot4 LSISA JBMC_GPIO JTPM S3008 PCIe slot3 JSGPIO JSSGPIO JCMOS JPCH_GPIO JNTB PCIe slot2 JLPC_DP I210 I217 JSPKR1 PCIe slot1 JUSB_INT JNGFF JBMC_RST JBMC_DIS JBMC_DP JINTRUDER JFRNT_SSI JLAN1 JLAN2 JCOM4 JLCM JBMC_I2C1 SB302-LB User's Manual...
- Page 15 Chapter 3 Motherboard Settings JPWR1 JVGA_INT +12V DACROA DACGOA +12V DDC_DATAO +12V DACBOA AHSYNCO +12V DVO_5V AVSYNCO DDC_CLKO JBMC_I2C10 JBUZZER JBMC_GPIO BMC BUZZER- I2C10SDA I2C10SCL JBMC_I2C1 SB302-LB User's Manual...
-
Page 16: System Leds
Chapter 3 Motherboard Settings 3.5 System LEDs 3.5.1 Front Panel LED 3.5.2 Rear Panel LED SB302-LB User's Manual... - Page 17 Chapter 3 Motherboard Settings 3.5.3 Internal LEDs LED4 LED1 LED3 LED2 SB302-LB User's Manual...
-
Page 18: Chapter 4. Bios Configuration Settings
Press ESC to run the setup procedure. There will be a message “Entering SETUP” displayed on the diagnostics screen. Caution: For the official released version, the last digit of the BIOS Version must end in an "0." SB302-LB User's Manual... - Page 19 Chapter 4 BIOS Configuration Settings Identify the BIOS Version. Load Optimal Default setting. Save the setting and exit the BIOS setup utility. SB302-LB User's Manual...
-
Page 20: Updating Bios
Chapter 4 BIOS Configuration Settings 4.1 Updating BIOS Important Notes: To identify the current BIOS version, please check the BIOS setup. SB302-LB User's Manual... - Page 21 To use this utility, you must include the flash.bat , H2OFFT-D.exe, and bin file in the same folder. Please follow the instructions to update whole flash part: Execute flash.bat to update Flash in the DOS environment. Reboot the system. SB302-LB User's Manual...
-
Page 22: Chapter 5. Bmc Configuration Settings
Insert Ethernet LAN cable into the BMC LAN port. There are two methods to setup BMC IP: BMC management port 5.1 Method 1 (Use the BIOS Setup) Step 1 BIOS SETUP Server Mgmt BMC network configuration Configuration Address source Static SB302-LB User's Manual... - Page 23 Chapter 5 BMC Configuration Settings Step 2 Input the IP address. Set the static IP. SB302-LB User's Manual...
- Page 24 Chapter 5 BMC Configuration Settings Step 3 Input the subnet mask address. SB302-LB User's Manual...
-
Page 25: Method 2 (Use A Dos Tool - Syscheck)
5.2 Method 2 (Use a Dos Tool - Syscheck) Step 1 Type in "sc –lanset." Step 2 Modify the IP setting. Note: type 1 for selecting static IP mode or type 2 for selecting DHCP mode. Step 3 Input the IP address. SB302-LB User's Manual... - Page 26 Step 4 Input the submask address. The IP address below is an example using a default IP setting. The IP address is configurable. Step 5 Complete the BMC IP configuration. Note: Type sc.exe –langet command to obtain BMC IP and MAC address. SB302-LB User's Manual...
-
Page 27: Connect To Bmc
Password: admin Note: The default user name and password are in lower-case characters. Note: Users who login with the admin user name and password will have full administrative power. The admin password can be changed after login. SB302-LB User's Manual... - Page 28 Chapter 5 BMC Configuration Settings Dashboard: Server Health - Sensor Readings: SB302-LB User's Manual...
- Page 29 Chapter 5 BMC Configuration Settings Configuration: Refer to AIC BMC User Guide for more information on AIC BMC. Mouse Mode setting: For Windows OS environment, set mode to absolute. For Linux OS environment, set mode to relative SB302-LB User's Manual...
- Page 30 Chapter 5 BMC Configuration Settings Remote Control: Environmental setting: Press “ALT+C” for local and remote OS mouse control switching. SB302-LB User's Manual...
-
Page 31: Updating Bmc Firmware
SB301C01 A:\ SB301C01>a.bat This is just an example. The latest BMC firmware version is available from the FAE or AIC website. Step 4 After updating the BMC firmware, please turn off and restart the system. Notes: 1. DO NOT USE EMM386 IN DOS ENVIRONMENT WHEN UPDATING FIRMWARE OR YOU WILL GET A FAIL. -
Page 32: Chapter 6. Hardware Specification
Chapter 6 Hardware Specification Chapter 6. Hardware Specification This chapter provides detailed instruction guide on hardware specification. 6.1 HDD Backplane 6.1.1 Placement PCBA Placement SB302-LB User's Manual... - Page 33 6.1.2 Connector Location Location JFAN3 JFAN3 JI2C3 JI2C0 JEXP2 JFAN1 JFAN1 JEXP_UART JEXP_UART JFAN4 JFAN4 JFAN2 JFAN2 JI2C4 JI2C4 JMCU_DBG JMCU_DBG JPMBUS JPMBUS SASHD3 SASHD3 JMCU_UART JMCU_UART JPWR1 JPWR1 SASHD2 SASHD2 JFRONT JFRONT JPWR2 JPWR2 SASHD1 SASHD1 SB302-LB User's Manual...
- Page 34 Chapter 6 Hardware Specification 6.1.3 Connectors Power Connector – JPWR1 Description Description +12V +12V +3.3V MUTE_L +5VSTBY PSU_N1 PS_ON_L Power Connector – JPWR2 Description Description +12V +12V +12V +12V PMBUS Connector – JPMBUS Description PMBUS_CLOCK PMBUS_DATA SB302-LB User's Manual...
- Page 35 I2C Connector – JI2C0, JI2C3, JI2C4 Description I2C_CLOCK I2C_DATA FAN Connector – JFAN1, JFAN2, JFAN3, JFAN4 Description I2C_CLOCK I2C_DATA Console for Expander – JEXP_UART Description Description DEBUG_RXD SMART_RXD +12V DEBUG_TXD SMART_TXD Remote Power Control – JMCU_UART Description Description DOWN_RXD UP_RXD DOWN_TXD UP_TXD SB302-LB User's Manual...
- Page 36 For External LED(-) LED Cathode • FAN Fail LED Description Remark For External LED(+) LED Anode For External LED(-) LED Cathode • Power Fault LED Description Remark For External LED(+) LED Anode For External LED(-) LED Cathode SB302-LB User's Manual...
- Page 37 MUTE Input(-) Active Low • Power/ID LED Description Remark For External LED(+) LED Anode For External LED(-) LED Cathode • Power SW Description Remark Power SW Input(-) Active Low • PMBUS Support Description Remark PMBUS_Disable_N Active Low SB302-LB User's Manual...
- Page 38 Activity detected Link down Expander alive, 0.833Hz Expander Blink (LED5) Blue (Blinking) (12 seconds per cycle) Expander Heart Bit (LED4) Blue (Blinking) Expander FW running Yellow (On) MCU alive MCU Status (LED15) Yellow (Off) Boot loader mode SB302-LB User's Manual...
- Page 39 Chapter 6 Hardware Specification 6.1.5 Jumpers JMCU_RST JMCU_RST JMD_SEL JMD_SEL Open Normal, default JMCU_RST Close Reset MCU Open Normal, default JMD_SEL Close Boot loader mode SB302-LB User's Manual...
- Page 40 Chapter 6 Hardware Specification 6.1.6 Drive Slot Map SB302-LB User's Manual...
-
Page 41: Chapter 7. Technical Support
Chapter 1 Product Introduction Chapter 1 Product Introduction Chapter 7. Technical Support www.aicipc.com • TAIWAN Tel: +886 3 433 9188 Fax: +886 3 287 1818 Email: sales@aicipc.com.tw • CHINA Tel: +86.21.54961421, +86.21.54961422 Fax: Extension: 608 Email Technical Support: support@aicipc.com • AMERICA - West coast Tel: +1.909.895.8989 Fax: +1.909.895.8999 Email: sales@aicipc.com...