
Related Manuals for Horizon Hobby Radian XL 2.6m


Summary of Contents for Horizon Hobby Radian XL 2.6m
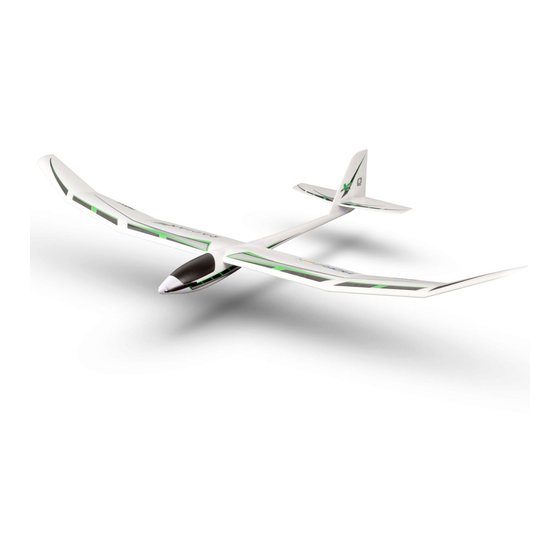
- Page 1 Radian XL 2.6m ® Instruction Manual Bedienungsanleitung Manuel d’utilisation Manuale di Istruzioni...
- Page 2 Do not use with incompatible components or alter this product in any way outside of the instructions provided by Horizon Hobby, LLC. This manual contains instructions for safety, operation and maintenance. It is essential to read and follow all the instructions and warn- ings in the manual, prior to assembly, setup or use, in order to operate correctly and avoid damage or serious injury.
-
Page 3: Table Of Contents
Box Contents Quick Start Information Transmitter Set up your transmitter using the Setup transmitter setup chart Hi Rate Low Rate dual Rates 28mm 20mm 55mm 38mm Center of 91mm back from leading edge Gravity (CG) at the root. Specifications Table of Contents Preflight ..................4 Transmitter Setup ................4 Motor: BL10 Brushless Outrunner... -
Page 4: Preflight
Preflight Remove and inspect contents. 11 Test the speed brake operation. Read this instruction manual thoroughly. 12 Perform the Control Direction Test with the transmitter. Charge the flight battery. 13 Perform the AS3X Control Direction Test with the aircraft. Setup Transmitter using transmitter setup chart. 14 Adjust flight controls and transmitter. -
Page 5: Model Assembly
Model Assembly Rudder Installation Required Adhesives: Thin CA 1. Slide the rudder’s CA hinges (A) in the hinge slots (B) of the vertical fin. 2. Bend the hinges by turning the rudder left, then carefully apply drops of thin CA to each hinge in the right side of each slot. 3. -
Page 6: Model Assembly Continued
Model Assembly Continued Horizontal Tail Installation 1. Slide the two horizontal tail tubes (A) into the holes on the vertical fin as shown. 2. Install the 2 piece (left and right) horizontal stabilizer as shown. 3. Secure the two horizontal tail pieces in place using the included (2) 2.5 x 5.5mm (B) and (2) 2.5 x 4mm (C) screws. -
Page 7: Control Horn And Servo Arm Settings
Model Assembly Continued Wing Installation 1. Place the assembled wing (A) over the fuse and connect spoiler servo connection (B) to the servo extension labeled SPOILER (C). 2. Carefully set the wing on top of the fuse, being careful not to pinch any wires. -
Page 8: Transmitter And Receiver Binding
Transmitter and Receiver Binding Binding is the process of programming the receiver to recognize the GUID Remove the bind plug from the bind port. (Globally Unique Identifier) code of a single specific transmitter. You need to ‘bind’ your chosen Spektrum ™... -
Page 9: Battery Installation And Esc Arming
Battery Installation and ESC Arming Battery Selection We recommend the E-flite 3200mAh 11.1V 3S 30C Li-Po battery ® (EFLB32003S30). If using a battery other than those listed, the battery should be within the range of capacity, dimensions and weight of the E-flite Li-Po battery packs to fit in the fuselage. -
Page 10: Center Of Gravity (Cg)
Center of Gravity (CG) The CG location is measured from the leading edge of the wing at the root. This CG location has been determined with the recommended Li-Po battery 91mm +/-3 (EFLB32003S30) installed to the front edge of the battery tray. back from leading edge at the root. -
Page 11: In Flight Trimming
In Flight Trimming During your first flight, trim the aircraft for level flight in a glide (power off). Make small trim adjustments with your transmitter’s trim switches to straighten the aircraft’s flight path. 3 Seconds After adjusting trim do not touch the control sticks for 3 seconds. This allows the receiver to learn the correct settings to optimize AS3X performance. -
Page 12: Post Flight
Post Flight Disconnect the flight battery from the ESC (Required for Safety Repair or replace all damaged parts. and battery life). Store the flight battery apart from the aircraft and monitor the Power OFF the transmitter. battery charge. Remove the flight battery from the aircraft. Make note of the flight conditions and flight plan results, planning for future flights. -
Page 13: Troubleshooting Guide
Troubleshooting Guide Problem Possible Cause Solution Throttle not at idle and/or throttle trim too high Reset controls with throttle stick and throttle trim at lowest setting Aircraft will not re- Throttle servo travel is lower than 100% Make sure throttle servo travel is 100% or greater spond to throttle but responds to other Throttle channel is reversed... -
Page 14: Ama National Model Aircraft Safety Code
AMA National Model Aircraft Safety Code Effective January 1, 2014 A. GENERAL B. RAdIO CONTROL A model aircraft is a non-human-carrying aircraft capable of sustained flight 1. All pilots shall avoid flying directly over unprotected people, vessels, in the atmosphere. It may not exceed limitations of this code and is intended vehicles or structures and shall avoid endangerment of life and property exclusively for sport, recreation, education and/or competition. -
Page 15: Limited Warranty
Product, (iv) attempted service by copy of your original sales receipt must be included for warranty consideration. anyone other than a Horizon Hobby authorized service center, (v) Product not Be sure your name, address, and RMA number are clearly written on the purchased from an authorized Horizon dealer, or (vi) Product not compliant outside of the shipping carton. -
Page 16: Contact Information
Compliance Information for the European Union EU Compliance Statement: Horizon Hobby, LLC hereby declares that this product is in compliance with the essential requirements and other relevant provisions of the R&TTE and EMC Directives. -
Page 17: Replacement Parts
Replacement Parts • Ersatzteile • Pièces de rechange • Pezzi di ricambio Part # | Nummer Description Beschreibung Description Descrizione Numéro | Codice Radian XL 2.6m - Fuselage EFL5501 Fuselage: Radian XL 2.6m E-flite Rumpf: Radian XL 2,6 m Fusoliera: Radian XL 2.6m Radian XL 2.6m - Partie centrale Wing Center Section w/ Spoilers: E-flite Tragflächenmittelteil m. Spoilern: Sezione centrale ala c/spoiler: EFL5502 Radian XL 2.6m Radian XL 2,6 m Radian XL 2.6m de l’aile avec aérofreins Radian XL 2.6m - Ailes gauche et Outer Wing Panels Left & Right: E-flite Tragflächenendstücke links u. Estremità alari destra e sinistra: Radian EFL5503 Radian XL 2.6m... - Page 18 XL 2.6m ® © 2016 Horizon Hobby, LLC. E-flite, Radian, AS3X, DSM, DSM2, DSMX, the DSMX logo, Bind-N-Fly, Z-Foam, ModelMatch, Dynamite, EC3 and the Horizon Hobby logo are trademarks or registered trademarks of Horizon Hobby, LLC. The Spektrum trademark is used with permission of Bachmann Industries, Inc. Futaba is a registered trademark of Futaba Denshi Kogyo Kabushiki Kaisha Corporation of Japan. All other trademarks, service marks and logos are property of their respective owners. US 8,672,726. Other patents pending.
Need help?
Do you have a question about the Radian XL 2.6m and is the answer not in the manual?
Questions and answers