Table of Contents
Advertisement
Description
ES65 - ASIA 200 V (50/60 Hz) and 380 V (60 Hz) IE3
ES65 - EU/USA/CHINA 380-400 V (50 Hz) and 230/460 V (60 Hz) IE3
ES100 - ASIA 200 V (50/60 Hz) and 380 V (60 Hz) IE3
ES100 - EU/USA/CHINA 380-400 V (50 Hz) and 230/460 V (60 Hz) IE3
ES200 - ASIA 200 V (50/60 Hz) and 380 V (60 Hz) IE3
ES200 - EU/USA/CHINA 380-400 V (50 Hz) and 230/460 V (60 Hz) IE3
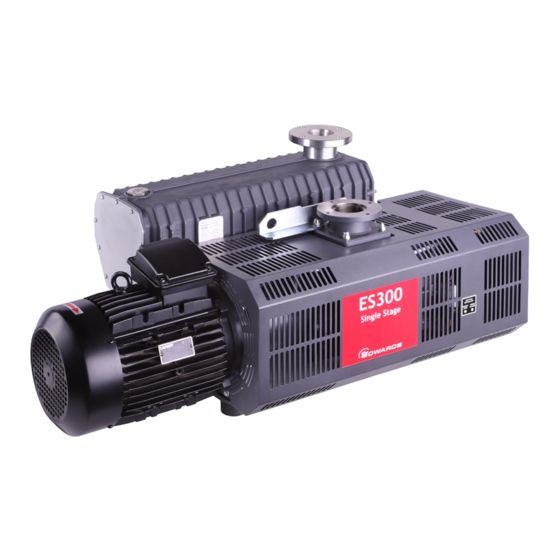
ES300 - ASIA 200 V (50/60 Hz) and 380 V (60 Hz) IE3
ES300 - EU/USA/CHINA 380-400 V (50 Hz) and 230/460 V (60 Hz) IE3
ES630 - ASIA 200 V (50/60 Hz) and 380 V (60 Hz) IE3
ES630 - EU/USA/CHINA 380-400 V (50 Hz) and 230/460 V (60 Hz) IE3
Instruction Manual
ES65 / ES100 / ES200 / ES300 and ES630
Single Stage Rotary Vane Pumps
Original Instructions
A352-03-880
Issue B
Item Number
A352-47-934
A352-47-940
A352-52-934
A352-52-940
A352-57-934
A352-57-940
A352-62-934
A352-62-940
A352-67-934
A352-67-940
Advertisement
Table of Contents

Related Manuals for Edwards ES65


Summary of Contents for Edwards ES65
- Page 1 ES65 / ES100 / ES200 / ES300 and ES630 Single Stage Rotary Vane Pumps Description Item Number ES65 - ASIA 200 V (50/60 Hz) and 380 V (60 Hz) IE3 A352-47-934 ES65 - EU/USA/CHINA 380-400 V (50 Hz) and 230/460 V (60 Hz) IE3 A352-47-940...
- Page 2 ES Single Stage Rotary Vane Pumps: ES65 – ASIA 200 V (50/60 Hz) & 380 V (60 Hz) IE3 A352-47-934 ES65 – EU/USA/CHINA 380-400 V (50 Hz) & 230/460 V (6 0Hz) IE3 A352-47-940 ES100 –...
-
Page 3: Table Of Contents
Locate the pump ......................12 Fill the pump with oil ....................12 3.5.1 Recommended pump oil ....................12 3.5.2 ES65, ES100 and ES630 oil filling procedure ................ 12 3.5.3 ES200 and ES300 oil filling procedure ................13 Electrical installation ....................13 3.6.1 Connect the pump to the electrical supply ................. 13 3.6.2... - Page 4 Spares ........................33 Accessories ....................... 34 7.4.1 Oil level sensor (ES65/ES100) ..................35 7.4.2 Oil level sensor and 120 ºC sensor (ES65/ES100) ..............36 7.4.3 Oil level sensor and PT100 (ES65/ES100) ................37 7.4.4 PT100 temperature sensor (ES65/ES100) ................38 7.4.5...
- Page 5 Gas ballast filter, ES65/ES100/ES630 ................26 Gas ballast filter, ES200/ES300 ..................26 ES65/ES100 oil level sensor ...................35 ES65/ES100 oil level sensor and 120 ºC sensor ..............36 ES65/ES100 oil level sensor and PT100 ................37 ES65 / ES100 PT100 temperature sensor ................38 ES200/ S300 oil level sensor ..................
- Page 6 Vacuum Pump and Vacuum Systems Safety Manual P400-40-100 Ultragrade 15, 19 and 20 oils P110-10-010 IT20K, IT100, IT300 and IT800 inlet traps and filters A441-01-880 Page iv © Edwards Limited 2015. All rights reserved. Edwards and the Edwards logo are trademarks of Edwards Limited.
-
Page 7: Introduction
Introduction Scope and definitions This manual provides installation, operation and maintenance instructions for the Edwards ES65, ES100, ES200, ES300 and ES630 Single Stage Rotary Vane Pumps. The pumps must be used as specified in this manual. Read this manual before installing and operating the pumps. -
Page 8: Es65 And Es100 Pumps
Oil level sight glass 4. Inlet and integral non-return valve C. 500 mm (Maintenance access 8. Oil drain tap and cooling) Page 2 © Edwards Limited 2015. All rights reserved. Edwards and the Edwards logo are trademarks of Edwards Limited. -
Page 9: Es630 Pump
B. 400 mm (Maintenance access) 4. Inlet and integral non-return valve 9. Accessory plate C. 500 mm (Maintenance access 5. Exhaust and cooling) © Edwards Limited 2015. All rights reserved. Page 3 Edwards and the Edwards logo are trademarks of Edwards Limited. -
Page 10: Description
With the gas ballast control closed, when the pump is switched off, vacuum will slowly rise inside the pump. Page 4 © Edwards Limited 2015. All rights reserved. Edwards and the Edwards logo are trademarks of Edwards Limited. -
Page 11: Technical Data
50 Hz electrical supply 60 Hz electrical supply Maximum gas ballast flow (Purge) regulated supply l/min pressure 0.5 bar (7 PSI) © Edwards Limited 2015. All rights reserved. Page 5 Edwards and the Edwards logo are trademarks of Edwards Limited. -
Page 12: Es65 Dimensions (Mm)
2. Oil filler plug 3. Inlet 4. Exhaust 5. ISO F DN40 (exhaust) 6. G2" (inlet) 7. ISO F DN40 (inlet) Page 6 © Edwards Limited 2015. All rights reserved. Edwards and the Edwards logo are trademarks of Edwards Limited. -
Page 13: Es200 Dimensions (Mm)
2. Oil filler plug 3. Inlet 4. Exhaust 5. ISO F DN40 (exhaust) 6. G2" (inlet) 7. ISO F DN63 (inlet) © Edwards Limited 2015. All rights reserved. Page 7 Edwards and the Edwards logo are trademarks of Edwards Limited. -
Page 14: Mechanical Data
Maximum mass (kg) Vibration Severity Class 1C for ES pumps (measured at ultimate pressure) (Measured at the inlet port to ISO 2372) Page 8 © Edwards Limited 2015. All rights reserved. Edwards and the Edwards logo are trademarks of Edwards Limited. -
Page 15: Electrical Data: Three-Phase Motors
For motor wiring information, refer to the wiring diagram supplied in the motor terminal box. Dual-voltage motors can be configured to operate with either the high-range or low-range electrical supply. Edwards supplies dual-voltage motors pre-set to the highest of the selectable voltages. For motor current information, refer to the motor rating plate. - Page 16 A352-03-880 Issue B This page has been intentionally left blank. Page 10 © Edwards Limited 2015. All rights reserved. Edwards and the Edwards logo are trademarks of Edwards Limited.
-
Page 17: Installation
Prevent any part of the human body coming into contact with the vacuum. Ensure that the pump is suitable for the application. If there is any doubt, refer to the Edwards guidelines in the Vacuum Pump and Vacuum Systems Safety manual. (See Associated Publications at the end of the contents list). -
Page 18: Locate The Pump
However, note that other oils may contain polymers which may be degraded during use so that they become thinner. Other oils, therefore, must be changed more frequently than Edwards oils. If necessary, adjust the maintenance schedule according to experience. -
Page 19: Es200 And Es300 Oil Filling Procedure
If not, the motor may be damaged. Edwards recommends connecting the electrical supply to the motor through a starter or circuit breaker having thermal over-current protection that can be adjusted to suit the full load current ratings shown on the motor rating plate. -
Page 20: Check The Direction Of Rotation
If using flexible bellows, ensure that the bellows have a maximum pressure rating that is greater than the highest pressure that can be generated in the system. Flexible bellows must be used if the pump is mounted on vibration isolators. Edwards recommends the use of Edwards flexible bellows. -
Page 21: Connect The Pump Outlet To The Vacuum System
Leak test the system after installing the pump. Seal any leaks found to prevent leakage of substances out of the system and leakage of air into the system. © Edwards Limited 2015. All rights reserved. Page 15 Edwards and the Edwards logo are trademarks of Edwards Limited. - Page 22 A352-03-880 Issue B This page has been intentionally left blank. Page 16 © Edwards Limited 2015. All rights reserved. Edwards and the Edwards logo are trademarks of Edwards Limited.
-
Page 23: Operation
3-5 mm. 4. Edwards recommend strongly to limit starting of the pump to no more than 5 or 6 per hour. If the process requires it, utilisation of an inlet valve and to let the pump run continuously is recommended. -
Page 24: To Pump Condensable Vapours
The pump is designed for unattended operation under the normal operating conditions specified in Section However, Edwards recommends checking the pump at a regular interval of not more than 14 days. Check the pump more frequently if pumping high volumes of gas or if operating the pump with the gas ballast control open. -
Page 25: Maintenance
Adjust the maintenance plan as necessary. When maintaining the pump, use Edwards spares and maintenance kits. The kits contain all components necessary to complete maintenance operations successfully. The item numbers of the spares and kits are given in Section Examine the condition of any external accessories, filters or traps (if fitted). - Page 26 Shaft end O-ring H02124225 Oil circulating pipe O-ring H02124230 Inlet valve O-ring H02124232 Automatic drain O-ring H02124233 Plate O-ring H02124235 Shaft front O-ring Page 20 © Edwards Limited 2015. All rights reserved. Edwards and the Edwards logo are trademarks of Edwards Limited.
- Page 27 Shaft end O-ring H02124225 Oil circulating pipe O-ring H02124230 Inlet valve O-ring H02124232 Automatic drain O-ring H02124233 Plate O-ring H02124235 Shaft front O-ring © Edwards Limited 2015. All rights reserved. Page 21 Edwards and the Edwards logo are trademarks of Edwards Limited.
- Page 28 Oil circulating pipe O-ring H02124227 Oil circulating pipe O-ring H02124231 Shaft front O-ring H02124232 Automatic drain O-ring H02124234 Inlet valve O-ring Page 22 © Edwards Limited 2015. All rights reserved. Edwards and the Edwards logo are trademarks of Edwards Limited.
- Page 29 Oil circulating pipe O-ring H02124227 Oil circulating pipe O-ring H02124231 Shaft front O-ring H02124232 Automatic drain O-ring H02124234 Inlet valve O-ring © Edwards Limited 2015. All rights reserved. Page 23 Edwards and the Edwards logo are trademarks of Edwards Limited.
-
Page 30: Check The Oil Level
4. If the oil is contaminated, drain and refill the pump with clean oil as described in Section 5.4. Change the oil if the colour is mid-brown. Page 24 © Edwards Limited 2015. All rights reserved. Edwards and the Edwards logo are trademarks of Edwards Limited. -
Page 31: Replace The Oil
The cartridges are not reusable. Refer to Table 1 for recommended change intervals. Adjust the replacement frequency as required to suit the pumping application. © Edwards Limited 2015. All rights reserved. Page 25 Edwards and the Edwards logo are trademarks of Edwards Limited. -
Page 32: Replace The Gas Ballast Filter - (Part Of Minor Service)
1. Remove the cover (Figure 12, item1) and replace the filter element (2). 2. Replace the foam filter placed on the polymer tube. Page 26 © Edwards Limited 2015. All rights reserved. Edwards and the Edwards logo are trademarks of Edwards Limited. -
Page 33: Clean The Motor Fan Cover
Test the earth continuity and the insulation resistance of the pump motor in accordance with local regulations for periodic testing of electrical equipment. Edwards recommends that the earth continuity is less than 0.1 ohm and the insulation resistance is greater than 10 Mohm. If the motor fails these tests, replace the motor. -
Page 34: The Pump Fails To Achieve Its Specified Performance (Failure To Reach Ultimate Vacuum)
The gas ballast control is open. O-ring is damaged or missing. Shaft seals are damaged. The exhaust valve is damaged. Page 28 © Edwards Limited 2015. All rights reserved. Edwards and the Edwards logo are trademarks of Edwards Limited. -
Page 35: The Pumping Speed Is Poor
The pump is filled with the wrong type of oil. 5.12.10 Oil back-streams to vacuum chamber The integrated inlet valve is faulty. The gas ballast is open. © Edwards Limited 2015. All rights reserved. Page 29 Edwards and the Edwards logo are trademarks of Edwards Limited. - Page 36 A352-03-880 Issue B This page has been intentionally left blank. Page 30 © Edwards Limited 2015. All rights reserved. Edwards and the Edwards logo are trademarks of Edwards Limited.
-
Page 37: Storage And Disposal
Take particular care with components and waste oil which have been contaminated with dangerous process substances. Do not incinerate fluoroelastomer seals and O-rings. © Edwards Limited 2015. All rights reserved. Page 31 Edwards and the Edwards logo are trademarks of Edwards Limited. - Page 38 A352-03-880 Issue B This page has been intentionally left blank. Page 32 © Edwards Limited 2015. All rights reserved. Edwards and the Edwards logo are trademarks of Edwards Limited.
-
Page 39: Service, Spares And Accessories
The majority of these centres employ Service Engineers who have undergone comprehensive Edwards training courses. Order spare parts and accessories from the nearest Edwards company or distributor. When ordering, state for each part required: Model and Item Number of the equipment ... -
Page 40: Accessories
120 ºC sensor and PT100 sensor ES65/100 A352-66-810 A352-66-811 A352-66-812 A352-66-813 ES200/ES300 A352-77-810 A352-77-811 A352-77-812 A352-77-813 ES630 A352-88-810 A352-88-811 A352-88-812 A352-88-813 Page 34 © Edwards Limited 2015. All rights reserved. Edwards and the Edwards logo are trademarks of Edwards Limited. -
Page 41: Oil Level Sensor (Es65/Es100)
4. Carry out a visual check on the sealing face of both the pump and the oil level sensor (1). 5. Secure using fixings provided. © Edwards Limited 2015. All rights reserved. Page 35 Edwards and the Edwards logo are trademarks of Edwards Limited. -
Page 42: Oil Level Sensor And 120 ºc Sensor (Es65/Es100)
Oil level sensor and 120 ºC sensor (ES65/ES100) Product Item Number ES65/ES100 oil level and 120 ºC sensor A352-66-811 Figure 14 - ES65/ES100 oil level sensor and 120 ºC sensor 1. Oil level sensor 2. 120 ºC sensor Fitting Instructions (refer also to Table 13). -
Page 43: Oil Level Sensor And Pt100 (Es65/Es100)
7.4.3 Oil level sensor and PT100 (ES65/ES100) Product Item Number ES65/ES100 oil level sensor and PT100 A352-66-812 Figure 15 - ES65/ES100 oil level sensor and PT100 1. PT100 2. Oil level sensor Fitting Instructions (refer also to Table 13): Note: Figure 15 shows the oil level sensor and PT100. -
Page 44: Pt100 Temperature Sensor (Es65/Es100)
7.4.4 PT100 temperature sensor (ES65/ES100) Product Item Number ES65/ES100 PT100 temperature sensor A352-66-813 Figure 16 - ES65 / ES100 PT100 temperature sensor 1. PT100 temperature sensor Fitting Instructions (refer also to Table 13): 1. Drain oil from pump. 2. Remove the blank plate and seal. -
Page 45: Oil Level Sensor (Es200/Es300)
4. Carry out a visual check on the sealing face of both the pump and the oil level sensor. 5. Secure using fixings provided. © Edwards Limited 2015. All rights reserved. Page 39 Edwards and the Edwards logo are trademarks of Edwards Limited. -
Page 46: Oil Level Sensor And 120 ºc Sensor (Es200/Es300)
4. Carry out a visual check on the sealing face of both the pump and the oil level sensor (2). 5. Secure using fixings provided. Page 40 © Edwards Limited 2015. All rights reserved. Edwards and the Edwards logo are trademarks of Edwards Limited. -
Page 47: Oil Level Sensor And Pt100 (Es200 / Es300)
4. Carry out a visual check on the sealing face of both the pump and the oil level sensor. 5. Secure using fixings provided. © Edwards Limited 2015. All rights reserved. Page 41 Edwards and the Edwards logo are trademarks of Edwards Limited. -
Page 48: Pt100 Temperature Sensor (Es200/Es300)
4. Carry out a visual check on the sealing face of both the pump and the PT100 temperature sensor. 5. Secure using fixings provided. Page 42 © Edwards Limited 2015. All rights reserved. Edwards and the Edwards logo are trademarks of Edwards Limited. -
Page 49: Oil Level Sensor (Es630)
4. Carry out a visual check on the sealing face of both the pump and the oil level sensor. 5. Secure using fixings provided. © Edwards Limited 2015. All rights reserved. Page 43 Edwards and the Edwards logo are trademarks of Edwards Limited. -
Page 50: Oil Level Sensor And120 ºc Sensor (Es630)
5. Carry out a visual check on the sealing face of both the pump and the oil level sensor. 6. Secure using fixings provided. Page 44 © Edwards Limited 2015. All rights reserved. Edwards and the Edwards logo are trademarks of Edwards Limited. -
Page 51: Oil Level Sensor And Pt100 (Es630)
4. Carry out a visual check on the sealing face of both the pump and the oil level sensor. 5. Secure using fixings provided. © Edwards Limited 2015. All rights reserved. Page 45 Edwards and the Edwards logo are trademarks of Edwards Limited. -
Page 52: Pt100 Temperature Sensor (Es630)
Item Number ITO100 inlet catchpot A441-02-000 7.4.14 ITO300 Inlet Catchpot Description as in Section 7.4.13. Product Item Number ITO300 inlet catchpot A441-03-000 Page 46 © Edwards Limited 2015. All rights reserved. Edwards and the Edwards logo are trademarks of Edwards Limited. -
Page 53: Ito Inlet Catchpot
ISO80 ITO800 ISO100 ITO100 IT0300 IT0800 Flange size (inlet and outlet) ISO40 ISO63 ISO100 Mass (kg) 19.5 Capacity (litres) 5.47 7.87 © Edwards Limited 2015. All rights reserved. Page 47 Edwards and the Edwards logo are trademarks of Edwards Limited. -
Page 54: Ito800 Inlet Catchpot
1" BSPP male to 1" NPTP female A259-18-103 1 ½" BSPP male to 1 ½" NPTP female A259-18-104 2" BSPP male to 2" NPTP female A259-18-105 Page 48 © Edwards Limited 2015. All rights reserved. Edwards and the Edwards logo are trademarks of Edwards Limited. -
Page 55: Itm Inlet Dust Filters
21. Not used 9. Hand wheel 22. Inlet port 10. Bezel 23. Chemical trap bottom gasket 11. Gasket 12. Sight glass cover © Edwards Limited 2015. All rights reserved. Page 49 Edwards and the Edwards logo are trademarks of Edwards Limited. - Page 56 A352-03-880 Issue B This page has been intentionally left blank. Page 50 © Edwards Limited 2015. All rights reserved. Edwards and the Edwards logo are trademarks of Edwards Limited.
Need help?
Do you have a question about the ES65 and is the answer not in the manual?
Questions and answers