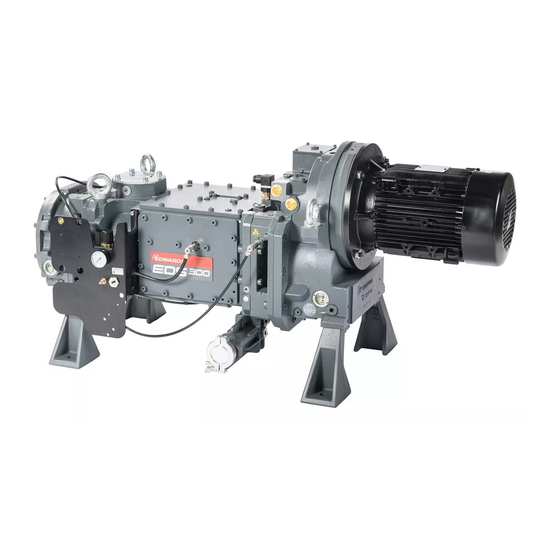
Edwards EDS200 Instruction Manual
Hide thumbs
Also See for EDS200:
- Instruction manual (56 pages) ,
- Instruction manual (18 pages) ,
- Instruction manual (12 pages)
Summary of Contents for Edwards EDS200
- Page 1 Flush Kit EDS200, EDS300 and EDS480 Pumps INSTRUCTION MANUAL A41892880_C Original instructions...
- Page 2 Copyright notice ©Edwards Limited 2021. All rights reserved. Trademark credit Edwards and the Edwards logo are trademarks of Edwards Limited, Innovation Drive, Burgess Hill, West Sussex RH15 9TW. Disclaimer The content of this manual may change from time to time without notice. We accept no liability for any errors that may appear in this manual nor do we make any expressed or implied warranties regarding the content.
-
Page 3: Table Of Contents
4.1 Installation on the pump without canopy......9 4.2 Installation on the pump with canopy (for EDS200 and EDS300 pumps). . . 13 5. -
Page 4: Safety And Compliance
Information about properties or instructions for an action which, if ignored, will cause damage to the pump or the system. We reserve the right to change the design and the stated data. The illustrations are not binding. Keep the instructions for future use. A41892880_C Page 4 05/2021 - ©Edwards Limited... -
Page 5: Safety Symbols
Warning - Dangerous voltage Identifies possible hazards from dangerous voltages. Warning - Hot surfaces Identifies a potential hazard from a hot surface. Warning - Use protective equipment Use appropriate protective equipment for the task. A41892880_C Page 5 05/2021 - ©Edwards Limited... -
Page 6: Introduction
The materials of construction for the different parts of the pump can be found in the respective instruction manuals. If in doubt, contact our customer care centre for advice. Our recommended solvents are: ▪ Xylene ▪ Water A41892880_C Page 6 05/2021 - ©Edwards Limited... - Page 7 This can be achieved by increasing the inlet pressure of the vacuum pump. To increase the inlet pressure of the vacuum pump, you can install one of our inlet purge accessories in combination with the flush kit. A41892880_C Page 7 05/2021 - ©Edwards Limited...
-
Page 8: Technical Data
24 V d.c. ▪ Insulation class H 180 °C ▪ IP rating IP65 ▪ Connection DIN 43650A Supplied cable length Materials Stainless Steel Borosilicate glass Materials in contact with the solvent Viton PTFE A41892880_C Page 8 05/2021 - ©Edwards Limited... -
Page 9: Installation
The illustrations in this manual show the installation of Flush kit / Solenoid valve. The same procedure is applicable for the remaining two variants. 4.1 Installation on the pump without canopy Follow these steps to install the Flush kit / Solenoid valve on your pump: A41892880_C Page 9 05/2021 - ©Edwards Limited... - Page 10 Do not fully tighten the hex head cap screw, so that the bracket position can be adjusted. Replace the plug screw with the adapter. ▪ Replace the plug screw adjacent to the pump inlet with the supplied adapter. Plug screw Adapter A41892880_C Page 10 05/2021 - ©Edwards Limited...
- Page 11 Loosen the hex head cap screw by 4 mm to 5 mm on the top cover of the pump. ▪ Slide the bracket in between the top cover of the pump and the hex head cap screw. Hex head cap screw A41892880_C Page 11 05/2021 - ©Edwards Limited...
- Page 12 Make sure that the nut is not completely removed. ▪ Fit the NRV into the adapter. ▪ Tighten the nut. Tighten the screw on the top cover to hold the bracket firmly. Screw A41892880_C Page 12 05/2021 - ©Edwards Limited...
-
Page 13: Installation On The Pump With Canopy (For Eds200 And Eds300 Pumps)
A41892880_C - Installation 4.2 Installation on the pump with canopy (for EDS200 and EDS300 pumps) Follow these steps to install the Flush kit /Solenoid valve on your pump: Prepare the Flush kit / Solenoid valve for installation. Flush kit / Solenoid valve... - Page 14 Loosen the nut of the NRV so that the NRV fitting can rotate freely on the pipe. Make sure that the nut is not completely removed. ▪ Fit the NRV into the adapter. ▪ Tighten the nut. A41892880_C Page 14 05/2021 - ©Edwards Limited...
- Page 15 A41892880_C - Installation Tighten the screw on the canopy to hold the bracket firmly. Screw A41892880_C Page 15 05/2021 - ©Edwards Limited...
-
Page 16: Commissioning
30 to 60 mbar at the inlet of the pump. There are two options to flush the vacuum pump. The selection of the option depends on the properties of the depositions inside the pump that you want to remove. A41892880_C Page 16 05/2021 - ©Edwards Limited... -
Page 17: Option 1
(depending on the solvent flush option chosen). If the noise level rises and the pump makes a metallic "pinking" noise, the pump may be in distress. A41892880_C Page 17 05/2021 - ©Edwards Limited... - Page 18 During the solvent flush procedure, we recommend you to monitor the state of the solvent leaving the exhaust of the pump. Make sure that most of the solvent leaving the exhaust is in the liquid phase. A41892880_C Page 18 05/2021 - ©Edwards Limited...
-
Page 19: Accessories
Inlet purge / Solenoid valve ATEX A41891003 Inlet purge / Solenoid valve A41891004 Inlet purge / Manual valve A41891002 Flush kit / Solenoid valve ATEX A41892003 Flush kit / Solenoid valve A41892004 Flush kit / Manual valve A41892002 A41892880_C Page 19 05/2021 - ©Edwards Limited... -
Page 20: Disposal
A41892880_C - Disposal 7. Disposal Dispose of the contaminated solvent and the flush kit safely in accordance with all local and national safety and environmental regulations. A41892880_C Page 20 05/2021 - ©Edwards Limited... - Page 21 A41892880_C - Disposal A41892880_C Page 21 05/2021 - ©Edwards Limited...
- Page 22 edwardsvacuum.com...


Need help?
Do you have a question about the EDS200 and is the answer not in the manual?
Questions and answers