Table of Contents
Advertisement
Advertisement
Table of Contents

Related Manuals for TRENDnet TEW-829DRU


Summary of Contents for TRENDnet TEW-829DRU
- Page 1 Cover Page TRENDnet User’s Guide...
-
Page 2: Table Of Contents
Create a port-based VLAN ....................19 MAC filtering ........................ 49 Create a port-based VLAN with 802.1Q tagging .............. 20 Denial of service (DoS) prevention ................50 Assigning VLAN IDs to Wireless SSIDs ................23 DMZ Host ........................50 © Copyright 2018 TRENDnet. All Rights Reserved. - Page 3 Setting up IPsec site-to-site VPN Failover (PSK) ............... 76 Troubleshooting ................. 103 Secure Socket Layer VPN (SSL) / OpenVPN..............81 Appendix ..................104 SSL VPN Server Setup ....................... 81 SSL VPN Client Setup (Windows)..................82 Certificate Management ....................86 © Copyright 2018 TRENDnet. All Rights Reserved.
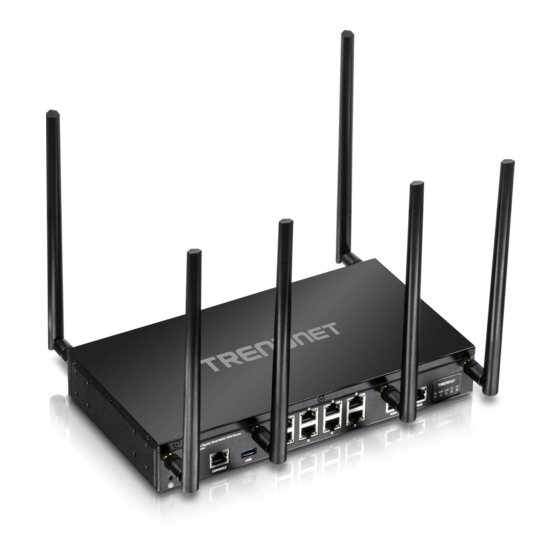
- Page 4 TRENDnet User’s Guide Features Product Overview TRENDnet’s AC3000 Tri-Band Wireless Gigabit Dual-WAN VPN SMB Router, model TEW- 829DRU, features three concurrent WiFi bands to maximize device networking speeds: two separate high performance 802.11ac networks (5GHz1: 1733Mbps / 5GHz2: 867Mbps), and a 400Mbps Wireless N network. It features dual-WAN ports for load balancing or fail-over modes, and encrypted Virtual Private Network (VPN) access for remote users.
- Page 5 Rack Mount Design Sturdy metal housing with rack mount brackets included Wall Mountable Wall mount ready Online Firmware Updates Automatic notification of firmware updates Management Supports web browser (HTTP, HTTPS), CLI, SSH and Telnet management © Copyright 2018 TRENDnet. All Rights Reserved.
- Page 6 Rear Panel View Front Panel View High Gain Detachable Antennas Reset On(-)/Off(o) Power Button Port Power Switch Ground Point USB 3.0 WAN1 Gigabit Indicators Port LAN Ports Port Security RJ-45 WAN2 Slot Console Port Port © Copyright 2018 TRENDnet. All Rights Reserved.
- Page 7 15 seconds and release to reset the device to factory defaults. Power Port Connects the included power adapter to supply device power. On(-)/Off(o) Turns the device power On(-) or Off(o). Power Switch © Copyright 2018 TRENDnet. All Rights Reserved.
-
Page 8: Product Overview
TEW-829DRU TRENDnet User’s Guide Applications © Copyright 2018 TRENDnet. All Rights Reserved. -
Page 9: Router Installation
When installing the Router on a level surface, attach the rubber feet to the bottom of each device. The rubber feet cushion the hub and protect the hub case from scratching. Note: The look of the router may be different than what is actually displayed. © Copyright 2018 TRENDnet. All Rights Reserved. -
Page 10: Product Hardware Features
4. Connect the includes power adapter from a power outlet to your router power port shown for initial installation and adjust as needed later on. and push the Power On(-)/Off(o) switch into the On(-) position. © Copyright 2018 TRENDnet. All Rights Reserved. - Page 11 6. Open your web browser on the connected computer and in the address bar, enter http://tew-829dru http://192.168.10.1 and press Enter to access the router web configuration page. © Copyright 2018 TRENDnet. All Rights Reserved.
-
Page 12: Applications
LAN IPv4 address settings. 9. Enter the new administrator password in the Password field and re-type the new password in the Confirmation field. Click Apply to save and commit the changes. © Copyright 2018 TRENDnet. All Rights Reserved. - Page 13 ISP (Internet Service Provider). If you are unsure about the Internet connection settings, please contact your ISP for details. After you have completed the Internet connection settings, click Apply to save and commit the changes. © Copyright 2018 TRENDnet. All Rights Reserved.
- Page 14 Note: WPA2-PSK AES wireless encryption is strongly recommended. The wireless and discover when connecting to your router wireless network. encryption key is the key your WiFi clients will need to enter when connecting to your router wireless network. © Copyright 2018 TRENDnet. All Rights Reserved.
-
Page 15: Basic Router Settings
A list of all pending configuration changes will be displayed. If you are ready to Password: (xxxxxxxx) permanently save all configuration changes, click Apply. Otherwise, to discard Note: User Name and Password are case sensitive. changes, click Revert to discard all pending configuration changes. © Copyright 2018 TRENDnet. All Rights Reserved. -
Page 16: Change Your Administrator Password
If you reset the device to factory defaults, you will need to access the router management page using the pre-configured settings on the included wireless sticker in the router package contents or on device label located on the bottom of the router. © Copyright 2018 TRENDnet. All Rights Reserved. -
Page 17: Create Time Schedules
Start Time / End Time – Manually define a time period for the schedule. Note: The time period is specified in 24 hour format. © Copyright 2018 TRENDnet. All Rights Reserved. -
Page 18: Change Lan Ipv4 Address Settings
4. Click Apply to LAN network interface route in the routing table. Typically, this parameter does not need to be modified. (Lower value = Higher priority in route table, 0 being the highest priority.) © Copyright 2018 TRENDnet. All Rights Reserved. -
Page 19: Configure Lan Ipv4 Dhcp Server Settings
End – Enter the ending value of DHCP IPv4 address range. (e.g. If your LAN IPv4 address is 192.168.50.1, entering 200 will define the last IP address of the DHCP pool is 192.168.50.200) © Copyright 2018 TRENDnet. All Rights Reserved. - Page 20 DHCP reservation. Typically, this parameter does not need to be modified. Log Queries – Checking this option will enable generate logging to internal or syslog of any DNS queries. Typically, this parameter does not need to be modified. © Copyright 2018 TRENDnet. All Rights Reserved.
-
Page 21: Add Static Dhcp Reservations
IPv4-Address – Enter the IPv4 address to assign to the computer or network device for the reservation. You can also click the drop-down list to select from list o of network devices detected by the router through DHCP. (e.g. 192.168.50.150) © Copyright 2018 TRENDnet. All Rights Reserved. -
Page 22: Add Static Arp Entries
4. Click the IPv4-Address drop-down list and select the IPv4 address to assign to the MAC address ARP table entry or select custom to manually enter an IPv4 address (format example: 192.168.10.129) 5. Click Apply to save and commit the changes. © Copyright 2018 TRENDnet. All Rights Reserved. -
Page 23: Configure Wan1 / Wan2 Interfaces For Internet Connectivity
4. Complete all of the fields required by your ISP and click Apply to save and commit the On demand – This option will automatically disconnect after the max. changes. idle time is reached and will automatically re-establish connection when Internet access is used. © Copyright 2018 TRENDnet. All Rights Reserved. - Page 24 Client ID to send when requesting DHCP – Optional parameter only required if your ISP requires a specific client ID to be sent when requesting IP address settings for Internet access. Applies to DHCP client WAN protocol. © Copyright 2018 TRENDnet. All Rights Reserved.
-
Page 25: Ipv6 Settings
Static IPv6 1. Log into your router management page (see “Access your router management page” Auto-configuration (SLAAC/DHCPv6) on page 8). PPPoE Link-Local Only 2. Click on Network and click on IPv6. © Copyright 2018 TRENDnet. All Rights Reserved. -
Page 26: Virtual Lans (Vlans)
Example: In the example below, we will enter the VLAN 50 interface IP address as interface so these ports can be re-assigned as untagged member ports of new VLANs 192.168.50.1 and subnet mask 255.255.255.0. in example below. © Copyright 2018 TRENDnet. All Rights Reserved. -
Page 27: Create A Port-Based Vlan With 802.1Q Tagging
5 & 6 will obtain 192.168.50.x/255.255.255.0 address settings and use the VLAN 50 IP interface 192.168.50.1 as the Internet gateway and gateway to other local IP subnets. 4. To create a new 802.1Q VLAN, under the VLANs section, click Add. © Copyright 2018 TRENDnet. All Rights Reserved. - Page 28 6. Enter the VLAN IP interface configuration under IP Address and Subnet Mask. Example: In the example below, we will enter the VLAN 50 interface IP address as 192.168.50.1 and subnet mask 255.255.255.0. © Copyright 2018 TRENDnet. All Rights Reserved.
- Page 29 VLAN 50 IP interface 192.168.50.1 as the Internet gateway and gateway to other local IP subnets. Additional VLANs can be created on the router and switch in which 802.1Q VLAN traffic can pass through the same single 802.1Q VLAN tag/trunk link. © Copyright 2018 TRENDnet. All Rights Reserved.
-
Page 30: Assigning Vlan Ids To Wireless Ssids
Example: In the example below, we will enter the VLAN 50 interface IP address as 192.168.50.1 and subnet mask 255.255.255.0. 4. To create a new 802.1Q VLAN, under the VLANs section, click Add. © Copyright 2018 TRENDnet. All Rights Reserved. -
Page 31: Copyright 2018 Trendnet. All Rights Reserved
8. Under Reassign SSID to VLAN, next to the SSID you would like to assign the new VLAN ID, click the Network/VID drop-down list and select the VLAN ID. Click Apply to save and commit the changes. © Copyright 2018 TRENDnet. All Rights Reserved. -
Page 32: Application Layer Gateway (Alg)
WINS/DNS servers, and local domain name for the DHCP server. Relay – Enables DHCP relay on a specific VLAN interface and forwards DHCP requests on the VLAN interface to an external DHCP server IP address (e.g. 192.168.50.20). © Copyright 2018 TRENDnet. All Rights Reserved. -
Page 33: Upnp And Nat-Pmp
Note: When UPnP/NAT-PMP is enabled, you can check the currently open connections in lowest number 0 being the highest priority. the UPnP/NAT-PMP entries table.. You can check the current routing table under Status > Routes under Active IPv6- Routes. © Copyright 2018 TRENDnet. All Rights Reserved. -
Page 34: Dynamic Routing Protocols
In the Overview table, you can enable and configure RIP for each interface by clicking Edit next to the interface. You can check the current routing table under Status > Routes under Active IPv6- Routes. © Copyright 2018 TRENDnet. All Rights Reserved. -
Page 35: Ospf (Open Shortest Path First)
Cost – Enter the OSPF cost value. Priority – Enter the OSPF priority value. Area - Enter the area id for OSPF. You can check the current routing table under Status > Routes under Active IPv6- Routes. © Copyright 2018 TRENDnet. All Rights Reserved. -
Page 36: Quality Of Service (Qos)
Default class – When QoS is enabled, select the default priority class used for all other traffic when QoS after all specific QoS classification rules have been applied. You can typically set this to Low or Medium. © Copyright 2018 TRENDnet. All Rights Reserved. - Page 37 Source Port (range) – Enter the source port or source port range to apply the QoS classification rule. Destination Port (range) – Enter the source port or source port range to apply the QoS classification rule. © Copyright 2018 TRENDnet. All Rights Reserved.
-
Page 38: Dynamic Dns
DDNS update only once and will not resend any Password: This is the password to login to your Dynamic DNS service account. more DDNS updates for the specified WAN. © Copyright 2018 TRENDnet. All Rights Reserved. -
Page 39: File Sharing Server
3. Review the settings below. When complete, click Apply to save and commit your changes. Note: By default, the Samba server name is set to TEW-829DRU or the LAN IP address Samba Users may also be used default LAN IP: 192.168.10.1. To change the Samba server name, you ... -
Page 40: Wake On Lan (Wol)
INSTANTLY button will immediately send a wake up message to the WoL device. Add new WoL schedule: Allows you to select a schedule when to send a wake up message to the WoL device. © Copyright 2018 TRENDnet. All Rights Reserved. -
Page 41: Wireless Networking And Security
Note: Please note that the default settings may provide more current channel, you can select a different wireless channel stability than the higher channel bandwidth settings such as for the band to operate. Auto 20/40MHz or Auto 20/40/80MHz for connectivity in busy © Copyright 2018 TRENDnet. All Rights Reserved. - Page 42 MAC addresses listed and allow all being discovered. others on the wireless band. MAC- List – Enter the MAC addresses to allow or deny. For each additional MAC address entries, click (e.g. a1:b2:c3:d4:e5:f6) © Copyright 2018 TRENDnet. All Rights Reserved.
-
Page 43: Multiple Ssid
20MHz channel width mode. Unchecking this option forces the radio to operate at the higher 40MHz channel which cause instability if there are too many neighboring 2.4GHz wireless networks. © Copyright 2018 TRENDnet. All Rights Reserved. -
Page 44: How To Choose The Type Of Wireless Security
Setting up wireless security is very important. Leaving your wireless network open and “Secure your wireless network” sections for details configuring wireless unsecure could expose your entire network and personal files to outsiders. TRENDnet security. recommends reading through this entire section and setting up wireless security on your new router. -
Page 45: Secure Your Wireless Network
8-63 characters 8-63 characters Note: It is recommended to use WPA2 CCMP (AES) encryption whenever possible as it the most secure option and supports the highest data rates supported by the wireless network device. © Copyright 2018 TRENDnet. All Rights Reserved. - Page 46 Note: It is recommended to use port 1812 which is typical default port used for the RADIUS service. Radius-Authentication-Secret: Enter the shared secret used to authorize your router with your RADIUS server. © Copyright 2018 TRENDnet. All Rights Reserved.
-
Page 47: Guest Network
“Secure your wireless network” sections for details configuring wireless security. Note: You can only select WPA2-PSK or WPA-PSK / WPA2-PSK Mixed Mode. EAP security cannot be applied to the wireless guest networks. © Copyright 2018 TRENDnet. All Rights Reserved. -
Page 48: Wifi Client Bridge Mode
LAN IP address. By default, the static LAN IP address: 192.168.10.1 / 255.255.255.0. 3. After the device completely apply the configuration changes and reboots, click Network and click Site Survey to scan for available wireless networks. © Copyright 2018 TRENDnet. All Rights Reserved. -
Page 49: Connect Wireless Devices Using Wps
3. To add a wireless device to your network, under WPS Method, next to Push Button, click the PBC Start button. Then push the WPS button on the wireless device (consult wireless client device’s User’s Guide for length of time) you are connecting to your router. © Copyright 2018 TRENDnet. All Rights Reserved. - Page 50 Instead of entering the wireless client device PIN under station PIN, you can enter the router device PIN in the wireless client device to activate WPS via PIN method. WPS Status Current Status – Displays the current WPS process status. © Copyright 2018 TRENDnet. All Rights Reserved.
-
Page 51: Steps To Improve Wireless Connectivity
3. Antenna orientation can also have a large impact on your wireless signal. Use the wireless adapter’s site survey tool to determine the best antenna orientation for your wireless devices. © Copyright 2018 TRENDnet. All Rights Reserved. -
Page 52: Firewall & Security Settings
Drop – When packet reaches the router, drops packet without any response to the sender. Accept – When packet reaches the router, allows a packet to traverse the router © Copyright 2018 TRENDnet. All Rights Reserved. -
Page 53: Port Forwarding Rules
WAN1, WAN2, or WAN1+WAN2. For example, choosing WAN1 will only allow the port forward to work on inbound connection requests on WAN1 only and inbound connections requests on WAN2 will be denied. © Copyright 2018 TRENDnet. All Rights Reserved. -
Page 54: Port Trigger Rules
TCP, UDP, or TCP+UDP. Match Port – Enter the match port number for the service to allow. Note: You can also enter a consecutive range of ports in the following format: 80-90 © Copyright 2018 TRENDnet. All Rights Reserved. -
Page 55: Ip Filtering
Internet access, this will need to be a public Internet IP. You can leave this setting blank to set the rule to apply to any public Internet IP address. © Copyright 2018 TRENDnet. All Rights Reserved. -
Page 56: Mac Filtering
Allow Mode (Whitelist) – Sets the MAC filter action to allow only the MAC address listed and deny all others access to the Internet. Important Note: Please make sure to add the MAC addresses in this list before applying the setting especially in Allow mode. © Copyright 2018 TRENDnet. All Rights Reserved. -
Page 57: Denial Of Service (Dos) Prevention
DMZ Host IP Address - Enter the IP address you assigned to the computer or stored in buffer memory for a specific session. network device to expose to the Internet. (e.g. 192.168.10.250) © Copyright 2018 TRENDnet. All Rights Reserved. -
Page 58: One-To-One Nat
Note: You can also enter a consecutive range of ports in the following format: 80-90 Typically, the internal port or port range is same as the external port or port range. © Copyright 2018 TRENDnet. All Rights Reserved. - Page 59 IP addresses from the local interfaces. (e.g. LAN, VLAN) Schedule – Allows you to select a schedule when the port forwarding rule should be enabled or disabled. © Copyright 2018 TRENDnet. All Rights Reserved.
-
Page 60: Radius Authentication
Retries – Enter the number of retries allowed before RADIUS server will deny authentication requests for a specific user. Allow local account login – Checking this option will still allow login to the router configuration page using the internal administrator account. © Copyright 2018 TRENDnet. All Rights Reserved. -
Page 61: Multiple Wan Configuration
2. Click on Network and click on Multiple WAN. 3. Review the settings below. When complete, click Apply to save and commit your changes. Note: Multiple WAN diagnostics can be used under Administrator > Diagnostics under the MWAN Interface Diagnostics section. © Copyright 2018 TRENDnet. All Rights Reserved. -
Page 62: Default Traffic Rule
WAN2 (Fixed) – In this mode, all Internet traffic will only be routed to WAN2 and allow you to device custom policies under the Advanced the WAN2 interface. The WAN1 interface is not used. tab. © Copyright 2018 TRENDnet. All Rights Reserved. -
Page 63: Web Management System (Router Limits™)
1. Log into your router management page (see “Access your router management page” on page 8). 2. Click on Services and click on Router Limits™. 3. Check the Enable option and click Apply. © Copyright 2018 TRENDnet. All Rights Reserved. - Page 64 7. After your Router Limits account has been created and your router paired, you will automatically be brought to your web management dashboard. The Current Status on your router will display Online that the content management service is running and paired with your online account. © Copyright 2018 TRENDnet. All Rights Reserved.
-
Page 65: Router Limits Content Management
Content filters and scheduling can be assigned for each group. By default, new devices are assigned to the Guest group. New groups can be created and devices reassigned to new groups for easy management. © Copyright 2018 TRENDnet. All Rights Reserved. - Page 66 History – This page will display the Internet access history through your router. This page will also displays timestamps of when websites were accessed and which devices access each site. Exceptions – This setting allows you to configure exceptions and allow access. © Copyright 2018 TRENDnet. All Rights Reserved.
- Page 67 You can access and manage your Router Limits account configuration settings through https://routerlimits.com and logging in. If behind your router, you can also access your account by going to Services > Router Limits™ in your router management page and clicking Manage Account. © Copyright 2018 TRENDnet. All Rights Reserved.
-
Page 68: Virtual Private Networking (Vpn)
Important Note: For any tunneling or VPN method used, to avoid IP address conflict and to ensure connectivity, it is required that each end (LAN IP network or single client) of the VPN tunnel is configured with a different IP network or subnet. © Copyright 2018 TRENDnet. All Rights Reserved. -
Page 69: Pptp Vpn Server
10. Click on the Status > Overview page and under the Network section, make note of your WAN IPv4 addresses to configure the PPTP VPN clients. You can also configure dynamic DNS to use a dynamic DNS hostname instead of dynamic WAN IP address. © Copyright 2018 TRENDnet. All Rights Reserved. - Page 70 PPTP VPN authentication, PAP/CHAP/MS-CHAPv1/MS- CHAPv2. It is strongly recommended to use MS-CHAPv2 since it offers the highest degree of security from these options and is supported by most modern computers and mobile devices. © Copyright 2018 TRENDnet. All Rights Reserved.
-
Page 71: Setting Up The Pptp Vpn Client (Windows)
8. Click the VPN type drop-down list and select Point to Point Tunneling Protocol (PPTP). 4. Under VPN, click Add a VPN connection. 9. Click the Type of sign-in info drop-down list and select User name and password. © Copyright 2018 TRENDnet. All Rights Reserved. -
Page 72: L2Tp Vpn Server
PPTP VPN Network > VPN > L2TP Server connection to your TEW-829DRU router. Click Save. You can enable and configure the L2TP VPN server on your router to allow remote computers or mobile devices with L2TP support to connect securely over the Internet and access the company LAN network. -
Page 73: Setting Up The L2Tp Vpn Server With Ipsec Encryption (Psk)
6. Check the Access LAN option to ensure VPN clients can access the router LAN interface. Note: If VLANs interfaces are created, they will available under Access vlan. 10. Click Apply and the bottom of the page so save and commit the changes. © Copyright 2018 TRENDnet. All Rights Reserved. - Page 74 Typically, L2TP with IPsec VPN software is pre-installed with most operating 13. Under Overview, enter a tunnel name and click Add. (e.g. L2TPwIPsec) systems. Please refer to your operating system or mobile device User’s Guide/Manual for configuring the VPN settings. © Copyright 2018 TRENDnet. All Rights Reserved.
-
Page 75: Setting Up The L2Tp Vpn Client (Windows) With Ipsec Encryption (Psk)
CHAPv2. It is strongly recommended to use MS-CHAPv2 since it offer the highest degree of security from these options and is supported by most modern computers and mobile devices. 4. Under VPN, click Add a VPN connection. © Copyright 2018 TRENDnet. All Rights Reserved. - Page 76 6. Enter a name in the Connection name field. authentication or if not, you will be prompted when attempting to establish PPTP VPN connection to your TEW-829DRU router. Click Save. 7. Enter the Internet WAN IP address, DNS, or dynamic DNS hostname of your router to connect over the Internet.
-
Page 77: Ipsec (Internet Protocol Security)
4. Click the Connection type drop-down list and select Site-to-Site. VPN Router A LAN IP Settings: 192.168.10.1 / 255.255.255.0 VPN Router B LAN IP Settings: 192.168.100.1 / 255.255.255.0 5. Click the Authentication type drop-down list and select IPSec IKEv2 PSK. © Copyright 2018 TRENDnet. All Rights Reserved. - Page 78 9. In the Remote subnet field, enter the remote LAN IP subnet. (e.g. 192.168.100.0/24) and click Apply. (e.g. 1234567890) and click Apply. You can add additional local subnets by click the add icon (e.g. 192.168.120.0/24) © Copyright 2018 TRENDnet. All Rights Reserved.
- Page 79 Apply. You can add additional local subnets by click the add icon (e.g. 192.168.20.0/24) 4. Click the Connection type drop-down list and select Site-to-Site. 5. For the Authentication type drop-down list and select IPSec IKEv2 PSK. © Copyright 2018 TRENDnet. All Rights Reserved.
-
Page 80: Setting Up Ipsec Server Vpn (Psk With Xauth)
10. Under Authentication Key, enter the Pre-Shared Key (PSK) for the IPsec VPN tunnel and click Apply. (e.g. 1234567890) 4. Click the Connection type drop-down list and select Remote Access (Roadwarrior). 5. For the Authentication type drop-down list and select IPSec XAUTH PSK. © Copyright 2018 TRENDnet. All Rights Reserved. - Page 81 LAN IP subnets and also different from the remote client side. 9. Under Authentication Key, enter the Pre-Shared Key (PSK) for the IPsec VPN tunnel. (e.g. 1234567890) © Copyright 2018 TRENDnet. All Rights Reserved.
- Page 82 Transform algorithm – The encryption/cipher algorithm used for IPsec phase 2. AES 256-bit offers the highest degree security. Hash algorithm – The authentication/hash algorithm used for IPsec phase 2. SHA2 256-bit offers highest degree of security. © Copyright 2018 TRENDnet. All Rights Reserved.
-
Page 83: Setting Up Ipsec Site-To-Site Vpn Failover (Psk)
Note: Changing the LAN IP address of your router will change the LAN IP network of your router. Example: VPN Router A LAN IP Settings: 192.168.200.1 / 255.255.255.0 VPN Router B LAN IP Settings: 192.168.210.1 / 255.255.255.0 © Copyright 2018 TRENDnet. All Rights Reserved. - Page 84 7. Under Overview, enter a tunnel name and click Add. (e.g. Tunnel1) 8. Click the Connection type drop-down list and select Site-to-Site. 15. Click to add an additional IP address and enter the remote WAN2 IP address (e.g. 172.16.0.80). © Copyright 2018 TRENDnet. All Rights Reserved.
- Page 85 Apply. You can add additional local subnets by click the add icon (e.g. 192.168.30.0/24) 17. Under Authentication Key, enter the Pre-Shared Key (PSK) for the IPsec VPN tunnel and click Apply. (e.g. 1234567890) © Copyright 2018 TRENDnet. All Rights Reserved.
- Page 86 3 seconds, and Fail Count to 1 for both WAN1 and WAN2 and click Apply to save and commit the configuration changes. 10. Click the Authentication type drop-down list and select IPSec IKEv2 PSK. © Copyright 2018 TRENDnet. All Rights Reserved.
- Page 87 Apply. (e.g. 1234567890) 16. In the Remote subnet field, enter the remote LAN IP subnet. (e.g. 192.168.200.0/24) and click Apply. You can add additional local subnets by click the add icon (e.g. 192.168.20.0/24) © Copyright 2018 TRENDnet. All Rights Reserved.
-
Page 88: Secure Socket Layer Vpn (Ssl) / Openvpn
Secure Socket Layer VPN (SSL) / OpenVPN Network > VPN > OpenVPN 8. In the Organization Name field, enter your company name (e.g. TRENDnet) 9. In the Org. Unit field, enter the section, group, or department. (e.g. IT) SSL VPN Server Setup 10. -
Page 89: Ssl Vpn Client Setup (Windows)
Enable client authentication – Checking this option will require additional security by means of user name and password authentication in addition to the standard encryption/authentication protocols. You will need to add a user name and password under Client Authentication Account. © Copyright 2018 TRENDnet. All Rights Reserved. - Page 90 5. At the installation window, click Next. 7. At the choose components window, click Next. 8. At the install location window, click Install. 6. At the license agreement window, review the license agreement and click I Agree. © Copyright 2018 TRENDnet. All Rights Reserved.
- Page 91 11. Make sure to uncheck the “Show Readme” and “Start OpenVPN GUI” options and click Finish. 10. At the installation completion window, click Next. 12. Copy the client configuration file(s) (client.ovpn) downloaded from the router to the following path without any sub-folders. C:\Program Files\OpenVPN\config © Copyright 2018 TRENDnet. All Rights Reserved.
- Page 92 Note: To disconnect your VPN client connection, right click OpenVPN system tray icon and select Disconnect. 15. After right-clicking the icon, the menu will appear. Click Connect to establish your VPN connection to your router. © Copyright 2018 TRENDnet. All Rights Reserved.
-
Page 93: Ipsec
Note: Setting this parameter is optional for IPsec VPN RSA. 2. Click on Administrator and click on Certificate Management. Organization Name – Enter the company name for the certificate (e.g. TRENDnet) Note: Setting this parameter is optional for IPsec VPN RSA. -
Page 94: Openvpn
Local Name – Enter the name of the city for the certificate. (e.g. Torrance) Organization Name – Enter the company name for the certificate (e.g. TRENDnet) Org. Unit – Enter the department or group name for the certificate (e.g. IT) ... -
Page 95: Router Maintenance And Monitoring
Enable Telnet – Checking this option will enable command line interface access via Telnet on the selected local interfaces. Enable SSH – Checking this option will enabled secure command line interface access via SSH (Secure Shell) on the selected local interfaces. © Copyright 2018 TRENDnet. All Rights Reserved. -
Page 96: Diagnostic Tools
Interface – Select the interface used to run the connectivity test. Default – Uses the internal loopback interface to conduct the connectivity test. © Copyright 2018 TRENDnet. All Rights Reserved. -
Page 97: Backup And Restore Your Router Configuration Settings
4. A separate file navigation window should open. 5. Select the router configuration file to restore and click Upload Archive (Default Filename: backup-TEW-829DRU-YYYY-MM-DD.dat). If prompted, click Yes or OK. 6. Wait for the router to restore settings. © Copyright 2018 TRENDnet. All Rights Reserved. -
Page 98: Scheduled Automatic Reboot
Stop Bits Hardware Flow Control 3. Click the Automatic reboot by schedule drop-down list and select the schedule used for the automatic device reboot function. Click Apply to save and commit the changes. © Copyright 2018 TRENDnet. All Rights Reserved. -
Page 99: Router Default Settings
WAN1 Primary / WAN2 Secondary 3. Next to Reset to defaults, click Perform Reset. When prompted to confirm this action, Failover click OK. 4. Wait for the router to settings to factory default. © Copyright 2018 TRENDnet. All Rights Reserved. -
Page 100: Upgrade Your Router Firmware
TRENDnet may periodically release firmware upgrades that may add features or fix Proceed. Please wait for the online firmware upgrade procedure to complete problems associated with your TRENDnet router model and version. To check if there is successfully. a firmware upgrade available for your device, please check your TRENDnet model and Note: The Keep Settings option will upgrade the firmware version and preserve your version using the link. - Page 101 Unchecking the Keep Settings option will upgrade the firmware version and reset the device to factory defaults. 5. At the verification page, click Proceed. Please wait for the online firmware upgrade procedure to complete successfully. © Copyright 2018 TRENDnet. All Rights Reserved.
-
Page 102: Ping Watchdog
5 mintes. Fail Count to Perform Reboot – Once ping/connectivity check fails, this sets the maximum amount of attempts the router will attempt to check connectivity before initiating an automatic reboot. © Copyright 2018 TRENDnet. All Rights Reserved. -
Page 103: Check The Router Status Information
Uptime – Displays the total amount of time the router has been up and running without reboot. Load Average – Displays the CPU load average of the device over the following time intervals. (one minute load avg., five minute load avg. fifteen minute load avg.) © Copyright 2018 TRENDnet. All Rights Reserved. - Page 104 Channel, Bitrate, BSSID (wireless MAC), encryption, and multiple SSID status. Activate UPnP Redirects – If UPnP is enabled, displays the currently active UPnP connections. Associated Stations – Displays the currently connect wireless client devices. © Copyright 2018 TRENDnet. All Rights Reserved.
-
Page 105: View Routing Table And Arp Entries
2. Click on Status and click on Routes. ARP – Displays the router ARP table. IPv6 Neighbors – Displays currently discovered/detected IPv6 neighbor devices. Active IPv4-Routes – Displays the current IPv4 active routing table. © Copyright 2018 TRENDnet. All Rights Reserved. -
Page 106: View Your Router Logging
By default, the syslog port is 514. Log output level – This setting allows you to change the type of logging displayed in the internal system log of router displays under Status > System © Copyright 2018 TRENDnet. All Rights Reserved. -
Page 107: Technical Specifications
IPsec VPN (AES-256/SHA-256/LAN-to-LAN) throughput: 90Mbps Static ARP (Up to 32 entries) SSL VPN (OpenVPN®) Throughput (Blowfish/SHA-1/Bridge): 15Mbps Inter-VLAN Routing (Up to 8 VLANs, 8 IP interfaces) SSID per VLAN assignment © Copyright 2018 TRENDnet. All Rights Reserved. - Page 108 802.11n (5GHz): -59 dBm (typical) @ 800Mbps Backup and restore configuration 802.11ac: -55 dBm (typical) @ 1733Mbps Internal logging Ping watchdog Diagnostic tools: Built-in ping, traceroute, and ns-lookup network utilities © Copyright 2018 TRENDnet. All Rights Reserved.
- Page 109 0° – 50° C (32° – 122° F) Operating Humidity Max. 95% non-condensing Certifications Dimensions 280 x 170 x 44.45mm (11 x 6.7 x 1.75 in.) Rack mountable 1U height Weight 1.24kg (2.74 lbs.) © Copyright 2018 TRENDnet. All Rights Reserved.
-
Page 110: Troubleshooting
Wireless. d. Then click Obtain an IP address automatically and click OK. 5. Please see “Steps to improve wireless connectivity” on page 28 if you continue to have wireless connectivity problems. © Copyright 2018 TRENDnet. All Rights Reserved. -
Page 111: Appendix
Ethernet and select the TCP/IP tab. Status. You'll see your network status and your IP address settings displayed. In MAC OS 10.5/10.6, in the left column, select Ethernet. e. Configure TCP/IP to use DHCP. © Copyright 2018 TRENDnet. All Rights Reserved. - Page 112 3. You may be prompted to enter a security key in order to connect to the network. 4. Enter in the security key corresponding to the wireless network, and click Connect. © Copyright 2018 TRENDnet. All Rights Reserved.
- Page 113 Pour les produits disponibles aux États-Unis / Canada du marché, seul le canal 1 à 11 peuvent être exploités. Sélection d'autres canaux n'est pas possible. © Copyright 2018 TRENDnet. All Rights Reserved.
- Page 114 Ce dispositive a ete concu pour fonctionner ave une antenna WiFi ayant un gain maximal de 5 dBi. Une antenne a gain plus eleve est strictement interdite par les reglemnets d’Industrie Canada. L’impedance d’antenne requise est de 50 ohms. © Copyright 2018 TRENDnet. All Rights Reserved.
- Page 115 Upon receiving the RMA unit, TRENDnet may repair the unit using refurbished parts. In prepaid, insured and packaged appropriately for safe shipment. International customers the event that the RMA unit needs to be replaced, TRENDnet may replace it with a refurbished product of the same or comparable model.
- Page 116 TRENDnet User’s Guide evidence of the original purchaser's date of purchase. Replacement products may be OF THE PURCHASE PRICE PAID, AT TRENDNET'S OPTION. THIS DISCLAIMER OF LIABILITY refurbished or contain refurbished materials. If TRENDnet, by its sole determination, is FOR DAMAGES WILL NOT BE AFFECTED IF ANY REMEDY PROVIDED HEREIN SHALL FAIL...
Need help?
Do you have a question about the TEW-829DRU and is the answer not in the manual?
Questions and answers