Table of Contents
Advertisement
Quick Links
Advertisement
Table of Contents

Related Manuals for TRENDnet TEW-755AP2KAC


Summary of Contents for TRENDnet TEW-755AP2KAC
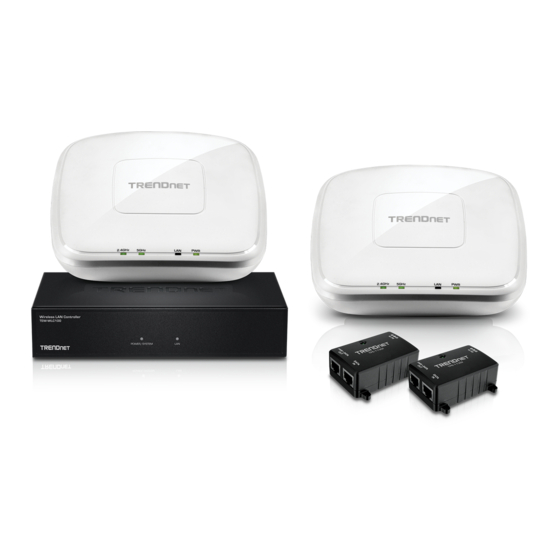
- Page 1 Cover Page TRENDnet User’s Guide...
-
Page 2: Table Of Contents
View your controller system log .................. 14 Troubleshooting ................42 Backup and restore your controller configuration settings ......... 15 Appendix ..................43 Reboot your controller ....................15 Reset your controller to factory defaults ..............16 © Copyright 2017 TRENDnet. All Rights Reserved. -
Page 3: Product Overview
Features Product Overview TRENDnet's N300 / AC1200 Dual Band Wireless Controller Kit, TEW-755AP2KAC / TEW- 821DAP2KAC, is designed to simplify management and setup processes for your access points. This new controller kit features seamless WiFi roaming, helping your devices stay connected when transitioning from one access point to another within the network. -
Page 4: Product Hardware Features
Gigabit ports (1-5). : Indicates no physical Ethernet connection or no network devices physically connected to any of the Gigabit ports (1-5). © Copyright 2017 TRENDnet. All Rights Reserved. - Page 5 DATA IN – Connects your PoE access point to your network (switch or router) 1000BASE-T via Ethernet cable. DC IN – Connects the 48V DC, 0.5 power adapter to power on the PoE injector and deliver power to the PoE access point. © Copyright 2017 TRENDnet. All Rights Reserved.
-
Page 6: Basic Installation & Setup
Important Note: Make sure your existing network is using a DHCP server to distribute IP address settings and administrator password first. addresses to the access points. By default, TRENDnet access points listed below will obtain an IP address automatically through DHCP or otherwise default back to 192.168.10.100 / 255.255.255.0 if a DHCP server is not available on your network. - Page 7 User Name: admin Password: admin Note: User name and password are case sensitive. 8. To change the controller administrator password, click Account Settings and click Edit. 6. Click Management and click on LAN. © Copyright 2017 TRENDnet. All Rights Reserved.
-
Page 8: Connect Your Wireless Access Points
PoE injectors. the back of the wireless controller to your network (e.g. router, switch, etc.) 3. Using additional Ethernet cables, connect the access points to the PWR+DATA OUT ports of the PoE inejctors. © Copyright 2017 TRENDnet. All Rights Reserved. -
Page 9: Initial Wireless Setup
IP address settings (configured in Section A) and login. Note: If the IP address settings were not changed in Section A, the IP address settings for the controller are 192.168.10.200 / 255.255.255.0. 2. Click Monitor and click Devices. © Copyright 2017 TRENDnet. All Rights Reserved. - Page 10 6. Click Configuration and click Wireless Groups/Profiles. 10. For Authentication method, select WPA/WPA2-PSK. For the WPA Cipher, select AES, and enter the Pre-Shared Key required to connect your wireless network. Click OK. © Copyright 2017 TRENDnet. All Rights Reserved.
- Page 11 If wall mounting, install the mounting plates with the correct orientation. After the mounting plates are properly installed, align the access point mounting holes with the mounting plate clips and slide in access point to lock into place. © Copyright 2017 TRENDnet. All Rights Reserved.
-
Page 12: Mounting Installation
When installing the Controller on a level surface, attach the rubber feet to the bottom of each device. The rubber feet cushion the hub and protect the hub Then, use screws provided with the equipment rack to mount each controller in the case from scratching. rack. © Copyright 2017 TRENDnet. All Rights Reserved. -
Page 13: Wireless Poe Access Point (Tew-755Ap / Tew-821Dap)
Phillips bit or screwdriver. After mounting plates are installed, align the access point mounting holes with the mounting plate clips and slide in acces point to lock into place. © Copyright 2017 TRENDnet. All Rights Reserved. -
Page 14: Controller Management
Note: The password can be up to 32 alphanumeric characters. Note: If you change the controller login password, you will need to access the controller management page using the User Name “admin” and the new password. © Copyright 2017 TRENDnet. All Rights Reserved. -
Page 15: Change Your Controller Lan Ip Address
TRENDnet controller model and version. To check if access the switch management page on your network. there is a firmware upgrade available for your device, please check your TRENDnet model and version using the link. http://www.trendnet.com/support. -
Page 16: View Your Controller System Log
(0-30 min, 30-60 min, or 1-2 hrs prior to the current time). You can also Search – Allows you to enter a custom filter/keyword to search in system logging, for example AP or client MAC address, etc. © Copyright 2017 TRENDnet. All Rights Reserved. -
Page 17: Backup And Restore Your Controller Configuration Settings
4. A separate file navigation window should open. 5. Select the controller configuration file to restore and click Restore Configuration. (Default Filename: backup_cfg_WLC100.tar.gz). If prompted, click Yes or OK. 6. Wait for the controller to restore settings. © Copyright 2017 TRENDnet. All Rights Reserved. -
Page 18: Reset Your Controller To Factory Defaults
1. Log into your controller management page (see “Access you wireless controller management page” on page 12). 2. Click on Management and click on Maintenance. 3. In the Backup/Restore System Configuration section, click Restore to factory default. © Copyright 2017 TRENDnet. All Rights Reserved. -
Page 19: Set Your Controller Time Zone
“Access you wireless controller management page” on page 12). 2. Click on Configuration and click on Sites. 3. Click the Time Zone drop down list and select the correct time zone. Click OK. © Copyright 2017 TRENDnet. All Rights Reserved. -
Page 20: Access Point Management And Configuration
Note: Once APs are added to the controller, they must be managed and configured addresses to the access points. By default, TRENDnet access points listed below will through the controller and can no longer be managed individually. APs must be... -
Page 21: Configuring Controller Managed Access Points
161. First number = 2.4G channel, Second Action – Displays an available action for the AP if it is available to add or number = 5G channel. managed by the current wireless controller. © Copyright 2017 TRENDnet. All Rights Reserved. - Page 22 Radio B/G/N (2.4GHz) (Settings for the 2.4G radio) Wireless Group – Sets the 2.4G wireless group assignment. By default, all APs are assigned to the wireless Default Group (1). © Copyright 2017 TRENDnet. All Rights Reserved.
- Page 23 Auto 20/40 MHz or Auto 20/40/80 MHz (Auto 20/40/80 MHz Recommended Default) When this setting is active, this mode is capable of providing higher performance only if the © Copyright 2017 TRENDnet. All Rights Reserved.
-
Page 24: Manually Add An Access Point
Enter the AP Ethernet/2.4G MAC address. use the default setting. Note: By default, TRENDnet indoor AP models TEW-755AP/821DAP/825DAP are set to automatically obtain IP address settings using an existing DHCP server. If the AP cannot obtain IP address settings from a DHCP server, the AP will default back to 192.168.10.100 / 255.255.255.0. -
Page 25: Remove Access Points From The Controller
To remove an AP or multiple APs, check the APs you would like to remove in the left column (The top check box will select all APs in the list), then click Remove. When prompted, click Yes to confirm removal of the selected APs. © Copyright 2017 TRENDnet. All Rights Reserved. -
Page 26: Wireless Groups And Profiles
SSID or each client device, upload can only be specified each client device. The unit is specified in bits. Lowercase “m” can be used to specify Megabits (e.g. 1m) and lowercase “k” can used to specify kilobits (e.g. 10k). © Copyright 2017 TRENDnet. All Rights Reserved. - Page 27 AP on the right would force the network. client to connect to the much higher signal strength AP on the right providing better connectivity during the transition between physical locations. © Copyright 2017 TRENDnet. All Rights Reserved.
- Page 28 RADIUS authentication. Note: It is recommended to use port 1812 which is the default RADIUS port. Shared Secret: Enter the shared secret used to authorize your APs with your RADIUS server. © Copyright 2017 TRENDnet. All Rights Reserved.
-
Page 29: Creating A New Wireless Group
5. The new group will be available in the wireless group drop-down list. Note: Each group will automatically be assigned the new number in the order the group was created. The number next to the name (2) indicated the internal group # © Copyright 2017 TRENDnet. All Rights Reserved. - Page 30 2 x APs will broadcast and allow connections for the 3 wireless profiles created under “Default group” 2 x APs will broadcast and allow connections for the 3 wireless profiles created under “R&D” © Copyright 2017 TRENDnet. All Rights Reserved.
-
Page 31: Captive Portal
Captive Portal with RADIUS (CoovaChilli) – This mode requires an external CoovaChilli server to be configured to provide the captive portal user login page and authenticate request through the access point. © Copyright 2017 TRENDnet. All Rights Reserved. - Page 32 None in the wireless profile settings since captive portal authentication will be used instead. If the Authentication Method is left enabled, the users will need to authenticate twice, once with the authentication method defined and also captive portal authentication. © Copyright 2017 TRENDnet. All Rights Reserved.
-
Page 33: To Advertisement Url
Images are automatically scaled when uploaded. The recommended image formats are JPEG, PNG, GIF. Maximum file size for images is 250KB. © Copyright 2017 TRENDnet. All Rights Reserved. -
Page 34: Captive Portal With Radius (Coovachilli)
RADIUS Shared Secret – Enter the shared secret used to allow the CoovaChilli authentication. server to allow the access point to authentication RADIUS authentication requests. © Copyright 2017 TRENDnet. All Rights Reserved. -
Page 35: Wap Maps
3. Click Browse or Choose File depending on your browser and navigate to the directory where the floor plan image you would like to upload. Once the desired floor plan image is selected, click Upload. © Copyright 2017 TRENDnet. All Rights Reserved. - Page 36 Reboot – Clicking this link will reboot the AP. - Click this option will remove the AP from the location on the floorplan and the AP will be moved back to the list of available APs on the left side. © Copyright 2017 TRENDnet. All Rights Reserved.
-
Page 37: Monitoring Access Points And Clients
The Clients (Total) chart displays the total number of clients over the most recent time interval. The Traffic (Mbytes) chart displays the total number of packets transmitted on all APs over the most recent time interval. © Copyright 2017 TRENDnet. All Rights Reserved. -
Page 38: View Client Connections
(B). History – Clicking this option displays a brief snapshot of the total amount of data downloaded (received) by the client device over the last 5 minutes in graph form. © Copyright 2017 TRENDnet. All Rights Reserved. -
Page 39: Technical Specifications
SSID broadcast Bandwidth control (download limit per SSID & client, upload limit per client) Certifications Set RSSI scanning/threshold Seamless WiFi roaming using 802.11r and OKC (opportunistic key caching) protocols © Copyright 2017 TRENDnet. All Rights Reserved. - Page 40 DBPSK/DQPSK/CCK for DSSS technique BPSK/QPSK/16-QAM/64-QAM for OFDM technique Operation Modes Access Point Antenna Gain Client 2.4 GHz: 2 x 4 dBi WDS AP WDS Bridge WDS Station © Copyright 2017 TRENDnet. All Rights Reserved.
- Page 41 Captive Portal (External Coovachilli server authentication) Internal Captive Portal (Local user account authentication and customizable portal page) 802.11k radio resource management RSSI Scanner (Client signal strength and tolerance) Operation Modes Access Point © Copyright 2017 TRENDnet. All Rights Reserved.
- Page 42 2.4 GHz: FCC: 1-11, ETSI: 1 – 13 5 GHz: FCC: 36, 40, 44, 48, 149, 153, 157, 161 and 165 ETSI: 36, 40, 44, 48 (52, 56, 60, 64, 100,104,108,112,116, 132,136,140)*** © Copyright 2017 TRENDnet. All Rights Reserved.
- Page 43 Dimensions (W x D x H) 70 x 45 x 25mm (2.75 x 1.8 x 1 in.) Weight 45 g (1.6 oz.) Temperature Operation: 0°C~50°C (32°F~ 122°F) Storage: -20°C~60°C (-4°F~140 °F) © Copyright 2017 TRENDnet. All Rights Reserved.
-
Page 44: Troubleshooting
Then click Use the following IP address, and make sure to assign your network adapter an IP address in the subnet of 192.168.10.x. Click OK Note: If you are experiencing difficulties, please contact your computer or operating system manufacturer for assistance. © Copyright 2017 TRENDnet. All Rights Reserved. -
Page 45: Appendix
This encryption standard also supports the highest Setting up wireless security is very important. Leaving your wireless network open and unsecure could expose your entire network and personal files to outsiders. TRENDnet connection speeds. TRENDnet recommends setting your access point to this encryption standard. - Page 46 If possible, upgrade wireless network interfaces (such as wireless cards in computers) 1. From the Apple menu, select Location, and then Network Preferences. from older wireless standards to 802.11n or 802.11ac. If a wirelessly networked device © Copyright 2017 TRENDnet. All Rights Reserved.
- Page 47 IP address. Click OK 3. On the Ethernet tab, the Ethernet ID is your MAC Address. MAC OS 10.4/10.5/10.6 a. From the Apple, drop-down list, select System Preferences. b. Click the Network icon. © Copyright 2017 TRENDnet. All Rights Reserved.
- Page 48 REACH Regulation (EC) No. 1907/2006 CE Mark Warning This is a Class A product. In a domestic environment, this product may cause radio interference, in which case the user may be required to take adequate measures. © Copyright 2017 TRENDnet. All Rights Reserved.
- Page 49 Cet équipement est conforme aux limites d'exposition aux rayonnements IC établies pour un environnement non contrôlé. Cet équipement doit être installé et utilisé avec un minimum de 20 cm de distance entre la source de rayonnement et votre corps. © Copyright 2017 TRENDnet. All Rights Reserved.
- Page 50 An RMA number is required in order to initiate warranty service support the event that the RMA unit needs to be replaced, TRENDnet may replace it with a for all TRENDnet products. Products that are sent to TRENDnet for RMA service must refurbished product of the same or comparable model.
- Page 51 OF SUCH DAMAGES, AND LIMITS ITS LIABILITY TO REPAIR, REPLACEMENT, OR REFUND evidence of the original purchaser's date of purchase. Replacement products may be OF THE PURCHASE PRICE PAID, AT TRENDNET'S OPTION. THIS DISCLAIMER OF LIABILITY refurbished or contain refurbished materials. If TRENDnet, by its sole determination, is...
Need help?
Do you have a question about the TEW-755AP2KAC and is the answer not in the manual?
Questions and answers