Advertisement
Quick Links
Advertisement

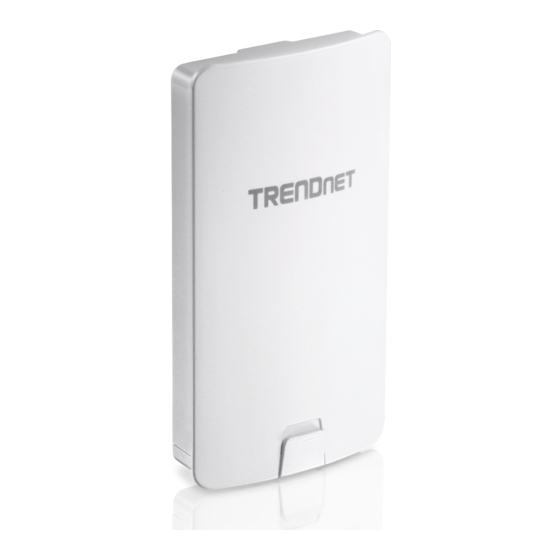
Summary of Contents for TRENDnet TEW-840APBO
- Page 1 Quick Installation Guide TEW-840APBO (V1)
- Page 2 Table of Contents 1 English 1. Before You Start 2. Hardware Setup and Configuration 3. Hardware Installation...
- Page 3 Ÿ Note: The TEW-840APBO does not support IEEE 802.3at/af PoE standards. You must use the proprietary/passive power over Ethernet injector that is supplied with the TEW-840APBO. This installation guide will walk you through the installation and configuration of two TEW-840APBO access points to establish a wireless point to point bridge using WDS (wireless distribution system).
- Page 4 Ÿ The initial configuration should be completed in a testing environment with two TEW-840APBO access points approximately 15 ft. (5 m) apart from one another with the front of the access points directly facing each other. Ÿ Configure and connect the access points before mounting.
- Page 5 Phase 2: TEW-840APBO Unit #1 Hardware Setup and Configuration 1. Remove the cover of the access point by pulling and holding the bottom tab in the vertical direction down (based on the access point orientation below) and sliding the cover below away from the access point.
- Page 6 2. Write down the SSID and WPA2 Key of the TEW-840APBO #1 access point. The SSID and WPA2 Key can be found on the inside of the device cover where the Ethernet LAN ports are located (shown below). Model: TEW-840APBO /A IP Address: 192.168.10.100...
- Page 7 4. Connect the other end of the network cable to the PoE port on the included PoE injector. 5. Using another network cable, connect one end to the LAN port on the included PoE injector. 6. Connect the other end of the network cable to your computer's Ethernet port. 7.
- Page 8 11. When prompted, login to the browser configuration page using the default user name and password settings. User Name: admin Password: admin Note: User Name and Password are case sensitive. 12. In the left hand menu under System Manager, click on Account. 13.
- Page 9 255.255.255.0, then click Save at the bottom of the page. When prompted to apply settings at the bottom right of the page, click Apply to commit the changes. Note: When configuring TEW-840APBO #2, enter the IP address settings 192.168.10.51 and Netmask 255.255.255.0.
- Page 10 Phase 3: TEW-840APBO Unit #2 Hardware Setup and Configuration When configuring the TEW-840APBO #2, repeat 1-14 of the steps in Phase 2 setup and configuration. 1. In Step 15, under IPv4 Settings , enter the IP Address 192.168.10.51 and Subnet Mask 255.255.255.0, then click Save at the bottom of the page.
- Page 11 7. Under Wireless Security – 5GHz, in the Passphrase field, enter the WPA2 key of TEW-840APBO #1 and click Save. Note: This is the WPA2 key of TEW-840APBO #1 from Phase 2 Step 2. 8. After you are brought back to the main wireless settings page, click Save at the bottom of the page.
- Page 12 In the left hand menu under Overview, click Connections and the Connection Status should display Associated. 2. Make sure both TEW-840APBO #1 and TEW-840APBO #2 access points are powered on approximately 15 ft. (5 m) apart from one another with front of access points directly facing each other.
- Page 13 3. To further verify connectivity, in the TEW-840ABPO #2 web management interface under Management, click on Tools. 4. Under Ping in the Target IP / Domain Name field, enter the IP address of TEW-840APBO #1, 192.168.10.50, then click Start. 5. Ping replies and 0% packet loss will indicate as successful point to point bridge connection between the TEW-840APBO #1 and #2.
- Page 14 3. Hardware Installation 1. Reinstall the cover by lining up the guide into the notch as shown and push until the cover clips into place and is secured. The cover includes cable openings to route the connected Ethernet cable(s) when installing. 2.
- Page 15 Note: When set to WDS station mode, the TEW-840APBO features WiFi signal strength connectivity LEDs located on the back of the access point to assist in determining the optimal mounting position.
- Page 16 Completed Installation Reference Internet Modem Router Building 1 Building 2...
- Page 19 Industry Canada statement: This device complies with ISED's license-exempt RSSs. Operation is subject to the following two conditions: (1) This device may not cause harmful interference, and (2) this device must accept any interference received, including interference that may cause undesired operation. Le présent appareil est conforme aux CNR d' ISED applicables aux appareils radio exempts de licence.
- Page 20 Professional installation instruction 1. Installation personal This product is designed for specific application and needs to be installed by a qualified personal who has RF and related rule knowledge. The general user shall not attempt to install or change the setting. 2.
- Page 21 Product Warranty Registration If you have any questions regarding the product Please take a moment to register your installation, please contact our Technical Support. product online. Go to TRENDnet’s website at: Toll free US/Canada: 1-855-373-4741 www.trendnet.com/register Regional phone numbers available at www.trendnet.com/support...


Need help?
Do you have a question about the TEW-840APBO and is the answer not in the manual?
Questions and answers