
Related Manuals for KinAn HT5216


Summary of Contents for KinAn HT5216
- Page 1 16 Ports / 32 Ports / 64 Ports User Manual CAT5 KVM over IP Switch 16 Ports / 32 Ports / 64 Ports User Manual...
-
Page 2: Table Of Contents
16 Ports / 32 Ports / 64 Ports User Manual Contents Overview ................................3 1.1 Features ............................... 3 1.2 Port Introduction ..........................6 1.3 Structure & Size ..........................7 1.4 Terms ..............................8 2. Installation & Setup ............................. 9 2.1.1 Rack Mounting ........................10 2.1.2 Device Connection Diagram ..................... - Page 3 16 Ports / 32 Ports / 64 Ports User Manual 3.2.2 Add new User ........................33 3.2.3 User Group list ........................34 3.2.4 Add User Group ........................35 3.2.5 Change Password ....................... 36 3.3 Device Management ........................37 3.3.1Network Settings ........................37 3.3.2 Date / Time ..........................
-
Page 4: Overview
16 Ports / 32 Ports / 64 Ports User Manual Overview The digital KVM Switches are IP-based KVM control units with enterprise level security which allow 1 local and 4 remote operators to monitor and access multiple servers from a single console at the same time. A single can control up to 64 servers in BIOS level. With HD OLED display, the operator can easily check the device operating status by simply push the front panel buttons even without monitor, keyboard and mouse. - Page 5 16 Ports / 32 Ports / 64 Ports User Manual 7. EMC/EMI metal case design ensuring a reliable electromagnetic compatibility environment 8. High port density – RJ-45 connectors and CAT5 / 5e/ 6 cables for up to 32 ports in a 1U housing; RJ-45 connectors and CAT5 / 5e/ 6 cables for up to 64 ports in a 2U housing 9.
- Page 6 16 Ports / 32 Ports / 64 Ports User Manual optimize screen when switching between different server with different resolution; Full-screen or sizable and scalable Virtual Remote Desktop 19. Mouse Syncing automatically synchronizes the local and remote mouse movements 20. Supports audit function, the administrator can audit the device through system logs and operation logs 21.
-
Page 7: Port Introduction
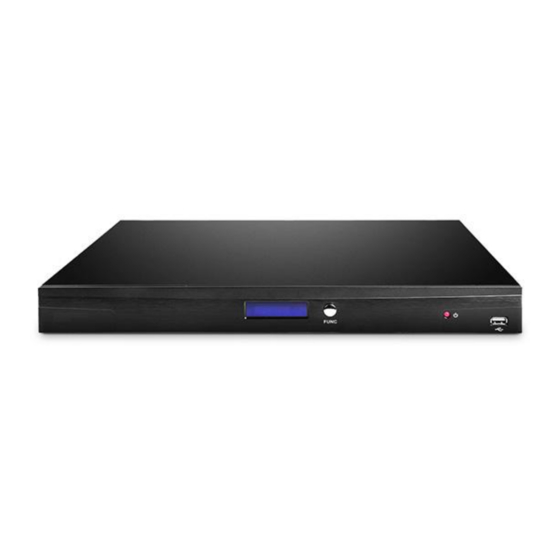
16 Ports / 32 Ports / 64 Ports User Manual 1.2 Port Introduction Real Panel Front Panel 6 / 51... -
Page 8: Structure & Size
16 Ports / 32 Ports / 64 Ports User Manual 1.3 Structure & Size 64 ports size diagram 16 / 32 Port size diagram 7 / 51... -
Page 9: Terms
16 Ports / 32 Ports / 64 Ports User Manual 1.4 Terms Power Interface 1 AC 100-240V 50-60HZ Power Interface 2 Ground Terminal Connect to the ground via the ground lead Interface to connect to the local workstation Local extended user interface 10/100/1000Mbps RJ45 interface Network Interface 1 Network Interface 2... -
Page 10: Installation & Setup
16 Ports / 32 Ports / 64 Ports User Manual Connect to serial device, e.g.: PDU S485 interface USB interface Connect to keyboard and mouse KVM interface Connect to servers via KVM adapter Access and control the connected target servers or Local User serial devices from the local console Access and control the connected target servers or... -
Page 11: Rack Mounting
16 Ports / 32 Ports / 64 Ports User Manual 2.1.1 Rack Mounting The KVM can be installed in the 19”1U rack. First screw the bracket to the front two sides of the KVM device with the M3x5 screws, as shown in the diagram below: And then position the KVM device on the rack with M6 screws, as shown in the diagram below: 10 / 51... -
Page 12: Device Connection Diagram
16 Ports / 32 Ports / 64 Ports User Manual 2.1.2 Device Connection Diagram 11 / 51... - Page 13 16 Ports / 32 Ports / 64 Ports User Manual Notice: 1. Power interface 1 and 2 should be connected to AC 100-240V 50-60HZ. To use the two power supplies, make sure both power interface 1 and 2 are connected to the power and turn on the power switch.
-
Page 14: Adapter Connection Diagram
16 Ports / 32 Ports / 64 Ports User Manual 2.1.3 Adapter Connection Diagram Plug the VGA and USB ports of the KVM adapter into the corresponding ports on the PC and connect the RJ45 ports to the corresponding ports on the KVM via CAT5 / 5E / 6 cables, as shown in the diagram above. -
Page 15: Setup & Operation
16 Ports / 32 Ports / 64 Ports User Manual 2.3 Setup & Operation Step 1: Configure the target server The KVM target server is the server that connected to the digital KVM Switch. Before install and use the digital KVM Switch, we need to configure the target server first. Please refer to below configuration instructions: ... - Page 16 16 Ports / 32 Ports / 64 Ports User Manual Set Mouse Precision Start—>Control Panel—>[Hardware]—>Mouse Please follow the steps above to finish the setting. Set up the display of the target server under Windows XP, Windows 2003, Windows2008 Start—>Control Panel—>[Hardware]—>Display 15 / 51...
- Page 17 16 Ports / 32 Ports / 64 Ports User Manual Please follow the steps above to finish the setting. Configure the mouse under Linux (ubuntu 10) Input “xset m 1 1” in the Linux command line terminal and press Enter to finish the mouse setting, as shown below.
-
Page 18: Step2: Install Java Client On The Client Pc
16 Ports / 32 Ports / 64 Ports User Manual Step2: Install Java client on the client PC The JAVA client is included in the USB disk in the package, follow below steps to install the JAVA client on the client PC. ... - Page 19 16 Ports / 32 Ports / 64 Ports User Manual Below figure comes out to show a successful installation window after about 30 seconds. Configure the JAVA components Open the control panel, as shown in below figure. 18 / 51...
- Page 20 16 Ports / 32 Ports / 64 Ports User Manual Double-click the JAVA icon, as shown in below figure. Please follow the steps above to finish the setting. 19 / 51...
- Page 21 16 Ports / 32 Ports / 64 Ports User Manual Remark: The IP address in step 6 above is the default IP address of the KVM unit; you can also set your own IP address. Step 3: Connecting the KVM Follow the below diagram to connect the KVM with cables and adapters.
- Page 22 16 Ports / 32 Ports / 64 Ports User Manual Step 4: Logging in Power on the KVM after connection, the login screen appears on the monitor after 1-2 munities, simply key in the username and password, then click login to bring up the local console main page. The local console main page is similar to the WEB browser;...
- Page 23 16 Ports / 32 Ports / 64 Ports User Manual Login to the remote WEB interface Default username: admin Default password: password Default IP address: 192.168.1.167 Open the browser, input “192.168.1.167” and press “Enter”, below warning window of JAVA plug-in operation comes out: If the plug-in is used for the first time, the system will require you to download the plug-in and load the runtime library.
-
Page 24: Operating Guide
16 Ports / 32 Ports / 64 Ports User Manual 3. Operating Guide This chapter provides detailed information on accessing and operating the KVM device from WEB console. The local console OSD page is similar to the WEB browser, the only difference is that the WEB OSD page can show the target server video window when access one port, and we can set up the video, keyboard and mouse on WEB OSD page. -
Page 25: Port Access
16 Ports / 32 Ports / 64 Ports User Manual 3.1 Port Access Once users log in, the Web Browser Main Page comes up, with the Port Access page displayed: 3.1.1 Browser GUI The web page screen components are described as below: No:KVM port number Port Name: The default port name is Port_X, users can change the port name at “Device->... -
Page 26: Port Operation
16 Ports / 32 Ports / 64 Ports User Manual 3.1.2 Port Operation The KXT III supports 4 users access to different KVM ports simultaneously. This chapter mainly shows access to the target server from WEB interface. 3.1.3 Connections Page Click “Link Up”... -
Page 27: Menu Bar
16 Ports / 32 Ports / 64 Ports User Manual The KXT III switch’s interface provides the following hotkeys: See the detail explanation in chapter 3.1.4 about the menu bar introduction. The default mouse in the target server interface is standard mouse mode with dual mouse 3.1.4 Menu bar Video control interface menu: Connection... - Page 28 16 Ports / 32 Ports / 64 Ports User Manual Keyboard Keyboard operation: click keyboard on the menu bar to send the following key combination to the target server. Send Ctrl+Alt+Del This composite key will bring up the task manager of the target server (Windows operating system) Send Alt+Tab ...
- Page 29 16 Ports / 32 Ports / 64 Ports User Manual Image Quality: 0-40, the image is clearer with the higher image quality, which requires a higher bandwidth. BrigKVMness: 0-100, the higher the brigKVMness value, the whiter the video image. Horizontal Offset: Adjust the horizontal offset position of video signal and enable the accurate synchronization of the mouse Vertical Offset: Adjust the vertical offset position of video signal and enable the accurate synchronization of the mouse...
- Page 30 16 Ports / 32 Ports / 64 Ports User Manual experience for the user. Single Cursor In Single Cursor mode, there is only a mouse cursor in the video window. Click “Single Cursor”, the following screen appears: Click “Ctrl+Alt+C” to exit the Single Cursor Mode. Absolute Mouse ...
- Page 31 16 Ports / 32 Ports / 64 Ports User Manual Exit Single Cursor Mode Hotkey: Click “ Ctrl+Alt+C” to exit the Single Cursor Mode. Disconnect From Target- Hotkey: Click “ Ctrl+Alt+Q” to exit from the current target server. Launch Settings: Window Mode: set the window size when start the video Standard: system recommended standard window size based on the resolution of the target server.
-
Page 32: Tool Bar
16 Ports / 32 Ports / 64 Ports User Manual Unselect to hide the view toolbar Scaling: To scale the video screen size according to the window size Full Screen: Full screen display the video. 3.1.5 Tool Bar : Connection Message : Mouse Synchronization : Full Screen... -
Page 33: 1User List
16 Ports / 32 Ports / 64 Ports User Manual 3.2.1User list User List interface: List all the registered users. Search To search users by entering username or full name if there are a lot of users. Delete Select the users and click “delete”... -
Page 34: Add New User
16 Ports / 32 Ports / 64 Ports User Manual 3.2.2 Add new User * Denotes a required attribute. User Name: The user name is consist of lowercase letters, Numbers, and underscores. Full Name: any character will be OK. ... -
Page 35: User Group List
16 Ports / 32 Ports / 64 Ports User Manual 3.2.3 User Group list User Group List Interface: List all the registered users, view more by page up and down. Search To search user groups by entering user group name if there are a lot of users. Deleted ... -
Page 36: Add User Group
16 Ports / 32 Ports / 64 Ports User Manual 3.2.4 Add User Group Group Name: any character will be OK. Permissions: refer to management permission and operation permission. Click “Fold” to fold the Permission menu; Click “Unfold” to unfold the Permission menu. Port Access: Permission to access to the KVM ports ... -
Page 37: Change Password
16 Ports / 32 Ports / 64 Ports User Manual Set port access permissions for the edit user group, you can select the port one by one, or select all ports by the following buttons: Set All Port Access to Deny Set All Port Access to View Set All Port Access to Control 3.2.5 Change Password... -
Page 38: Device Management
16 Ports / 32 Ports / 64 Ports User Manual 3.3 Device Management This chapter mainly shows device configuration and settings. 3.3.1Network Settings Device Name: Modify the device name. IPV4 Address settings: IP Address: The default IP address. ... -
Page 39: Date / Time
16 Ports / 32 Ports / 64 Ports User Manual 3.3.2 Date / Time Date / Time Settings User Specified: Users set the time / date manually. NTP Server Settings: The system automatically updates date / time according to the time ... -
Page 40: Port Settings
16 Ports / 32 Ports / 64 Ports User Manual 3.3.4 Port Settings Configure each KVM port; users can add their own tabs. Click the port name to modify the port name. 39 / 51... -
Page 41: Local Port
16 Ports / 32 Ports / 64 Ports User Manual 3.3.5 Local Port Disconnect Hotkey Settings: “ Double-click Left Shift Key”-hotkeys to bring up the OSD menu in the target server interface Connect Hotkey Settings: Click port het key + number key (1-9) to select port in the OSD menu. ... -
Page 42: Security
16 Ports / 32 Ports / 64 Ports User Manual Port No.: KVM port number. Workstation Status: Availability status of the workstation. Port Name: The name of the configured KVM port. Click the workstation name to bring up the Workstation Configuration. Image above is the configuration interface of workstation 1. -
Page 43: Security Settings
16 Ports / 32 Ports / 64 Ports User Manual 3.4.1 Security Settings Login limitations: User name login limitations Enable single Login Limitation: If a user name is logged in, it can’t be logged in again. Enable Password Aging: Current password validity: 1-365 days. The default is 50 days if we ... - Page 44 16 Ports / 32 Ports / 64 Ports User Manual Number of restricted passwords based on history: The new password cannot be the same as the latest 3 (default) password, the number can be changed between 1 and 10. Minimum/maximum length of strong password: 8-64 characters ...
-
Page 45: Authentication Settings
16 Ports / 32 Ports / 64 Ports User Manual 3.4.2 Authentication Settings Authentication Ways: Local: Local database authentication. LDAP: Set the IP address, port and user search DN of the LDAP server, and then test the LDAP 44 / 51... -
Page 46: Audit Log
16 Ports / 32 Ports / 64 Ports User Manual server access. RADIUS: Set RADIUS server IP address and other parameters. 3.4.3 Audit Log Provide audits and queries to users. 45 / 51... -
Page 47: Maintenance
16 Ports / 32 Ports / 64 Ports User Manual 3.5 Maintenance Provides system maintenance such as testing tools, data backup and reboot to the device. 3.5.1 Device Information 46 / 51... -
Page 48: 2Backup/ Restore
16 Ports / 32 Ports / 64 Ports User Manual 3.5.2Backup/ Restore Backup Manual: Backup the current system settings by manually click “OK”. Automatic: Set time and the system automatically backup data. Restore: Restore the last backup for the system. ... -
Page 49: Restore Factory Settings
16 Ports / 32 Ports / 64 Ports User Manual 3.5.4 Restore Factory Settings Click “Restore Factory” to restore factory settings. 3.5.5 Restart Device 3.5.6 Remote Upgrade The remote upgrade function provides users with a better upgrading experience. Upgrade method: Click “Browser”... - Page 50 16 Ports / 32 Ports / 64 Ports User Manual Upgrade mode: Restart Device : Click to restart the device. Effective Immediately: Click and the upgrade will be effective immediately. Generally select “Restart Device” will be OK. 49 / 51...
-
Page 51: Specifications
16 Ports / 32 Ports / 64 Ports User Manual 4. Specifications Model KVM Switch Local 1 local user, max 4 extended local users No. of users Remote 4 remote users Computer 16 ports, 32 ports connections 64 ports Port selection OSD menu, hotkeys keyboard Local... - Page 52 Phone: +1 (877) 205 5306 Live service http://www.fs.com/product_catalogs.html Copyright © 2009-2018 FS.COM Limited All Rights Reserved. Privacy Policy | Terms of use | Site Map| Give Feedback...
Need help?
Do you have a question about the HT5216 and is the answer not in the manual?
Questions and answers