Sunny Health & Fitness SF-E3607 User Manual
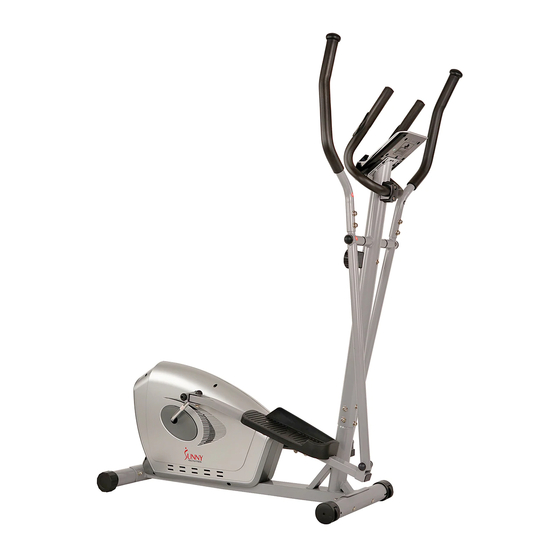
Magnetic elliptical trainer
Hide thumbs
Also See for SF-E3607:
- User manual (12 pages) ,
- User manual (31 pages) ,
- User manual (29 pages)
Advertisement
Advertisement
Table of Contents

Related Manuals for Sunny Health & Fitness SF-E3607


Summary of Contents for Sunny Health & Fitness SF-E3607
- Page 1 MAGNETIC ELLIPTICAL TRAINER SF-E3607 USER MANUAL IMPORTANT! Please retain owner’s manual for maintenance and adjustment instructions. Your satisfaction is very important to us, PLEASE DO NOT RETURN UNTIL YOU HAVE CONTACTED support@sunnyhealthfitness.com or 1- 877 - 90SUNNY (877-907-8669).
-
Page 2: Important Safety Information
IMPORTANT SAFETY INFORMATION We thank you for choosing our product. To ensure your safety and health, please use this equipment correctly. It is important to read this entire manual before assembling and using the equipment. Safe and effective use can only be achieved if the equipment is assembled, maintained and used properly. -
Page 3: Exploded Diagram
EXPLODED DIAGRAM... -
Page 4: Parts List
PARTS LIST Description Spec. Qty. Description Spec. Qty. Φ25x1.5 Main Frame Round Cap Handlebar Post Pulse Wire Front Stabilizer Inner Hex Screw M8x30 Rear Stabilizer Spring Washer 5 L/R Pedal Support 1 pr. Clamp Cover Φ20xΦ28x0.3 6 L/R Swing Tube 1 pr. -
Page 5: Hardware Package
Flywheel Axle Wrench Crank Cover Spanner S=17,19 Spanner S=10,13,14,15,17 Spanner S=13,14 Wrench Sensor Bracket Ordering Replacement Parts (U.S. and Canadian Customers only) Please provide the following information in order for us to accurately identify the part(s) needed: The model number (found on cover of manual) ... -
Page 6: Assembly Instructions
ASSEMBLY INSTRUCTIONS STEP 1: Attach the Front & Rear Stabilizers (No. 3 & 4) to the Main Frame (No. 1) with 4 Carriage Bolts (No. 12), Spring Washers (No. 52), 4 Arc Washers (No. 13) and 4 Acorn Nuts (No. 14). Tighten and secure with Spanner (No. - Page 7 STEP 3: Remove pre-assembled 2 Hex Bolts (No. 24), 2 Spring Washers (No. 52), 2 Flat Washers (No. 25) and 2 Wave Washers (No. 54) from the Shaft (No. 27). Attach the Shaft (No. 27) into the Handlebar Post (No. 2) then insert Wave Washer (No.
- Page 8 STEP 4: Attach the 2 Pedals (10L/R) to the corresponding 2 Pedal Supports (No. 5L/R) with 4 Hex Bolts (No. 33), 4 Flat Washers (No. 34) and 4 Nylon Nuts (No. 35) using Spanner (No. 102). NOTE: There are 3 positions on the Pedal Support (No.
- Page 9 STEP 6: Removed pre-assembled 4 Cross Pan Head Screws (No. 55) from the back of Computer (No. Connect Extension Wire (No. 18) and 2 Pulse Wires (No. 50) to the relevant wires of the Computer (No. 9). Attach the Computer (No. 9) to the computer bracket of Handlebar Post (No.
- Page 10 ADJUSTMENTS & USAGE GUIDE 1.If you find there is no difference between tension level 1 to level 8, check the connection of the tension cable. See Diagram below. 2.If the meter does not show numbers correctly, check the batteries. If the meter does not count the speed and time, check the connections of Extension Wire (No.
- Page 11 6.If it is very hard to pedal on the higher tension levels, or you hear rubbing noises, please remove the Chain Cover (No. 66L/R), and adjust the screw seen in the following diagram. You will need to lower the position of the screw by turning counter-clockwise; this will keep the Magnetic Board (No.
-
Page 12: Exercise Computer
EXERCISE COMPUTER SPECIFICATIONS: TIME.………………………………..00:00-99:59 MIN: SEC SPEED.………………………………………0.0-999.9 MPH DISTANCE.………………………………0.00-99.99 MILES CALORIES.………………….……………...0.0-999.9 KCAL ODOMETER………………………………..0.0-9999 MILES PULSE.………………………………....40-240 BPM FUNCTION KEY: MODE: Press to select function. RESET: Press to reset the value back to zero. SET: Press to preset the desired countdown of TIME, DISTANCE, or CALORIES. OPERATION PROCEDURES: 1.
Need help?
Do you have a question about the SF-E3607 and is the answer not in the manual?
Questions and answers