
Subscribe to Our Youtube Channel
Related Manuals for SEW-Eurodrive VARIBLOC VU01


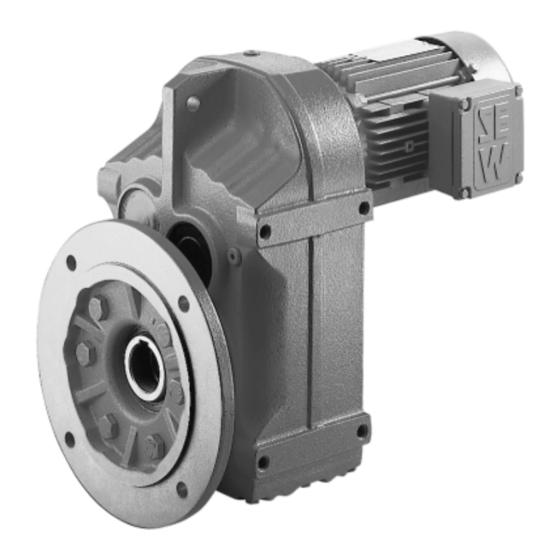
Summary of Contents for SEW-Eurodrive VARIBLOC VU01
- Page 1 Edition ® VARIBLOC Variable Speed Gear Unit and Options 09/2000 Operating Instructions 0922 1913 / EN...
- Page 2 SEW-EURODRIVE...
-
Page 3: Table Of Contents
Important Notes....................4 Safety Notes ...................... 5 ® VARIBLOC Design ..................6 Type designation..................6 ® VARIBLOC variable speed gear unit – unit design ......... 6 ® Overview of VARIBLOC mounting options ..........7 Installation ......................8 Before you begin..................8 Preliminary work .................. -
Page 4: Important Notes
Important Notes Important Notes Safety Always follow warnings and safety instructions in this publication! and warning instructions Electrical hazard Possible effects: Serious or fatal injury. Immediate danger Possible effects: Serious or fatal injury. Dangerous situation Possible effects: Minor injury. Harmful situation Possible effects: Damage to equipment or surroundings. -
Page 5: Safety Notes
Safety Notes Safety Notes Preliminary The following safety notes refer to the use of variable speed gear units. remarks When using variable speed geared motors, please observe safety notes for gear units and motors in the appropriate operating instructions. Please refer to the additional safety notes in the individual sections of these operating instructions. -
Page 6: Varibloc ® Design
Type designation ® VARIBLOC Design Type designation Example VU 21 HS BMG HF Manual brake release, lock-type Brake Angle selection element with handwheel and position indication ® VARIBLOC Variable Speed Gear Unit size ® VARIBLOC Variable Speed Gear Unit series U-shaped flow of energy 03794AEN ®... -
Page 7: Overview Of Varibloc ® Mounting Options
® Overview of VARIBLOC mounting options ® Overview of VARIBLOC mounting options 03712AXX ® Figure 2: Overview of VARIBLOC mounting options 1 Brake BM(G) (with IG voltage pulse encoder) 2 Bearing cover 3 Right-angle tachometer TW 4 AC tachogenerator GW 5 Axial tachometer TA 6 Voltage pulse encoder IG 7 Adjustment device with handwheel and position indication HS... -
Page 8: Installation
Before you begin Installation Never adjust variable speed gear unit at standstill! (Damages to the adjustment device and the wide V-belt may result) Before you begin The drive may • the entries on the nameplate of the drive match the supply voltage only be installed •... -
Page 9: Required Tools
Required tools • Ensure adequate supply of cooling air and that heated air from other units is not drawn in. ® Installation in • VARIBLOC gear units are supplied in corrosion-resistant versions (design B) for damp areas or in use in damp areas or in the open. Any damage to the paintwork (e.g. at the breather the open valve) must be repaired. - Page 10 Mounting of output components Figure 4 shows the correct mounting arrangement of a gear or sprocket wheel in order to avoid excessive overhung loads. incorrect correct 03369AEN Figure 4: Correct mounting arrangement of a gear or sprocket wheel • Only use a mounting device (see Figure 3) for installing input and output elements. Use the center bore and the thread on the shaft end for positioning purposes.
-
Page 11: Startup
® VARIBLOC startup Startup Never adjust variable speed gear unit at standstill! (Damages to the adjustment device and the wide V-belt may result) ® VARIBLOC startup Check the correct direction of rotation in the disengaged state (paying special attention to unusual sliding noises during racing phase). Secure the key for the trial run without output components. -
Page 12: Installation And Setup Of Optional Equipment
Installation and setup of EF/EFPA adjustment device Installation and Setup of Optional Equipment Never adjust variable speed gear unit at standstill! (Damages to the adjustment device and the wide V-belt may result) Secure key for trial run without output components. Do not deactivate monitoring and protection devices –... - Page 13 Installation and setup of EF/EFPA adjustment device Connecting / 1. Set geared motor to desired maximum adjusting display speed unit for EFPA 2. Remove housing cover (1) from the switch element of the variable speed motor 3. Set potentiometer (5) of variable speed motor and secure (Figure 7): –...
- Page 14 Installation and setup of EF/EFPA adjustment device Speed control Setting values of potentiometer "Center" range R VU01 VU11 VU21 VU31 VU41 VU51 VZ01 VZ11 VZ21 VZ31 VZ41 34 % 22 % 38 % 32 % 35 % 27 % 28 % 35 % 38 % 36 %...
- Page 15 Installation and setup of EF/EFPA adjustment device for design with potentiometer (5) also (Figure 10): b) Loosen lower screw of coupling (4) c) Turn potentiometer (5) on coupling – counterclockwise until stop reached – clockwise by approx. 15 ° until terminals 6 and 7 measure approx.
-
Page 16: Installation And Setup Of Hydraulic Adjustment Unit Hy
Installation and setup of hydraulic adjustment unit HY Installation and setup of hydraulic adjustment unit HY Max. 10 03752AXX Figure 11: Hydraulic adjustment unit The hydraulic adjustment unit is a closed system. The required adjustment force is generated through the piston of the adjustment cylinder. This cylinder receives the response force (spring force) of the driven adjustment disc. -
Page 17: Installation And Setup Of Gw, Ig, Tw And Ta
Installation and setup of GW, IG, TW and TA Installation and setup of GW, IG, TW and TA AC encoder GW, 1. Use the AC encoder GW IG voltage pulse – for VU 01-51/VZ 01-41 encoder 2. Use the IG voltage pulse encoder –... - Page 18 Installation and setup of GW, IG, TW and TA Mounting the 1. Move bolt head (1) in front of bore for voltage pulse encoder (2) voltage pulse 2. Install voltage pulse encoder (2) into the appropriate thread of the geared motor encoder IG housing until it touches the bolt head (1) (Figure 13)
- Page 19 Installation and setup of GW, IG, TW and TA Connection/ The contact-free digital remote speed display DA is connected to the AC encoder GW adjustment of DA or the IG voltage pulse encoder (Figure 14 and Figure 15): 1. Connect the device (Figure 14) 2.
- Page 20 Installation and setup of GW, IG, TW and TA Connection/ The contact-free analog remote speed display FL is connected to the voltage pulse ® adjustment of FL encoder IG at the VARIBLOC (Figure 16) 1. Connect the device 2. Operate drive at maximum speed 3.
- Page 21 Installation and setup of GW, IG, TW and TA Adjustment data • Accuracy of indication: + / -1 of last digit of digital remote • Measuring interval (quartz): adjustment in increments of 0.001 s in the range of speed display DA 0.010 s to 9.999 s after removing the face plate, recommended measuring interval: 0.5 to 2 s •...
- Page 22 Installation and setup of GW, IG, TW and TA DA calculation examples Example 1 Example 2 Drive R107R77VU21DADV100L4 R107R77VU21DADV100L4 Output speed = 1.0 -6.3 Output speed = 1.0 -6.3 Pulse rate z = 4 Pulse rate z = 4 Data max.
-
Page 23: Inspection / Maintenance
Inspection and maintenance intervals Inspection / Maintenance Inspection and maintenance intervals Unit / unit part Interval What to do? -> Further details on page ... ® VARIBLOC Weekly Pass through speed range Every 3000 hours of operation Inspect wide V-belt "Inspect wide V-belt"... -
Page 24: Replacing Wide V-Belt
Replacing wide V-belt Replacing wide V-belt Caution: Use only original parts in accordance with the valid spare parts list! Replacing wide V- 1. Adjust and set geared motor to highest speed. belt for VU 01-51 and VZ 01-41 (Figure 17) 2. - Page 25 Replacing wide V-belt 03710AXX Figure 17: Replacing wide V-belt for VU 01-51 and VZ 01-41 1 Ventilation plate 2 Bearing cover 3 Adjustment unit 4 Adjustment sleeve 5 Snap ring 6 Ball bearing 7 Wide V-belt 8 Wood wedge TV Driving adjustment disc GV Driven adjustment disc ®...
- Page 26 Replacing wide V-belt Replacing wide V- 1. Adjust and set geared motor to highest speed. belt for VU 6 (Figure 18) 2. De-energize the drive and secure it against unintentional re-start! Block output side. 3. Fully open driving adjustment disc TV: –...
- Page 27 Replacing wide V-belt 03761AXX Figure 18: Replacing wide V-belt for VU 6 1 Plate cover 2 Snap ring 3 Support disc 4 Adjustment unit 5 Cover 6 Ball bearing 7 Wide V-belt 8 Wood wedge TV Driving adjustment disc GV Driven adjustment disc ®...
-
Page 28: Limiting The Speed Range For Designs Nv, H, Hs
Limiting the speed range for designs NV, H, HS Limiting the speed range for designs NV, H, HS The limit speeds n and n are factory set. After wear of the belt or after installing a new wide V-belt, it may be necessary to define the speed range again. -
Page 29: Operation And Service
® Malfunction of VARIBLOC variable speed gear unit Operation and Service Please provide the following information if you require assistance from customer service: • Nameplate information • State type and extent of the fault • Time and circumstances of the fault •... - Page 30 Malfunction of optional equipment Contact-free remote speed Malfunction Possible cause Solution display FL and Input sensitivity (clearance of pulse Correct input sensitivity: DA, voltage pulse encoder / screw head) too high or Increase or decrease clearance between IG encoder IG too low voltage pulse encoder and screw head ( Section "Mounting the voltage pulse encoder IG (Figure...
- Page 31 SEW Worldwide SEW Worldwide Germany Headquarters Bruchsal SEW-EURODRIVE GmbH & Co Phone: (0 72 51) 75-0 Production Ernst-Blickle-Straße 42 Fax: (0 72 51) 75-19 70 Sales D-76646 Bruchsal Telex: 7 822 391 Service http://www.SEW-EURODRIVE.de P.O. Box 3023 · D-76642 Bruchsal sew@sew-eurodrive.de Production Graben...
- Page 32 SEW Worldwide Argentina Assembly Buenos Aires SEW EURODRIVE ARGENTINA S.A. Phone: (3327) 45 72 84 Sales Centro Industrial Garin, Lote 35 Fax: (3327) 45 72 21 Service Ruta Panamericana Km 37,5 sewar@sew-eurodrive.com.ar 1619 Garin Australia Assembly Melbourne SEW-EURODRIVE PTY. LTD.
- Page 33 SEW Worldwide Colombia Assembly Bogotá SEW-EURODRIVE COLOMBIA LTDA. Phone: (0571) 5 47 50 50 Sales Calle 22 No. 132-60 Fax: (0571) 5 47 50 44 Service Bodega 6, Manzana B Santafé de Bogotá Croatia Sales Zagreb KOMPEKS d. o. o. Phone: +385 14 61 31 58 Service PIT Erdödy 4 II...
- Page 34 SEW Worldwide Italy Assembly Milan SEW-EURODRIVE di R. Blickle & Co.s.a.s. Phone: (02) 96 98 01 Sales Via Bernini,14 Fax: (02) 96 79 97 81 Service I-20020 Solaro (Milano) Japan Assembly Toyoda-cho SEW-EURODRIVE JAPAN CO., LTD Phone: (0 53 83) 7 3811-13 Sales 250-1, Shimoman-no, Fax: (0 53 83) 7 3814...
- Page 35 SEW Worldwide Portugal Assembly Coimbra SEW-EURODRIVE, LDA. Phone: (0231) 20 96 70 Sales Apartado 15 Fax: (0231) 20 36 85 Service P-3050-901 Mealhada infosew@sew-eurodrive.pt Romania Sales Bucharest Sialco Trading SRL Phone: (01) 2 30 13 28 Service str. Madrid nr.4 Fax: (01) 2 30 71 70 71222 Bucuresti sialco@mediasat.ro...
- Page 36 SEW Worldwide Turkey Assembly Istanbul SEW-EURODRIVE Phone: (0216) 4 41 91 63 + 4 41 91 64 Sales Hareket Sistemleri San. ve Tic. Ltd. Sti + 3 83 80 14 + 3 83 80 15 Service Bagdat Cad. Koruma Cikmazi No. 3 Fax: (0216) 3 05 58 67 TR-81540 Maltepe ISTANBUL seweurodrive@superonline.com.tr...
- Page 37 Notes 09/2000...
- Page 38 SEW-EURODRIVE GmbH & Co · P.O.Box 30 23 · D-76642 Bruchsal/Germany · Tel. +49- 72 51-75-0 Fax +49-72 51-75-19 70 · http://www.SEW-EURODRIVE.com · sew @ sew-eurodrive.com...
Need help?
Do you have a question about the VARIBLOC VU01 and is the answer not in the manual?
Questions and answers