
Subscribe to Our Youtube Channel
Related Manuals for Schiller AT-10 plus


Summary of Contents for Schiller AT-10 plus
- Page 1 AT-10 plus AT-10 plus 12 Channel ECG Unit 12 Channel ECG Unit User Guide User Guide...
- Page 2 Sales and Service Information Sales and Service Information The SCHILLER sales and service centre network is world-wide. For the address of your The SCHILLER sales and service centre network is world-wide. For the address of your local distributor, contact your nearest SCHILLER subsidiary. In case of difficulty a local distributor, contact your nearest SCHILLER subsidiary.
-
Page 3: Table Of Contents
2.1.2 Options..................... 13 2.1.3 Connectors..................13 Operating Philosophy ............14 2.2.1 User and User Rights............... 14 Main Components of the AT-10 plus ....... 14 2.3.1 LCD Screen..................15 2.3.2 Keypad ..................... 16 External Connections............18 2.4.1 Back Panel ..................18 2.4.2... - Page 4 AT-10 plus Electrode Placement ......25 Electrode Identification and Colour Code ......25 Standard 10-lead Resting ECG.......... 26 4.2.1 Placing the Electrodes ..............26 4.2.2 Exercise ECG .................. 27 Further Lead Combinations..........28 4.3.1 Nehb Leads..................28 4.3.2 Additional Leads ................29 Skin/Electrode Resistance..........
- Page 5 AT-10 plus User Guide Memory and Transmission ....59 Memory................59 7.1.1 Transmitting, Printing and Deleting Stored Recordings ....60 Storing a Recording ............60 7.2.1 Automatic Storage................60 7.2.2 Manual Storage................60 Transmitting/ Receiving Data ..........60 7.3.1 Setup....................61 7.3.2...
- Page 6 AT-10 plus Page 6...
-
Page 7: Safety Notes
Intended Use ! The AT-10 plus is a 12-channel, ECG device used for the recording, analysis and evaluation of ECG Recordings. Recordings made with the AT-10 plus can be used as a diagnostic aid for heart function and heart conditions. It is designed for indoor use and can be used for all patients of both sexes, all races, and all ages. -
Page 8: Organisational Measures
The device must be serviced before reusing. ! Only connect the original SCHILLER patient cable to the patient socket. Safety Facilities ! Operating the device without the correctly rated fuse, or with defective cables, constitutes a danger to life. -
Page 9: Operation With Other Devices
! If the device is a part of a medical system, the original SCHILLER patient cable must only be used with, and connected to, the patient connector on the AT-10 plus. -
Page 10: Safety Symbols And Pictograms
Safety Notes AT-10 plus Safety Symbols and Pictograms Safety Symbols and Pictograms 1.8.1 Symbols used in this document The safety level is classified according ANSI Z535.4. The following overview shows the used safety symbols and pictograms used in this manual. -
Page 11: Symbols Used On The Devicei
Equipment/components and accessories no longer required must be disposed of in a municipally approved collection point or recycling centre. Alternatively, you can return the equipment to your supplier or SCHILLER AG for disposal. Improper disposal can harm the environment and human health. -
Page 12: Terms Of Warranty
• assembly operations, extensions, readjustments, modifications, or repairs are car- ried out by persons authorized by him, and • the SCHILLER AT-10 plus and approved attached equipment is used in accord- ance with the manufacturers instructions. There are no express or implied warranties which extend beyond the warranties hereinabove set forth. -
Page 13: Introduction
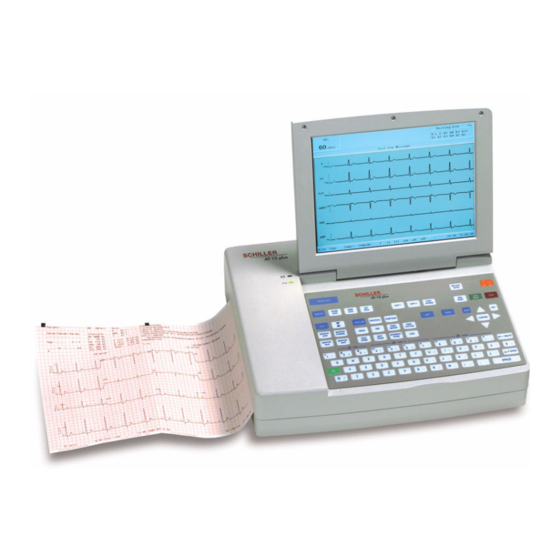
AT-10 plus User Guide Features 2 Introduction Features The SCHILLER AT-10 plus is a 12-channel ECG unit designed to record, display, and measure resting ECGs. The AT-10 plus has the following features: 2.1.1 Standard • Pacemaker Detection • Manual (real time) mode - (leads, speed and amplitude can be changed as re- quired) •... -
Page 14: Operating Philosophy
The administrator level allows access to all ‘technical‘ settings including extra system screens, test screens, software updates, etc., and is accessed by a code. Details are given in the service handbook. Main Components of the AT-10 plus (1) LCD screen. (2) Integrated thermal printer and paper tray. -
Page 15: Lcd Screen
Introduction AT-10 plus User Guide Main Components of the AT-10 plus 2.3.1 LCD Screen The display will vary according to the current task being carried out. In all screens however, the top, middle and bottom areas always display the same information groups. -
Page 16: Keypad
Introduction AT-10 plus Main Components of the AT-10 plus 2.3.2 Keypad The keyboard is divided into the following functional areas: (1) Alphanumeric and Dual Purpose Keys. The numerical keys are dual purpose as follows: – Key 1 - switch myogram filter on or off –... - Page 17 Introduction AT-10 plus User Guide Main Components of the AT-10 plus • Exercise Keys – Exercise key - exercise ECG settings and function – Protocol key - display/select/ edit exercise protocols – Symptoms key - manual input of symptoms – Begin key - start exercise test (beginning of warm-up phase) according to pro- tocol set –...
-
Page 18: External Connections
Use the hospital or building common ground for all mains powered units. ! If an external printer, monitor or ergo device is connected to the AT-10 plus, the potential equalisation stud must be connected to common ground when the AT- 10 plus is working on battery power i.e. -
Page 19: Side Panel
Introduction AT-10 plus User Guide External Connections 2.4.2 Side Panel (1) EKG/ECG patient cable input socket. • The patient cable and connector is CF rated, that is fully floating and isolated, defibrillation protected, suitable for intra-cardiac application. • The unit is only CF rated and defibrillation protected if used with the original SCHILER patient cable. -
Page 20: Operation
• Do not allow the unit to come into contact with acidic vapours or liquids. • The AT-10 plus should not be placed in the vicinity of X-ray or diathermy units, large transformers or electric motors. It must also be positioned at least one meter from the mains supply. -
Page 21: Switching On And Off
Operation AT-10 plus User Guide Start-up and Initial Preparation 3.1.4 Switching ON and OFF The unit is switched on and off with the On / Off key. 3.1.5 Power Supply and Battery Operation The unit can be operated either from the mains supply or from the built-in rechargeable battery. -
Page 22: Changing The Printing Paper
• Certain glues can react with the paper - do not attach the printout onto a mounting sheet with glue. SCHILLER can only guarantee perfect printouts when SCHILLER original chart paper or chart paper of the same quality is used. -
Page 23: Selecting Menu Options Using The Arrow Keys
Operation AT-10 plus User Guide Selecting Menu Options using the Arrow Keys Selecting Menu Options using the Arrow Keys When any of the setting keys are pressed (ECG, Exercise, NIBP, Menu etc.), menu tabs are displayed and menu options displayed, as given in the example below when the ECG key is pressed. -
Page 24: Entering Patient Data
Operation AT-10 plus Entering Patient Data Entering Patient Data In the patient data screen, new patients can be entered and previously stored patient AT-10 plus data, can be edited. Press the ‘Patient data’ key to display the patient screen. New Patient ? You can edit the current patient (select ‘no‘), or enter the details of a new patent... -
Page 25: Electrode Placement
Electrode Placement AT-10 plus User Guide Electrode Identification and Colour Code 4 Electrode Placement Electrode Identification and Colour Code The electrode placements shown in this Section are labelled with the colours according to Code 1 requirements. The equivalent Code 2 colours are given below. -
Page 26: Standard 10-Lead Resting Ecg
Electrode Placement AT-10 plus Standard 10-lead Resting ECG Standard 10-lead Resting ECG 4.2.1 Placing the Electrodes A minimal resistance between skin and electrode is required to obtain the best ECG signal and ensure the highest quality ECG recording. Therefore please note the following points: Ensure that the patient is warm and relaxed. -
Page 27: Exercise Ecg
Electrode Placement AT-10 plus User Guide Standard 10-lead Resting ECG Then place the following: – RA and LA (right arm and left arm), on the inside arm just above the wrist – LL (left leg), on the left inside lower leg, just above the ankle –... -
Page 28: Further Lead Combinations
Electrode Placement AT-10 plus Further Lead Combinations Further Lead Combinations 4.3.1 Nehb Leads The Nehb leads are bipolar chest leads. They are of special interest for the diagnosis of changes in the posterior ventricle wall. Three leads are arranged in the form of a triangle, also called the “small cardiac triangle”. -
Page 29: Additional Leads
Electrode Placement AT-10 plus User Guide Further Lead Combinations 4.3.2 Additional Leads The clips from the chest electrodes C1 through C3 have to be removed and connected to the electrodes C7 through C9 placed on the patients back in the appropriate positions. -
Page 30: Skin/Electrode Resistance
Electrode Placement AT-10 plus Skin/Electrode Resistance Skin/Electrode Resistance 4.4.1 Electrode and Patient Cable Check (Lead Test) The electrode lead status is shown on the LCD in the top right information area. When an electrode indication flashes (1), - an audible indication is also given - it indicates that the electrode resistance is too high. -
Page 31: Lead Sequence
Electrode Placement AT-10 plus User Guide Lead Sequence Lead Sequence 4.5.1 Setting Standard, Cabrera or User Defined Lead Sequence HR Variability Autom. Format Prog. Leads Lead Filter General Lead Test Pacemaker Interpretation Rhythm Rec Late Potential Lead Sequence Standard Signals... -
Page 32: Resting Ecg
! Do not use the unit if the earth connection is suspect or if the mains cable is in any way damaged. ! When the mains lead is not connected to the AT-10 plus, and any external mains powered unit(s) (e.g printer, monitor etc.,) are connected, use the potential equalisation stud for grounding protection. -
Page 33: Procedural Flow Diagram
Resting ECG AT-10 plus User Guide Procedural Flow Diagram Procedural Flow Diagram Page 33... -
Page 34: Automatic Mode Recording
Resting ECG AT-10 plus Automatic Mode Recording Automatic Mode Recording To take an automatic ECG recording, press the Auto Start key. After approximately 10 seconds the recording is analysed and the result displayed on the screen.The interpretation statements can be edited and further printouts obtained in different formats. -
Page 35: Manual Mode (Rhythm Printout) Recording
Resting ECG AT-10 plus User Guide Manual Mode (Rhythm Printout) Recording Manual Mode (Rhythm Printout) Recording Manual mode provides a direct printout of the real-time ECG with full control of parameter selection. Manual real-time printout is not available on an external printer because the data processing of inkjet and laser printers is too slow for real time print. -
Page 36: Rhythm Mode Recording
Resting ECG AT-10 plus Rhythm Mode Recording Rhythm Mode Recording At the time of print this function was not available. Rhythm monitoring of ECG signals allows the constant recording of one or two specified leads for an unlimited length of time (limited only by the amount of paper). -
Page 37: Recording External Signals (Using The Dc Inputs)
This can be done alone or in conjunction with an ECG recording. An example of an external device which could be connected, is a phonopulse recording unit or a small ECG unit (e.g. SCHILLER MS-3). 5.5.1 Procedure... -
Page 38: Changing Lead Group, Amplitude And Speed
Resting ECG AT-10 plus Changing Lead Group, Amplitude and Speed Changing Lead Group, Amplitude and Speed ! After heavy artefacts or lead off, the indication of the heart rate may not be reliable. The following can be freely chosen during data acquisition for the display and for a manual printout. -
Page 39: Re-Centring The Trace, 1Mv Reference Pulse
Resting ECG AT-10 plus User Guide Changing Lead Group, Amplitude and Speed 5.6.3 Re-centring the trace, 1mV reference pulse Occasionally the trace can wonder from the baseline. To re-centre the ECG trace, and to display / print a 1mV reference pulse, press the 1mV key. -
Page 40: Ecg Settings
Resting ECG AT-10 plus ECG Settings ECG Settings When the ECG key is pressed a screen is shown with a number of tabs at the top. When the tabs are selected further ECG options and settings are available. This section gives an overview of all the settings and tabs available in the following table. - Page 41 Resting ECG AT-10 plus User Guide ECG Settings Parameter Options Description Rhythm Rec (not Rhythm Lead R1, R2, R3 Defines the rhythm leads used for rhythm recording available at time of and r1 print) Defines the printout format (and by default the speed of the trace). Select...
- Page 42 Resting ECG AT-10 plus ECG Settings Parameter Options Description Autom. Format ECG Printout No Printout No printout of the ECG given at the end of an auto (Automatic mode for mode recording (the recording can be stored in the formats 1 and 2) memory and printed at a later time if required).
- Page 43 (off). The cutoff frequency is set above. SSF Filter (smoothing) The smoothing filter (SSF: SCHILLER smoothing filter) is a low pass filter to suppress high frequency artefacts between the QRS complexes. When this filter is switched on, `SSF` is shown on the bottom line of the automatic printout.
-
Page 44: Exercise Ecg
ECG Settings 6 Exercise ECG ! The AT-10 plus is CF rated. The patient connection is fully isolated. Always ensure however, that during the recording neither the patient nor the conducting parts of the patient connector nor the electrodes come into contact with other persons or conductive objects (even if these are earthed). -
Page 45: Exercise Flow Diagram
Exercise ECG AT-10 plus User Guide Exercise Flow Diagram Exercise Flow Diagram Page 45... -
Page 46: Test Procedure Overview
Test Procedure Overview Test Procedure Overview • Ensure that the ergo device is connected to the AT-10 plus, and is powered up ready for use, please read the ergometer documentation. • Ensure that the external NIBP unit (if used), is connected and powered up. -
Page 47: During The Test
Exercise ECG AT-10 plus User Guide During the Test During the Test The following is an example of the screen during an exercise ECG when using a bicycle or a treadmill. Typical Display for a Bicycle Protocol Typical Display for a... - Page 48 Exercise ECG AT-10 plus During the Test In addition to the resting ECG display and control (see page 38), the following test information is displayed: (1) The target heart rate is shown in brackets next to the heart rate. The target HR...
- Page 49 Exercise ECG AT-10 plus User Guide During the Test Metabolic Equivalents (METS) The metabolic equivalents, or METS, provides a simple means of determining energy expenditure during exercise. The provision of a MET value for each stage of an exercise test assists in determining the exercise tolerance of a patient in conjunction with factors such as weight, degree of fitness, sex and age.
-
Page 50: Entering Symptoms
Exercise ECG AT-10 plus During the Test 6.3.1 Entering Symptoms During the test, subjective patient symptoms can be entered according to their severity. To enter this data, press the Symptoms Key Assessment of Symptoms Borg: (0..20) Chest Pain (0..31) Dysnea (0..31) -
Page 51: Nibp
(the screen remains on display for 30 seconds). – The BP entry screen is only displayed when the NIBP key is pressed. • BP taken with a digital BP unit connected to the AT-10 plus and recorded automat- ically: –... -
Page 52: At The End Of The Test
Exercise ECG AT-10 plus At the End of the Test At the End of the Test Press the End key to enter the recovery phase as defined in the protocol. When the End key is pressed the recovery stage is entered immediately. If you wish to continue to the end of the current stage before entering the recovery stage, press the Fn key followed by the End key. -
Page 53: Exercise Settings
Exercise ECG AT-10 plus User Guide Exercise Settings Exercise Settings 6.5.1 General Exercise Settings When the Exercise key is pressed a screen is shown with a number of tabs at the top. When the tabs are selected further ECG options and settings are available. This section gives an overview of all the settings and tabs available in the following table. - Page 54 Exercise ECG AT-10 plus Exercise Settings Parameter Options Description Stage Report Print Resting ECG Select Yes or No to print the resting ECG format (auto format 1). Stage print format During the exercise and recovery phase, periodic printouts can be obtained at preset intervals defined below.
-
Page 55: Defining A Protocol
Exercise ECG AT-10 plus User Guide Defining a Protocol Defining a Protocol When the Protocol key is pressed a screen is shown with a number of tabs at the top. When the tabs are selected further protocol options and settings are available. This section gives an overview of all the settings and tabs available in the following table. - Page 56 Exercise ECG AT-10 plus Defining a Protocol Parameter Options Description Treadmill Protocol Choose Protocol Select a protocol (from the standard protocols or from previously user defined protocols). Change Protocol Name Define any suitable name (not available at time of print).
-
Page 57: Standard Treadmill Protocols
Exercise ECG AT-10 plus User Guide Defining a Protocol 6.6.1 Standard Treadmill Protocols Some of the proven protocols are as follows: 6.6.2 Bruce Stage Duration [minutes] Speed [km/hr] / Elevation [%] [mph] 2.7 (1.7) 4.0 (2.5) 5.4 (3.4) 6.7 (4.2) 8.0 (5.0) -
Page 58: Ellestad
Exercise ECG AT-10 plus Defining a Protocol 6.6.5 Ellestad Stage Duration [minutes] Speed [km/hr] / Elevation [%] [mph] 2.7 (1.7) 10.0 4.8 (3.0) 10.0 6.4 (4.0) 10.0 8.0 (5.0) 10.0 8.0 (5.0) 15.0 9.6 (6.0) 15.0 6.6.6 Cooper Stage Duration [minutes]... -
Page 59: Memory And Transmission
Memory and Transmission AT-10 plus User Guide Memory 7 Memory and Transmission Recordings can be stored locally, and/or transmitted to a PC. This can be carried out either automatically or manually after a recording has been taken. Recordings stored in memory can also be transmitted at any time. -
Page 60: Transmitting, Printing And Deleting Stored Recordings
RS-232 connector on the side Transmission to a computer (with for example the SEMA-200 installed) connected panel directly to the RS-232 interface on the side of the AT-10 plus. SCHILLER Communication When the SCM option is installed transmission is possible over a network or Module (SCM) option telephone system. -
Page 61: Setup
Memory and Transmission AT-10 plus User Guide Transmitting/ Receiving Data 7.3.1 Setup RS-232 connector to a computer Using the RS-232 cable assembly, attach the RS-232 connector on the side panel of the AT-10plus to the RS-232 connector of your PC - consult your computer documentation for details. -
Page 62: Automatic Transmission
To receive data from a remote location, press the Get Data key. • Transmission over the telephone system uses a modem - the internal modern op- tion (in the SCHILLER Communications module option), must be installed. • When transmitting to SEMA-200 the SEMACOMM program must be installed on the computer. -
Page 63: General And System Settings
General and System Settings AT-10 plus User Guide System Settings 8 General and System Settings System Settings When the Menu key is pressed a screen is shown with a number of tabs at the top. When the tabs are selected further options and settings are available. This section gives an overview of all the settings and tabs available in the following table. - Page 64 Set to Yes or No. External Display Output Software The current software version for the AT-10 plus. Also displayed is the serial Software Version Display number of the unit and any options that are installed as follows: Base configuration (upper case)
- Page 65 61) with the SCHILLER Receive default communication tool (SCOT) installed. When the Retrieve default icon is clicked all unit settings in the SCOT program are transferred to the connected AT-10 plus. Comm. following pages RS-232 This defines the maximum communication rate for the modem (when Modem Baudrate is selected in the Mode field (below)).Tick the rate defined in the modem...
- Page 66 General and System Settings AT-10 plus Table of Unit Settings Parameter Options Description Network- See following page SCM Modem - See following page. Peripherals The latest BP measurement is displayed on the monitor and all BP Blood Pressure unit measurements are stored with the exercise recording. Select the way the blood pressure will be taken as follows: •...
-
Page 67: Communication Settings
RS-232 Type • Only active when RS-232 interface is chosen above, recordings can be Line transmitted to a PC / SCHILLER unit connected directly to the RS-232 Modem interface - to do this select line. When recordings are to be transmitted to the remote unit via the phones system - select modem (not available at time of print.) - Page 68 General and System Settings AT-10 plus Table of Unit Settings Network Setup These settings are only applicable when SCM and Net have been selected (see Comm tab previous page). System Menu RS-232 Comm. Network SCM Modem Peripherals Identification Macro System Config.
-
Page 69: Unit Maintenance
" No kinks, abrasion or wear in any cable assembly. " Input/output connectors undamaged. In addition, at the same time as the visual inspection, the AT-10 plus should be switched on, the menu scrolled through, and some sample functions tested. This will: •... -
Page 70: Cleaning The Casing And Cable Assemblies
The casing of the AT-10 plus can be cleaned with a soft damp cloth on the surface only. Where necessary a domestic non-caustic cleaner can be used for grease and finger marks. -
Page 71: Battery Maintenance
Unit Maintenance AT-10 plus User Guide Battery Maintenance Battery Maintenance • The battery requires no maintenance during its life. • Replace the battery approx. every 4 years (depending upon application) when the battery running time falls substantially under one hour. -
Page 72: Changing The Fuse And Mains Voltage
Unit Maintenance AT-10 plus Changing the fuse and mains voltage Changing the fuse and mains voltage ! The mains voltage may only be changed by qualified personnel. ! Before the fuse and mains voltage are changed, the device must be disconnected from the mains and the mains plug removed for the wall socket. -
Page 73: 10 Trouble Shooting
" Ensure that fresh SCHILLER paper is installed. not clear, or the " Note that the thermal paper used for the AT-10 plus is heat and printout is light sensitive. If it is not stored in its original seal, stored in high ‘patchy‘. -
Page 74: Accessories And Disposables
Your local representative stocks all the disposables and accessories available for the AT-10 plus. A full list of all SCHILLER representatives can be found on the SCHILLER website (www.schiller.ch). In case of difficulty contact our head office. Our staff will be pleased to help process your order and provide any details for all SCHILLER products. -
Page 75: 11 Technical Data
Technical Data AT-10 plus User Guide System 11.1 11 Technical Data 11.1 System Dimensions 348 x 288 x 87 mm, approx. 4.2 kg. Monitor • Backlit for graphic and LCD alphanumeric representation • Resolution: 800 x 600 dots Power supply Mains Voltage •... -
Page 76: Ecg
Technical Data AT-10 plus 11.2 11.2 Patient input Fully floating and isolated, defibrillation-protected (only with original SCHILLER pa- tient cable) Leads • 12 simultaneous leads • Standard • Cabrera Monitor display Leads • 3 - 12 channel display of the selected leads –... - Page 77 Technical Data AT-10 plus User Guide 11.2 Patient input Fully floating and isolated, defibrillation-protected (only with original SCHILLER pa- tient cable) Leads • 12 simultaneous leads • Standard • Cabrera Automatic lead programs 3/12-channel presentations of 12 simultaneously recorded leads...
-
Page 78: Safety Standards
Technical Data AT-10 plus 11.3 Safety Standards 11.3 Safety Standards Safety standard IEC/EN 60601-1 IEC/EN 60601-2-25 IEC/EN 60601-1-2 Protection class I according to IEC/EN 60601-1 (with internal power supply) Conformity/Classification CE/IIa according Directive 93/42/EEC Protection This device is not designed for outdoor use (IP 20) -
Page 79: 12 Index
Index AT-10 plus User Guide 12 Index Numerics 1mV reference pulse ......ECG Options and Settings ....Identification ........... Electrode inch/lbs ........... Colour Code ........Interpretation ....... Electrode and Patient Cable Check (Lead Isolating the Mains Supply ..... Abnormal ECG ........ - Page 80 RR Variability ......... Safety Precautions ........SCHILLER Communication Module Modem ..........Network Setup ........Phone No........... SCHILLER Communication Tool ... Selecting Data for Transmission ... Selecting Menu Options ......Selecting Menu Options using the Arrow Keys Sensitivity ..........Sequential ..........
Need help?
Do you have a question about the AT-10 plus and is the answer not in the manual?
Questions and answers