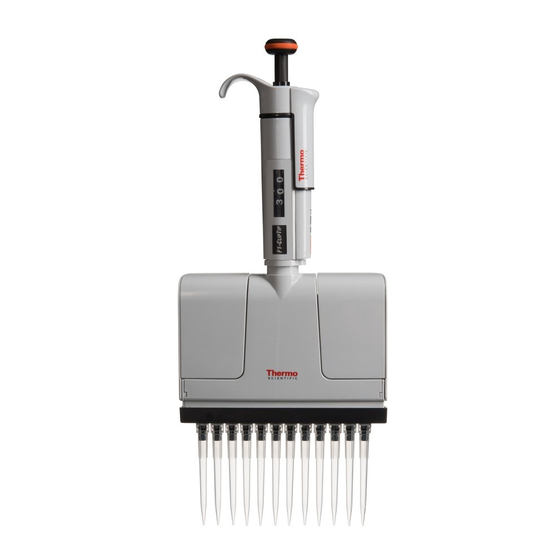
Thermo Scientific F1-ClipTip User Manual
F1-cliptip
Hide thumbs
Also See for F1-ClipTip:
- Instructions for use manual (31 pages) ,
- Instructions for use manual (31 pages)
Table of Contents
Advertisement
Advertisement
Table of Contents

Related Manuals for Thermo Scientific F1-ClipTip


Summary of Contents for Thermo Scientific F1-ClipTip
- Page 1 Thermo Scientific F1-ClipTip Single Channel Multichannel Instructions for Use...
- Page 2 The CE mark covers the system containing the CE marked F1-ClipTip pipette and the CE marked ClipTip pipette tips. Product specifications are subject to change without prior notice. ClipTip is a registered...
-
Page 3: Table Of Contents
CONTENTS 1. INTRODUCTION 2. PACKAGE 3. MAIN ILLUSTRATION 4. SAFETY 5. OPERATION 6. CALIBRATION AND ADJUSTMENT 7. MAINTENANCE 8. STERILIZATION 9. TROUBLESHOOTING 10. APPENDICES... -
Page 4: Introduction
0.1-2 µl and 10 µl based pipette models use ‘Snap and Lip’ seal tips. The F1-ClipTip product offering covers a volume range from 0.1 µl to 1000 µl and includes variable and fixed volume single channel pipettes as well as multichannel pipettes. The convenient color coding* system facilitates to identify the correct ClipTip by volume for use. -
Page 5: Package
2. Package The F1-ClipTip package contains the following items: F1-ClipTip pipette Service tool Multichannel service tool Tip fitting tool Bag of grease 1g (Order No. 3300200) Instructions for Use Calibration certificate / Warranty Certificate O-ring Order No. 2214930 Single Channel Pipette (Scp) 300 (3 pcs) Order No. -
Page 6: Safety
The F1-ClipTip is to be used by trained personnel with required laboratory skills. The instructions for use must be read prior to and during the use of the device (pipette and tip). The F1-ClipTip pipette can be used between +4°C and +40°C. -
Page 7: Operation
Operate the pipetting button gently. If it is quickly released, sample liquid may enter the pipette, which will affect the pipetting performance and may damage the pipette. Follow the guidance in the “Thermo Scientific Good Laboratory Pipetting Practices” brochure to minimize the risk of repetitive strain injury (RSI). - Page 8 2. Lift the pipette. 3. If the tip is not attached, repeat Steps 1 and 2. Incorrect use of tips Use only ClipTip tips with an F1-ClipTip pipette. Check that all clips are locked to ensure tip sealing. Picture 4b ClipTip tips are designed for single use only.
-
Page 9: Calibration And Adjustment
6. Calibration and Adjustment 6.1 Factory calibration limits F1-ClipTip pipettes are factory calibrated and adjusted to give the volumes as specified with distilled or deionized water using the forward pipetting technique. Manufacturer specifications are shown on the pipette calibration certificate and in Appendix 2. The pipette should be recalibrated for use with any tip type not named on the Calibration Certificate. - Page 10 The performance of a new and serviced pipette must be checked and documented. The manufacturer’s specifications should be used as guidelines and the user should establish acceptable imprecision and inaccuracy performance limits (ISO 8655). The user determines the performance and applicability of the pipette and tip combination for a particular application and determine the required interval for performance checking.
-
Page 11: Maintenance
When the F1-ClipTip is not in use, make sure it is stored in an upright position. We recommend a pipette stand for this purpose. -
Page 12: Press The Tip Ejector 4.1. Rotate The Tip Ejector 10 Counterclockwise And Pull It Out (Picture
7.2.1 Disassembly of 1000ul single channel pipettes 1. Remove the tip fitting 5 (Picture 8). To remove the tip fitting place the star-shaped end of tool 3 (picture 9) into the end of the tip fitting. Turn the tool counterclockwise to unscrew the tip fitting (picture 10). Picture 9 Picture 8 2. -
Page 13: Turn The Tip Cone 11 Counterclockwise With The Service Tool
3. Remove the Clip trigger 8 and Clip trigger spring 9. 4. Turn the tip cone 11 counterclockwise with the service tool 1. There are two slots in the service tool: the smaller one for pipettes under 300 μl and the bigger one for pipettes over 300 μl. -
Page 14: Turn The Tool Counterclockwise To Unscrew The Tip Fitting (Picture
Reassemble the Clip trigger spring 9 and Clip trigger 8. Assemble the tip fitting according to instruction in 7.2.4. Reassemble the tip ejector 10. 100-1000μl, 500 / 1000μl Fixed Put the O-ring 17 and support ring 16 onto the tip cone 11. Slide the spring 13 onto the piston 12 and slide the entire assembly into the tip cone 11. - Page 15 7. While the tip ejector 23 is in the down position, open its upper end slightly on both sides and pull downwards. Remove the fastening spring 22. Remove the ejector link 24. Press the piston bar 16 beam into the down position. Finally unfasten the four screws 20/21 and the tip ejector. The ejector slide 25 and two springs 26 can be removed for maintenance.
-
Page 16: Sterilization
7.2.7 Cleaning and reassembling multichannel pipettes See the cleaning instructions in Section 7.2.2 “Single channel pipettes”. Check the volume-specific reassembling of the piston assemblies starting on page 23. The pipette is assembled in the reverse order to disassembling. Note that the ejector link 24 must be in the down position simultaneously with the tip ejector 23 (page 26). -
Page 17: Troubleshooting
9. Troubleshooting The table below lists possible problems and their solutions. Defect Possible reason Possible action ►Re-attach/tighten the tip fitting Leakage • Tip fitting incorrectly attached or loose or replace with new tip fitting(s) using the tool. ►Discard the tip. • ClipTip clips are bent ►Change the O-ring. -
Page 18: Appendices
10. Appendices Appendix 1. Conversion table Value of the conversion factor Z (µl/mg), as a function of temperature and pressure, for distilled water. Temperature Air pressure °C 101.3 15.0 1.0017 1.0018 1.0019 1.0019 1.0020 1.0020 1.0020 15.5 1.0018 1.0019 1.0019 1.0020 1.0020 1.0020... - Page 19 Appendix 2. Manufacturer specification limits Thermo Scientific F1-ClipTip Variable Volume Single Channel Order No. Range Volume Inaccuracy Imprecision Compatible µl µl SD µl ClipTip 4641310N 0.1–2 µl ±0.050 ±2.50 0.040 2.00 12.5 Ext ±0.024 ±12.00 0.020 10.00 ±0.033 ±33.00 0.025 25.00...
- Page 20 Thermo Scientific F1-ClipTip Variable Volume Multichannel Order No. Range Channel Volume Inaccuracy Imprecision Compatible µl µl SD µl CV% ClipTip 4661210N 1–10 µl ±0.240 ±2.40 0.160 1.60 12.5 Ext ±0.120 ±12.00 0.080 8.00 4661120N 5–50 µl ±0.75 ±1.50 0.35 0.70 ±0.25...
- Page 21 Appendix 3. ISO8655 calibration specifications Thermo Scientific F1-ClipTip specifications according to ISO8655 standard. Thermo Scientific F1-ClipTip Variable Volume Single Channel Range Volume Inaccuracy Imprecision Compatible Color µl µl SD µl ClipTip code 0.1–2 µl ±0.080 ±4.0 0.040 12.5 Ext pink ±0.080...
- Page 22 Appendix 4. Assembly and spare parts * Available as a spare part. See model specific order numbers on page 30. 1062930 1062800 Multichannel service tool Service and adjustment tool 0300070 Tip fitting tool * 5. Tip fitting * 42. Tip cone assembly * 50.
- Page 23 1–10µl 2–20µl 0.1–2µl 10 µl Fixed 20 µl Fixed 1–300µl 5.2* 5.1*...
- Page 24 5–50µl 25 / 50 µl Fixed 1–300µl 10–100µl 5.2* 5.1*...
- Page 25 100–1000µl 20–200µl 30–300µl 500 / 1000 µl Fixed 100 / 200 µl Fixed 1–300µl 250µl Fixed 5.2* 5.2* 5.1* 5.1*...
- Page 26 8-ch 1-10 µl * 50...
- Page 27 12-ch 1-10 µl * 50...
- Page 28 8-ch 5-50 µl * 50 10-100 µl 30-300 µl 5.2* 5.1*...
- Page 29 12-ch 5-50 µl 10-100 µl 30-300 µl 5.2* 5.1*...
- Page 30 F1-ClipTip single channel and multichannel spare part order numbers Single Channel 0.1–2µl 30–300µl / 250µl Fixed 2216410 2216160 4 pcs 2216480N 5.1. 2214930 3 pcs 5.2. 1033430 1–10µl / 10µl Fixed 1033330 1030060 2216130N 2216390N 100–1000µl 2–20µl / 20µl Fixed 500µl / 1000µl Fixed...
- Page 31 Appendix 5. ClipTip ordering information Thermo Scientific ClipTip racked and sterile tips Code ClipTip Volume 94410060 ClipTip 12.5 Ext 12.5 µl 10x96/rack 94410063 ClipTip 12.5 Ext, sterile 12.5 µl 10x96/rack 94410210 ClipTip 20 20 µl 10x96/rack 94410213 ClipTip 20, sterile 20 µl...
- Page 32 Appendix 6. F1-ClipTip and ClipTip compatibility table Non-filter and filter tips Product code Description 4641310N F1-ClipTip 0.1-2µl 4641320N F1-ClipTip 1-10µl 4641180N F1-ClipTip 2-20µl 4641190N F1-ClipTip 5-50µl 4641200N F1-ClipTip 10-100µl 4641210N F1-ClipTip 20-200µl 4641220N F1-ClipTip 30-300µl 4641230N F1-ClipTip 100-1000µl 4651280N F1-ClipTip 10µl fixed volume 4651200N F1-ClipTip 20µl fixed volume...
- Page 33 Appendix 7. Pipette accessories Multichannel stand F–stand #9420390 #9420400 Reagent reservoir 100 ml #95128085 Reagent reservoir 25 ml #95128093 Reagent reservoir 25 ml divided #951228095...
- Page 34 info.pipettes@thermofisher.com www.thermofisher.com thermofisher.com © 2018 Thermo Fisher Scientific Inc. All rights reserved. All trademarks are the property of Thermo Fisher Scientific Inc. and its subsidiaries. Specifications, terms and pricing are subject to change. Not all products are available in all countries. Please consult your local sales representative for details. Thermo Fisher Scientific Oy Ratastie 2 01620 Vantaa...
Need help?
Do you have a question about the F1-ClipTip and is the answer not in the manual?
Questions and answers