Table of Contents
Advertisement
Advertisement
Table of Contents

Related Manuals for BKI VGG Series


Summary of Contents for BKI VGG Series
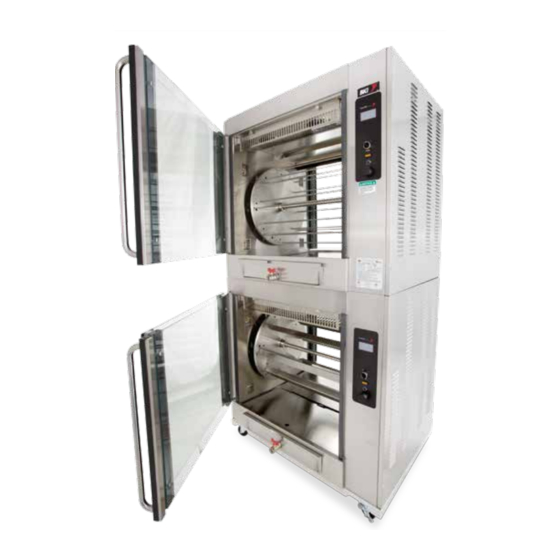
- Page 1 High Capacity Rotisserie Oven Series SERIES: VGG Operation Manual...
- Page 2 U.S.A. COVERAGE PERIOD Warranty claims must be received in writing by BKI within one (1) year from date of installation or within one (1) year and three (3) months from data of shipment from the factory, whichever comes first.
-
Page 3: Table Of Contents
Safety Cut-Out ..............................22 Maintenance ................................23 Scheduled Maintenance ............................23 Oven Cleaning (Daily) ............................. 23 Troubleshooting ..............................26 Accessories ................................28 Wiring Diagrams ..............................29 NOTES ..................................36 BKI Worldwide is a wholly owned subsidiary of Standex International Corporation. -
Page 4: Introduction
Removable components allow for easy maintenance and cleaning. The BKI name and trademark on this unit assures you of the finest in design and engineering -- that it has been built with care and dedication -- using the best materials available. Attention to the operating instructions regarding proper installation, operation, and maintenance will result in long lasting dependability to ensure the highest profitable return on your investment. -
Page 5: Specific Precautions
These sparks could cause serious injury, damage, or fire. BKI provides an Equipotential ground terminal for the connection of a bonding conductor after the installation of the appliance per lEC60417-1. This terminal is located on the drive side of the oven base and is marked with this symbol. - Page 6 Introduction Keep this manual with the Equipment This manual is an important part of your equipment. Always keep it near for easy access. If you need to replace this manual, phone the applicable BKI Technical Services Department: Technical Services Department 2812 Grandview Drive Simpsonville, S.C.
-
Page 7: Safety Labels
POWER Health and Sanitation Practices BKI Rotisserie Ovens are manufactured to comply with health regulations and are tested and certified to NSF standards. You must operate the equipment properly, using only quality products and use meat thermometers to insure meats are thoroughly cooked. -
Page 8: Operation
Rotisserie Oven Operation Operation Controls and Indicators POWER Hardware Controls Item # Description Function Depressing the switch allows the operator to “jog” the rotor position when the Rotor Switch door is open. Releasing the switch stops the rotor. Main Power Isolator This light illuminates to indicate that power is being applied to the oven from Light the Main Power Isolator (Circuit Breaker). -
Page 9: Configuring The Cts Oven Controller
Rotisserie Oven Operation Configuring the CTS Oven Controller Configuration Access Touch and hold the The area on the control screen is black. The lower right portion of the red graphic in this diagrams indicates the screen until the control area to touch and hold. chirps twice. - Page 10 Rotisserie Oven Operation Recipe Editing (continued) Edit the Recipe Name using the alpha- numeric keyboard. Recipe Names are limited to a maximum of 14 characters. Edit Recipe Name. Touch [SAVE] to save the new Recipe Name Touch [SAVE]. and return to the Select Item screen. Touch [X] to exit and [Clr] –...
-
Page 11: Changing Access Code
Rotisserie Oven Operation Changing Access Code Supervisor level configuration screen is displayed. Touch [Chg Code]. Touch [X] to exit and return to Main Recipe screen. Use the screen keypad to enter the new 4 digit Access Code. Enter new Access Touch [ENTER]. -
Page 12: Exporting Recipe, Configuration And History Files (Continued)
Rotisserie Oven Operation Exporting Recipe, Configuration and History Files (continued) Insert the USB flash drive into the USB port located on the control side of the oven. The message line will change to read “Drive Supervisor level Inserted” and the [Save Recipes], [Save Config] configuration screen is displayed. -
Page 13: Cooking With The Cts Oven Controller
Rotisserie Oven Operation Cooking with the CTS Oven Controller View a Recipe There are up to 15 recipes programed in the control. Touch [▲] or [▼] to scroll through Touch and highlight desired recipe. the list. Touch [VIEW]. Touch and highlight the recipe name in the selection window. - Page 14 Rotisserie Oven Operation Cooking a Recipe (continued) When the oven reaches the programed LOAD OVEN screen is preheat temperature the LOAD OVEN displayed. screen is displayed. To exit the cook recipe The control will emit an audible alarm for 5 touch and hold [X] until seconds and the screen background will the control chirps twice.
-
Page 15: Configuring The Cts Controller For Use In The Vgg Oven
Rotisserie Oven Operation Configuring the CTS Controller for use in the VGG Oven The Controller configuration must be verified as described below after installing a CP0065 Controller in the VGG oven. Touch and hold the The area on the control screen is black. The lower right portion of the red graphic in this diagrams indicates the screen until the control... - Page 16 Rotisserie Oven Operation Touch the [Alarms] button on the Factory Access Screen. Alarm Configuration screen is displayed. Touch the [Heater] button at the bottom of the Alarm Configuration screen. Use the [+] and [-] buttons to set Time: to 3m and Temp: to 50F.
-
Page 17: Controller Errors, Warnings And Events
If the fan is not operating, call the authorized BKI service agency to service the oven. This message is displayed when the temperature in the oven’s control CTRL TEMP WARNING compartment rises to a temperature that will harm the oven’s components. -
Page 18: Events
Rotisserie Oven Operation Events Here is a list of controller system events which cause an entry in the History log: Factory Rst Factory Reset is performed as the controller is being tested at the factory. This resets the recipes and controller configuration to defaults and performs a touchscreen calibration. -
Page 19: Accessory Use
Rotisserie Oven Operation Accessory Use Trussing Chickens It is recommended that whole chickens be trussed before cooking. Trussing holds the wings and legs of the chicken tightly against the body. This improves the visual appeal of the chickens while they are cooking. In addition trussing keeps the chicken moist by retaining more of the natural juices and helps prevent the wing tips from burning. -
Page 20: V-Spits
Rotisserie Oven Operation V-Spits Up to four (4) whole chickens can be placed on a VGG-8 V-spit and up to four (3) whole chickens can be placed on a VGG-5 V-spit. Insert the tapered end of the V-spit under the legs and through the cavity of the trussed chicken as shown below. -
Page 21: Installation
Installation Serious injury, equipment damage or death could result if attempting to install this oven yourself. Ensure that an authorized BKI service agent install the oven. Unpacking and Handling It is the owners’ responsibility to file all freight claims with the delivering truck line. Inspect all cartons and crates for damage as soon as they arrive. - Page 22 Rotisserie Oven Installation Chart 1. Location and Clearance Electrical Specifications (North America) 1Ph + Gnd, 60Hz Volts Amps Breaker 29.3 23.5 27.8 Electrical Specifications (North America) 3Ph + Gnd, 60Hz Volts Amps Breaker 17.2 13.8 16.3 Electrical Specifications (Europe) 230/400 Volts, 3Ph + Gnd + E, 50Hz Amps Watts Breaker...
- Page 23 Rotisserie Oven Installation Electrical Specifications (North America) 3Ph + Gnd, 60Hz Volts Amps Breaker 29.7* 10.6* 26.4* 9.9* 28.7* 11.8* * Ratings per oven cavity. VGG-16 requires a separate power supply for each oven cavity. Electrical Specifications (Europe) 230/400 Volts, 3Ph + Gnd + E, 50Hz Model Amps Breaker...
-
Page 24: Guidelines For European Appliances
If for any reason the thermal cut-out operates, the oven will automatically shut down and should be switched ‘Off’, disconnected from the mains and allowed to cool. NOTE: - The thermal cut-out will not re-set automatically. The oven must not be re-used until a qualified electrician or BKI service agent has checked it. -
Page 25: Maintenance
5. Remove V-spits, meat forks, hanging baskets and drip trays from the unit and place them in a large sink to soak in hot cleaning solution. Clean the components with warm water, a sponge and BKI Cleaner. Wipe dry with a clean cloth. - Page 26 7. Place the Rotor System components in a large sink to soak in hot cleaning solution. Clean the components with warm water, a sponge and BKI Cleaner. Wipe dry with a clean cloth. 8. Remove the Fan Cover as described below: a.
- Page 27 9. Place the Fan Guard and Circulation Bottom in a large sink to soak in hot cleaning solution. Clean the components with warm water, a sponge and BKI Cleaner. Wipe dry with a clean cloth. 10. Carefully clean the fan blades using a scrub brush and hot cleaning solution. Do not bend or disfigure the fan blades.
-
Page 28: Troubleshooting
(where applicable). is not lit. Problem with building power Check circuit breaker at building power supply panel. If problem persists, contact BKI service agent for corrective action. Unit will not turn on. Blown Fuse Contact BKI service agent for corrective Main Power Isolator Light action. - Page 29 Rotisserie Oven Maintenance Problem Cause Possible Solution Defective blower fan motor. Contact BKI service agent for corrective action. Defective heating element. Contact BKI service agent for corrective action. Control displays “999” Temperature probe connection Contact BKI service agent for corrective under the temperature loose or defective probe.
-
Page 30: Accessories
Item MEAT BASKET w/ 4 GOOSERS, VGG-8 MB0037 (Not available for VGG-5) MEAT BASKET, VGG-5 MB0040 MEAT BASKET, VGG-8 MB0038 MEAT FORK, VGG-5 MF0044 MEAT FORK, VGG-8 MF0032 VEE SPIT, VGG-5 MF0045 VEE SPIT, VGG-8 MF0038 BKI RUBBER GLOVE G0089... -
Page 31: Wiring Diagrams
Rotisserie Oven Wiring Diagrams Wiring Diagrams Refer to the table below to find the wiring diagram associated with your unit. Wiring Diagram Part # Figure # VGG-8 10.2kW, 208V-240V, 3 Phase Delta SB55090000 Figure 11 VGG-8 12.0kW, 208V-240V, 3 Phase Delta SB55090100 Figure 12 VGG-8 10.2kW, 230/400V, 3 Phase Wye... - Page 32 Rotisserie Oven Wiring Diagrams Figure 11. VGG-8 10.2kW, 208V-240V, 3 Phase (SB55090000) SENSOR...
- Page 33 Rotisserie Oven Wiring Diagrams Figure 12. VGG-8 12.0kW, 208V-240V, 3 Phase (SB55090100) SENSOR...
- Page 34 Rotisserie Oven Wiring Diagrams Figure 13. VGG-8 10.2kW, 230/400, 50Hz, 3 Phase (SB55090200) SENSOR...
- Page 35 Rotisserie Oven Wiring Diagrams Figure 14. VGG-8 12.0kW, 230/400, 50Hz, 3 Phase (SB55090300) SENSOR...
- Page 36 Rotisserie Oven Wiring Diagrams Figure 15. VGG-5, 208-240V, 3 Phase (SB55092000) SENSOR...
- Page 37 Rotisserie Oven Wiring Diagrams Figure 16. VGG-5, 230/400V, 3 Phase (SB55092100) SENSOR...
-
Page 38: Notes
Rotisserie Oven NOTES NOTES 2812 Grandview Drive, Simpsonville, S.C. 29680, USA http://www.bkideas.com Made and printed in the U.S.A SS-OM-064.02 Revised 9/25/18...
Need help?
Do you have a question about the VGG Series and is the answer not in the manual?
Questions and answers