Table of Contents
Advertisement
Quick Links
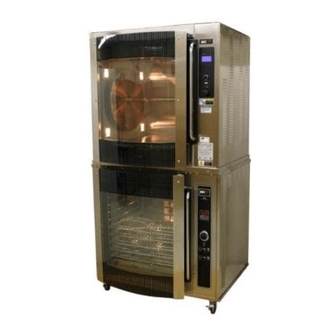
VECTO GRILL
VISUAL DISPLAY ROTARY OVENS
MODELS VG8/C & 16/C
Electronic Control
OPERATING INSTRUCTIONS
1
NOTICE:
THE COMBINATION OF FACTS, DATA, DESIGN ELEMENTS, ENGINEERING DATA, MANUFACTURING DATA & ASSEMBLY DATA
WHICH MAY BE CONTAINED IN THIS DOCUMENT ARE OF A PROPRIETARY NATURE TO BKI.
THESE MATERIALS ARE NOT TO BE USED OR COPIED WITHOUT PRIOR WRITTEN PERMISSION FROM BKI.
ALL RIGHTS ARE RESERVED.
Advertisement
Table of Contents

Subscribe to Our Youtube Channel
Related Manuals for BKI 16/C


Summary of Contents for BKI 16/C
-
Page 1: Operating Instructions
VECTO GRILL VISUAL DISPLAY ROTARY OVENS MODELS VG8/C & 16/C Electronic Control OPERATING INSTRUCTIONS NOTICE: THE COMBINATION OF FACTS, DATA, DESIGN ELEMENTS, ENGINEERING DATA, MANUFACTURING DATA & ASSEMBLY DATA WHICH MAY BE CONTAINED IN THIS DOCUMENT ARE OF A PROPRIETARY NATURE TO BKI. -
Page 2: Table Of Contents
NOTE: - THE THERMAL CUT-OUT WILL NOT RESET AUTOMATICALLLY. The oven must not be reused until it has been checked by a qualified electrician or a BKI appointed service agent. THE COMBINATION OF FACTS, DATA, DESIGN ELEMENTS, ENGINEERING DATA, MANUFACTURING DATA & ASSEMBLY DATA WHICH MAY BE CONTAINED IN THIS DOCUMENT ARE OF A PROPRIETARY NATURE TO BKI. -
Page 3: Unpacking And Setting Up
…. it will always be an asset to your business. UNPACKING & SETTING UP Your “Vectogrill” oven has been completely assembled and tested before despatch. It has been packed for safe shipment to your premises. Meat-forks and other accessories may have been packed separately, check all parts and accessories against the delivery note. -
Page 4: Standard Meatforks
Hold the meat-fork with the handle to the right–hand side, facing up Stop rotor disc using the rotation switch Open the oven door Place the pointed ends of the meat-fork into the left-hand disc holes Push the meat-fork into the disc to allow the right-hand (handle end) pins locate into the right-hand disc. -
Page 5: The Controls
THESE MATERIALS ARE NOT TO BE USED OR COPIED WITHOUT PRIOR WRITTEN PERMISSION FROM BKI. The Controls. NOTICE: ALL RIGHTS ARE RESERVED. Navigation Keys Temperature “UP & Down” Time “Up & Down” Program “Up & Down” Heat “ON” Oven Light Switch (Cont). - Page 6 Xtra : Each press of the Xtra button adds five minutes to the programmed cook time. Press this button up to 11 times for an additional 55 minutes of cook time. The oven will be maintained at the final program temperature.
- Page 7 A quick press of the Stop button ` pauses` the controller during a pre-heat or cook/hold cycle. Press and hold the Stop button to end a Pre-heat or Cook/Hold cycle. Note: the oven fans will continue to run for 20 seconds after the end of the Cook/Hold cycle, this is normal.
-
Page 8: Programming
The oven can be programmed for Hold mode and Single-stage Cooking as follows: • Turn main power isolator “ON” • Turn oven main switch “ON” the controller will pause for a moment, and then; • Display shows Actual oven Temp •... -
Page 9: Important Notes
Use the Navigation keys to set the required Hold time and temperature settings. Remember, The “Xtra Time” button will only function if the “Hold” function has been programmed or the oven is above the hold temperature. THE COMBINATION OF FACTS, DATA, DESIGN ELEMENTS, ENGINEERING DATA, MANUFACTURING DATA & ASSEMBLY DATA WHICH MAY BE CONTAINED IN THIS DOCUMENT ARE OF A PROPRIETARY NATURE TO BKI. - Page 10 Locking the Controller In certain cases the controller may be locked off to prevent unauthorised changes or additions to the program menu. One the controller has been locked, the operator may change the program number (as described earlier) but can not change the Cook Times, Temperatures or Hold features within each program number.
-
Page 11: Operating
If the oven is not required, press and hold the Stop button to switch oven (Elements & fans “OFF”). A short press on the pre-heat button will put the oven in pause, (the light next to the pre-heat button will flash) the heating elements and fans will automatically switch off after 20 seconds. - Page 12 (if the oven is close to, or above the required cook temperature) Select a program number Wait until the Prog & Cook button lights go out, load the oven and then press the Cook button to start program. (Cook details will re-appear and timer will start to countdown) We would strongly advise that you always pre-heat the oven, especially when cooking full loads! The controller will automatically change between Stage-1 &...
-
Page 13: Operating Overview
If NOT, add Xtra time Note: A quick press of the Stop button puts the oven in pause mode; the function light (cook, hold) will flash, Press the flashing function button again to restart. Press & hold stop button until function lights go out to stop oven completely. -
Page 14: Do`s & Don'ts
Spare sets of accessories or drip pans are available to provide for advance preparation and cook continuity. Allow accessories, drip pans, etc to air dry Before replacing into oven. Clean glass doors at regular intervals between cooks. Clean glass with a dilute solution of warm water and Anti-bacterial detergent using a soft cloth. -
Page 15: Daily Cleaning Schedule
® fat pump, replace fat drawer. • Remove Fan cover. Spray both sides of the fan cover with Oven cleaner, lay fan cover in the bottom of the oven, leave for 10 mins. • Spray Oven cleaner onto the interior oven walls leave for 10 mins.
Need help?
Do you have a question about the 16/C and is the answer not in the manual?
Questions and answers