Allied Telesis AT-TQ5403 Quick Installation Manual
Hide thumbs
Also See for AT-TQ5403:
- Management software user manual (142 pages) ,
- User manual (98 pages) ,
- Installation manual (58 pages)
Advertisement
Quick Links
Quick Installation Guide
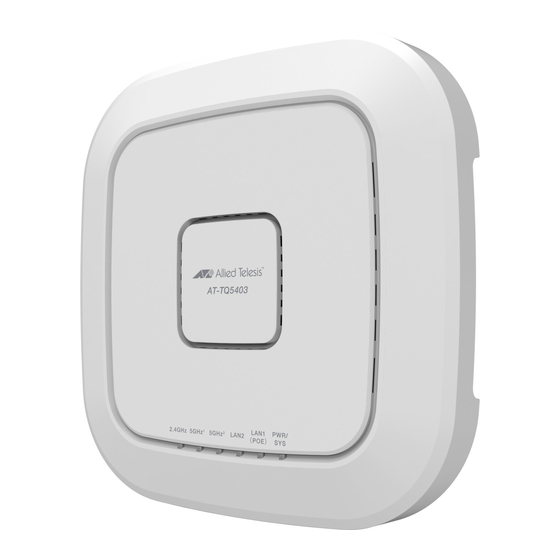
AT-TQ5403
Wireless Access Point
Installation and User's Guides
This document contains an abbreviated version of the installation instructions for the
AT-TQ5403 Wireless Access Point. For complete installation and management
instructions, refer to the AT-TQ5403 Installation Guide and Wireless Access Point User's
Guide on the Allied Telesis web site at www.alliedtelesis.com/support.
Safety and Electromagnetic Emissions Certificates
For Safety and Electromagnetic Emissions certificates, refer to the AT-TQ5403 Installation
Guide.
Installation Options
This quick installation guide explains how to install the device on a desktop, wall or
ceiling.
Physical Description
For a complete physical description of the AT-TQ5403 Wireless Access Point, refer to the
Allied Telesis Installation Guide. The back edge view of the AT-TQ5403 is shown below.
Kensington
Ethernet
Lock Port
LAN1-POE+
LAN2
Console
Ports
Serial Port
Package Contents of the AT-TQ5403 Wireless Access Point
The following items should be in the shipping container:
One AT-TQ5403 Wireless Access Point
This AT-TQ5403 Quick Installation Guide
Two mounting-bracket screws
One mounting bracket
Two RJ-45 Dust Caps
If you are planning to use the AT-TQ5403 DC IN jack to power the device or use a
Kensington anti-theft cable/lock, you must separately order the AT-MWS0091 AC/DC
Power Adapter (or equivalent power supply), or anti-theft cable/lock. For installation
information on the adapter and anti-theft cable/lock device, refer to the AT-TQ5403
Installation Guide.
If any item is missing or damaged, contact your Allied Telesis sales representative for
assistance. You should retain the original shipping material in case you need to return the
unit to Allied Telesis.
*613-002592 Rev B*
613-002592 Rev B
Installing the Wireless Access Point on a Desktop
To install the access point on a desktop, perform the following procedure:
1.
Connect the two Ethernet cables. If you choose to power the access point with a DC
power supply, plug the DC connector into the DC IN jack.
2.
If you choose to install an anti-theft cable/lock to the AT-TQ5403, follow the
instructions provided in the vendor's packaging for the installation.
3.
The installation of your AT-TQ5403 Access Point on the table top surface is now
complete.
Installing the Wireless Access Point on a Wall or Ceiling
To install the access point on a wall or ceiling, there are three stages:
Pre-Fitting Mounting Bracket on AT-TQ5403 Access Point
Installing Mounting Bracket
Attach Chassis to Mounting Bracket
Pre-Fitting Mounting Bracket on AT-TQ5403 Access Point
1.
Install the two screws (provided) in the bottom side of the access point chassis.
Refer to the following figure.
2.
Align and insert the mounting bracket keyholes over the two screws installed in
DC Power
Step 1 and slide the bracket into the narrow part of the keyhole slots.Refer to the
Button
following figure.
DC Input
DC Input
Reset
Button
Jack
Jack
3.
Tighten the screws so that they touch the mounting bracket plate and then loosen
them by 1/4 turn. Adjust the chassis screws so they are loose enough to allow the
mounting bracket to slide in the keyhole slots, but tight enough to be hold the chassis
close to the bracket without rattling.
4.
Slide the mounting bracket forward and temporarily remove it from the access point
so the bracket can be independently mounted on the ceiling or wall in the next steps.
Installing Mounting Bracket
1.
Choose an allowable orientation of the access point on the wall from the examples
shown in the next figure. When installing the mounting bracket, ensure that its thumb
screw is oriented in the same direction as the front of the access point chassis. Refer
to the arrows in the following figure.
1
Ceiling
Wall
2.
Using the mounting bracket as a template on the ceiling or the wall, mark the two
key-hole slots with a pencil in the location and orientation where you want to install
the access point.
3.
Pre-drill the two marked locations for the keyhole slots on the hard-surface ceiling or
wall and install two M4 screws and anchors (not provided). Leave the screws loose
enough so the bracket can slide under the screw head
4.
Insert the openings of the bracket key-holes under the two screw heads and slide the
bracket into narrow end of the key-hole slot opening. Tighten the screws snugly onto
the bracket.Refer to the following figure.
Ceiling
5.
Locate the two existing open bracket mounting holes in the opposite corners from
the key-hole slots. Pre-drill holes through these holes into the mounting
surface.Refer to the following figure.
Ceiling
6.
Install and tighten two M4 screws (not provided) in the holes prepared in Step 5. The
physical position of the bracket is now stationary.
2
Wall
Wall
3
Advertisement

Subscribe to Our Youtube Channel
Related Manuals for Allied Telesis AT-TQ5403


Summary of Contents for Allied Telesis AT-TQ5403
- Page 1 Two RJ-45 Dust Caps If you are planning to use the AT-TQ5403 DC IN jack to power the device or use a Tighten the screws so that they touch the mounting bracket plate and then loosen Kensington anti-theft cable/lock, you must separately order the AT-MWS0091 AC/DC them by 1/4 turn.
- Page 2 The non-US model of this product has a country code setting that must be set during the provided herein is subject to change without notice. In no event shall Allied Telesis, Inc. be initial management session of the unit. The setting ensures that the unit operates in Increase the separation between the equipment and receiver.
Need help?
Do you have a question about the AT-TQ5403 and is the answer not in the manual?
Questions and answers