Table of Contents
Advertisement
Quick Links
MW21
NCPR Simulator Plus
Instruction
Manual
Contents
●
●
Right Arm Installation
●
Umbilical Catheterization
●
Do not mark on the model and other components
with pen or leave any printed materials contacted on
surface. Ink marks on the model cannot be removed.
Simulated Blood making
NG/OG Tube Feeling
P.1
P.1
P.2
Advertisement
Table of Contents

Related Manuals for Kyoto Kagaku NCPR Simulator Plus


Summary of Contents for Kyoto Kagaku NCPR Simulator Plus
-
Page 1: Table Of Contents
Do not mark on the model and other components with pen or leave any printed materials contacted on surface. Ink marks on the model cannot be removed. MW21 NCPR Simulator Plus Instruction Manual Contents Introduction ● Manufacturer’s Note DOs and DON’Ts Before you start ●... -
Page 3: Introduction
Manufacturer’s Note / Introduction DOs and DON’Ts Manufacturer’s Note Features Provides training in regards to the routine procedure for umbilical catheterization for both the operator and assistant. Omphalotomy/ Catheter insertion/ Ligation with clip or string/ Placement Model provides training for three types of punctures and catheterization procedures. Landmark palpation access/ Transilluminator acceess The simulator is designed for training in neonatal care. -
Page 4: Before You Start Set Includes/Con Guration
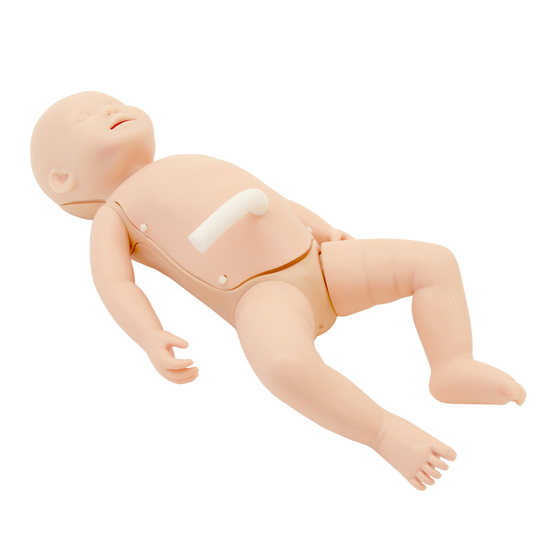
Set includes Before You Start Con guration Set Includes Before your first use, ensure that you have all components listed below. C A D Neonatal model Syringe *Right arm is not connected when shipped. E Simulation blood tube (Red) Lubricant Simulation blood tube (Blue) Plastic jar Simulation blood (swab type) -
Page 5: Preparation
Before Training Preparation Right Arm Installation 1. Remove the body skin. (The skin is fixed by six braces.) 2. Lift the lung and rib and remove the umbilical part. 3. Attach the right arm to the shoulder at red circle. 4. -
Page 6: Umbilical Blood Preparation
Before Training Preparation 2 Simulated Blood making 1. Pour 1000mL of water into the plastic beaker. Put the simulated blood (swab type) into the beaker and stir the water sufficiently to prepare the simulated blood. Caution Take care not to drop simuleted blood on clothes as simuleted blood stains can be very di cult to remove. -
Page 7: Installation Of Simulated Blood Tube
Before Training Preparation Umbilical blood preparation 3 2. Put the umbilical part in the body, and the lung and rib on it. Cover the model with the body skin. Put the umbilical cord through the body skin hole first, and put the body skin on the body to fix by six braces. -
Page 8: Injection Of The Simulated Blood
Before Training Preparation 5 Injection of the Simulated Blood 1. Connect syringe to the red tube to inject the simulated blood, and open the blue cock on the tip of blue tube. Put the tip of blue tube in the plastic jar, and keep injecting the simulated blood until the blood ejects from the blue tube. -
Page 9: Training
Training Positioning keeping/ Assessment of Anterior Fontanel Training Intravenous Puncture/ Central Venousline Catheterization 1 Training Positioning keeping/ Assessment of Anterior Fontanel Training for the position keeping and changing Palpating to assess the anterior fontanel 2 Intravenous Puncture/ Central Venousline Catheterization Landmark Palpation Transillumination ●... - Page 10 Umbilical Catheterization Training NG/OG Tube Feeling 3 Umbilical Catheterization Provides training for routine procedure of umbilical catheterization for both operator and assistant. Omphalotomy ● Ligation with clip or string ● ● Catheter insertion Placement ● Recommened Catheter Size; 16G 30cm Artery and Vein are elaborated 4...
-
Page 11: Airway Suction Cpr
Airway Suction Training 5 Airway Suction Training for the nasogastric and orogastric suction Recommended catheter size; 5Fr. *Use the lubricant to spray the catheter, nasal and oral cavity of model before practicing. 6 Training for chest compression 9... -
Page 12: Airway Management
Training Airway Management Airway Management 6 Training for the procedure of intubation with laryngoscope ● Bag-Valve-Mask ventilation Training for the assessment of intubation to the esophagus or one-lung or two-lung intubation ● Preparing for Intubation Spray the lubricant into the oral cavity and device before intubation practice. Recommended device size Tube:2.0~3.0 mm Blade:0... -
Page 13: After Training
Drainage of simulated blood and After Training umbilical blood,stomach uid / replacing skin mask 1 Drainage of Simulated blood, Umbilical blood and Stomach uid 1. Discharge the simulated blood from the blood tube after practice. Connect the empty syringe to the red tube connector to draw the simulated blood after opening the blue cock. -
Page 14: Veins Replacement
After Training Veins Replacement Veins Replacement 3 Replacing the vain tubes of the leg and arm 1. Remove the leg skin and disconnect the tube from the connectors in femoral part to remove the vein tube. When installing new tube, do the opposite order of processes. Put the tube along the trench on the leg and foot. - Page 16 Do not mark on the model and other components with pen or leave any printed materials Caution contacted on surface. Ink marks on the model cannot be removed. For inquiries and service, please contact your distributor or KYOTO KAGAKU CO., LTD. ■ (World Wide) ■...
Need help?
Do you have a question about the NCPR Simulator Plus and is the answer not in the manual?
Questions and answers