
Related Manuals for SMAR DT302


Summary of Contents for SMAR DT302
- Page 1 OPERATION, MAINTENANCE AND INSTRUCTIONS MANUAL FIELDBUS CONCENTRATION DENSITY TRANSMITTER MAY / 16 DT302 VERSION 3 D T 3 0 2 M E...
- Page 2 Specifications and information are subject to change without notice. Up-to-date address information is available on our website. web: www.smar.com/contactus.asp...
- Page 3 The DT302 is available as a product on its own, but also replaces the circuit board for the DT301. They use the same sensor board. Refer to the maintenance section of this manual for instructions on upgrading.
- Page 4 Smar provides specific training to instruct and qualify such professionals. However, each country must comply with the local safety procedures,...
-
Page 5: Table Of Contents
" TABLE OF CONTENTS UGEVKQP"3"/"KPUVCNNCVKQP"000000000000000000000000000000000000000000000000000000000000000000000000000000000000000000000000000000000000000000"303" GENERAL ................................1.1 RECOMMENDATION IN USING OF DT302 ......................1.1 MODELS OF DT302 ..............................1.2 FIXATION ................................. 1.2 A - INDUSTRIAL MODEL TOP MOUNTING - BETWEEN CENTRE OF THE SENSORS 250 MM ....... 1.3 B – INDUSTRIAL MODEL SIDE MOUNTING ......................1.4 C –... - Page 6 FV524"⁄"Qrgtcvkqp."Ockpvgpcpeg"cpf"Kpuvtwevkqpu"Ocpwcn" UGEVKQP"6"/"OCKPVGPCPEG"RTQEGFWTGU0000000000000000000000000000000000000000000000000000000000000000000000000000000000000000"603" GENERAL ................................4.1 PROCEDURE TO CHANGE THE DT302 MAIN BOARD ..................4.2 DISASSEMBLY PROCEDURE ..........................4.2 GROUP OF THE PROBE (16A, 16B, 19A OR 19B) ....................4.2 ELECTRONIC CIRCUIT ............................4.3 REASSEMBLE PROCEDURE ..........................4.3 GROUP OF THE PROBE (16A, 16B, 19A OR 19B) ....................4.3 ELECTRONIC CIRCUIT ............................
- Page 7 Kpuvcnncvkqp"Hnqyejctv" " Kpuvcnncvkqp"Hnqyejctv" XKK"...
- Page 8 FV524"⁄"Qrgtcvkqp."Ockpvgpcpeg"cpf"Kpuvtwevkqpu"Ocpwcn" XKKK"...
-
Page 9: General
General The DT302 has a built-in temperature sensor to compensate for temperature variations. At the factory, each transmitter is submitted to a temperature cycle process, and the characteristics under different pressures and temperatures are recorded in the transmitter memory. At the field, this feature minimizes the temperature variation effect. -
Page 10: Models Of Dt302
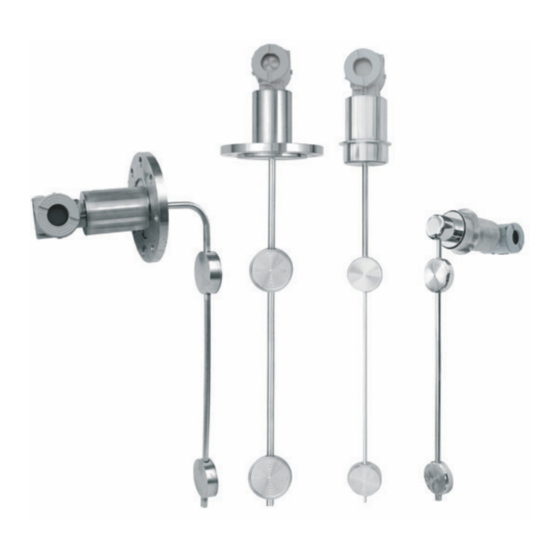
DT302 – Operation, Maintenance and Instructions Manual Models of DT302 DT302I - Industrial Model, for general use. DT302S- Sanitary Model, for food, pharmaceutical industries and other applications where is necessary sanitary conditions. The industrial model uses flanged connection according to the standard ANSI B16.5 or DIN 2526. -
Page 11: A - Industrial Model Top Mounting - Between Centre Of The Sensors 250 Mm
Installation A - Industrial Model Top Mounting - Between Centre of the Sensors 250 mm Figure 1.1 – DT302 Dimensional (A) -
Page 12: B - Industrial Model Side Mounting
DT302 – Operation, Maintenance and Instructions Manual B – Industrial Model Side Mounting (14,4) (9,65) (5,73) (0,24) (3,23) (3,50) ELECTRICAL CONNECTION FLANGED CONNECTION 4” Figure 1.1 – DT302 Dimensional (B) -
Page 13: C - Sanitary Model Top Mounting - Between Centre Of The Sensors 500 Mm
Installation C – Sanitary Model Top Mounting - Between Centre of the Sensors 500 mm (3,27) ELECTRICAL CONNECTION (3,50) 4 TRI-CLAMP CONNECTION (4,72) Figure 1.1 – DT302 Dimensional (C) -
Page 14: D - Sanitary Model Side Mounting
DT302 – Operation, Maintenance and Instructions Manual D – Sanitary Model Side Mounting (11,53) (9,05) (2,48) (3,50) ELECTRICAL CONNECTION 4” TRI-CLAMP CONNECTION Figure 1.1 – DT302 Dimensional (D) -
Page 15: E - Industrial Model Top Mounting
Installation E – Industrial Model Top Mounting (3,23) ELECTRICAL CONECTION (3,50) 4” FLANGED CONNECTION Figure 1.1 – DT302 Dimensional (E) -
Page 16: F - Sanitary Model Top Mounting - Between Centre Of The Sensors 800 Mm
DT302 – Operation, Maintenance and Instructions Manual F – Sanitary Model Top Mounting - Between Centre of the Sensors 800 mm Electrical Connection Flange Connection 4" RF ANSI B16,5 150# 15,8 Figure 1.1 – DT302 Dimensional (F) -
Page 17: A - Typical Installation For Low Flow Tank (Industrial Model)
Sch 5 S Tube 2” Sch. 5S ext. 60,3) Curve 2” 90º RL Sch. 5S Reduction 2” x 1” Curve 1” 90º RL Sphere Valve Drain 1” Sch. 5S Sch. 5 S (7,72) Figure 1.2 – Typical Installation for DT302 (A) -
Page 18: B - Typical Installation For Low Flow Tank (Sanitary Model)
Reduction 4” x 2” Tube 2” Sch. 5 S Sch. 5 S ext. 60,3) Curve 2” 90º RL Sch. 5 S Curve 1 1/2” 90º ext. 38,1) Reduction 2 1/2” x 1 1/2” Figure 1.2 – Typical Installation for DT302 (B) 1.10... -
Page 19: C - Typical Installation For High Flow Tank (Industrial Model)
Sch. 5 S ext. 114,3) Curve 4” 90º RC Sch 5 S Curve 2” 90º RC Reduction 4” x 2” Sphere Valve Drain 1” Sch. 5 S Sch. 5 S (6,89) Figure 1.2 – Typical Installation for DT302 (C) 1.11... -
Page 20: D - Typical Installation In Overflow Tanks
DT302 – Operation, Maintenance and Instructions Manual D – Typical Installation in Overflow Tanks Electrical Connection Flange connection 4" RF ANSI B16,5 150# 15,8 Figure 1.2 – Typical Installation for DT302 (D) 1.12... -
Page 21: E - Typical Installation In Tank (Industrial Model)
Installation E – Typical Installation in Tank (Industrial Model) (4,72) (3,15) FLANGE 4” ANSI B16,5 MINIMUM LEVEL MINIMUM DIAMETER 20” Figure 1.2 – Typical Installation for DT302 (E) 1.13... -
Page 22: F - Typical Installation In Tank (Sanitary Model)
DT302 – Operation, Maintenance and Instructions Manual F – Typical Installation in Tank (Sanitary Model) (2,24) TRI-CLAMP 4” DT301 MINIMUM LEVEL MINIMUM DIAMETER 20” Figure 1.2 – Typical Installation for DT302 (F) 1.14... -
Page 23: G - Typical Installation In Tank With Diaphragm Protection (Industrial Model)
Installation Typical Installation in Tank with Diaphragm Protection (Industrial Model) (4,72) (3,15) Flange 4” ANSI B16,5 MINIMUM LEVEL PROTECTION DEVICE PROTECTION DEVICE MINIMUM DIAMETER 20” Figure 1.2 – Typical Installation for DT302 (G) 1.15... -
Page 24: H - Typical Installation For Low Flow Tank (Industrial Model)
DT302 – Operation, Maintenance and Instructions Manual H - Typical Installation for Low Flow Tank (Industrial Model) Figure 1.2 – Typical Installation for DT302 (H) 1.16... -
Page 25: I - Typical Installation In Tank For Interface Level (Industrial Model)
Installation I - Typical Installation in Tank for Interface Level (Industrial Model) FLANGE 4” ANSI B16,5 TANK (4,72) (3,15) SENSOR INTERFACE LEVEL WATER SENSOR Figure 1.2 – Typical Installation for DT302 (I) 1.17... -
Page 26: J - Typical Installation In Tank For Stand Pipe Interface Level (Industrial Model)
DT302 – Operation, Maintenance and Instructions Manual J - Typical Installation in Tank for Stand Pipe Interface Level (Industrial Model) FLANGE 4” ANSI B16,5 TANK DRAIN VENT INTERFACE LEVEL WATER DIAMETER 4” DIAMETER 1” DRAIN Figure 1.2 – Typical Installation for DT302 (J) 1.18... -
Page 27: Housing Rotation
Various types of Fieldbus devices may be connected on the same bus. The DT302 receives power from the bus via the signal wiring. The power supply may come from a separate unit or from another device such as a controller or DCS. -
Page 28: Bus Topology And Network Configuration
DT302 – Operation, Maintenance and Instructions Manual Bus Topology and Network Configuration Wiring Other types of cable may be used, other than for conformance testing. Cables with improved specifications may enable longer trunk length or superior interface immunity. Conversely, cables with inferior specifications may be used subject to length limitations for trunk and spurs plus possible nonconformance to the RFI/EMI susceptibility requirements. -
Page 29: Intrinsic Safety Barrier
Use of SB312LP, DF47-12 or DF47-17 is recommended. Jumper Configuration In order to work properly, the jumpers J1 and W1 located in the DT302 main board must be correctly configured (See Table 1.1 - Description of the Jumpers). This jumper enables the simulation mode parameter in the AI block. -
Page 30: Installation In Hazardous Areas
Required” could be applied for Explosion Proof Version. (CSA Certification). The standard plugs provided by Smar are certified according to the standards at FM, CSA and CEPEL. If the plug needs to be replaced, a certified plug must be used. -
Page 31: Functional Description - Sensor
Section 2 OPERATION The DT302 Concentration Density Transmitter use capacitive sensors (capacitive cells) as pressure sensing elements. This is exactly the same sensor as the DT301 series uses, the sensor modules are therefore interchangeable. Figure 2.1 - Capacitive Cell Functional Description - Sensor Where, ≥... -
Page 32: Functional Description - Electronics
DT302 – Operation, Maintenance and Instructions Manual Functional Description – Electronics Refer to the block diagram. The function of each block is described below. SENSOR ASSEMBLY MAIN CIRCUIT BOARD PROBE POWER SUPPLY ISOLATION FIRMWARE DOWNLOAD INTERFACE LOCAL ADJUSTE SUPPLY EEPROM... - Page 33 Operation Fieldbus Modem Monitors line activity, modulate and demodulate communication signals, inserts and deletes start and end delimiters, and checks integrity of frame received. Power Supply Takes power of the loop-line to power the transmitter circuitry. Power Isolation Isolates the signals to and from the input section, the power to the input section must be isolated. Display Controller Receives data from the CPU identifying which segments on the liquid crystal display to turn on.
- Page 34 DT302 – Operation, Maintenance and Instructions Manual...
-
Page 35: Transducer Block
CONFIGURATION One of the many advantages of Fieldbus is that device configuration is independent of the configurator. The DT302 may be configured by a third party terminal or operator console. Any particular configurator is therefore not addressed here. The DT302 contain one input transducer block, one resource, one display transducer block and functions blocks. -
Page 36: Concentration/Density Transducer Block Parameter Description
DT302 – Operation, Maintenance and Instructions Manual Concentration/Density Transducer Block Parameter Description Parameter Description ST_REV Indicates the level of static data. TAG_DESC Transducer block description. STRATEGY This parameter is not checked and processed by transducer block. ALERT_KEY Number of identification in the plant. - Page 37 Pressure calculated according to the SIMULATE_DENSITY_VALUE. CALC_PRESS_CAL_POINT_LO Calculated pressure value by AUTO_CAL_POINT_LO procedure. CALC_PRESS_CAL_POINT_HI Calculated pressure value by AUTO_CAL_POINT_HI procedure. DT302 range code: Range 1 ( 0.5 @ 1.8 g/cm DT_RANGE_CODE Range 2 (1.0 @ 2.5 g/cm Range 3 ( 2.0 @ 5.0 g/cm DENSITY_KGM3 Density Value in Kg/m3.
-
Page 38: Concentration/Density Transducer Block Parameter Attributes
DT302 – Operation, Maintenance and Instructions Manual Parameter Description K_TEMP Temperature constant used to calculate generic concentration. MOUNTING_POSITION Indicates de probe assembly position (direct or reverse). Table 3.1 – Concentration/Density Transducer Block Parameter Description Concentration/Density Transducer Block Parameter Attributes Relative... - Page 39 Configuration Relative Object Parameter Mnemonic Data Type Store Size Access Default –value Index Type POLYNOMIAL_VERSION Simple Unsigned8 CHARACTERIZATION_TYPE Simple Unsigned8 Enable&Backup CURVE _BYPASS_LD Simple Unsigned16 CURVE_LENGTH Simple Unsigned8 CURVE_X Record Array of Float CURVE_Y Record Array of Float CAL_POINT_HI_BACKUP Simple Float 5080 CAL_POINT_LO_ BACKUP...
-
Page 40: Concentration/Density Transducer Block View Object
DT302 – Operation, Maintenance and Instructions Manual Concentration/Density Transducer Block View Object Relative Parameter Mnemonic View_1 View_2 View_3 View_4 Index ST_REV TAG_DESC STRATEGY ALERT_KEY MODE_BLK BLOCK_ERR UPDATE_EVT BLOCK_ALM TRANSDUCER_DIRECTORY TRANSDUCER_TYPE XD_ERROR COLLECTION_DIRECTORY PRIMARY_VALUE_TYPE PRIMARY_VALUE PRIMARY_VALUE_RANGE CAL_POINT_HI CAL_POINT_LO CAL_MIN_SPAN CAL_UNIT SENSOR_TYPE... -
Page 41: How To Configure The Transducer Block
Configuration Relative Parameter Mnemonic View_1 View_2 View_3 View_4 Index DATASHEET ORDERING_CODE MAXIMUM_MEASURED_PRESSURE MAXIMUM_MEASURED_TEMPERATURE ACTUAL_OFFSET ACTUAL_SPAN MAXIMUM_OFFSET_DEVIATION MAXIMUM_GAIN_DEVIATION OVERPRESSURE_LIMIT MAXIMUM_NUMBER_OF_OVERPRESSURE GRAVITY HEIGHT MEASURED_TYPE LIN_DILATATION_COEF PRESSURE_COEFFICIENT ZERO_ADJUST_TEMP HEIGHT_MEAS_TEMP TEMP_ZERO TEMP_GAIN AUTO_CAL_POINT_LO AUTO_CAL_POINT_HI SOLID_POL_COEFF_0 SOLID_POL_COEFF_1 SOLID_POL_COEFF_2 SOLID_POL_COEFF_3 SOLID_POL_COEFF_4 SOLID_POL_COEFF_5 SOLID_LIMIT_LO SOLID_LIMIT_HI PRESS_COMP SIMULATE_PRESS_ENABLE SIMULATE_PRESS_VALUE SIMULATE_DENSITY_VALUE CALCULATED_PRESS_VALUE... - Page 42 The method is generally defined as guide line to help the user to make common tasks. The configuration tool identifies each method associated to the parameters and enables the interface to it. The Syscon (System Configurator) configuration software from Smar, for example, can configure many parameters of the blocks.
- Page 43 Configuration Figure 3.4 - Transducer Type Configuration Using this window, the user can set the transducer type according to the application, selecting "Density". Figure 3.5 - Measured Type Configuration Also, the user can select the Measured Type, choosing Density (g/cm³), Density (Kg/m³), Relative Density @ 20°C (g/cm³), Relative Density @ 4°C (g/cm³), Baumé, Brix, Plato Degree, INPM, Relative Density Alcohol 0 - 100, Solid Percent, Density (lb/ft³) and API.
-
Page 44: Engineering Unit Selection
%sol = a0 + a1 bme1 + a2 bme2 + a3 bme3 + a4bme4 + a5 bme5 The table and the graph below indicate the application of the DT302 polynomial that relates Baume degree to solid percent, generating the polynomial: y = 0.004768x4 - 0.760813x3 + 45.407284x2 - 1200.648795x + 11919.089787. -
Page 45: How To Configure The Analog Input Block
Configuration WARNING The XD_SCALE from transducer block should follow the measured type unit and its range; otherwise an error is going to appear in the XD_ERROR. Configuration parameters for concentration and density algorithm. Polynomial Coefficients for Solid Percent calculation. Figure 3.6 – Density Parameters AI XD_SCALE.unit for Concentration/Density Range 1 Range 2... -
Page 46: Lower And Upper Concentration/ Density Calibration
The calibration is used to match the reading with the correct concentration/density. Please, sure that the DT302 is measuring concentration/density. Open the Transducer Block and see the Transducer Type parameter. Please, see the following figure: 3.12... - Page 47 Configuration Figure 3.8 – Transducer Block – Transducer Type Selection If is required an adjustment of unit, please just select the desired unit using the measured type parameter according to the application. If the adjust requires a changing of measured values, please, calibrate the device with reference, according to these steps: •...
-
Page 48: Lower And Upper Concentration/ Density Self-Calibration
Lower Calibration (Air Self-Calibration) Place the DT302 in work position (vertical) and facing the air, wait approximately 5 minutes for stabilization. To execute the lower calibration, write a value to AUTO_CAL_POINT_LO. Any value written will calibrate internally the transmitter in 1.2 Kg/m³. -
Page 49: Pressure Calibration
Configuration Via Local Adjustment Concentration/Density Calibration The calibration process is always with reference, it means that the user must apply to the transmitter the measuring conditions. In order to calibrate via local adjustment, firstly is necessary to configure the TRDTY, LOWER and UPPER in the Display Function Block. For details, please see the section 'Display Transducer Block'. - Page 50 DT302 – Operation, Maintenance and Instructions Manual Upper: SENSOR_RANGE_EUO < NEW_UPPER < SENSOR_HI_LIMIT * 1.25 Otherwise, Invalid calibration request. (NEW_UPPER - TRIMMED_VALUE) < SENSOR_HI_LIMIT * 0.1 Otherwise, Excessive correction. (NEW_UPPER - CAL_POINT_LO) >CAL_MIN_SPAN * 0,75 Otherwise, Invalid calibration request. Lower: SENSOR_RANGE.EU0 <...
-
Page 51: Temperature Calibration
Figure 3.12 – Temperature Calibration Configuration Screen Sensor Data Reading Always when DT302 is on, is verified if the serial number of the sensor in the sensor board is the same that the saved serial number in EEPROM in the main board. When these numbers are different (a swap of sensor set or main board was carried through) the data stored in the EEPROM of sensor board is copied to the EEPROM of the main board. -
Page 52: Transducer Display - Configuration
Series 302 field devices from Smar has the same methodology to handle with it. So, since the user has learned once, he is capable to handle all kind of field devices from Smar. All functions blocks and transducers defined according Profibus PA have a description of their features written, by the Device Description Language. -
Page 53: Definition Of Parameters And Values
Configuration In order to work with the local adjustment using the magnetic tool, it is necessary to previously prepare the parameters related with this operation via SYSCON (System Configuration). There are seven groups of parameters, which may be pre-configured by the user in order to able, a possible configuration by means of the local adjustment. - Page 54 DT302 – Operation, Maintenance and Instructions Manual In case you wish to visualize a certain tag, opt for the index relative equal to zero, and for the sub- index equal to one (refer to paragraph Structure Block in the Function Blocks Manual).
-
Page 55: Calibrating Using Local Adjustment
Without display, the local adjustment is not possible. Figure 3.16 - Local Adjustment Table 3.4 shows the actions on the Z and S holes on the DT302 when Local Adjustment is enabled. HOLE ACTION Initializes and rotates through the available functions. -
Page 56: W1 Jumper Connections
DT302 – Operation, Maintenance and Instructions Manual W1 Jumper Connections If W1 (see figure 3.21) is connected to ON, the local adjustment programming tree is enabled and then important block parameters can be adjusted and communication can be pre-configured via local adjustment. - Page 57 S and from orifice S. once more LOC ADJ should be displayed. Figure 3.19 - Step 2 - DT302 Place the magnetic tool in orifice Z. If this is the first In this option the configuration, the option first variable...
- Page 58 DT302 – Operation, Maintenance and Instructions Manual In order to calibrate the In order to decrement upper value (UPPER), the upper value, place insert the magnetic tool the magnetic tool in in orifice S as soon as orifice Z to shift the...
-
Page 59: General
The transmitter eventually can require maintenance, and then it may be changed in the field. In this case, the possibly damaged sensor should be returned to Smar for evaluation and, if necessary, repair. Refer to the item "Returning Materials" at the end of this Section. -
Page 60: Procedure To Change The Dt302 Main Board
DT302 – Operation, Maintenance and Instructions Manual If the problem is not presented in the table above follow the Note below: NOTE The Factory Init should be tried as a last option to recover the equipment control when the equipment presents some problem related to the function blocks or the communication. -
Page 61: Electronic Circuit
Only after that is recommended to install the main board. Electronic Circuit Plug sensor connector and power supply connector to main board. Attach the display to the main board. Observe the four possible mounting positions. The Smar mark indicates up position. -
Page 62: Interchangeability
Upgrading DT301 to DT302 The sensor and casing of the DT301 is exactly the same as the DT302. By changing the circuit board of the DT301 it becomes a DT302. Upgrading the DT301 to a DT302 is therefore very much the same as the procedure for replacing the main board described above. -
Page 63: Returning Materials
Maintenance Procedures Returning Materials If it becomes necessary to return the transmitter and/or configurator to Smar, simply contact our office, informing the defective instrument's serial number, and return it to our factory. In order to speed up analysis and solution of the problem, the defective item should be returned with the Service Request Form (SRF –... - Page 64 DT302 – Operation, Maintenance and Instructions Manual Figure 4.3 - DT302 Exploded View - Sanitary Model...
- Page 65 Maintenance Procedures Figure 4.4 - DT302 Exploded View - Industrial Model...
- Page 66 NOTE 1: For category A, it is recommended to keep, in stock, 25 parts installed for each set, and for category B, 50. NOTE 2: Includes Terminal Block, Bolts, caps and Identification plate without certification. NOTE 3: The main board of DT302 and probe are items. NOTE 4: O-rings are packaged in packs of 12 units.
- Page 67 Maintenance Procedures 400-0244 Sanitary Model Probe COD. RANGE Minimum Span 1.8 g/cm3 0,025 g/cm 2.5 g/cm 0,025 g/cm 5.0 g/cm 0,025 g/cm COD. Diaphragm Material Hastelloy C276 316L SST Tantalum Others – Specify COD. Fill Fluid DC 200/20 - Silicone Oil DC 704 - Silicone Oil Glycerin and water –...
- Page 68 DT302 – Operation, Maintenance and Instructions Manual 4.10...
-
Page 69: Filling Fluids
The latter is an important consideration in case the filling fluid happens to come in contact with the process fluid, should a leakage occur. Table 5.1 presents the filling fluids, which are available for the DT302, together with physical properties and applications. THERMAL... -
Page 70: Performance Specifications
DT302 – Operation, Maintenance and Instructions Manual Humidity Limits 0 to 100% RH. Temperature Compensation Automatic with PT100. Performance Specifications Reference conditions: temperature 25°C (77°F), power supply of 24 Vdc, normal atmospheric pressure, silicone oil fill and range full - scale calibration. -
Page 71: Ordering Code
Technical Characteristics Ordering Code MODEL SANITARY CONCENTRATION/DENSITY TRANSMITTER CODE Range Minimum Span 1.8 g/cm 0.025 g/cm 2.5 g/cm 0.025 g/cm Note: For the concentration units: °Brix, °Plato, °INPM, °GL and °Baumé, specify code1. 5.0 g/cm 0.025 g/cm CODE Wetted Parts Material Hastelloy C276 316L SST Probe in 316 SST and Diaphragms in Hastelloy C276... - Page 72 DT302 – Operation, Maintenance and Instructions Manual MODEL SANITARY CONCENTRATION/DENSITY TRANSMITTER (CONTINUATION) CODE Identification Plate FM: XP, IS, NI, DI EXAM (DMT): EX-IA; NEMKO: EX-D CEPEL: EX-D, EX-IA With certification EXAM (DMT) GRUPO I, M1 EX-IA NEPSI: EX-IA CODE Housing Material (1) (2)
- Page 73 Technical Characteristics MODEL INDUSTRIAL CONCENTRATION/DENSITY TRANSMITTER CODE Range Minimum Span 1.8 g/cm 0.025 g/cm Note: For the concentration units: °Brix, °Plato, °INPM, °GL and °Baumé, specify code1. 2.5 g/cm 0.025 g/cm 5.0 g/cm 0.025 g/cm CODE Diaphragm Material / Probe Hastelloy C276 / Hastelloy C276 316L SST / 316L SST Hastelloy C276 / 316L SST...
-
Page 74: Optional Items
DT302 – Operation, Maintenance and Instructions Manual MODEL INDUSTRIAL CONCENTRATION/DENSITY TRANSMITTER (CONTINUATION) CODE Identification Plate FM: XP, IS, NI, DI EXAM (DMT): EX-IA; NEMKO: EX-D CEPEL: EX-D, EX-IA Sem Certificacao EXAM (DMT) GRUPO I, M1 EX-IA NEPSI: EX-IA CODE Housing Material (1) (2) -
Page 75: Device Registration Itk
Crrgpfkz"C" " CERTIFICATIONS INFORMATION Gwtqrgcp"Fktgevkxg"Kphqtocvkqp" Consult www.smar.com for the EC declarations of conformity for all applicable European directives and certificates. ATEX Directive (94/9/EC) – “Electrical equipment and protective system intended for use in potential explosive atmospheres” The EC-Type Examination Certificate had been released by Nemko AS (CE0470) and/or DEKRA EXAM GmbH (CE0158), according to European Standards. -
Page 76: North American Certifications
Environmental Protection - Enclosure Types (Type X): Supplementary letter X meaning special condition defined as default by Smar the following: Saline Environment approved - salt spray exposed for 200 hours at 35ºC. (Ref: NEMA 250). - Ingress protection (IP W): Supplementary letter W meaning special condition defined as default by Smar the following: Saline Environment approved - salt spray exposed for 200 hours at 35ºC. -
Page 77: European Certifications
Egtvkhkecvkqpu"Kphqtocvkqp" " Special conditions for safe use: Entity Parameters:Fieldbus Power Supply Input (report 3015629): Vmax = 24 Vdc, Imax = 250 mA, Pi = 1.2 W, Ci = 5 nF, Li = 8 uH Vmax = 16 Vdc, Imax = 250 mA, Pi = 2.0 W, Ci = 5 nF, Li = 8 uH Temperature Class: T4 Maximum Ambient Temperature: 60ºC (-20 to 60 ºC) Overpressure Limits: 1015 psi (report 3011728) -
Page 78: Identification Plate
The certificate number ends with the letter "X" to indicate that for the version of Density Transmitter model DT302 equipped with housing made of aluminum alloy, only can be installed in "Zone 0" if is excluded the risk of occurs impact or friction between the housing and iron/steel itens. - Page 79 Egtvkhkecvkqpu"Kphqtocvkqp" " EXAM and NEMKO C07"...
- Page 80 FV524"⁄"Qrgtcvkqp."Ockpvgpcpeg"cpf"Kpuvtwevkqpu"Ocpwcn" " CEPEL C08"...
-
Page 81: Control Drawing
Egtvkhkecvkqpu"Kphqtocvkqp" " Control Drawing Factory Mutual (FM) C09"... - Page 82 FV524"⁄"Qrgtcvkqp."Ockpvgpcpeg"cpf"Kpuvtwevkqpu"Ocpwcn" " C0:"...
- Page 83 Appendix B SRF – Service Request Form Proposal No.: Density Transmitters Company: Unit: Invoice: COMMERCIAL CONTACT TECHNICAL CONTACT Full Name: Full Name: Function: Function: Phone: Extension: Phone: Extension: Fax: Fax: Email: Email: EQUIPMENT DATA Model: Serial Number: Sensor Number: Firmware Version: Technology: ( ) HART®...
- Page 84 DT302 – Operation, Maintenance and Instructions Manual...
Need help?
Do you have a question about the DT302 and is the answer not in the manual?
Questions and answers