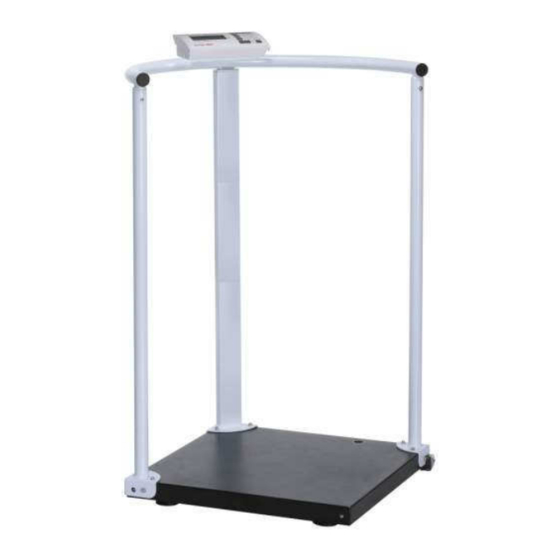
Charder MS-2500 Service Manual
Dual slope type
Hide thumbs
Also See for MS-2500:
- User manual (18 pages) ,
- User manual (35 pages) ,
- Calibration manual (9 pages)
Table of Contents
Advertisement
MS-2500
Dual Slope type
SERVICE MANUAL
TABLE OF CONTENTS
PRECAUTIONS ................................................................................................................................... 1
GENERAL INFORMATION .................................................................................................................. 1
GENERAL INSPECTION ..................................................................................................................... 1
TROUBLESHOOTING ......................................................................................................................... 1
SPECIFICATION.................................................................................................................................. 2
PANEL / OVERLAY.............................................................................................................................. 3
ERROR MESSAGE.............................................................................................................................. 4
WIRING................................................................................................................................................ 6
LCD FORMAT...................................................................................................................................... 7
CONTROL PANEL ............................................................................................................................... 8
LOAD CELL ......................................................................................................................................... 9
ZERO COUNT ADJUSTMENT (Dual slope model)............................................................................ 10
TROUBLESHOOTING TREE............................................................................................................. 12
MS2500 SERVICE MENU CONFIGURATION................................................................................... 13
DEFAULT COMPANY SETTINGS ..................................................................................................... 14
CALIBRATION PROCEDURE ........................................................................................................... 15
PRINT FUNCTION INSTRUCTION.................................................................................................... 17
USING PRINT FUNCTION................................................................................................................. 18
SCHEMATICS-MAIN BOARD CH-0733 .......................................................................................... 21
LAYOUT-MAIN BOARD CH-0733 ................................................................................................... 24
SCHEMATICS-POWER BOARD CH-0689 ........................................................................................ 25
LAYOUT-POWER BOARD CH-0689............................................................................................... 25
SCHEMATICS- JUNCTION BOARD (CH-0525) ................................................................................ 26
LAYOUT-JUNCTION BOARD (CH-0525)........................................................................................ 26
MS 2500 PARTS & ASSEMBLY ........................................................................................................ 27
DP2701, NP- 4444 INDICATOR PARTS & ASSEMBLY .................................................................... 28
INSTRUCTION FOR CHARGING AND CONNECTING .................................................................... 30
INSTRUCTION FOR REPLACING BATTERY ................................................................................... 31
GRAVITY COMPENSATION ............................................................................................................. 32
0
Advertisement
Table of Contents
Troubleshooting

Subscribe to Our Youtube Channel
Related Manuals for Charder MS-2500


Summary of Contents for Charder MS-2500
-
Page 1: Table Of Contents
MS-2500 Dual Slope type SERVICE MANUAL TABLE OF CONTENTS PRECAUTIONS ........................... 1 GENERAL INFORMATION ........................1 GENERAL INSPECTION ........................1 TROUBLESHOOTING ......................... 1 SPECIFICATION..........................2 PANEL / OVERLAY..........................3 ERROR MESSAGE..........................4 WIRING..............................6 LCD FORMAT............................7 CONTROL PANEL ..........................8 LOAD CELL ............................ -
Page 2: Precautions
PRECAUTIONS READ the service manual BEFORE operating or servicing this equipment. FOLLOW the instructions carefully. Keep this manual for future reference. Don’t allow untrained personnel to operate, clean, inspect, maintain, service or tamper with this equipment. ALWAYS DISCONNECT this equipment from the power source before cleaning or performing maintenance. -
Page 3: Specification
SPECIFICATION Model MS 2500 Capacity 300kg x 0.1kg/ 660lb x 0.2lb Weight Unit Kg / lb LCD Display 1.0 inch LCD display with 5 and 1/2 digits Dimensions Platform size: 550(L) x 550(W) x 50(W) mm Key Functions ON/OFF, UNIT , HOLD/BMI , TARE Zero count 2000~9000 Span count... -
Page 4: Panel / Overlay
PANEL / OVERLAY 1. NP 4444... -
Page 5: Error Message
ERROR MESSAGE Error Message Description Solution 1. Check display. Nothing appears on the 2. Disassemble indicator. display after pushing 3. Check wires and control panel. ON/OFF key. (refer P.7 & P.9) Can’t switch on scale Battery housing wires are using AAA battery. disconnected or broken. - Page 6 Error Message Description Solution 1. Check the load cell wires are well and connected to the correct points. (refer P.7) 2. Check resistances of load cell. No weighing. (refer P.11) 3. If you change the load cell, please re-calibrate the scale. (refer P.17) The scale shows non- complete segments when...
-
Page 7: Wiring
WIRING ACTION: 1. Remove battery from the scale. 2. Un-screw the lower housing. 3. Remove upper housing. 4. Make sure that all wire connectors are well and that no insulation material is touching the soldering contacts. 5. Make sure that all wires are connected to the correct points. Wiring Connector RED (solder pad “E+”) -
Page 8: Lcd Format
LCD FORMAT ACTION: Problem- The scale shows non-complete segments when power on. Solution: • Turn off the scale and take out the batteries from the scale. • Check LCD pin. (Please refer to above LCD FORMAT) For instance, if the top left arrow (S1) disappears, then check pin 1 and pin 4. •... -
Page 9: Control Panel
CONTROL PANEL 1. NP4381 (300kg Capacity) 1. Control panel switch damaged. 2. Use multi-meter to measure voltage current of control panel. 3. Reconnect control panel switch. Make sure that control panel is connected to the correct housing (CN5). 4. If problem persists, replace a new control panel. -
Page 10: Load Cell
LOAD CELL Check load cell for proper bridge resistances as below. MODEL MEASURING POINTS RESISTANCE REMARK Each resistant on load +E (Red) to -E (Black) 690 ohms minimum cell should be same +E (Red) to +S (White) AL1420A 345 ohms minimum and the tolerance <... -
Page 11: Zero Count Adjustment (Dual Slope Model)
ZERO COUNT ADJUSTMENT (Dual slope model) • Why should I adjust ZERO count? Situations in which ZERO count need to get adjusted o Load cell damaged because of over load; beyond scale’s capacity. o Main board has been replaced. o Because of rough handling of scale, the ZERO count move out of range. o Load cell has been replaced. - Page 12 R1-If ZERO count is less than 2000, put resistor at R1 to increase the ZERO count value. R2- If ZERO count is more than 9000, put resistor on R2 to decrease the ZERO count value. ZERO Count Adjustment Procedure: 1. ZERO count value is below the lower limit i.e. 2000. •...
-
Page 13: Troubleshooting Tree
TROUBLESHOOTING TREE... -
Page 14: Ms2500 Service Menu Configuration
MS2500 SERVICE MENU CONFIGURATION Press [UNIT 4key display] for 3 seconds without release to enter program setting mode. First SETUP will appear, and then it will change to “UNIT” automatically. Press [TARE 4key display] to switch to next function. Program flow is like Press [HOLD/BMI 4key display] to enter function flow. -
Page 15: Default Company Settings
DEFAULT COMPANY SETTINGS Function Description Default (Units): Kg , st , lb Kg/lb (Graduations): Setting division, capacity 300Kg 600kg 3000 d 3000d graduation. 300.1 600.2 (Weight Section Division): Setting weight section division (Filter): Fast/ Normal/ Slow (Auto Zero Tracking): 0.25d/ 0.5d/ 1d/ 3d/ OFF (Stable Range): 0.25d/ 0.5d/ 1d/ 3d/ OFF (Zero Range): 2% (or 100%) (Overload Range): 9d (or 2%) -
Page 16: Calibration Procedure
CALIBRATION PROCEDURE To calibrate the scale, please turn off the scale and move Calibration pin to center (refer P.14). Operation Display Turn the scale on using the ON/OFF key. Press UNIT key for 3 seconds and SETUP will show shortly. UNIT will appear on the display. Press the TARE key repeatedly until the “CAL ib”... - Page 17 Confirm by pressing the UNIT key and the number on the display will be 000.0 Place calibration weight on the centre of the scale plate, and the display will show SPAN Count value (15000~20000). Press the HOLD/BMI key. adjustment process is started. When the adjustment is finished successfully, the scale is automatically switched over to the weighing mode again and the calibration weight will be...
-
Page 18: Print Function Instruction
PRINT FUNCTION INSTRUCTION PIN 2--TXD PIN 2--TXD PIN 3--RXD PIN 3--RXD PIN 5--GND PIN 5--GND PARAMETERS OF RS232 INTERFACE Set parameters of the scale interface on the connected device. It is not possible to change the scale parameters. BAUD RATE: 9600 bps PARITY CHECK: no DATA LENGTH: 8 bits STOP BIT: 1 bit... -
Page 19: Using Print Function
USING PRINT FUNCTION Print function is only available for some specific models, please make sure whether the model has print function or not. A. Using Printer to print out the results. You can print through PC simply press P on keyboard after weighing and taking BMI. B. - Page 20 Step.8- Set Port Settings • Set up as below: BAUD RATE: 9600 bps DATA BITS: 8 bits PARITY : None STOP BITS: 1 bit FLOW CONTROL: NONE or Xon/Xoff • Click OK button to complete the setting.
- Page 21 Step.9- Print out the results • After weighing and calculating BMI of the patient, press the print button on the control panel of MS2500. The results will appear on the computer screen in the below format.
-
Page 22: Schematics-Main Board Ch-0733
SCHEMATICS—MAIN BOARD CH-0733 Main Board CH-0733 (P.1/3) - Page 23 Main Board CH-0733 (P.2/3) RS 232 OPTION...
- Page 24 Main Board CH-0733 (P.3/3)
-
Page 25: Layout-Main Board Ch-0733
LAYOUT—MAIN BOARD CH-0733 PRIMARY SIDE OF MAIN BOARD CH-0733... -
Page 26: Schematics-Power Board Ch-0689
SCHEMATICS-POWER BOARD CH-0689 LAYOUT—POWER BOARD CH-0689... -
Page 27: Schematics- Junction Board (Ch-0525)
SCHEMATICS- JUNCTION BOARD (CH-0525) LAYOUT—JUNCTION BOARD (CH-0525) -
Page 28: Ms 2500 Parts & Assembly
MS 2500 PARTS & ASSEMBLY Please refer to P.30 for the list of spare parts. -
Page 29: Dp2701, Np- 4444 Indicator Parts & Assembly
DP2701, NP- 4444 INDICATOR PARTS & ASSEMBLY Please refer to P.29 for spare parts list. - Page 30 MS2500- SPARE PART LIST DESCRIPTION CEC P/N DRAWING NR. ZLC04478KG(CH-0733) w/t RS232 MAIN BOARD 090016001926 300kg POWER BOARD ZLC04359KG(CH-0689) w/t RS232 090016001722 JUNCTION 090016001774 ZLC04389KG(CH-0525) BOARD OVERLAY 060014000524 NP-4444 REV 004 (300kg) RECHARGEABL 020015000020 1.2Vx6,1200mA E BATTERY CONTROL 020009000076 NP-4381 REV 003 (4key) PANEL AD-0482 REV 003 ADAPTOR...
-
Page 31: Instruction For Charging And Connecting
Common Spare Parts(Used in all models of MS2500) DESC. DRAWING. NR LENS 060007000100 LS-0911 REV 002 WIRE 020037000109 WR-8117 REV 001 WHEEL 050007000239 SS-2040 REV 001 RUBBER FEET 060004000486 SW-1121 REV 001 Fixed bracket INSTRUCTION FOR CHARGING AND CONNECTING If LCD displays , it need to be charged, please use MS 2500 exclusive adaptor to re-charge. -
Page 32: Instruction For Replacing Battery
INSTRUCTION FOR REPLACING BATTERY 1. Remove the battery cover 2.Take the battery housing out. 3. Replace new batteries. 4. Make sure batteries are well installed. 5. Reinstall the battery housing. 6. Reinstall the battery cover. -
Page 33: Gravity Compensation
GRAVITY COMPENSATION If the scale has been moved (transported to another city/state/country) from the place where it has been calibrated, the user need to carry out Gravity Compensation Procedure to compensate the Gravity difference between the place of calibration and place of use (refer P.32 for example). Please follow the procedure below: Steps Description Display... - Page 34 Situation.1- The scale has been re-calibrated in France and place of use is England Key in the Gravity value of France in step.4 and Gravity value of England in step.7 to compensate the gravity difference. Situation.2- The scale has been originally calibrated in France and place of use is England but later the scale has been moved to Germany.
- Page 35 1. List of Tables. • Specification…...Page-3. • Error Message……Page-4. • Wiring………Page-6 • Load Cell Resistance…….Page-9. • Approval Scale Company Settings……Page-12 • Calibration Procedure…..Page-13 • Spare Parts List………Page-26 • Gravity Compensation Procedure…..Page-31 2. List of Pictures. • Panel……Page-3. • Main Board (CH-0651)……..Page-6 •...
Need help?
Do you have a question about the MS-2500 and is the answer not in the manual?
Questions and answers