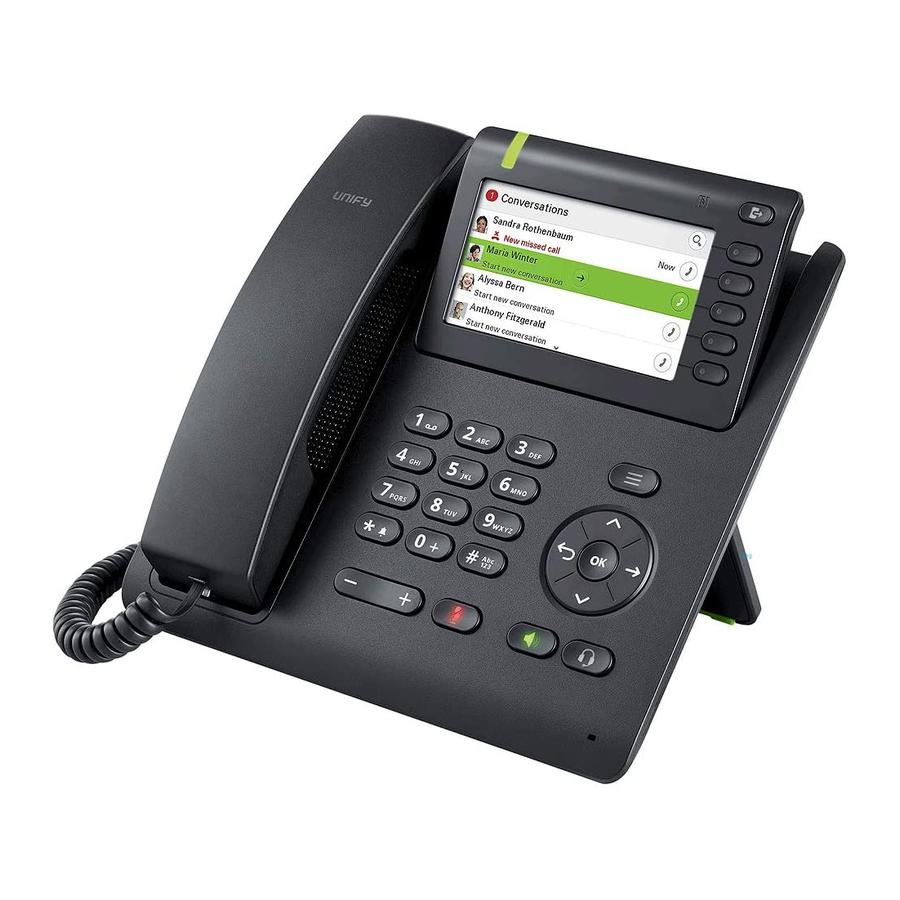
Unify OpenScape CP600 User Manual
Desk phone, key module
Hide thumbs
Also See for OpenScape CP600:
- User manual (233 pages) ,
- Installation and quick reference manual (33 pages) ,
- Quick reference card (2 pages)
Table of Contents
Advertisement
Quick Links
Download this manual
See also:
Quick Reference Manual
Advertisement
Table of Contents

Subscribe to Our Youtube Channel
Related Manuals for Unify OpenScape CP600


Summary of Contents for Unify OpenScape CP600
- Page 1 OpenScape Desk Phone CP600/CP600E OpenScape Key Module 600 OpenScape Voice OpenScape 4000 User Guide SIP A31003-C1000-U102-5-7619...
- Page 2 Provide feedback to further optimize this document to edoku@unify.com. As reseller please address further presales related questions to the responsible presales organization at Unify or at your distributor. For specific technical inquiries you may use the support knowledgebase, raise - if a software support contract is in place - a ticket via our partner portal or contact your distributor.
-
Page 3: Important Information
19/EU applies should be disposed of separately from the municipal waste stream in appropriate collection systems. Information concerning the proper disposal of your Unify product in the business- to-business market segment is available from your local sales representative in Uni- fy or partner sales. -
Page 4: Location Of The Telephone
Unify is committed in terms of its product strategy to bringing environmentally friendly products to market, taking account of the entire product life cycle. Unify strives to acquire the relevant envi- ronmental labels for its products in the event that the environmental label programs permit qualifi- cation for individual Unify products. -
Page 5: License Information
Important information License information More information about the EULA and Open Source licenses you can find on the Web interface, section Licenses page 208. ... -
Page 6: Table Of Contents
Contents Contents Important information ....... . . 3 Trademarks ..............3 Software update . - Page 7 Contents Operating your OpenScape Desk Phone CP600/CP600E . . . 31 Navigating in menus ............31 Conversations .
- Page 8 Contents During a call ..............75 Activating/deactivating the microphone .
- Page 9 Contents Programmable keys ....... . 114 List of available functions ........... . . 114 Programming a key .
- Page 10 Contents Activating/deactivating the ringer ..........150 Tone and indication with an unsecured voice connection .
- Page 11 Contents Call logging ..............193 Deactivating Logging .
-
Page 12: General Information
General information About this manual This document contains general descriptions of the technical options, which may not always be available in individual cases. The required features must therefore be individually defined in the terms of the contract. If a particular function on your phone is not available to you as described, this may be due to one of the following reasons: •... -
Page 13: Icons Used In The Manual
Icons used in the manual Tips Refers to a setting performed via the Web interface. Indicates important additional information in relation to handling. ñ Indicates required intervention by the administrator. Displays for describing operation Selected action Original illustration on display Incoming call Answer Reject... -
Page 14: Action Not Selected
Action not selected Display illustrations Incoming call Answer Reject Deflect Andre-Marie Ampere 3336 Step-by-step illustration in User Guide When an action is not selected, it will be shown right-aligned in a light color. The Reject associated Softkey is also shown. The action can be executed by pressing the Softkey even if it has not been selected. - Page 15 Confirm the selected conversation with the Softkey to establish the connection Daniel Bernoull « or with the key to open the context menu. Information displayed for a non-selected conversation A conversation is displayed in a light color if it is not selected. This description is Andre-Marie Ampere 11:22 only used if it aids understanding.
-
Page 16: Service
Service The service department can only help you if you experience problems or defects with the phone itself. Should you have any questions regarding operation, your specialist retail- er or network administrator will be glad to assist you. For queries regard- ing connection of the telephone, please contact your network provider. -
Page 17: Remote Configuration For Cloud Service Providers
Remote configuration for cloud service providers From factory defaults to operational telephone This section describes the remote configuration process, from the initial factory defaults to the operational telephone. If your telephone is already operational, please continue reading from Section "Getting to know the OpenScape Desk Phone CP600/CP600E ( page 19)". -
Page 18: Canceling The Remote Configuration
Starting the remote configuration Once you have entered a valid PIN, the remote configuration of your telephone starts automatically. You are shown the following messages on the display: Asking redirect server... Configuring phone... Deployment done The configuration is concluded and the telephone is operational with the re- quired settings. -
Page 19: Getting To Know The Openscape Desk Phone Cp600/Cp600E
Getting to know the OpenScape Desk Phone CP600/CP600E The following sections describe the most frequently used controls and displays. The user interface of your telephone Favourites Conversations Tuesday 24 Sep 2015 Voicemail Settings You can make and receive calls as normal using the handset. The graphic display permits intuitive operation of the phone page 26. -
Page 20: Ports On The Underside Of The Phone
Ports on the underside of the phone Power supply unit (e.g. Phone Manager) (if necessary) Network switch Country-specific cable Key module Headset Handset Service interface Properties of your OpenScape Desk Phone CP600/CP600E 4.3" color graphic display, 480 x 272 pixels. Display type Please note that the screen is greyscale on CP600E. -
Page 21: Using Network Ports More Efficiently
Using network ports more efficiently The OpenScape Desk Phone CP600/CP600E has a Gigabit Ethernet switch. This means that you can also connect a PC with a Gigabit LAN port to the LAN directly via the phone. The option for connecting the telephone and PC must first be activated on the telephone by your administrator. Network switch OpenScape Desk Phone CP600/ CP600E... -
Page 22: Keys
Keys Softkeys Function when key is pressed Activates function of left-hand display option or opens an additional menu. Used in the Favourites menu as a Function key page 49. Audio controls Audio keys Function when key is pressed :/É Activate/deactivate the loudspeaker page 65. -
Page 23: Navigator
Navigator You can use this control to navigate within lists and execute actions in the selected area. Operation Functions when key is pressed In conversation mode: « • Open subscriber information Press the key. In settings: • Go down a level In lists and menus: •... -
Page 24: Dialpad
Dialpad Number entry If you enter a digit when the phone is in idle mode, for example, an input field opens automatically for entering numbers. You can only enter the numbers 0 to 9 as well as the characters * and # via the keypad in 123 mode (indicated at the left-hand margin of the input field). - Page 25 Complete your input: Company: Move cursor left Move cursor right Copy Press the Softkey for to complete your input. Character overview (depends on the current language setting) 1x 2x 3x 4x 5x 6x 7x 8x 9x 10x 11x 12x 13x 14x 15x 16x 17x ï...
-
Page 26: Different Display Interfaces
Different display interfaces Your OpenScape Desk Phone CP600 is fitted with a color graphic display page 20, in which dif- ferent contents are displayed depending on the particular situation. Your OpenScape Desk Phone CP600E is fitted with a greyscale graphic display page 20, in ... - Page 27 Softkeys Favourites Conversations Voicemail Tuesday 24 Sep 2015 Settings Softkeys Favourites Conversations Voicemail Tuesday 24 Sep 2015 Settings @ Main menu Favourites Conversations Start display Voicemail Settings User settings Administrator settings In addition, different icons represent different situations and switches: Icon Meaning The ringer is deactivated...
-
Page 28: Presence
Presence To access the "Presence" menu, press the key above the Softkeys. You are offered the fol- lowing selection: Out-of-Office/Call Forwarding Presence Forward all calls 3334 Do not disturb Lock phone Out-of-Office/Call Forwarding Presence Forward all calls 3334 Do not disturb Lock phone Personal Presence via the phone is temporarily suspended by means of Call forwarding or Do not disturb. -
Page 29: Context-Dependent Displays
Context-dependent displays Depending on the situation at hand, the graphic display on your OpenScape Desk Phone CP600/ CP600E shows different content, to which you can respond intuitively. Action with Softkey Conversations 3334 11:12 d Missed call Paul Baum 10:57 3336 10:37 b Dialled call x 3335... -
Page 30: Action Via Dialpad
Action via dialpad Press any key on the dialpad to start dialing a phone number with automatic phone number searching. 3334 Wednesday d Missed call Paul Baum Softkeys Wednesday 3336 31 Sep b Dialled call x 3335 29:Sep b Dialled call x As soon as you enter the first digits, an input field opens for selecting the phone number and you will be shown conversations that match the input to date in the corresponding positions. -
Page 31: Operating Your Openscape Desk Phone Cp600/Cp600E
Operating your OpenScape Desk Phone CP600/CP600E The following descriptions provide an overview of how to operate your phone. Before looking at the functions and settings, you should set up the User password to protect your phone against unauthorized use page 139. ... -
Page 32: Conversations
Conversations A conversation is a contact with a call history. New conversations are created or updated for • a previously answered call • a dialed call • a missed call • an Exchange entry following automatic synchronization • an entry from a corporate directory if a new number was used (LDAP) If you have activated use of Circuit ( page 192), then only conversations from Circuit will be in- ... -
Page 33: Opening Details Of A Conversation Or Conducting A Call
Opening details of a conversation or conducting a call You can open a selected conversation using a navigation key or start a call using the Softkey « or the navigation key . If a conversation is not selected, you can start a call using the Soft- Conversations 3333 9:44... - Page 34 Use the key to navigate to the Contact details option and select this option using the Softkey. €...
-
Page 35: Creating Or Editing Conversations
Creating or editing conversations Conversations are created based on dialed or answered calls. New contacts are synchronized with the phone when connected to Exchange. When you search for a subscriber using LDAP page 87, this contact is transferred to conversations. ... - Page 36 3339 Last name: 3339 Work 1: 3339 Press the Softkey for to access edit mode. You can complete the following fields for a contact: • Last name: Last name of a contact. • First name: First name of a contact. •...
- Page 37 Last name: Einstein Move cursor left Move cursor right Copy Delete the digits using the key and enter the last name. Press the Softkey in the input field to complete input for this field. 3339 Last name: Einstein First name: Work 1: 3339 Work 2: €...
- Page 38 3339 Last name: Einstein First name: Albert Work 1: 3339 Work 2: Save the contact data. You can add missing entries subsequently. The following information is shown on the display, for example, the next time you call this contact. Incoming call Answer Reject Deflect...
-
Page 39: Searching For Conversations
Searching for conversations You have a number of options available to you for initiating a search for conversations. If you want to call the located contact for the conversation immediately and you know the phone number roughly then you can lift the handset or press the speaker key or press the headset key. - Page 40 Search for names (alphanumeric search string) • LDAP was not configured by your administrator: The phone now searches in the local conversation list for 'Am' and thus finds all the conversations that contain the name 'am', for example 'Ampere' or even 'Samara'. The hits are listed chronologically.
- Page 41 Order of conversations On entry into search mode, the local conversations are ordered by their time stamp, i.e. most re- cent ones are displayed first. Upon entering a search criteria, the local conversations are listed first and ordered by their time stamp, the most recent ones are displayed first.
-
Page 42: Displaying The History Of A Conversation
Displaying the history of a conversation The current history of a conversation is shown directly in the conversation list. The histories of oth- er calls can be viewed under Details or also directly with the History option during a call. Conversations 3339 Yesterday... -
Page 43: Deleting Conversations
Deleting conversations If you misdial, for example, or cancel dialing prematurely, an entry will still be created in the con- versations list. You can delete this entry again immediately. Entries for incoming calls that you no longer need can also be removed from the list. Conversations Yesterday b Dialled call x... -
Page 44: Toggle Between Circuit And Local Conversation List
Toggle between Circuit and local conversation list There is a possibility to toggle between the Circuit and local conversation list to easily see the rel- evant list. Prerequisites: The phone is connected and switched to Circuit mode page 192. The conversa- ... -
Page 45: Marking All Conversations As Read
Marking all conversations as read You are able to mark all new missed calls in Conversation List as read in a single action. Conver- sation List options provides you with a functionality that will mark all new missed calls as read. This means: •... - Page 46 Conversations Fred ‰ Missed call Wilma 1 minute b Dialled All missed calls are Betty marked as read Yesterday b Received Barney Friday Missed call ‰...
-
Page 47: Telephony Interface
Telephony interface Telephony view Incoming call Your phone rings and the notification LED flashes. In addition to the "classic" telephone functions, additional information and functions are offered on the display: notification LED flashes Incoming call Answer Select a function Reject using the Softkey Deflect Andre-Marie Ampere... - Page 48 Switching to a different menu during a call You can use the key while on a call to switch to the Conversations menu. Conversations Returning to the call view Andre-Marie Ampere 30:07 j Active call Indicates an active call 3334 6:10 d Missed call Daniel Bernoulli...
-
Page 49: Programmable Keys
Programmable keys Programmable keys are available to you in the Favourites menu or on an optionally connected OpenScape Key Module 600 page 52. See more information how to set up the Favourites screen as the Landing screen page 158. ... - Page 50 Unallocated Unallocated Unallocated Unallocated Press the second Softkey to assign the first of four functions. Key programming: KM 1 Key 1 Normal Unallocated Label Settings Shifted Unallocated Press the second Softkey to switch to the list of functions. Normal Call waiting Immediate ring PreView Call recording...
- Page 51 Key programming: KM 1 Key 1 Normal Call waiting Label Call waiting Settings Shifted Unallocated If you prefer not to change the standard name Call waiting, simply conclude the assignment with the Softkey Q. You will receive confirmation "Changes saved". It is not possible to program a second level under Favourites.
-
Page 52: Programmable Keys On The Openscape Key Module 600
Programmable keys on the OpenScape Key Module 600 The OpenScape Key Module 600 has twelve keys to which you can assign functions or numbers ¬ at two levels. Use the and keys to switch to the required level when using a function or se- lected dialing key. -
Page 53: Corporate Directory
Corporate directory If you have access to a corporate directory or LDAP database (consult your administrator), you can search for contacts in it via conversations. LDAP is queried automatically when a phone num- ber is dialed. Answering machine (Voicemail) Depending on the type and configuration of your communications platform (consult your adminis- trator), messages from configured services are displayed in this application. -
Page 54: Inline Notification About Incoming Calls
Inline notification about Incoming calls Prerequisite: Your administrator enabled rollover visual alert and determined how rollover calls are to be signaled. The phone is active (or held) in a call on a different line. The inline notification apply to DSS ( page 123) and MultiLine ( page 126) calls. - Page 55 • pressing the “Cancel” Softkey: If the notification is shown when the Favourites screen is not available or the key is not on the Favourites screen, then the notification can be canceled via a special Softkey. • Hold Consult Add participant from Albert Einstein...
-
Page 56: Settings
Settings Use the key to open the Main menu and then switch to the settings. Conversations Voicemail Settings Tuesday Sept 24, 2015 Settings User settings Administrator settings The menu comprises a configuration area both for users and for administrators. User settings ******.. -
Page 57: User Settings
User settings Menu You can adjust local settings for your OpenScape Desk Phone CP600/CP600E using the "User settings" menu. The menu structure consists of several levels. User settings Date and time Audio Bluetooth Configuration You can also configure all of the settings using your OpenScape Desk Phone CP600/ CP600E's Web interface page 207. - Page 58 Handling Allow call waiting Allow DND Busy when dialling Press the Softkey for Q to save your new setting. Parameters You can set values in some submenus. Connected calls Allow call joining Join in conferences Allow hold reminder Hold reminder delay Press the Softkey for K to open the setting.
- Page 59 Connected calls Allow call joining Join in conferences Allow hold reminder Hold reminder delay Exit the menu. Level You can use menus with levels to adjust the volume or brightness, for example. An example of display brightness is given here. Switch to the telephone settings menu - Phone Backup/Restore Screensaver...
- Page 60 Brightness Increase Decrease Adjust the brightness to the desired level. Use the key to do this. The display is adjusted im- " mediately. Brightness Increase Decrease Complete the setting by pressing the Softkey for Display Brightness Key module contrast Key module brightness Save your new settings.
-
Page 61: Administration
Administration You can access the administration area via the "Admin" function and by entering the administration password. Refer to the administration manual for your phone for more detailed information on this topic. During a software update, the phone must not be disconnected from the power supply unit, the LAN line or the phone line. -
Page 62: Telephone Settings
Telephone settings Please read the introductory chapters "Getting to know your OpenScape CP 600/600E" page 19 and "Operating your OpenScape CP 600/ 600E" page 31 carefully before performing any of the steps described here on your phone. Display angle You can swivel the display unit. -
Page 63: Volumes
Volumes Set the volume here, for instance, for the loudspeaker, handset or headset. You can preset different volumes for the following microphones and signals in ten levels: • Loudspeaker • Ringer • Handset • Headset • Handsfree • Rollover • Group pickup beep You can also configure this setting via the Web interface page 207. -
Page 64: Key Click
Key click You can select here whether a tone should be heard when a key is pressed. You can also decide whether this should apply for all keys or only those on the key- pad. In addition, you can adjust the tone volume or disable the tone. You can also configure this setting via the Web interface page 207. -
Page 65: Making Calls
Making calls Incoming calls The telephone rings if the ringtone is active. The notification LED also flashes. If transmitted, calling party information (name, phone number) appears in the in- formation section on the left-hand side of the display. Any settings you are currently making on the phone will be interrupted by an incoming call. -
Page 66: Answering A Call Via The Headset
Suggestions for using speakerphone mode: • Adjust the call volume while speakerphone mode is active. • The ideal distance between the user and the phone in speakerphone mode is 50 cm. Answering a call via the headset Prerequisite: A headset is connected. Make sure your headset port is set up properly page 147. -
Page 67: Answering A Video Call
Answering a video call Prerequisite: The configuration to accept video media has to be enabled. In case it was not enabled by administrator, you can configure the video media using the "User settings" menu. Press the key for the Main menu if appropriate. Open using the Softkey. - Page 68 Hide video during a video call After accepting the video call, press the softkey with the crossed out camera icon. When you hide video using the Softkey, the following screen is displayed. You can return full screen pressing "Show video" button. Show video Hold Consult...
-
Page 69: Rejecting A Call
Rejecting a call You can reject an incoming call. Prerequisite: An incoming call is displayed or signaled. The function is ap- proved by the administrator. Press the Softkey. The caller hears a busy signal. Reject P The rejected caller is saved in the conversations list as a missed call. You can then call this party back at a later time. -
Page 70: Making Calls
Making calls If you allowed the option "Busy When Dialing" page 186, you will not be interrupted by an incoming call. In this case, the caller hears the busy sig- nal. You make a call by entering the phone number of the relevant party using the dialpad or by searching for this party in the permanent Conversations list. -
Page 71: On-Hook Dialing
On-hook dialing The connection is set up with on-hook dialing via a connected headset or via the loudspeaker (speakerphone mode). The line is seized before dialing. Use the search function in Conversations if appropriate ( page 39). Enter digits via the dialpad. Press the key if a headset is connected. -
Page 72: Dialing With The Selected Dialing Key
Dialing with the selected dialing key With connected OpenScape Key Module 600 If you press a selected dialing key, the associated contact or phone number is displayed and the connection is set up. You can program frequently used phone numbers on programmable keys page 114. -
Page 73: Redialing Via The Function Key
Redialing via the Function key No history is created for contacts if the call log or Exchange is deactivated. Conversations that have been dialed manually or searched for via LDAP are likewise not created. Previous entries have been deleted. Press the key for the Main menu if appropriate. Open using the Softkey. -
Page 74: Using Autodial Delay
Deleting callback requests You can delete scheduled callback requests if you no longer need to return a call, for example because you have met the other party in person. Prerequisite: A callback was requested. Press the Softkey. All callback requests are deleted. Cancel callbacks O Using autodial delay A number is automatically dialed after a set delay starting from the entry of the... -
Page 75: During A Call
During a call Activating/deactivating the microphone You can temporarily switch off the handset microphone to prevent the other party from listening in while you consult with someone in your office for example. Prerequisite: You are conducting a call. Deactivating the microphone Press the key shown. -
Page 76: Switching From Speakerphone Mode To The Handset
Switching from speakerphone mode to the handset Prerequisite: You are conducting a call in speakerphone mode. Lift the handset. É The key shown is no longer lighting. Switching from headset to speakerphone mode In standard mode Press and hold the key (open listening is activated), Press the key shown. -
Page 77: Consulting A Second Party
Consulting a second party You can call a second party while a call is in progress. The connection to the first party is placed on hold. Prerequisite: You are conducting a call. 2:40 AM The connection is set up to a subscriber. Klaus Maier 3336 Press the Softkey. - Page 78 Ending a consultation call You end the consultation Press the Softkey. The consultation call is disconnected. The call with the first End & reconnect party is resumed. The second party hangs up If the second party hangs up, you will be prompted to retrieve the first call again if "Hold and hang-up"...
-
Page 79: Switching To The Held Party (Alternating)
Switching to the held party (alternating) Prerequisite: You are conducting a consultation call page 77 or have accept- ed a second call page 82. You are in the call connection menu. Press the Softkey. Alternate You can switch back and forth between two parties by repeatedly confirm- ing "Alternate". -
Page 80: Putting On Hold And Retrieving Alternately Or Simultaneously
End conference Allowing call partners to continue a conference after you exit Prerequisite: The function "Allow joining in a local conference" ( page 191) was activated. Press the Softkey. Exit conf. É Replace the handset or, if you are in speakerphone mode, press the loudspeak- er key. -
Page 81: Connecting Parties
Connecting parties You can connect the first party with the party you consulted, clearing down your connection to both parties in the process. Prerequisite: You are conducting a consultation call page 77 and you are in the call menu of an active call. Press the Softkey. -
Page 82: Call Waiting (Second Call)
Call waiting (second call) You can accept a second incoming call in the course of an ongoing call. The call- er hears the on-hook signal while you hear a call-waiting signal tone. You can reject, forward or accept the second call. You can block the second call or the signal tone page 182. - Page 83 Press the Softkey. Ignore H The caller still hears the on-hook signal. You can subsequently Answer, Reject or Deflect the second call via Conversations. You administrator must have al- lowed for a corresponding wait time for this in the system so that the call is not terminated prematurely or forwarded.
-
Page 84: Transferring A Call
Transferring a call You can transfer your current call to another party with or without consultation. Blind transfer Prerequisite: You are conducting a call. The "Allow call transfer" and "Transfer on ring" options are allowed page 184 and page 187. ... -
Page 85: Ending A Call
Ending a call Press the Softkey shown. Disconnect P Ê Press the key shown. The key LED goes out. É Press the key shown. The key LED goes out. Replace the handset. Configuring Call forwarding You can also enter the call forwarding settings via the "Presence" key page 171. - Page 86 Enable or disable using the Softkey. Audible ¢ _ Open with the Softkey. The current setting is displayed. Forwarding party You will be offered the following options: • Display last • Display first Confirm with the Softkey, for example "Display last" to switch. Display last ¥...
-
Page 87: Corporate Directory
Corporate directory Depending on the existing infrastructure, the corporate directory can use a num- ber of different sources. The contents are displayed collectively in the conversa- tions. One potential source is your personal Exchange directory. When using Circuit page 192, other directory data cannot be used at the ... -
Page 88: Searching For Contacts Via Conversations
Enter the folder with the destination data and conclude your input with the Soft- key. Save the configuration. You can perform searches using the name (simple search) or different informa- tion on an entry (for example Job function). Your administrator can provide you with the list of possible search terms. -
Page 89: Listening To Voicemail
Listening to Voicemail To use this function, you need to have a voice mailbox set up on your communi- cation platform for Voicemails (see page 53). The notification LED lights up to signal new messages. It only extinguishes when all messages have been picked up. -
Page 90: Importing Contacts Via Wbm
Importing contacts via WBM You can import your contacts into your phone through WBM interface (for more information, see ”Web interface (WBM)” page 207). The contact file can be exported from Outlook or OSM. See the products documentation for instructions on how to export contacts from an Outlook client or OSM. - Page 91 4. The progress and outcome of the import will be indicated to you – A completion message is displayed when the "Press to see import results" button is pressed – A successful import will be indicated by a "Import completed" text mes- sage below the panel on the page –...
-
Page 92: Exporting Contacts Via Wbm
Exporting contacts via WBM You can export your contacts from your phone through WBM interface page 207, so you can use them elsewhere, store them, etc. Log on to the User Pages on WBM using your password (for more infor- mation, see User Pages page 208). -
Page 93: Using Bluetooth
Using Bluetooth Bluetooth is an open standard for high-performance technology and allows wire- less communication, for example between PCs and tablets or mobile telephones and headsets. In contrast to infrared connections, Bluetooth does not require a visual contact for communication purposes and can be used over distances of up to 10 meters. To exchange data between Bluetooth-enabled devices, the devices need to un- dergo a one-off discovery procedure. -
Page 94: Transferring Contacts
Transferring contacts The Bluetooth function on your OpenScape CP 600 allows you to transfer con- tacts in vCard format (file extension: .vcf) from other Bluetooth devices to your OpenScape CP 600 and save them in the Conversations list. You can also send entries from the Conversations list as vCards to other Bluetooth-enabled devic- Due to the diverse range of PCs, mobile telephones and PDA devices cur- rently available, we are unable to provide universal instructions on how to... -
Page 95: Sending A Vcard
Sending a vCard Sending to a paired device Prerequisite: The receiving device is included in the list of paired devices, Blue- tooth is activated on the device and can receive vCards. μ€ Select the required contact from the Conversations menu. The selected contact is highlighted. -
Page 96: Using A Bluetooth Headset
Using a Bluetooth headset You can connect a Bluetooth headset to your OpenScape CP 600, which is ap- proved for use with the OpenScape CP 600. Ask your administrator about ap- proved headset types. Connecting the Bluetooth headset Prerequisite: The Bluetooth function on your OpenScape CP 600 is activated page 104. -
Page 97: Testing A Bluetooth Headset
Connecting a Bluetooth headset to OpenScape CP 600 The Bluetooth headset must now be connected to the OpenScape CP 600. € Select the Bluetooth headset in the list. Confirm with the Softkey to connect. You will receive a corresponding confirma- ? Headset ¦... -
Page 98: Using A Bluetooth Conference Phone
Using a Bluetooth conference phone You can connect a Bluetooth conference phone to your OpenScape CP 600, which is approved for use with the OpenScape CP 600. Ask your administrator about approved conference types. Connecting a Bluetooth conference phone "Konftel 60W" Below is an example of connecting and operating a "Konftel 60W"... -
Page 99: Testing The Bluetooth Conference Phone "Konftel 60W
Connecting/disconnecting Konftel 60W with OpenStage The Konftel 60W must now be connected to the OpenScape CP 600. If you want to use the Konftel 60W subsequently at another location for example, you should first disconnect it from the OpenScape CP 600. €... -
Page 100: Using A Bluetooth Device
Using a Bluetooth device You can control calls on the HFAG (hands-free audio gateway, e.g. mobile de- vice) from your OpenScape CP 600 phone via Bluetooth. Incoming HFAG call Answer Incoming calls Reject Bluetooth status bar icon indicates an HFAG call. For more information about how to proceed during incoming call, see ”Incoming calls”... -
Page 101: Outgoing Hfag Call
Pull audio Contact details History The “Pull audio” button reroutes the audio stream from HFAG back to Open- Scape CP 600. Audio has to be pulled to the phone. The option to end the audio on the mobile phone is rejected by the CP phone. For more information about how to proceed during a call, see ”During a call”... -
Page 102: Hfag Call States In Main Menu Screen
Outgoing Call Ringing Ringing HFAG call states in Main Menu Screen Incoming HFAG call in the Main menu screen Monday, 20 Sep 2018 The icon with the Bluetooth rune index indicates incoming HFAG call. -
Page 103: Hfag Call States In Conversations Screen
Connected HFAG call in the Main menu screen Favourites Monday, 20 Sep 2018 Conversations Voicemail Settings The icon with the Bluetooth rune index indicates connected HFAG call. HFAG call states in Conversations Screen Conversations Active call Yesterday Missed call Friday New missed call Friday Missed call... -
Page 104: Bluetooth Settings
Bluetooth settings Activating and deactivating Bluetooth ñ The Bluetooth function was activated for your phone by the administrator. You can also configure this setting via the Web interface page 207. Press the key for the Main menu if appropriate. Open using the Softkey. -
Page 105: Managing Bluetooth Devices
Open using the Softkey. The current name is displayed. Phone name The predefined name is entered. ¾ OpenScape CP600 75:7E:FF Change to the desired name and conclude your input with the Softkey. Save the setting by selecting the Softkey. Managing Bluetooth devices The following functions are available in the Bluetooth pairing manager: •... - Page 106 Open using the Softkey. $ User settings if nec. Enter and confirm the User password. Open using the Softkey. $ Bluetooth Open using the Softkey. Paired devices Paired devices are displayed. Start the search for new devices with the Softkey. Add device Õ...
- Page 107 € Select the relevant Bluetooth device. Confirm with the Softkey to connect. You will receive a corresponding confirma- ? Headset Ž ¦ _ tion. It often suffices to switch on the Bluetooth device in order to establish the connection automatically. Confirm with the Softkey to disconnect.
- Page 108 Connecting/disconnecting a Bluetooth device automatically If your Bluetooth device is proximity-system enabled, you can activate Proximity Monitoring. If the paired device comes into the immediate vicinity of the Open- Scape CP 600, the connection is established automatically. If the device is re- moved from the vicinity, the connection is dropped automatically.
- Page 109 " Adjust using the toggle key. Confirm the setting with the Softkey. Proximity Threshold Save the setting with the Softkey and exit the menu. Checking the proximity display Check different positions of your Bluetooth device at which the connection can still be maintained.
- Page 110 Deleting a Bluetooth device from the list You can delete a single Bluetooth device from the list, for example, if it will be no longer in the vicinity for an indefinite period. Press the key for the Main menu if appropriate. Open using the Softkey.
-
Page 111: Blacklist For Bluetooth Devices
Open the Configuration menu with the Softkey. Configure U The current name is displayed. Open the field name with the Softkey. Headset_1 K Name The predefined name is entered. Headset ¾ Change to the desired name and conclude your input with the Softkey. Save the setting by selecting the Softkey. -
Page 112: Removing A Bluetooth Device From The Blacklist
Removing a Bluetooth device from the blacklist Press the key for the Main menu if appropriate. Open using the Softkey. Settings Open using the Softkey. $ User settings if nec. Enter and confirm the User password. Open using the Softkey. $ Bluetooth Open using the Softkey. -
Page 113: Eddystone Beacons
Setting up a connection to a server for telephone beacons € Select input for URI. The current address is displayed. Open the URI field with the Softkey. https://www.unify.com K An address may already be entered. This should be an optimally short HTTPS https://www.unify.com Q ¾... -
Page 114: Programmable Keys
Programmable keys You can assign a series of functions for the phone to programmable Feature keys on the OpenScape Key Module 600 to suit your requirements. If you have not connected a OpenScape Key Module 600, you can use the Fa- vourites menu to program frequently used functions. -
Page 115: Programming A Key
Programming a key Initiating programming Directly via the key on the OpenScape Key Module 600 Hold down the Function key on the OpenScape Key Module 600 to which a func- tion is to be assigned until the programming prompt is displayed. Press the Softkey to open the programming. -
Page 116: Beginning Programming
Beginning programming Open using the Softkey. Unallocated Normal Open using the Softkey (not in Favourites). Unallocated Shifted € Choose the function to be programmed on the key. Confirm with the Softkey to set the function, for example Do not disturb. Do not disturb ¥... - Page 117 The input field is displayed. Rep. dialing ¾ Enter the key label you want and confirm with the Softkey. Open using the Softkey. Setting The input field is displayed. © Enter the subscriber's destination phone number and confirm with the Softkey. For example, insert a ’¬’...
-
Page 118: Using Keys
Enter the key label you want and confirm with the Softkey. Save the programming with the Softkey. Using keys Function keys on the OpenScape Key Module 600 A function or selected dialing can be programmed on the first or the second lev- el. -
Page 119: Resetting Keys
Example 2: Immed ring This function allows you to switch the preset delay ( page 134) on and off for all line keys. The delay is always activated by default. Press the key for the Main menu if appropriate. Open using the Softkey. -
Page 120: Making Calls In The Team
Making calls in the team Group call Your administrator can incorporate multiple telephones in a call pickup group. If your telephone belongs to a pickup group, you can also accept calls intended for other members of the group. A group call is displayed on the phone. The administrator may have made the following settings for signaling: Telephone status Ring on group call =... -
Page 121: Picking Up The Group Call Only Using The Key
Picking up the group call only using the key Prerequisite: The Call pickup key is configured. Your administrator has set up the group call such that it is only displayed ñ by the Call pickup key flashing. The phone can also ring when idle. A group call is waiting. -
Page 122: Picking Up A Group Call
Picking up a group call A group call is signaled. t Incoming call Confirm with the Softkey. Pickup call Lift the handset (only if the appropriate function is set by your administrator). Press the Function key or press it again if call answering was initiated via the á... -
Page 123: Direct Station Selection Keys
Direct station selection keys Apart from line keys, the administrator can also configure direct station selection (DSS) keys. You can use a DSS key to call an internal station directly, pick up calls for this station or forward calls directly to it. The DSS keys are also used for consultation calls. -
Page 124: Call Pickup
Call pickup You can pick up calls for the DSS subscriber. The LED flashes if a call is incom- ing for this station's line. Indirect pickup Prerequisite: The auto-answer function is deactivated page 176. Press the DSS key. The call is routed to your primary line and rings. Q Office £... -
Page 125: Led Display On Dss Keys
LED display on DSS keys DSS key Meaning Off: The phone is in idle mode. Flashes: You can accept a call for the DSS subscriber via the £ key. The call is routed to your primary line when the call is ac- cepted. -
Page 126: Multiline
MultiLine The next section describes the settings for a MultiLine phone and how to use a MultiLine phone. To simplify understanding, we recommend first reading the Section "Operating your OpenScape Desk Phone CP600/ CP600E ( page 31)". Refer to page 133 for a detailed description of the set- ... - Page 127 Phantom line Phantom lines are not used as primary lines by any telephones in a line trunk group. Phantom lines are established, for example, when the number of lines provided by a communications system exceeds the number of available tele- phones.
-
Page 128: Incoming Calls
Incoming calls Answering a call via the main line The phone rings. The caller and the relevant line are displayed. The notification Incoming call ø ë LED flashes. Thomas Meier 1234954 Press the flashing key for the main line on the OpenScape Key Module 600 and 3336 ø... -
Page 129: Making Calls
Using the line key on the OpenScape Key Module 600 Prerequisite: A OpenScape Key Module 600 is connected. Press the flashing key for the secondary line on the OpenScape Key Module 600 3338 ù £ and use speakerphone mode. Press the Softkey and use speakerphone mode. Answer O Line keys without OpenScape Key Module 600 If you have not connected a OpenScape Key Module 600 and lines are config-... - Page 130 Enter and confirm the phone number if you want to use the main line. You can also search for and use the contact from the list. Press the key to select a different line. Open using the Softkey. Favourites € Select the required line.
-
Page 131: During Calls
Forwarding calls for the primary line Call forwarding can only be activated for the primary line. Which call forwards are possible, how they are configured and activated can be found from page 170. Call forwarding information ñ Your administrator has activated "Forwarding shown". If you have activated one of the forwarding types on your phone for the primary line and a subscriber calls, an information window with the following information opens:... - Page 132 Making and receiving calls with multiple lines It is assumed for the following description that you have a OpenScape Key Mod- ule 600. Lines configured in Favourites operate accordingly page 129. Accepting a waiting call Depending on the settings for "Rollover", you will be notified of incoming calls page 136.
-
Page 133: Settings For Multiline (Keyset)
Lines with hot or warm line function Your administrator has configured a hot or warm line for the primary line or ñ for a secondary line. The function is activated when on • the primary line you lift the phone's handset or press the line or loudspeaker key •... - Page 134 Details for keyset line x : Primary line Hot/Warm line destination 3339 3336 Ring on/off Selection order Setting the time for a delayed ringer Specify the length of time before a held call should be signaled on a line. You can also configure this setting via the Web interface page 207.
- Page 135 Entering a number for the hot and warm line function Specify which number should be dialed when the hot or warm line function is ac- tivated. You can also configure this setting via the Web interface page 207. Press the key for theMain menu if appropriate. Open using the Softkey.
-
Page 136: Rollover For A Line
Rollover for a line ñ Your administrator can determine how rollover calls are to be signaled. Only the relevant line key flashes. Line ø £ You hear a special advisory tone and the corresponding line key flashes. Line ý £ The ringer melody set sounds briefly (approx. -
Page 137: Mobility Function
Mobility function The mobility function allows you to use another telephone as if it were your own. You use your customary phone number and all contacts as well as telephone settings are available to you on the other phone. Logging on to another telephone Prerequisite: The mobility function is available on this telephone. -
Page 138: Privacy/Security
Privacy/security Do not disturb If "Do not disturb" is activated, your telephone will not ring. The caller hears the busy tone or an announcement that the called party cannot accept any calls at present. Do not disturb can be activated/deactivated using a specially programmed Function key on the OpenScape Key Module 600 or also from the Presence menu page 28. -
Page 139: Security
Activate with the Softkey. Allow DND ¢ _ Save the setting by selecting the Softkey. Security User password Your User password protects your individual configurations, including your lan- guage settings. You can also use the User password to lock your telephone page 141. - Page 140 Open using the Softkey. Current password The input field is displayed. ****** © Enter the current password and conclude your input with the Softkey. Open using the Softkey. New password The input field is displayed. ****** © Enter the new password (at least 6 characters) and conclude your input with the Softkey.
-
Page 141: Locking The Phone
Open using the Softkey. New password The input field is displayed. ****** © Enter six zeros ("000000") to deactivate the password prompt. Confirm your in- put with the Softkey. Open using the Softkey. Confirm password The input field is displayed. ****** ©... - Page 142 Press the Softkey. Unlock phone Ø Enter the User password and confirm. The phone is unlocked if the password is correct. Press the Softkey. Admin unlock Ø Enter the administrator password if the User password is not known. Confirm with the Softkey. The phone is unlocked if the password is correct. If the telephone is locked, an emergency number entered by the adminis- trator can be dialed using the dialpad or the Emergency call option.
-
Page 143: Other Settings And Functions
Other settings and functions Audio settings Optimize the audio settings on your OpenStage for your work environment and according to your personal requirements. Room character To ensure that the other party can hear you properly in speakerphone mode, you can adjust the phone to the room acoustics by choosing one of the following room character conditions: •... -
Page 144: Ringer
Ringer Select your preferred ringer from the available audio files. If no individual audio files are available, the "Pattern" ringer is preset. To upload your own files in ".mp3" or ".wav" format, please consult your administrator. You can also configure this setting via the Web interface page 207. -
Page 145: Pattern Melody
Pattern melody You can also configure this setting via the Web interface page 207. Prerequisite: You have chosen the "Pattern" ringer, see page 144. Press the key for the Main menu if appropriate. Open using the Softkey. Settings Open using the Softkey. -
Page 146: Opening Listening Mode
Confirm with the Softkey to switch. You hear the set Pattern melody with the se- lected Pattern sequence. Save the setting with the Softkey. Opening listening mode Select the mode here that you prefer for open listening page 75. You can also configure this setting via the Web interface page 207. -
Page 147: Setting Headset Port Use
Setting headset port use You can also configure this setting via the Web interface page 207. Press the key for the Main menu if appropriate. Open using the Softkey. Settings Open using the Softkey. $ User settings if nec. Enter and confirm the User password. -
Page 148: Special Ringers
Special ringers You can assign a special individual ringer to the following incoming calls or events to allow faster identification: • Internal • External • Recall (Callback) • Emergency • Special 1 • Special 2 • Special 3 ñ The administrator has activated the special ringers. You can also configure this setting via the Web interface page 207. - Page 149 Settings for the "Pattern" If you selected "Pattern" as the ringer, you can make further settings for the pat- Ringer Pattern tern Melody and Pattern sequence: Open using the Softkey Melody € Choose a Melody between 1 and 8. You will immediately hear the associated melody.
-
Page 150: Activating/Deactivating The Ringer
Activating/deactivating the ringer You can see whether the function is activated or deactivated from the corre- sponding icon in the status bar on the display page 26. Hold down the key shown. Tone and indication with an unsecured voice connection Use this option to activate an alert tone that you hear when a secure voice con- nection with the party you are currently talking to ceases to be secure. -
Page 151: Display Language
Display language You can also configure this setting via the Web interface page 207. Press the key for the Main menu if appropriate. Open using the Softkey. Settings Open using the Softkey. $ User settings if nec. Enter and confirm the User password. Open using the Softkey. -
Page 152: Time Display Format
27.Suomi 28.Svenska 29.Türkçe Русск Time display format You can also configure this setting via the Web interface page 207. Press the key for the Main menu if appropriate. Open using the Softkey. Settings Open using the Softkey. $ User settings if nec. -
Page 153: Date Display Format
Date display format You can also configure this setting via the Web interface page 207. Press the key for the Main menu if appropriate. Open using the Softkey. Settings Open using the Softkey. $ User settings if nec. Enter and confirm the User password. €... -
Page 154: Country-Specific Setting
Country-specific setting Adapt your phone settings to suit the country-specific conditions (for example, transmission parameters). You can also configure this setting via the Web interface page 207. Press the key for the Main menu if appropriate. Open using the Softkey. Settings Open using the Softkey. -
Page 155: Screensaver
Screensaver Activate a screensaver for the telephone idle state. Your administrator can set a time of between two and eight hours defining how long the phone should be idle before display backlighting deactivates completely. You can also configure this setting via the Web interface page 207. -
Page 156: Automatic Screensaver Activation
Automatic screensaver activation Set how long OpenScape CP 600/600E should be idle before the screensaver automatically activates. You can choose from the following settings: • 0 minutes (deactivated) • 1 minute (default) • 5 minutes • 10 minutes • 20 minutes •... -
Page 157: Setting The Fade Time For The Screensaver
Setting the fade time for the screensaver Set the intervals at which the screensaver images change here. The following fade times are possible: • 5 seconds • 10 seconds • 20 seconds • 30 seconds • 60 seconds You can also configure this setting via the Web interface page 207. -
Page 158: Return To Main Menu After Timeout
Return to Main menu after timeout You can choose between screensaver or menu screen that the phone will switch to after a period of idle state has passed. The timer for this idle period will be the same as the existing screensaver timer page 157. - Page 159 if nec. Enter and confirm the User password. € Select "Phone". Open using the Softkey. $ Phone Open using the Softkey. $ Display Open using the Softkey. $ Landing screen The phone displays the current settings. Conversations ¥ € μ Select the type of the Landing screen in the list.
-
Page 160: Contrast For Openscape Key Module 600
Contrast for OpenScape Key Module 600 If you have connected an OpenScape Key Module 600, you can adjust the key label contrast to suit your ambient lighting. You can also configure this setting via the Web interface page 207. Press the key for the Main menu if appropriate. -
Page 161: Brightness For Openscape Key Module 600
Brightness for OpenScape Key Module 600 If you have connected an OpenScape Key Module 600, you can adjust the key label brightness to suit your ambient lighting. You can also configure this setting via the Web interface page 207. Press the key for the Main menu if appropriate. -
Page 162: Energy Saving Mode
Energy saving mode Set how long OpenScape CP 600/600E should be idle before the background lighting automatically switches off. You can choose from the following settings: • 1 minute • 5 minutes • 30 minutes • 60 minutes • 2 hours •... -
Page 163: Setting Daylight Saving Time
Setting daylight saving time You can also configure this setting via the Web interface page 207. Prerequisite: Auto DST is deactivated page 164. Press the key for the Main menu if appropriate. Open using the Softkey. Settings Open using the Softkey. $ User settings if nec. -
Page 164: Automatic Daylight Saving Time
Automatic daylight saving time The Auto DST setting is provided for information purposes and can only be changed by your administrator. You can also access this information via the Web interface page 207. Press the key for the Main menu if appropriate. Open using the Softkey. -
Page 165: Displaying The Date And Time
Displaying the date and time You can read the date and time display here if necessary (cannot be changed). You can also check this setting via the Web interface page 207. Checking the time Press the key for the Main menu if appropriate. Open using the Softkey. -
Page 166: Displaying Network Information
Displaying network information This information overview in the user area of the service menu provides you with information about the IP address or name of the phone and the HTML address of the web interface. It also provides real-time data about the network activity of the phone. - Page 167 Network information PC RX PC TX LAN autonegotiation LAN information.100 Mbps full duplex,Gigabit enabled € Scroll Network information LAN autonegotiation LAN information.100 Mbps full duplex,Gigabit enabled PC autonegotiation PC information Link down DNS name : Name or number of telephone. URL: HTTP address of the Web interface.
-
Page 168: Resetting User Data
Resetting user data The following user-specific settings, which you changed via the phone menu or the web interface, can be reset to factory settings. • Display settings • Language setting • Screensaver Some images for the screensaver will be deleted or deleted default images will be restored. -
Page 169: Sd Card
SD Card You only see status information at present for a possible SD card. Usage is not yet possible. Please note that SD slot is not available on CP600E. Press the key for the Main menu if appropriate. Open using the Softkey. Settings Open using the Softkey. -
Page 170: Programming Call Forwarding
Programming call forwarding You can forward calls for your phone to another phone. You can also change, activate and deactivate Call forwarding during a call. ñ The Forwarding function must be approved by the administrator. On multi-line telephones page 52, you can only configure call forward- ... -
Page 171: Activating Or Deactivating Immediate Call Forwarding
Activating or deactivating immediate call forwarding All calls are forwarded regardless of other settings. The prerequisite for forward- ing is that a forwarding destination has been entered. If no destination has been entered, you will be forwarded automatically to enter a destination when you at- tempt to activate forwarding. - Page 172 Managing call forwarding Open the Presence menu. Forward all calls ¦_ « Open the Forward to menu. Open the Forwarding controls menu. Forwarding controls Three types of call forwarding are offered in the Forwarding menu: • Unconditional • Busy • No reply (after xs) You can check at this point whether a call forwarding type is already acti- vated.
-
Page 173: Copying And Pasting Destination Phone Numbers
Copying and pasting destination phone numbers The current destination phone number for a call forwarding type is copied. For example, the current destination phone number for All Calls should also become the current destination phone number for No reply. Open the Presence menu. Forward all calls ¢_ «... -
Page 174: Activating/Deactivating Call Forwarding
Activating/deactivating call forwarding Prerequisite: A destination has to be entered first in order to activate the for- warding type. Open the Presence menu. The forwarding type "All calls" should be disabled if you want to use the call type All calls ¦_ "Busy". -
Page 175: Call Forwarding Chain
Open the input field with the Softkey ( page 24). Delay (seconds) The input field is displayed. © Enter the required time in seconds and confirm your entry with the Softkey. Save your input. The new time is displayed. Exit the Presence menu if appropriate. -
Page 176: Cti Calls
CTI calls Beep on auto-answer When you dial a number with a CTI application (e.g. Outlook) and auto-answer is activated, the phone switches automatically to speakerphone mode. If auto- answer is deactivated, the phone first rings and you have to press the loud- speaker key or lift the handset in order to set up the call. -
Page 177: Beep On Auto-Reconnect
Beep on auto-reconnect You can reconnect a held call both via the CTI application and via the phone. A beep sounds when you toggle between an active call and a held call when the function is active. You can also configure this setting via the Web interface page 207. -
Page 178: Activating/Deactivating The Hold Reminder Tone
Activating/deactivating the hold reminder tone You can also configure this setting via the Web interface page 207. Press the key for the Main menu if appropriate. Open using the Softkey. Settings Open using the Softkey. $ User settings if nec. Enter and confirm the User password. -
Page 179: Activating/Deactivating Hold And Hang-Up
Activating/deactivating Hold and hang-up This function works in the following call scenarios: • You have placed a call on hold and hang up. • You are conducting a consultation call and the second party hangs up. • You have answered a second call and you or the second party hangs up. You can use "Hold and hang-up"... -
Page 180: Music On Hold
Music on hold If the Music on hold option is active, music is played back when you are placed on hold by another party. You can also configure this setting via the Web interface page 207. Press the key for the Main menu if appropriate. Open using the Softkey. -
Page 181: Permitting Call Deflection
Permitting call deflection You can also configure this setting via the Web interface page 207. Press the key for the Main menu if appropriate. Open using the Softkey. Settings Open using the Softkey. $ User settings if nec. Enter and confirm the User password. Open using the Softkey. -
Page 182: Allowing Call Waiting
Allowing call waiting If the call waiting (second call) function is deactivated, a caller hears the busy signal if you are already conducting a call. ñ The option was programmed by your administrator. You can also configure this setting via the Web interface page 207. -
Page 183: Connecting Subscribers By Hanging Up
Connecting subscribers by hanging up Set the "Toggle associate" function to Yes if you want to connect to a second or pickup call by hanging up. You can also configure this setting via the Web interface page 207. Press the key for the Main menu if appropriate. Open using the Softkey. -
Page 184: Allowing Call Transfer
Allowing call transfer You can also configure this setting via the Web interface page 207. Press the key for the Main menu if appropriate. Open using the Softkey. Settings Open using the Softkey. $ User settings if nec. Enter and confirm the User password. Open using the Softkey. -
Page 185: Settings For Autodial Delay
Settings for autodial delay You can also configure this setting via the Web interface page 207. The setting does not affect automatic emergency number dialing. If you select Autodial delay (s), you must either confirm with the Softkey or wait until the autodial delay expires to set up a call when dialing with the handset on hook. -
Page 186: Allowing Busy When Dialling
Allowing Busy when dialling If you activate this function, an incoming call received while you are dialing is re- jected. The caller then hears the busy signal. You can also configure this setting via the Web interface page 207. Press the key for the Main menu if appropriate. -
Page 187: Allowing Transfer On Ring
Allowing Transfer on ring If this option is allowed, you can activate call transfer by replacing the handset even before the called party answers. You can also configure this setting via the Web interface page 207. Press the key for the Main menu if appropriate. Open using the Softkey. -
Page 188: Activating/Deactivating Immediate Dialing
Activating/deactivating immediate dialing Immediate dialling should only be activated if your administrator has configured and approved a dial plan. Immediate dialling is deactivated by default. For this reason after entering the number you must either confirm the "Wählen" option or wait until the dial delay expires to set up the connection. -
Page 189: Permitting A Callback
Permitting a callback ñ The Callback function is approved by the administrator. You can also configure this setting via the Web interface page 207. Press the key for the Main menu if appropriate. Open using the Softkey. Settings Open using the Softkey. $ User settings if nec. -
Page 190: Allowing A Conference
Allowing a conference This option allows or blocks the "Local conference" function. You can also configure this setting via the Web interface page 207. Press the key for the Main menu if appropriate. Open using the Softkey. Settings Open using the Softkey. $ User settings if nec. -
Page 191: Allow Joining In A Conference
Allow joining in a conference You can use this option to decide whether or not your call partners are allowed to join calls after you exit the conference call. You can also configure this setting via the Web interface page 207. ... -
Page 192: Activating Circuit
Activating Circuit To use your Circuit account in conversations, you have to enter the server ad- dress and your access details. Activating Circuit excludes other corporate direc- tories and the local caller list page 87. You can also configure this setting via the Web interface page 207. -
Page 193: Call Logging
Call logging Deactivating Logging The function can be disabled in order to prevent unauthorized third parties gain- ing information on the other party involved in the call. No further calls or conver- sations are then logged in conversations. The function is always activated by de- fault. -
Page 194: Displaying The Missed Call Log
Displaying the missed call log All missed calls intended for this line are logged and new missed calls are dis- played. If the "No" option is selected for "Include calls answered elsewhere", missed calls for this line that were answered either by other subscribers in the group or with "Directed pickup"... -
Page 195: Call Recording
Call recording A central voice recorder (voice recorder from ) is installed in the network for recording calls to which your telephone connects in order to record the cur- rent voice traffic. The recorder records the entire voice flow of two or more par- ticipants. -
Page 196: Explanations Of Recording
Explanations of recording Recordable calls A recordable call is any call that has a call connection status on the telephone. This can be any incoming or outgoing call. It is immaterial here whether a call is set up directly via the telephone or via an application. •... -
Page 197: Recording Calls
MultiLine There is no difference between multi-line calls and single-line calls when it comes to recording calls. If recording has started, the call is recorded, otherwise not. The recording status of a line continues as long as calls are connected to this line. - Page 198 Call recording with AutoStart Standby mode is activated in principle in idle mode. The recording button LED lights up. You cannot switch off the recorder. As soon as a call is set up, call re- cording starts automatically. Lift the handset. Press the key shown.
- Page 199 The recording is paused while you initiate the consultation. The recording sym- on the display disappears. If the consultation partner answers, the consultation call is recorded. You hear a beep and the recording symbol is shown on the display again. You can now terminate the consultation call or for example switch back to the first call party (alternate) while the consultation call is placed on hold.
- Page 200 Your call is paused and reconnected during the recording. Prerequisite: You are making a call that is being recorded. Your call partner has placed the call on hold. You hear the music on hold. The recording is paused and the recording symbol has disappeared from the dis- play.
- Page 201 • You place the active line on hold during the call recording and then resume the call on this line. • You seize a different line during call recording. The first line is placed on man- ual hold. Prerequisite: The telephone has more than one line configured. The active call is being recorded.
-
Page 202: Diagnostic Data
Diagnostic data This information overview in the user area of the service menu provides you with information on the current configuration of the telephone: Press the key for the Main menu if appropriate. Open using the Softkey. Settings Open using the Softkey. $ User settings if nec. - Page 203 Diagnostic data IPv4 address 192.168.1,203 IPv4 subnet mask 255.255.255.0 IPv4 default route 192.168.1.2 Primary DNS 217.237.148.22 Secondary DNS 192.168.1.2 IPv4 Route 1 IP None IPv4 Route 1 gateway None IPv4 Route 1 mask None IPv4 Route 2 IP None IPv4 Route 2 gateway None IPv4 Route 2 mask None...
- Page 204 Diagnostic data FIPS enabled Media.Negotiation Single IP ICE.Check.pairs.max ICE.Max.Check.ms 15000 ICE.Gather.Ta.timer.ms ICE.Gather.RTO.timer.ms ICE.Check.Ta.timer.ms ICE.Check.RTO.timer.ms Bluetooth hardware address 00:1A:E8:75:7E:FF Total calls made Total calls received Calls made via dialler Calls made via conversations Calls made via search...
-
Page 205: Individual Settings That Impact Energy Efficiency
Individual settings that impact energy efficiency You can actively reduce energy consumption by making the following settings on your telephone and therefore contribute in an important way to protecting the environment. • You can reduce the ringer volume, display brightness and contrast – the de- fault settings on delivery are 50%. -
Page 207: Web Interface (Wbm)
Web interface (WBM) You can configure a number of settings for your phone via the Web interface. Communication is via a secure HTTPS connection. Access to the Web interface must be activated by your adminis- trator. Launching the Web interface For more information on the IP address, the web interface address, and how to connect the telephone to the network, refer to the section entitled "Network information"... -
Page 208: Administrator Settings
Administrator settings This area lets you configure settings for administering your phone and the network environment. Access to the Administrator settings is protected by the admin password. For further information, consult your administrator or refer to the administration manual. User Pages The Web interface homepage opens once you have entered and confirmed the phone's IP ad- dress. -
Page 209: User Menu
User menu All settings that you can make via the web interface's user menu can also be made via the phone's user menu page 57. User Pages User login User login V page 139 Date and time – Time V page 165 ... - Page 210 – Handling – Allow call waiting V page 182 – Allow DND V page 138 – Busy when dialling V page 186 – CTI calls – Auto-answer V page 176 – Beep on auto-answer V page 176 ...
- Page 211 Phone – Display – Brightness V page 161 – Key module contrast. V page 160 – Key module brightness V page 161 – Screensaver – Enabled V page 155 – Idle time (mins) V page 156 ...
- Page 212 File transfer – Slideshow images Slideshow images Choose the image file you wish to use as a slideshow image Browse... Save Cancel Closing or navigating away from this page will cancel the file upload Delete all user slideshow images Default slideshow images will be restored Default slideshow images will be restored Default slideshow images will be restored Delete...
- Page 213 – Ringtones Ringtones Choose the ringtone you wish to transfer to the phone (1MB max) None selected Browse... Ringtone name (optional) Save Cancel Closing or navigating away from this page will cancel the file upload Delete all user ringtones Default ringtone settings will be restored Delete Delete Ringtone Nr.
-
Page 214: Fixing Problems
Fixing problems Caring for your telephone • Never allow the telephone to come into contact with coloring, oily or aggressive agents. • Always use a damp or antistatic cloth to clean the telephone. Never use a dry cloth. • If the telephone is very dirty, clean it with a diluted neutral cleaner containing surfactants, such as a dish detergent. - Page 215 Priority Description Canceled by user Appears if the PIN entry was rejected The IP address of the Unify Vermittlungrechner cannot be retrieved. DNS query failed. A connection cannot be established to the Unify Vermittlungrechner – No response A connection cannot be established to the Unify Vermittlungrechner –...
- Page 216 To correct any other problems: Contact your administrator first if a fault persists for more than five minutes, for example. Pass on the message displayed in the red field, if appropriate, as shown in the next example. Problems that cannot be corrected should be referred to Customer Service. Conversations Voicemail Tuesday 17 Nov.
-
Page 217: Repair And Recycling Concept, Extending Performance Capability
This section includes additional user instructions in accordance with the basic award criteria for the Blue Angel eco-label pursuant to RAL-UZ 150. Obligations for Unify arising from this section are only valid in Germany. Recycling and disposal of equipment in the OpenScape Desk Phone family Return of OpenScape Desk Phone waste equipment. -
Page 218: Repair Reliability And Spare Part Supply
Repair reliability and spare part supply Unify Software and Solutions GmbH & Co. KG guarantees repair support and spare part supply for up to 5 years following product discontinuation of the OpenScape Desk Phone telephones. Extending performance capability The functionality of all OpenScape Desk Phone telephones can be extended fundamentally by means of software updates. -
Page 219: Special Features For Operation On An Openscape 4000
Special features for operation on an OpenScape 4000 Special features for operation on an OpenScape 4000 Not all functions are supported fully when operating an OpenScape Desk Phone CP600/CP600E on an OpenScape 4000, as is the case on an OpenScape Voice. Passively supported functions Some of the functions are only available to you as a passive user. -
Page 220: Index
Index Index Controlling ............198 Icons ..............196 Line key .............. 200 Manual ..............197 Multi-line ............. 197 Operating modes ..........195 Abort deployment ............. 18 Second call ............199 Administration ............61 Tips ..............196 AICS Zip tone ..........66, 78, 128 Call settings Alerts ................ - Page 221 Index DSS key Consultation ............123 Key modules ............21 Indirect pickup ............. 124 Rejecting a call ............ 124 During calls MultiLine .............. 131 Language setting Country setting ............ 154 Language for user prompts ......... 151 LDAP ............... 87 Eddystone beacons ..........113 LED displays ............
- Page 222 Index Parameters .............. 58 Telephone maintenance ........214 Phantom line ............127 Telephony interface Pickup group ............120 SingleLine ............. 47 Presence ..............28 Time ............... 165 Primary line ............126 Time display format ..........152 Privacy ..............138 Toggle/connect ............79 Private line .............
Need help?
Do you have a question about the OpenScape CP600 and is the answer not in the manual?
Questions and answers