
Subscribe to Our Youtube Channel
Related Manuals for Keba KeContact P30 e-series


Summary of Contents for Keba KeContact P30 e-series
- Page 1 KeContact Charging station Operating instructions V 3.22 Translation of the original manual...
- Page 2 Specifications are subject to change due to further technical developments. Details presented may be subject to correction. All rights reserved. Gewerbepark Urfahr, 4041 Linz, Austria, Telefon: +43 732 7090-0, KEBA AG Headquarters: Fax: +43 732 7309-10, keba@keba.com For information about our subsidiaries please look at www.keba.com.
-
Page 3: Table Of Contents
Preparing the charging station ............5.2.2 Teaching in the RFID master card ............. 5.2.3 Teaching in the slave card ..............5.2.4 Deleting RFID cards ................5.2.5 RFID authorization at charging network ..........Authorization via key switch................Charging process....................... Operating instructions V3.22 © KEBA... - Page 4 Table of contents Starting the charging process ................Ending the charging process ................Error diagnosis......................Maintenance........................ Changing the cylinder lock................Operating instructions V3.22 © KEBA...
-
Page 5: Introduction
This symbol reminds you of the possible consequences of touching electro- statically sensitive components. Information Identifies practical tips and useful information. No information that warns about potentially dangerous or harmful functions is contained. Operating instructions V3.22 © KEBA... -
Page 6: Purpose Of The Document
The device manufacturer assumes no liability for resulting claims! Guarantee Only the maintenance work expressly permitted by KEBA may be performed. Any other manipulations to the device will also result in loss of warranty. A device with broken warranty seals or removed lead seals may no longer be put into operation. -
Page 7: Notes On This Document
Operation of the charging station 1.6.2 Not contained in this document ● Assembly/disassembly of the charging station ● Commissioning of the charging station ● Troubleshooting Further documentation Manuals and additional information are available on the KEBA website: www.keba.com/en/emobility/service-support/downloads/Downloads Operating instructions V3.22 © KEBA... -
Page 8: Safety Notes
Persons who, due to their special training, expertise and experience as well as knowledge of current standards, are able to assess the work per- formed and the possible hazards. Operating instructions V3.22 © KEBA... - Page 9 ● Never clean the charging station with aggressive solvents and cleaning products, scouring materials, water jets (e.g. garden hose, pressure cleaner etc.) or excessive pressure. Operating instructions V3.22 © KEBA...
-
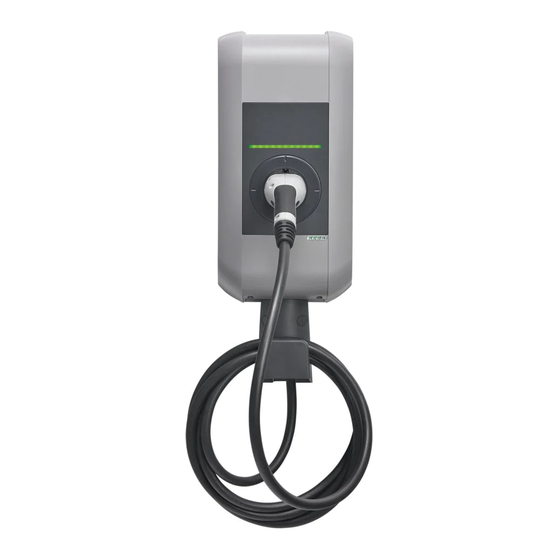
Page 10: Description Of The Charging Station
... Charging socket with cover (op- ble (optional) tional) ... Holder for charging cable (optional) ... Display (optional) Information Depending on the design of the charging station, the charging socket or charging cable may deviate from the shape shown. Operating instructions V3.22 © KEBA... -
Page 11: Type Plate
The type and features of the charging station can be determined by the product designation. The product designation is specified on the type plate. Due to technical or legal restrictions, not all versions/options are available in all countries. Operating instructions V3.22 © KEBA... - Page 12 WLAN x-series GSM x-series WLAN, GSM Switching element Contactor 1-phase Contactor 3-phase Energy meter / MID None Energy meter (not calibrated) Calibratable energy meter (MID) Authorization None RFID Key switch MID: Measuring Instruments Directive Operating instructions V3.22 © KEBA...
-
Page 13: Options
3.4.2 Key switch The key switch is used for authorizing a charging process with a key. Fig. 3-4: Key switch ... Key switch For information about replacing the cylinder lock, see 8.1 Changing the cylin- lock. Operating instructions V3.22 © KEBA... -
Page 14: Displays And Operating Elements
The charging station is in commissioning mode. (S2) Flashing red Error, for details see "Diagnosis" Blue/red Error display via color code, for details on possible causes of er- Red/white ror and troubleshooting see "FAQs" on the KEBA website Operating instructions V3.22 © KEBA... -
Page 15: Display (Optional)
Display during startup of the charging station Transmitted energy of the current charging process, Display at start and after completion of a charging process Text display, e.g. call for action or information about the charging process Operating instructions V3.22 © KEBA... -
Page 16: Display With Calibratable Energy Meter (Mid)
If the display is marked with a preceding "M!", an internal message was stored in the memory of the charging station during the charging process. When restarting the charging station, the marking is reset. MID-relevant error. The charging station must be returned for repair. Operating instructions V3.22 © KEBA... -
Page 17: Authorization
A maximum of 20 RFID cards can be taught into a charging station. An RFID master card must first be taught-in for this. Using this master card, additional RFID slave cards can subsequently be taught-in. Operating instructions V3.22 © KEBA... -
Page 18: Preparing The Charging Station
1) Unscrew the two screws on the bottom of the housing cover 2) Lift the housing cover at bottom max. 1 cm and then push upwards 2. 3) Unscrew the four screws of the connection panel cover and remove the connection panel cover upwards. Operating instructions V3.22 © KEBA... -
Page 19: Teaching In The Rfid Master Card
After teaching in the RFID master card, the LED bar flashes green for a fur- ther 60 seconds and a charging session authorized by the RFID master card can be started. After this, the LED bar flashes blue to indicate that au- thorization to start a charge is required. Operating instructions V3.22 © KEBA... -
Page 20: Teaching In The Slave Card
(approx. 10 seconds). The charging station will now automatically perform a restart, deleting all previously taught-in cards in the process. If the deletion was successful, the LED bar flashes green and charging with- out authorization is possible. Operating instructions V3.22 © KEBA... -
Page 21: Rfid Authorization At Charging Network
The key is only necessary for starting the charging procedure; after this the key can be removed, since the charg- ing procedure is continued even without the key attached. Operating instructions V3.22 © KEBA... -
Page 22: Charging Process
2) For charging station with charging socket: Disconnect the charging cable at the charging station 3) For charging stations with permanently installed charging cable: Stowing of the charging cable on the holder of the charging station The charging process is completed. Operating instructions V3.22 © KEBA... -
Page 23: Error Diagnosis
Charging cable cannot be un- plugged Press the plug in and con- The charging socket may not nect again to the vehicle. unlock due to tension on the Then finish the charging charging cable process again. Operating instructions V3.22 © KEBA... - Page 24 Errors must always be ac- knowledged by unplugging Error the charging cable. For more information, see "FAQs" on the KEBA website. Switch off the supply voltage of the charging station (in- LED bar flashes red stalled or superordinate RCD and line circuit breaker). Un-...
-
Page 25: Maintenance
A new cylinder lock must meet the following requirements: ● Profile half cylinder according to EN 1303 or DIN 18252 ● Adjustable lock nose ● Dimensions according to the illustration. Dimension A = 30 mm Fig. 8-8: Dimensions of the cylinder lock in mm Operating instructions V3.22 © KEBA... - Page 26 5) Turn the key to the right until the resistances have been noticeably over- come and the key can be removed. Do not turn the key past the [MAX] position. The key switch is now ready for use. Operating instructions V3.22 © KEBA...
Need help?
Do you have a question about the KeContact P30 e-series and is the answer not in the manual?
Questions and answers