Vinotemp Wine-Mate WM-1500HTD Installation Manual
Hide thumbs
Also See for Wine-Mate WM-1500HTD:
- Installation, use & care manual (25 pages) ,
- Use & care manual (21 pages) ,
- Installation instruction (3 pages)

Related Manuals for Vinotemp Wine-Mate WM-1500HTD


Summary of Contents for Vinotemp Wine-Mate WM-1500HTD
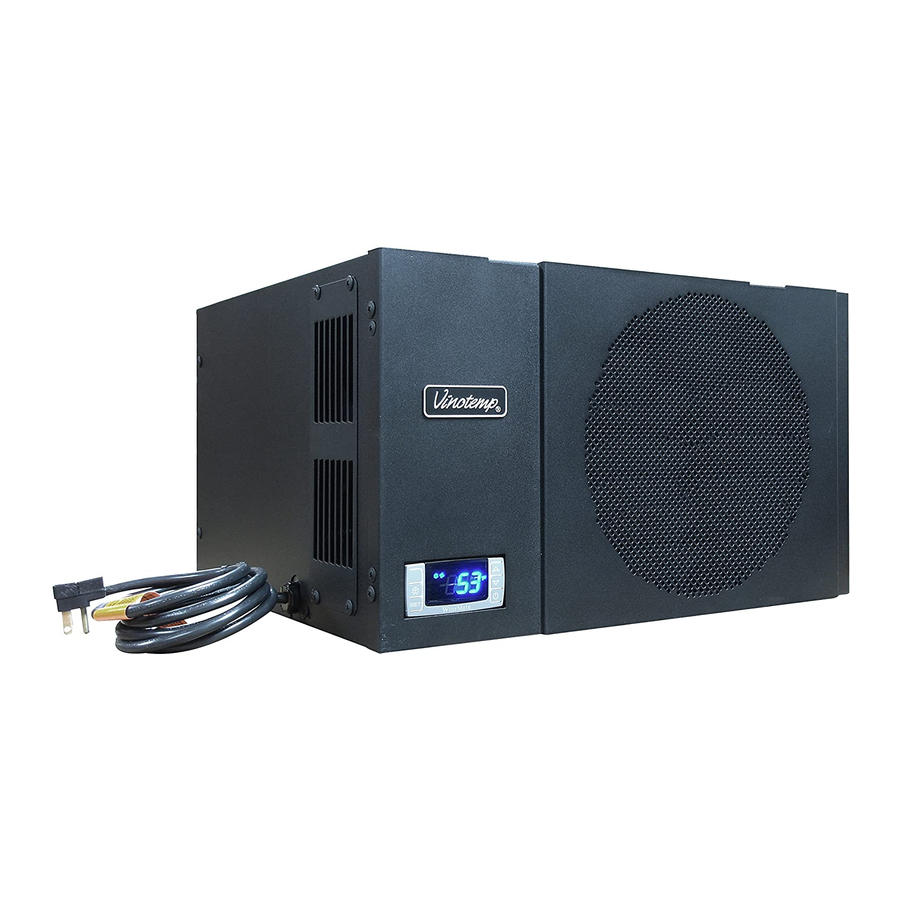
- Page 1 Installation Manual WM-1500HTD WM-1500HTD-TE WM-2500HTD WM-2500HTD-TE www.vinotemp.com www.vinotemp.com Tel: (310) 886-3332 Fax: (310) 886-3310 Email: info@vinotemp.com Read and save these instructions...
-
Page 2: Important Safety Information
Important Safety Information • DO NOT PLUG IN UNTIL 24 HOURS AFTER DELIVERY. • DO NOT USE A GROUND FAULT INTERRUPTER (GFI). • A DEDICATED 20 AMP CIRCUIT IS REQUIRED. - Page 3 The specifications and dimensions are listed as follows: Cabinet Size Model Exhaust Electrical Weight (lb) (cu ft) Rear Exhaust 115V/60Hz/4A 1500htd Top Exhaust 115V/60Hz/4A 1500htd-te Rear Exhaust 115V/60Hz/5A 2500htd Top Exhaust 115V/60Hz/5A 2500htd-te NOTES: • The voltage, frequency and current are specified on the label, on the cooling unit.
- Page 4 cabinet temperature, or higher ambient temperature and less insulation will cause the capacity to reduce and may not maintain a temperature of 55 ° • In order for the unit to operate properly, the ambient temperatures for WM- ° ° 1500HTD should not be higher than 78 F or lower than 50 •...
- Page 5 2. Cooling Unit Installation • The cooling unit produces cooling that is supplied into the cabinet, meanwhile it also generates heat that must be exhausted outside of the cabinet. So the cold-air supply with return-air intake, and hot-air exhaust with ambient-air side must be separated and sealed.
- Page 6 Fig. 2.1 CUTOUT AND HOLE DIMENSIONS Fig. 2.2 REAR EXHAUST CUTOUT...
- Page 7 Fig. 2.3 TOP EXHAUST CUTOUTS Fig. 2.4 MOUNTING SCREW INSERTS Fig. 2.5 REAR GASKETS...
- Page 8 Fig. 2.6 TOP EXHAUST GASKETS Fig. 2.7 MOUNTING OOLING UNIT...
- Page 9 Fig. 2.8 MOUNTING FRONT COVER Fig. 2.9 COOLING UNIT MOUNTED (REAR EXHAUST)
- Page 10 Fig. 2.10 COOLING UNIT MOUNTED (TOP EXHAUST) Fig. 2.11 INSTALLING WALL GRILLE...
Need help?
Do you have a question about the Wine-Mate WM-1500HTD and is the answer not in the manual?
Questions and answers