Table of Contents
Advertisement
Quick Links
Download this manual
See also:
Programming Manual
Advertisement
Table of Contents

Related Manuals for Saluki S3331B


Summary of Contents for Saluki S3331B
- Page 1 S3331 Series Handheld Spectrum Analyzer User Manual Saluki Technology Inc.
- Page 2 Tel: 886.2.2175 2930 Email: sales@salukitec.com www.salukitec.com The manual applies to the cable & antenna tester of the following models: S3331A handheld spectrum analyzer (9kHz-3.6GHz). S3331B handheld spectrum analyzer (9kHz-7.5GHz). Standard Accessories of S3331 handheld spectrum analyzer Item Name...
- Page 3 Manual rests with Saluki. Saluki Tech owns the copyright of this Manual which should not be modified or tampered by any organization or individual, or reproduced or transmitted for the purpose of making profit without its prior permission, otherwise Saluki will reserve the right to investigate and affix legal liability of infringement.
- Page 4 Tel: 886.2.2175 2930 Email: sales@salukitec.com www.salukitec.com Contacts Service Tel: 886.2.2175 2930 Website: www.salukitec.com Email: info@salukitec.com Address: No. 367 Fuxing N Road, Taipei 105,Taiwan (R.O.C.)
-
Page 5: Table Of Contents
Tel: 886.2.2175 2930 Email: sales@salukitec.com www.salukitec.com Content BRIEF INTRODUCTION..................................... 7 1.1. Key Feature ......................................7 1.2. Typical Applications ....................................7 1.3. Measurement Functions ..................................7 SAFETY INSTRUCTIONS ..................................9 2.1. Device safety ......................................9 2.2. Precautions on personal safety................................9 OVERVIEW ........................................ - Page 6 Tel: 886.2.2175 2930 Email: sales@salukitec.com www.salukitec.com 5.10. TOI Distortion Measurement ................................44 REMOTE CONTROL ....................................46 6.1. OS supported ....................................... 46 6.2. Software Installation Procedures................................46 6.3. Connection ......................................49 6.3.1. USB Port Connection ..................................49 6.3.2. LAN connection ....................................50 6.4.
-
Page 7: Brief Introduction
Level accuracy: 1.5dB Build - In Tracking source Frequency 100kHz – 1.5GHz for S3331A, 100kHz - 3.2GHz for S3331B, covers most of the applications. Output power -30dBm - 0dBm in 1dB steps . With an external coupler, user can make approximate scalar network operations ... - Page 8 Tel: 886.2.2175 2930 Email: sales@salukitec.com www.salukitec.com Limit Line User-defined mask Channel Power OBW(Occupied Bandwidth) ACPR (Adjacent Channel Power Ratio) AF/FM demodulation Audio demodulation Scalar network measurement with external coupler ...
-
Page 9: Safety Instructions
Tel: 886.2.2175 2930 Email: sales@salukitec.com www.salukitec.com 2. Safety Instructions Please read safety instruction carefully and Strictly follow! We will spare no efforts to ensure that production process comply with latest safety standards so as to safeguard the safety of our users. The design and tests of our products and accessory equipment comply with relevant safety standards. - Page 10 Tel: 886.2.2175 2930 Email: sales@salukitec.com www.salukitec.com When cleaning the device, please unplug the device to avoid electric shock. Use dry or moist soft cloth to clean the device. Do not clean the internal of the device. Before using this device, personnel need to be trained. When using the device, concentration is required. Operation by unqualified people may cause personal injuries and property losses.
-
Page 11: Overview
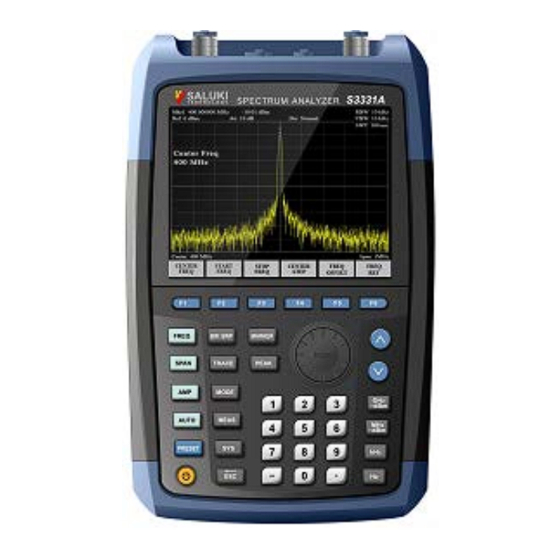
Tel: 886.2.2175 2930 Email: sales@salukitec.com www.salukitec.com 3. Overview This chapter will help the user get to know S3331 quickly. This chapter includes introductions of: Front Panel Interface on side 3.1. Front Panel Overview This Section will give a detailed introduction to the front panel of S3331. You can get generally familiar with the basic application of the panel keyboard of the instrument by reading it. -
Page 12: Function Keys Description
Tel: 886.2.2175 2930 Email: sales@salukitec.com www.salukitec.com Description Description Power Switch USB Port ⑤ ⑪ Knob RF input ⑥ ⑫ 3.2. Function Keys description Frequency settings. Include Start Frequency, Stop frequency, center frequency Frequency span setting Amplitude Settings. Include Reference level, antenuator, pre-amplifier, scale settings. Bandwidth/Sweep settings. -
Page 13: Interfaces On Side
Tel: 886.2.2175 2930 Email: sales@salukitec.com www.salukitec.com Figure 3-2 Soft Keys on S3331 3.4. Interfaces on Side Figure 3-3 Side View of S3331 Handheld Spectrum Analyzer Description Description External Trigger Input (BNC) Ear phone interface ① ④ Reference Clock I/O (BNC) Power adapter interface ②... -
Page 14: User Interface
Tel: 886.2.2175 2930 Email: sales@salukitec.com www.salukitec.com Description Description USB Port Battery hatch ③ ⑥ 3.5. User Interface Figure 3-4 User Interface of S3331 Handheld spectrum analyzer Name Trace Display Format ① Detector Type ② Attenuator ③ ④ ⑤ Trace ⑥ Sweep time ⑦... -
Page 15: Menu Description
Tel: 886.2.2175 2930 Email: sales@salukitec.com www.salukitec.com 4. Menu Description This chapter will provide a full function – menu mapping and will give description of each menu option. 4.1. Menu Structure This section provides the structure of all buttons and soft-keys. Detail function description will be provided in section 4.2. S3331 has following function keys on front panel. -
Page 16: Amp
Tel: 886.2.2175 2930 Email: sales@salukitec.com www.salukitec.com 4.2. AMP Pop up menus related to parameter setting of Amplitude, including [Reference Level], [Attenuator▶], [Preamplifier ON OFF], [Scale Type Logarithm Linear], [Scale/Division], [Ref Unit], [Ref Offset]. Please refer to following diagram for the menu structure. Ref Level ... -
Page 17: Bw/Swp
Tel: 886.2.2175 2930 Email: sales@salukitec.com www.salukitec.com 4.3. BW/SWP Pop up the soft menus for setting of resolution bandwidth ,video bandwidth and sweep, including [RBW Auto Manual], [RBW Mode Det Count], [VBW Auto Manual], [Average], [Sweep Time], [Sweep Point], [Sweep Single], [Sweep Count], [EMI BW] [RBW Auto Manual] ... -
Page 18: Freq
Tel: 886.2.2175 2930 Email: sales@salukitec.com www.salukitec.com 30kHz, 9kHz. 4.4. FREQ The [Frequency] key on the front panel is used to set parameters related to the signal/spectrum analyzer frequency, including [Center Frequency], [Start Frequency], [Stop Frequency], [CF Step Auto ON OFF], [Frequency Offset]. User can configure the frequency measurement scope through the [Start Frequency] and [Stop Frequency], or through the [Center Frequency] and [Span]. -
Page 19: Marker
Tel: 886.2.2175 2930 Email: sales@salukitec.com www.salukitec.com 300MHz input signal, and set the [CF Step Auto Manual] as Manual, and input 300MHz. If the current center frequency is 300MHz, press the stepping key to increase the center frequency to 600MHz. Press the stepping key again to increase the center frequency by 300MHz to 900MHz. - Page 20 Tel: 886.2.2175 2930 Email: sales@salukitec.com www.salukitec.com [Normal] Menu description: Create a new normal maker, or change the active marker from a delta marker to a normal marker. Normal marker will information is displayed on screen (X axis value, Y axis value) [Delta] ...
-
Page 21: Meas
Tel: 886.2.2175 2930 Email: sales@salukitec.com www.salukitec.com Menu description: to set the Start Frequency equal to the Marker Frequency. The menu changes the value of start frequency. [Marker → Stop] Menu description: to set the Stop Frequency equal to the Marker Frequency. The menu changes the value of stop frequency. [Marker →... - Page 22 Tel: 886.2.2175 2930 Email: sales@salukitec.com www.salukitec.com Menu description: This function will provide a waterfall diagram to show the possibility of a signal. It is very helpful to do interference analysis. [Field Strength] Menu description: Turn on field strength function. Detailed settings to be done in [Meas Setup]. [ACPR] ...
-
Page 23: Mode
Tel: 886.2.2175 2930 Email: sales@salukitec.com www.salukitec.com 4.7. Mode... - Page 24 Tel: 886.2.2175 2930 Email: sales@salukitec.com www.salukitec.com Press [Mode] key, following function buttons will pop out. These functions are [Track Gen], [Demod], [Trig], [Pass- Fail], [FD]. [Track Gen] Menu description: to enable and disable the tracking source and make tracking source output settings. Tracking source is an option of S3331 series handheld analyzer.
- Page 25 Tel: 886.2.2175 2930 Email: sales@salukitec.com www.salukitec.com [Network Meas] Menu description: Network Meas is mainly used for frequency-amplitude measurement. The frequency of tracking source and the spectrum analyzer are coupled. S3331 acts as a scalar network analyzer. [Network Meas On Off] Menu description: Turn On Off Network measurement function ...
- Page 26 Tel: 886.2.2175 2930 Email: sales@salukitec.com www.salukitec.com Menu Description: Tigger signal from external trigger source. [POS] rising edge and [NEG] falling edge are supported. [Pass-Fail] Menu Description: S3331 provide a powerful Pass-fail function with [Window Meas] and [Limit Meas] [Window Meas] ...
-
Page 27: Peak
Tel: 886.2.2175 2930 Email: sales@salukitec.com www.salukitec.com 4.8. PEAK The [Peak] key on the front panel. is used to turn on the peak search for traces by the control instrument and turn on marker for display, including [Next Peak], [ Right Peak], [Left Peak], [Marker->CF], [Continuous Max ON OFF], [Min Search]. [Next Peak] ... -
Page 28: Span
Tel: 886.2.2175 2930 Email: sales@salukitec.com www.salukitec.com 4.9. Span Press the [Span/X Axis] on the front panel to enable the span function and set the signal/spectrum analyzer into center frequency/span mode. Press the [Span] key to pop up [Span], [Full Span], [Zero Span] and [Previous Span] at the same time. [Span] ... -
Page 29: System
Tel: 886.2.2175 2930 Email: sales@salukitec.com www.salukitec.com 4.10. System [System] Menu description: To check system information and system log. Including serial number, device type, hardware version, network settings, power supply etc. [Language] Menu description: To change the language. [Date/Time] ... -
Page 30: Trace
Tel: 886.2.2175 2930 Email: sales@salukitec.com www.salukitec.com Menu description: Set the screen brightness [Calibration] Menu description: Calibrated the instrument [Service] Menu description: This function is not open for end user. 4.11. Trace Press [Trace] key on the front panel to pop up corresponding soft menu. Including: [Trace 1 2 3 4 5], [Clear Write], [Max. Hold], [Min. Hold], [Bland], [View], [Detector], [Operation ]. - Page 31 Tel: 886.2.2175 2930 Email: sales@salukitec.com www.salukitec.com value of previous measured trace data. [Min. Hold] Menu description: to set the current trace processing method as minimum hold, i.e., the new trace data will be assigned with minimum value of previous measured trace data. [Blank] ...
- Page 32 Tel: 886.2.2175 2930 Email: sales@salukitec.com www.salukitec.com [2<-->3] Menu description: Exchange the data in trace register 2 and trace register 3 and display [1->3] Menu description: Put data in trace register 1 into trace register 3 and display. [2->3] ...
-
Page 33: Typical Operation
Tel: 886.2.2175 2930 Email: sales@salukitec.com www.salukitec.com 5. Typical Operation This chapter will show how to use S3331 handheld spectrum analyzer, following functions are included: Continuous signal measurement Measure two signals with small frequency interval N dB bandwidth measurement ... -
Page 34: Measure Two Signals With Small Frequency Interval
Tel: 886.2.2175 2930 Email: sales@salukitec.com www.salukitec.com Select [Span] Use number keys,knob or up/down arrow key to set span to 5MHz By now the signal is show in the screen as shown in figure 4-1. User a marker to measure the frequency and amplitude of the signal Press【Marker】... - Page 35 Tel: 886.2.2175 2930 Email: sales@salukitec.com www.salukitec.com Figure below. Fig 4-2: Equipment Connection for 2 signal capture Set the frequency of one signal generator to 1800.4995MHz and the other to 1800.5005MHz. Set the output amplitude of both to -20dBm. Respectively adjust the signal output amplitude of two signal generators and view the signals displayed on the spectrum analyzer to make the displayed amplitudes of two signals equal.
-
Page 36: Resolving Signals Of Different Amplitudes
Tel: 886.2.2175 2930 Email: sales@salukitec.com www.salukitec.com Optimize the test result. Lower the RWB to 100kHz. Press【BW/SWP】 , [Res BW Auto Man], input 100[Hz] Then the 2 signals are clearly shown in screen as shown in figure below Fig 4-4: 100Hz RBW Trace 5.3.2. - Page 37 Tel: 886.2.2175 2930 Email: sales@salukitec.com www.salukitec.com explain the testing steps: As shown in Figure 3-5, connect the outputs of two signal generators to the spectrum analyzer input. Set the frequency of one signal generator to 1800MHz and amplitude to -10dBm. Set the frequency of the other signal generator to 1800.05MHz and signal output amplitude to -50dBm.
-
Page 38: N Db Bandwidth Measurement
Tel: 886.2.2175 2930 Email: sales@salukitec.com www.salukitec.com Press【Peak】 , [Next Peak] to put the delta marker on the peak of small signal. Now, the frequency difference and amplitude difference of the two signals with difference amplitudes can be read, as shown in following figure. -
Page 39: Adjacent Channel Power
Tel: 886.2.2175 2930 Email: sales@salukitec.com www.salukitec.com Select [NdB On Off], turn on the NdB bandwidth measure function. The default value of NdB is 3dB. The value can be changed by selecting [NdB] and input the required value. Read out the result Figure 4-8: 3dB Bandwidth Test Result 5.5. -
Page 40: Channel Power Measurement
Tel: 886.2.2175 2930 Email: sales@salukitec.com www.salukitec.com Figure 4-9: Adjacent Channel Measurement 5.6. Channel Power Measurement Following example uses a S1103 signal generator and generates a 500MHz, -10dBm continuous signal. Example Connect the signal generator output port to S3331 RF test port. Press 【Preset】... -
Page 41: Occupied Bandwidth Measurement
Tel: 886.2.2175 2930 Email: sales@salukitec.com www.salukitec.com Figure 4-10: Channel Power Measurement 5.7. Occupied Bandwidth Measurement Following example uses a S1103 signal generator and generates a 500MHz, -10dBm continuous signal. Example Connect the signal generator output port to S3331 RF test port. Press 【Preset】... -
Page 42: Use Pre-Amplifier To Capture Weak Signals
Tel: 886.2.2175 2930 Email: sales@salukitec.com www.salukitec.com Figure 4-10: Occupied Bandwidth Measurement 5.8. Use Pre-amplifier to Capture Weak Signals Following example uses a S1103 signal generator and generates a 500MHz, -80dBm continuous signal. Example Connect the signal generator output port to S3331 RF test port. Press 【Preset】... -
Page 43: Harmonic Distortion Measurement
Tel: 886.2.2175 2930 Email: sales@salukitec.com www.salukitec.com Figure 4-11: Pre-amplifier On Measurement 5.9. Harmonic Distortion Measurement Following example uses a S1103 signal generator and generates a 300MHz, -10dBm continuous signal. Example Connect the signal generator output port to S3331 RF test port. Press 【Preset】... -
Page 44: Toi Distortion Measurement
Tel: 886.2.2175 2930 Email: sales@salukitec.com www.salukitec.com difference. Press 【Peak】 key and select [Next Peak], then marker 2 will move to the third harmonic. Read out the frequency and amplitude difference. Fig4-12: Harmonic Distortion Measurement 5.10. TOI Distortion Measurement In following example, use 2x signal generator to generate a 500MHz, -10dBm Sine signal and a 501MHz, -10dBm sine signal. Example Connect the outputs of two signal generators to the spectrum analyzer RF input port using a T-shaped connector, as shown in Figure below. - Page 45 Tel: 886.2.2175 2930 Email: sales@salukitec.com www.salukitec.com Select [Ctr FREQ] and input 500MHz Press 【SPAN】 Select [SPAN] and input 5MHz Press 【BW/SWP】 Select [Res BW Auto Man] and input 1kHz Use 【Peak】 and 【Marker】 keys to do the analyze. Press 【Peak】...
-
Page 46: Remote Control
Appendix A S3331 Handheld Spectrum Analyzer Programming manual. Users can also use the the PC software (SA Remote Control) provided by Saluki to get remote access to S3331 via LAN or USB port. - Page 47 Tel: 886.2.2175 2930 Email: sales@salukitec.com www.salukitec.com 4.In following window, browse the folder to install the software, then click “Next”...
- Page 48 Tel: 886.2.2175 2930 Email: sales@salukitec.com www.salukitec.com 5.Click “Next” in following window and wait for the software to be installed. 6.If framework 4.0 is not installed, framework installation wizard will pop out and please follow the wizard and complete the installation. 7.If NI VISA foundation is not installed, installation wizard will pop out and please follow the wizard to complete the installation 8.If user already get NI VISA foundation and Framework 4.0 or higher version installed, the Installation will complete and a...
-
Page 49: Connection
USB device with a yellow triangle sign with an exclamation in it. Right click it and load the driver manually. All USB drivers are saved in the installation directory folder. (default path is C:\Program Files (x86)\SALUKI\SALUKI SARemoteControl\USB... -
Page 50: Lan Connection
6.3.2. LAN connection S3331 can be connected to LAN, user can use the Saluki remote control software to manage S3331. LAN connection not only provide SCPI command control, but also provide a UI. It is a mapping of the keys and display of the S3331. -
Page 51: Key Zone
Tel: 886.2.2175 2930 Email: sales@salukitec.com www.salukitec.com The UI can be devided into several zones Key Zone Soft Key Zone Menu Bar Display Zone 6.4.1. Key Zone These keys are mapping to the physical keys on S3331 front panel. Please refer to section 3.1 Front Panel Overview and section 3.2 Function Keys Description for detail function of these keys. - Page 52 Tel: 886.2.2175 2930 Email: sales@salukitec.com www.salukitec.com File 6.4.5.1. Save image It can be used to save the current display as a picture and save locally. View 6.4.5.2. View menu is used to set the display of each function zone of the software. For example if Ctrl, SCPI and Virtualkey is unpicked, the software UI will be like following screenshot and gives a better view for Uset to observe the measurement result...
- Page 53 Tel: 886.2.2175 2930 Email: sales@salukitec.com www.salukitec.com Device 6.4.5.3. Device menu is main used to control the connection Help 6.4.5.4. Help menu is used to get the software information...
- Page 54 Tel: 886.2.2175 2930 Email: sales@salukitec.com www.salukitec.com...
-
Page 55: Trouble Shooting
If the instrument is powered via adapter: Make sure the power adapter model is correct and working well. If the power is ok, but the instrument does not work, the fuse inside may be burned. Please contact Saluki. 7.2. Keys not respond or the response is incorrect: If all the keys are not responding, it is possible that the keyboard cable is loose. -
Page 56: S3331 Specifications
Tel: 886.2.2175 2930 Email: sales@salukitec.com www.salukitec.com 8. S3331 Specifications 8.1. Frequency S3331A S3331B Frequency range 9kHz~3.6GHz 9kHz~7.5GHz Resolution Frequency readout accuracy ± ( frequency indication × frequency ± ( frequency indication × frequency reference+1% × reference+1% × span+10% × RBW+0.5 ×... -
Page 57: Rbw
Tel: 886.2.2175 2930 Email: sales@salukitec.com www.salukitec.com S3331A S3331B input/output Output level 0dBm±2dB Output level 0dBm±2dB Trig input BNC female 5V TTL(±10V,100mA maximum) 5V TTL(±10V,100mA maximum) 8.4. RBW S3331A S3331B Range 1Hz - 500kHz, 1MHz, 3MHz 1Hz - 500kHz, 1MHz, 3MHz Resolution filter shape factor(60dB/3dB) <5:1 (Typ.) -
Page 58: Sweep Time
Tel: 886.2.2175 2930 Email: sales@salukitec.com www.salukitec.com 8.7. Sweep Time S3331A S3331B Sweep time Full Span 3ms ~ 3000s 3ms ~ 3000s zero span 1ms ~ 3000s 1ms ~ 3000s Sweep mode Continuous,single Continuous,single 8.8. Spurious Response S3331A S3331B >30MHz +13dBm... - Page 59 Tel: 886.2.2175 2930 Email: sales@salukitec.com www.salukitec.com S3331A S3331B Power adapter Input Voltage 100V~240V 50/60Hz 1.5A Input Voltage 100V~240V 50/60Hz 1.5A Output Voltage 9V 4000mA Output Voltage 9V 4000mA...
-
Page 60: S3331 Handheld Spectrum Analyzer Programming Manual
Tel: 886.2.2175 2930 Email: sales@salukitec.com www.salukitec.com Appendix A: S3331 Handheld Spectrum Analyzer Programming Manual...
Need help?
Do you have a question about the S3331B and is the answer not in the manual?
Questions and answers