Advertisement
RB-2 OWNER'S MANUAL
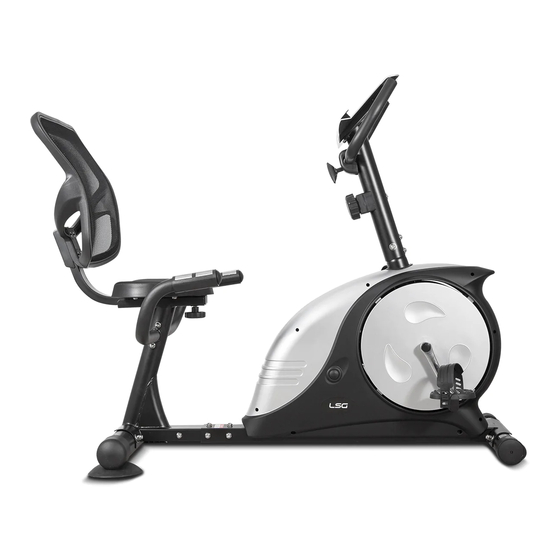
Product may vary slightly from the item pictured due to model upgrades
Read all instructions carefully before using this product. Retain this owner's manual for future
reference.
NOTE: This manual may be subject to updates or changes. Up to date manuals are available through our website at
www.lifespanfitness.com.au
Advertisement

Related Manuals for LSG RB-2


Summary of Contents for LSG RB-2
- Page 1 RB-2 OWNER’S MANUAL Product may vary slightly from the item pictured due to model upgrades Read all instructions carefully before using this product. Retain this owner’s manual for future reference. NOTE: This manual may be subject to updates or changes. Up to date manuals are available through our website at...
-
Page 2: Table Of Contents
TABLE OF CONTENTS IMPORTANT SAFETY INSTRUCTIONS CARE INSTRUCTIONS ASSEMBLY INSTRUCTIONS COMPUTER OPERATION EXERCISE GUIDE EXPLODED DIAGRAM PARTS LIST WARRANTY RB-2... -
Page 3: Important Safety Instructions
Before using the equipment, check that the nuts and bolts are securely tightened. If you hear any unusual noises coming from the equipment during use and assembly, stop immediately. Do not use the equipment until the problem has been rectified. RB-2... -
Page 4: Care Instructions
Batteries are to be installed or replaced by adults only b. Do not use rechargeable batteries. Do not mix different battery types. Do not mix old and new batteries. Do not mix alkaline, standard (Carbon-Zinc), or rechargeable (Nickel-Cadmium) batteries c. Remove batteries when product is not in use RB-2... -
Page 5: Assembly Instructions
Prior to assembly, make sure that you will have enough space around the item; Use the present tooling for assembly; before assembling please check whether all needed parts are available. It is strongly recommended this machine to be assembled by two or more people to avoid possible injury. RB-2... - Page 6 STEP 1: 1. Disassemble the hex nut (20) and flat washer (21) from the front main frame (1) with the wrench. Then lock the hex nut (20) and flat washer (21) into the hole of the rear main frame (9). RB-2...
- Page 7 (1) to the rear main frame (9) with hex nut (20), spring washer (42) and flat washer (21). STEP 3: 1. Secure the seat frame (23) on the rear main frame (9) with flat washer (17) and plum knob (16), adjusting to a suitable distance, then fasten tightly. RB-2...
- Page 8 STEP 5: 1. Connect the pulse wire (14) and the extension pulse wire 1 (10) together. Then fasten the handlebar (15L/R) to the rear main frame (9) tightly with Allen bolt (12), flat washer (21) and acorn nut (6). RB-2...
- Page 9 2. B: Feed the tension connecting wire (29) through the bottom of the handlebar post (32) and pull it out from the hole on the handlebar post (32). 3. Then connect the cable of the tension controller (33) with the hook of the tension connecting wire (29) RB-2...
- Page 10 (36), flat washer (21) and spacer (38). STEP 9: 1. Connect the extension pulse wire 3 (30) and sensor wire (31) with the relevant cables of the computer (44),then lock the computer (44) on the bracket of the handlebar post (32) with screws (41). RB-2...
-
Page 11: Computer Operation
Note: If no pulse signal input then the computer will show “P” on the PULSE window. If the computer shows “Err” on the message window, Keep your hands up in the induction sheet test after test, need to press the ENTER key, and then press the RECOVERY key. RB-2... - Page 12 UP, DOWN three is one of the key to exit the test results. 6. PULSE RECOVERY key: Press the key to activate heart rate recovery function. Battery: If improper display on monitor, please reinstall the batteries to have a good result. RB-2...
-
Page 13: Exercise Guide
Finish each workout with a light jog or walk for at least 1 minute. Then complete 5 to 10 minutes of stretching to cool down. This will increase the flexibility of your muscles and will help prevent post-exercise problems. RB-2... - Page 14 This is how your pulse should behave during general fitness exercise. Remember to warm up and cool down for a few minutes. The most important factor here is the amount of effort you put in. The harder and longer you work, the more calories you will burn. RB-2...
-
Page 15: Exploded Diagram
6. EXPLODED DIAGRAM RB-2... -
Page 16: Parts List
U-bracket Computer End cap Carriage bolt M8X73 Screw M8x15 46L/R Crank 1 pr. Flat washer d8 Screw ST3x10 Square end cap Back bracket cover Seat frame Flat washer D6 Saddle Screw M6X40 Backrest Screw ST4.2X18 Extension pulse wire 2 RB-2... -
Page 17: Warranty
Please visit our website to view our full warranty terms and conditions: http://www.lifespanfitness.com.au/warranty-repairs Warranty and Support: Please email us at support@lifespanfitness.com.au for all warranty or support issues. For all warranty or support related enquiries an email must be sent before contacting us via any other means. RB-2...
Need help?
Do you have a question about the RB-2 and is the answer not in the manual?
Questions and answers