
Related Manuals for BEC MX-200


Summary of Contents for BEC MX-200
- Page 1 User Manual BEC MX-200 Advanced Industrial 4G/LTE Wireless Router Last revised: October, 2015 Version release: v1.10...
-
Page 2: Table Of Contents
TABLE OF CONTENTS CHAPTER 1: INTRODUCTION ......1 .............. 1 NTRODUCTION TO YOUR OUTER & S ..............3 EATURES PECIFICATIONS ..............5 ARDWARE PECIFICATIONS ................. 6 PPLICATION IAGRAMS CHAPTER 2: PRODUCT OVERVIEW ....7 ..........7 MPORTANT OTE FOR SING OUTER ................ - Page 3 System Log ...................... 33 3G/4G-LTE Status..................... 34 Statistics ......................36 DHCP Table ...................... 39 IPSec Status ..................... 40 PPTP Status ..................... 41 L2TP Status ...................... 42 GRE Status ....................... 42 ARP Table ......................43 ..................44 UICK TART .................. 46 ONFIGURATION Interface Setup ....................
- Page 4 Access Control ......................108 Packet Filter ........................ 110 CWMP (TR-069) ......................114 Parental Control ......................116 Maintenance ....................117 User Management ..................... 117 Time Zone ........................119 License ........................120 Firmware & Configuration ..................121 System Restart ......................122 Auto Reboot ....................... 123 Diagnostics Tool ......................
-
Page 5: Chapter 1: Introduction
4G/LTE Mobility To offer an advanced network solution that meets the growing demands of M2M services, MX-200 exclusively features dual WAN - load balance or auto-failover/failback to provide extraordinary, always-on internet connectivity. - Page 6 Support a WEB GUI page to install this device quickly. With this wizard, simple steps will get you connected to the Internet immediately. Firmware Upgradeable Device can be upgraded to the latest firmware through the WEB based GUI. BEC MX-200 User Manual...
-
Page 7: Features & Specifications
• IP Tunnel IPv4 in IPv6 (DS-Lite)* • NAT, static routing and RIP-1/2 • Universal Plug and Play (UPnP) compliant • Dynamic Domain Name System (DDNS) • Virtual server and DMZ • SNTP, DNS relay • IGMP proxy and IGMP snooping BEC MX-200 User Manual... - Page 8 • Web-based GUI for remote and local management (IPv4/IPv6) • Firmware upgrades and configuration data upload and download via web-based GUI • Supports DHCP server / client / relay • Supports SNMP • TR-069 supports remote management BEC MX-200 User Manual...
-
Page 9: Hardware Specifications
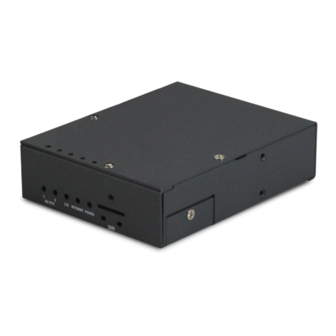
• SIM Card: One (1) slot • Reset Button • Power Connector: 4-pin connectors • LED Indicators • Power • Internet • LTE • Ethernet Physical Specifications • Dimensions (W*H*D): 4.29" x 1.17" x 3.43" (109mm x 29.7mm x 87mm) BEC MX-200 User Manual... -
Page 10: Application Diagrams
Introduction Application Diagrams Application Diagrams The MX-200 Advanced Industrial 4G/LTE Wireless VPN Router is ideal the ideal solution for Digital signage, Remote surveillance, Vending Machines, Retail Point-of-Sales (PoS), Remote patient care/maintenance services, SCADA, Metering applications and much more. Industrial Industry:... -
Page 11: Chapter 2: Product Overview
Important Note for Using This Router Do not use the router in high humidity or high temperature. Do not use the same power source for the MX-200 on other equipment. Do not open or repair the case yourself. If the device becomes... -
Page 12: Device Description
(Cat-5 or Cat-5e) to any of those two LAN ports. RS-232 serial port for machine connection and data collection SERIAL Connect the male end of RS-232 serial data cable to the MX-200 and the other end to a machine or PC BEC MX-200 User Manual... - Page 13 After the device is powered on, press it 6 seconds or above: to restore to factory default RESET settings (this is used when you cannot login to the router, e.g. forgot your password) POWER Connect the supplied screw terminal block, 2-pin 3.5mm, to this jack port BEC MX-200 User Manual...
- Page 14 Boot failure Insert mini SIM card (2FF) with the gold contact facing down. SIM Card Slot Push mini SIM card (2FF) inwards to eject it * Power off the MX-200 before inserting or removing the SIM card BEC MX-200 User Manual...
-
Page 15: System Recovery Procedures
System Recovery Procedure & Cabling System Recovery Procedures The purpose is to allow users to restore the MX-200 to its initial stage when the device is outage, upgraded to a wrong / broken firmware, cannot access to the GUI with wrong username and/or password, etc. -
Page 16: Chapter 3: Basic Installation
PC’s network components. The TCP/IP protocol stack and Ethernet network adapter must be installed. If not, please refer to your Windows-related or other operating system manuals. Any TCP/IP capable workstation can be used to communicate with or through the MX-200. To configure other types of workstations, please consult the manufacturer’s documentation. Attention... -
Page 17: Network Configuration - Ipv4
Network and Sharing Center When the Network and Sharing Center window pops up, select and click on Change adapter settings on the left window panel. Select the Local Area Connection, and right click the icon to select Properties. BEC MX-200 User Manual... - Page 18 In the TCP/IPv4 properties window, select the Obtain an IP address automatically Obtain Server address automatically radio buttons. Then click OK to exit the setting. Click OK again in the Local Area Connection Properties window to apply the new configuration. BEC MX-200 User Manual...
-
Page 19: Configuring Pc In Windows 7/8 (Ipv4)
12. When the Network and Sharing Center window pops up, select and click on Change adapter settings on the left window panel. 13. Select the Local Area Connection, and right click the icon to select Properties. BEC MX-200 User Manual... - Page 20 Obtain an IP address automatically Obtain Server address automatically radio buttons. Then click OK to exit the setting. 16. Click OK again in the Local Area Connection Properties window to apply the new configuration. BEC MX-200 User Manual...
-
Page 21: Configuring Pc In Windows Vista (Ipv4)
Center at the top bar. When the Network Sharing Center window pops up, select and click on Manage network connections on the left window pane. Select the Local Area Connection, and right click the icon to select Properties. BEC MX-200 User Manual... - Page 22 Obtain an IP address automatically and Obtain DNS Server address automatically radio buttons. Then click OK to exit the setting. Click OK again in the Local Area Connection Properties window to apply the new configuration. BEC MX-200 User Manual...
-
Page 23: Configuring Pc In Windows Xp (Ipv4)
Configuring PC in Windows XP (IPv4) 1. Go to Start. Click on Control Panel. 2. Then click on Network and Internet. 3. In the Local Area Connection Status window, click Properties. 4. Select Internet Protocol (TCP/IP) and click Properties. BEC MX-200 User Manual... - Page 24 Basic Installation Windows XP (IPv4) 5. Select Obtain address automatically and the Obtain DNS server address automatically radio buttons. 6. Click OK to finish the configuration. BEC MX-200 User Manual...
-
Page 25: Network Configuration - Ipv6
Network and Sharing Center When the Network and Sharing Center window pops up, select and click on Change adapter settings on the left window panel. Select the Local Area Connection, and right click the icon to select Properties. BEC MX-200 User Manual... - Page 26 In the TCP/IPv6 properties window, select the Obtain an IPv6 address automatically Obtain Server address automatically radio buttons. Then click OK to exit the setting. Click OK again in the Local Area Connection Properties window to apply the new configuration. BEC MX-200 User Manual...
-
Page 27: Configuring Pc In Windows 7/8 (Ipv6)
Then click on Network and Internet. When the Network and Sharing Center window pops up, select and click on Change adapter settings on the left window panel. Select the Local Area Connection, and right click the icon to select Properties. BEC MX-200 User Manual... - Page 28 In the TCP/IPv6 properties window, select the Obtain an IPv6 address automatically Obtain Server address automatically radio buttons. Then click OK to exit the setting. Click OK again in the Local Area Connection Properties window to apply the new configuration. BEC MX-200 User Manual...
-
Page 29: Configuring Pc In Windows Vista (Ipv6)
Center at the top bar. When the Network and Sharing Center window pops up, select and click Manage network connections on the left window pane. Select the Local Area Connection, and right click the icon to select Properties. BEC MX-200 User Manual... - Page 30 Obtain an IP address automatically and Obtain DNS Server address automatically radio buttons. Then click OK to exit the setting. Click OK again in the Local Area Connection Properties window to apply the new configuration. BEC MX-200 User Manual...
-
Page 31: Configuring Pc In Windows Xp (Ipv6)
1. On the Desktop, Click Start > Run, type cmd, then press Enter key in the keyboard, the following screen appears. 2. Key in command ipv6 install Installation of IPv6 is now completed. Please test it to see if it works or not. . BEC MX-200 User Manual... -
Page 32: Default Settings
Caution: After pressing the RESET button for more than 6 seconds then release it, to be sure you power cycle the device again. Device LAN IP Settings IP Address: 192.168.1.254 Subnet Mask: 255.255.255.0 DHCP Server: DHCP server is enabled. Start IP Address: 192.168.1.100 IP pool counts: 100 BEC MX-200 User Manual... -
Page 33: Chapter 4: Device Configuration
The default username and password is “admin” and “admin” respectively for the Administrator. For the User account, default username and password is “user” and “user”. NOTE: This username / password may vary by different Internet Service Providers. Congratulations! You have successfully logged on to your MX-200 BEC MX-200 User Manual... - Page 34 Login to Your Device Once you have logged on to your MX-200 via your web browser, you can begin to set it up according to your requirements. On the configuration homepage, the left navigation pane links you directly to the...
-
Page 35: Status
Model Name: Name of the router for identification purpose. Firmware Version: Software version currently loaded in the router MAC Address: A unique number that identifies the router Data Time: Setup correct time on the MX-200 with your PC. Check on Time Zone section for more configuration information. - Page 36 DHCP Server: Display LAN DHCP status of IPv4 and IPv6. Enable / 192.168.1.100~199: DHCPv4 server status on or off / DHCP IP range Enable / Stateless: DHCPv6 server status on or off / DHCPv6 server Type BEC MX-200 User Manual...
-
Page 37: System Log
Device Configuration Status – System Log System Log In system log, you can check the operations status and any glitches to the router. Refresh: Press this button to refresh the statistics. BEC MX-200 User Manual... -
Page 38: 3G/4G-Lte Status
Network Mode / Band: Show the using network mode and LTE band. Usage Allowance >> click “Usage To enable this feature, please go to Configuration >> Interface Setup >> Internet Allowance” >> enable “Save the statistics to ROM” BEC MX-200 User Manual... - Page 39 Billing Cycle: Display the start date and number of days remaining in current billing cycle Clean: Reset current saved mobile usage Save: Click to save current mobile status to ROM Refresh: Click to refresh this page. BEC MX-200 User Manual...
-
Page 40: Statistics
Receive Total Frames: Display the total number of frames received until the latest second since system is up. Receive Total Bytes: Display the total frames received till the latest second since system is up. Refresh: Click to refresh this page. BEC MX-200 User Manual... - Page 41 Receive Total Bytes: Display s the number of bytes received until the latest second. Receive CRC Errors: Display the number of error packets on this port. Receive Under-size Frames: Display the number of under-size frames received until the latest second. Refresh: Click to refresh this page. BEC MX-200 User Manual...
- Page 42 Receive Total Bytes: Display s the number of bytes received until the latest second. Receive CRC Errors: Display the number of error packets on this port. Receive Under-size Frames: Display the number of under-size frames received until the latest second. Refresh: Click to refresh this page. BEC MX-200 User Manual...
-
Page 43: Dhcp Table
Host Name: Show the hostname of the PC. IP Address: The IP allocated to the device. MAC Address: The MAC of the connected device. Expire Time: The total remaining interval since the IP assignment to the PC. BEC MX-200 User Manual... -
Page 44: Ipsec Status
Statistics: Display the upstream/downstream traffic per session in KB. The value clears when session disconnects. Remote Gateway: The IP of the remote IPSec gateway. Remote Network: The IP and Netmask of remote access range. Local Network: The IP and Netmask of local access range. BEC MX-200 User Manual... -
Page 45: Pptp Status
Connection Type: Remote Access or LAN to LAN. Server IP Address: Show the IP of remote PPTP Server. Remote Network: Display the remote network and subnet mask in LAN to LAN PPTP connection. Refresh: Click this button to refresh the connection status. BEC MX-200 User Manual... -
Page 46: L2Tp Status
Connection Name: Display the user-defined GRE connection name. Active: Show if the tunnel is active for connection. Connection State: Show the connecting status. Remote Gateway IP: The IP of the remote GRE gateway. Remote Network: Display the remote network. BEC MX-200 User Manual... -
Page 47: Arp Table
Address Filter function. See the Firewall section of this manual for more information on this feature. #: The numeric table list indicator. IP Address: It is IP Address of internal host that join this network. MAC Address: The MAC address of internal host. BEC MX-200 User Manual... -
Page 48: Quick Start
Once changed, please use this new password next time when accessing to the router. Click NEXT to continue. Step 2 – Time Zone Choose your time zone. Click NEXT to continue. Step 3 – ISP Connection Type Set up your 3G/4G-LTE Internet connection. BEC MX-200 User Manual... - Page 49 The Setup Wizard has completed. Click on BACK to make changes or correct mistakes. Click NEXT to save the current settings and complete the Quick Start setups. Go back to the Status > Device Info to view the status. BEC MX-200 User Manual...
-
Page 50: Configuration
WAN Interface: List all available WAN interfaces. (In this section, you have selected to use 3G/4G-LTE) Status: Choose Activated to enable the 3G/4G-LTE connection. Usage Allowance: Enable and click “Usage Allowance” for further setting configuration of your 3G/4G-LTE data usage. BEC MX-200 User Manual... - Page 51 LTE Mode*: Display current selected LTE frequency band. To change the band, please click “LTE Mode” link to access to the band selection page. LTE Band LTE Band: A list of available LTE bands to choose from. BEC MX-200 User Manual...
- Page 52 * Feature is available with specific cellular module IP Pass-through Mode: When enabled, MX-200 is in bridge mode that it does not obtain a WAN IP address; features such as routing capabilities, NAT, firewall, etc., are being disabled. The client router that is behind the MX-200now obtains a WAN IP address.
- Page 53 MTU: aximum Transmission Unit. The size of the largest datagram (excluding media-specific headers) an IP attempts to send through the interface. 0 means to use default MTU size, 1500byte. Click Save to apply the settings. BEC MX-200 User Manual...
- Page 54 EWAN (LAN 1) Status: Select to enable/activate or disable/deactivated the service. IPv4/IPv6 IP Version: Choose IPv4, IPv4/IPv6, IPv6 based on your environment. If you don’t know which one to choose from, please choose IPv4/IPv6 instead. ISP Connection Type: BEC MX-200 User Manual...
- Page 55 Connect Manually: Select Connect Manually when you don't want the connection up all the time. TCP MSS Option: Enter the maximum size of the data that TCP can send in a segment. Maximum Segment Size (MSS). BEC MX-200 User Manual...
- Page 56 None is for disabling the RIP function. Both means the router will periodically send routing information and accept routing information then incorporate into routing table. IN only means the router will only accept but will not send RIP packet. BEC MX-200 User Manual...
- Page 57 MLD Proxy: MLD (Multicast Listener Discovery Protocol) is to IPv6 just as IGMP to IPv4. It is a Multicast Management protocol for IPv6 multicast packets. When router’s Internet configuration is finished successfully, you can go to status to get the connection information. Click Save to apply the settings. BEC MX-200 User Manual...
-
Page 58: Lan
Alias IP Address: This is for local networks virtual IP interface. Specify an IP address on this virtual interface. Alias IP Subnet Mask: Specify a subnet mask on this virtual interface. IGMP Snooping: Select Activated to enable IGMP Snooping function, Without IGMP snooping, BEC MX-200 User Manual... - Page 59 If set to Disabled, the DHCP server will be disabled. If set to Relay, the MX-200 acts as a surrogate DHCP server and relays DHCP requests and responses between the remote server and the clients. Enter the IP address of the actual, remote DHCP server in the Remote DHCP Server field in this case.
- Page 60 DHCPv6 server. The Server maintains a database that keeps track of which addresses have been assigned to which hosts. DHCPv6 Server: Check whether to enable DHCPv6 server. DHCPv6 Server Type: Select Stateless or Stateful. When DHCPv6 is enabled, this parameter is BEC MX-200 User Manual...
- Page 61 Router Advertisement messages periodically which would multicast the IPv6 Prefix information (similar to v4 network number 192.168.1.0) to all LAN devices if the field is enabled. We suggest enabling this field. Click Save to apply the settings. BEC MX-200 User Manual...
-
Page 62: Dual Wan
Dual WAN, is a feature to have two independent Internet connection connected concurrently, offers a reliable Internet connectivity and maximize bandwidth utilization for critical applications delivery. General Setting Mode: Select a mode then click Save to proceed. BEC MX-200 User Manual... - Page 63 2. Probe by Signal Strength: Enable to measure the LTE signal strength Minimum RSRP / RSSI: Set a minimum requirement for RSRP and RSSI for initiating automatic WAN failback or failover procedures. Click Save to apply the settings. BEC MX-200 User Manual...
- Page 64 Gateway: Internal system will wait for responses to the pings from the gateway of the WAN. Host: Internal system will wait for responses to the pings from a fixed IP address. Click Save to apply the settings BEC MX-200 User Manual...
-
Page 65: Outbound Load Balance
Balance by weight: Use an IP hash to balance traffic based on a ratio. It is to guarantee requests from the same IP address get forward to the same WAN interface. Click Save to apply the settings BEC MX-200 User Manual... -
Page 66: Protocol Binding
Click Save to apply the settings Example: All traffics from IP 192.168.1.100/255.255.255.0 with port 8080 will go through WAN1 interface. The only time it would go through WAN2 interface is when WAN1 has no Internet connection. BEC MX-200 User Manual... -
Page 67: Advanced Setup
SPI: If you enabled SPI, all traffics initiated from WAN would be blocked, including DMZ, Virtual Server, and ACL WAN side. Enabled: Activate your SPI function. Disabled: Deactivate the SPI function. Click Save to apply the settings BEC MX-200 User Manual... -
Page 68: Routing
Gateway IP Address or Interface: This is the gateway IP address or existing interface to which packets are to be forwarded. Metric: It represents the cost of transmission for routing purposes. The number need not be precise, but it must be between 1 and 15. Click Save to add this route BEC MX-200 User Manual... -
Page 69: Dynamic Routing
IPSec/ PPTP encryption is applied or some application layer protocols such as SIP phones are located behind a NAT. And NAT makes it difficult for systems behind a NAT to accept incoming communications. OSPF BEC MX-200 User Manual... - Page 70 Device Configuration Advanced Setup – Routing BEC MX-200 User Manual...
-
Page 71: Nat
Service Index: Associated to EWAN interface marking each EWAN service (0-7), to select which EWAN service the DMZ and Virtual server are applied to. Click DMZ or Virtual Server to move on to set the DMZ or Virtual Server parameters, which are represented in the following scenario. BEC MX-200 User Manual... - Page 72 DMZ Host IP Address: Give a static IP address to the DMZ Host when Enabled radio button is checked. Be aware that this IP will be exposed to the WAN/Internet. Click Save to apply the settings BEC MX-200 User Manual...
- Page 73 NOTE: This feature disables automatically if WAN connection is in BRIDGE mode or NAT is being turned OFF. Virtual Server is also known as Port Forwarding that allows MX-200 to direct all incoming traffic to the servers on the LAN.
- Page 74 PC, with an address that does not fall into the range of IP addresses that are to be issued by the DHCP server. You can configure the virtual server IP address manually, but it must still be in the same subnet as the router. BEC MX-200 User Manual...
- Page 75 Enter the static IP assigned to the local PC that is hosting the FTP server. Ex: 192.168.1.102 Enter ”21” to Local Start and End Port number. The MX-200 will forward port 21 request from WAN to the specific LAN PC (Example: 192.168.1.102) in the network.
-
Page 76: Static Dns
192.0.32.10 (IPv4). IP Address: The IP address you are going to give a specific domain name. Domain Name: The friendly domain name for the IP address. Click Save to apply your settings. BEC MX-200 User Manual... -
Page 77: Time Schedule
End Time: The ending point of the interval for the timeslot, anytime in 00:00 – 24:00. Click Save to apply your settings. Example, you can add a timeslot named “TimeSlot1” which features a period from 9:00 of Monday to 18:00 of Tuesday. Another TimeSlot2 spanning from 09:00 to 18:00 of Wednesday BEC MX-200 User Manual... -
Page 78: Mail Alert
WAN IP change has been detected. Recipient’s Email (3G/4G-LTE Usage Allowance): E Enter a valid e-mail address to receive an alert message when the 3G over Usage Allowance occurs. Click Apply button to save your settings BEC MX-200 User Manual... -
Page 79: Remote System Log
Remote System Log: Select Activated to enable this feature Server IP Address: Assign the remote log server IP address. Server UDP Port: Assign the remote log server port, 514 is commonly used. Click Save to apply the settings BEC MX-200 User Manual... -
Page 80: Serial (Rs-232 Port)
3000ms (3 seconds), data transactions will get aborted. Here are the possible causes for a timeout to occur: Serial connection errors between the MX-200 and the serial device Hardware issue with the Serial device ... - Page 81 “0x” + Hex code TCP Idle Timeout (Seconds): Default time is in 60 seconds. Specify an idle time-out in seconds. After the timeout expires, meaning no data transmission within the definded time, serial connection will get aborted. BEC MX-200 User Manual...
-
Page 82: Vpn
For example, a VPN could be used to securely connect the branch offices of an organization to a head office network through the public Internet. MX-200 supports IPSec, PPTP, L2TP, and GRE for enterprise users. BEC MX-200 User Manual... -
Page 83: Ipsec
(network-to-network), or between a security gateway and a host (network-to-host). A total of 8 IPSec tunnels can be added. Click Add New Connection to create an IPSec connection . BEC MX-200 User Manual... - Page 84 (network-to-host). If the remote peer is a host, select Single Address. Subnet: The subnet of the local network, for establishing an IPSec tunnel between a pair of security gateways (network-to-network), If the remote peer is a network, select Subnet. BEC MX-200 User Manual...
- Page 85 AH(Authentication Header) and ESP(Encapsulating Security Payload). Use ESP for greater security so that data will be encrypted and the data origin be authenticated but using AH data origin will only be authenticated but not encrypted. BEC MX-200 User Manual...
- Page 86 IPSec peer has lost. Please be noted, it must be enabled on the both sites. PING to the IP: It is able to IP Ping the remote PC with the specified IP address and alert when the BEC MX-200 User Manual...
- Page 87 Reconnection Time set. 180 seconds is minimum time interval for this function. Reconnection Time: It is the reconnecting time interval after NO TRAFFIC is initiated. 3 minutes is minimum time interval for this function. Click Save to apply the settings. BEC MX-200 User Manual...
- Page 88 VPN – IPSec (Example on LAN-to-LAN) Examples: IPSec – Network (LAN) to Network (LAN) Two of the MX-1000 devices want to setup a secure IPSec VPN tunnel NOTE: The IPSec Settings shall be consistent between the two routers. BEC MX-200 User Manual...
- Page 89 Main Security Plan Pre-Shared Key 1234567890 Phase 1 Encryption AES-128 Phase 1 Authentication SHA1 Phase 1 Diffie-Hellman Group MODP 1024(group2) Phase 2 Proposal Phase 2 Authentication SHA1 Phase 2 Encryption 3DES Prefer Forward Security MODP 1024(group2) BEC MX-200 User Manual...
- Page 90 Main Security Plan Pre-Shared Key 1234567890 Phase 1 Encryption AES-128 Phase 1 Authentication SHA1 Phase 1 Diffie-Hellman Group MODP 1024(group2) Phase 2 Proposal Phase 2 Authentication SHA1 Phase 2 Encryption 3DES Prefer Forward Security MODP 1024(group2) BEC MX-200 User Manual...
- Page 91 Device Configuration VPN – IPSec (Example on Remote Access) Examples: IPSec – Remote Employee to MX-200 Connection Router servers as VPN server, and host should install the IPSec client to connect to head office through IPSec VPN. BEC MX-200 User Manual...
- Page 92 Main Security Plan Pre-Shared Key 1234567890 Phase 1 Encryption AES-128 Phase 1 Authentication SHA1 Phase 1 Diffie-Hellman Group MODP 1024(group2) Phase 2 Proposal Phase 2 Authentication SHA1 Phase 2 Encryption 3DES Prefer Forward Security MODP 1024(group2) BEC MX-200 User Manual...
-
Page 93: Pptp Server
IP should be in the same subnet as local LAN, but not occupied. Remote Network IP Address: Please input the subnet IP for remote network. Remote Network Netmask: Please input the Netmask for remote network. Click Save to apply your settings. BEC MX-200 User Manual... -
Page 94: Pptp Client
Server Address: Enter the WAN IP address of the PPTP server. Remote Network IP Address: Please input the subnet IP for remote network. Remote Network Netmask: Please input the Netmask for remote network. Click Save to apply the settings. BEC MX-200 User Manual... - Page 95 Device Configuration VPN – PPTP (Example on Remote Dial-in) Example: PPTP – Remote Employee Dial-in to MX-200 The input IP address 192.168.1.2 will be assigned to the remote worker. Please make sure this IP is not used in the Office LAN.
- Page 96 Dial in authenticate user password Connection Type LAN to LAN LAN to LAN for dial in Assigned IP 192.168.1.2 An IP assigned to the dial in client Remote Network IP 129.168.0.0 Remote access network Remote Network Netmask 255.255.255.0 BEC MX-200 User Manual...
- Page 97 Dial in authenticate user name Password test Dial in authenticate user password Connection Type LAN to LAN LAN to LAN for dial in Server IP 69.121.1.33 Dialed server IP Remote Network IP 129.168.1.0 Remote access network Remote Network Netmask 255.255.255.0 BEC MX-200 User Manual...
-
Page 98: L2Tp
(when acting as a server). Username: Please input the username for this account. Password: Please input the password for this account. Private IP Address Assigned to Dial-in User: The private IP to be assigned to dial-in user by L2TP BEC MX-200 User Manual... - Page 99 Active as Default Route: Enabled to let the tunnel to be the default route for traffic, under this circumstance, all packets will be forwarded to this tunnel and routed to the next hop. Click Save to apply the settings. BEC MX-200 User Manual...
- Page 100 Device Configuration VPN – L2TP (Example on Remote Dial-in) Example: L2TP VPN – Remote Employee Dial-in to MX-200 A remote worker establishes a L2TP VPN connection with the head office using Microsoft's VPN Adapter (included with Windows XP/2000/ME, etc.). The router is installed in the head office, connected to a couple of PCs and Servers.
- Page 101 Device Configuration VPN – L2TP (Example on Remote Dial-out) Example: L2TP VPN – MX-200 Dial-out to a Server A company’s office establishes a L2TP VPN connection with a file server located at a separate location. The router is installed in the office, connected to a couple of PCs and Servers.
- Page 102 The branch office establishes a L2TP VPN tunnel with head office to connect two private networks over the Internet. The routers are installed in the head office and branch office accordingly. NOTE: Both office LAN networks must be in different subnets with the LAN-LAN application. BEC MX-200 User Manual...
- Page 103 Dial in authenticate user password Assigned IP 192.168.1.200 An IP assigned to the dial in client Connection Type LAN to LAN LAN to LAN for dial in Remote Network IP 129.168.0.0 Remote access network Remote Network Netmask 255.255.255.0 BEC MX-200 User Manual...
- Page 104 Username test Dial in authenticate user name Password test Dial in authenticate user password Connection Type LAN to LAN LAN to LAN for dial out Remote Network IP 129.168.1.0 Remote access network Remote Network Netmask 255.255.255.0 BEC MX-200 User Manual...
-
Page 105: Gre Tunnel
‘interval’, based on default settings, the time interval can be 30 seconds), the local router will shut up its tunnel interface. Keep-alive Retry Times: Set the keep-alive retry times, default is 3. Keep-alive Interval: Set the keep-alive Interval, unit in seconds. Default is 5 seconds. BEC MX-200 User Manual... - Page 106 Device Configuration VPN – L2TP (Example on LAN-to-LAN) MTU: Maximum Transmission Unit. Active as Default Route: Select if to set the GRE tunnel as the default route. Click Save to apply the settings BEC MX-200 User Manual...
-
Page 107: Access Management
Device Management Device management offers users a way to change the embedded web server accessing port, default 80. User can change the http port to 8080 or something else here. Click Save to apply the settings. BEC MX-200 User Manual... -
Page 108: Snmp
Simple Network Management Protocol (SNMP) is a protocol used for exchanging management information between network devices. SNMP is a member of the TCP/IP protocol suite. The MX-200 serves as a SNMP agent that allows a manager station to manage and monitor the router through the network. -
Page 109: Universal Plug & Play
Auto-configured: Select this check box to allow UPnP-enabled applications to automatically configure the MX-200 so that they can communicate through the MX-200, for example by using NAT traversal, UPnP applications automatically reserve a NAT forwarding port in order to communicate with another UPnP enabled device;... -
Page 110: Dynamic Dns (Ddns)
Username / Password: Enter the user name and password of the account you created with this service provider. Wildcard support: Select this check box to enable DYNDNS Wildcard. Period: Set the time period on how often the MX-200 will update the DDNS server with your current external IP address. Click Save to apply the settings. - Page 111 Example: How to register a DDNS account If you do not have an account with Dynamic DNS, please go to www.dyndns.org to register an account first. User test1 register a Dynamic Domain Names in DDNS provider http://www.dyndns.org/ DDNS: www.hometest.com using username/password test/test BEC MX-200 User Manual...
-
Page 112: Access Control
Rule Index: The numeric rule indicator. Active: Yes to activate the rule. Secure IP Address: The default 0.0.0.0 allows any client to use this service to manage the MX-200. Type an IP address range to restrict access to the client(s) without a matching IP address. - Page 113 Device Configuration Access Management – Access Control Default Rule 2: (Index 2), an ACL rule to open Ping to WAN side. BEC MX-200 User Manual...
-
Page 114: Packet Filter
Source IP Address: The source IP address of packets to be monitored. 0.0.0.0 means “Don’t care”. Source Subnet Mask: Enter the subnet mask of the source network. Source Port Number: The source port number of packets to be monitored. 0 means “Don’t care”. BEC MX-200 User Manual... - Page 115 Destination Port: This is the Port or Port Ranges that defines the application. DSCP: show the set DSCP. Protocol: It is the packet protocol type used by the application. Select either TCP or UDP or ICMP or ICMPv6 Click Save to apply the settings. BEC MX-200 User Manual...
- Page 116 ICQ: Select this option to Allow/Deny ICQ. MSN: Select this option to Allow/Deny MSN. YMSG: Select this option to Allow/Deny Yahoo messenger. Real Audio/Video (RTSP): Select this option to Allow/Deny Real Audio/Video (RTSP). Click Save to apply the settings. BEC MX-200 User Manual...
- Page 117 In a word, the command serves as a switch to the access of some specific URL with the filter on. URL (Host): Specified URL which is prohibited from accessing. Click Save to apply the settings. BEC MX-200 User Manual...
-
Page 118: Cwmp (Tr-069)
Path: Local path in HTTP URL for an ACS to make a Connection Request notification to the CPE. Username: Username used to authenticate an ACS making a Connection Request to the CPE. Password: Password used to authenticate an ACS making a Connection Request to the CPE. BEC MX-200 User Manual... - Page 119 ACS. When the inform interval time arrives, the CPE will send inform message to automatically connect to ACS. NATT Config - This is a proprietary feature provided by BEC. May leave them in blank, no configuration is required. NATT Server: By BEC administrator only.
-
Page 120: Parental Control
Host Name: It is the domain name of your OpenDNS. If you don’t have one, please leave it blink. Username / Password: Put down your OpenDNS account username and password Click Save to apply the settings. BEC MX-200 User Manual... -
Page 121: Maintenance
The User account is with limited access (specified by advanced users with admin account) to the GUI. Total of 8 accounts can be created to grant access to manage the MX-200 via the web page. ... - Page 122 Interface Setup / Advanced Setup / Access Management Setup / Maintenances: Enable to grant this user access to these features. When someone accesses to the MX-200 using this “user” account, he/she can only manage and configure the features that is pre-selected in Web GUI Permission for this account..
-
Page 123: Time Zone
With default, MX-200 does not contain the correct local time and date. There are several options to setup, maintain, and configure current local time/date on the MX-200. If you plan to use Time Schedule feature, it is extremely important you set up the Time Zone correctly. -
Page 124: License
Some of the advanced features are required for a license. For more information, please contact with Billion/BEC for more information. Input your license key here and click “Upgrade” to enable the features. NOTE: Device will reboot after the upgrade. BEC MX-200 User Manual... -
Page 125: Firmware & Configuration
Firmware is the software that controls the hardware and provides all functionalities which are available in the GUI. This software may be improved and/or modified; your MX-200 provides an easy way to update the code to take advantage of the changes. . -
Page 126: System Restart
You may also restore your router to factory settings by holding the small Reset pinhole button on the back of your router in about more than 6s seconds whilst the router is turned on. BEC MX-200 User Manual... -
Page 127: Auto Reboot
Maintenance – Auto Reboot Auto Reboot Schedule an automatic reboot for your MX-200 to ensure proper operation and best performance. This reboot will only reboot with current configuration settings and not overwrite any existing settings. Click Save to apply the settings Example: Schedule MX-200 to reboot at 10:00pm (22:00) every weekday (Monday thru Friday) and reboot at 9:00am on Saturday and Sunday. -
Page 128: Diagnostics Tool
LAN and WAN sides. 3G/4G-LTE / EWAN (LAN1) Ping other IP Address: Click Yes if you wish to ping other IP address rather than google.com Click START to begin to diagnose the connection. BEC MX-200 User Manual... -
Page 129: Chapter 5: Troubleshooting
Troubleshooting Chapter 5: Troubleshooting If your MX-200 is not functioning properly, you can refer to this chapter for simple troubleshooting before contacting your service provider support. This can save you time and effort but if symptoms persist, consult your service provider. -
Page 130: Recovery Procedures
5. Internet LED lit Red, and router starts to write firmware into flash. Please DO NOT power off the router at this step. 6. Internet LED lit Green when successfully upgrade firmware. 7. Power cycle off/on the MX-200 BEC MX-200 User Manual... -
Page 131: Appendix: Product Support & Contact
& C PPENDIX RODUCT UPPORT ONTACT If you come across any problems please contact the dealer from where you have purchased the product. Contact BEC @ http://www.bectechnologies.net MAC OS is a registered Trademark of Apple Computer, Inc. BEC MX-200 User Manual... - Page 132 FCC Radiation Exposure Statement This equipment complies with FCC radiation exposure limits set forth for an uncontrolled environment. This equipment should be installed and operated with minimum distance 20cm between the radiator & your body. V102110 BEC MX-200 User Manual...
Need help?
Do you have a question about the MX-200 and is the answer not in the manual?
Questions and answers