Rockwell Automation PowerFlex 755 Configuration
Modular drives
Hide thumbs
Also See for PowerFlex 755:
- Configuration manual (17 pages) ,
- Maintenance schedule (5 pages)
Table of Contents
Advertisement
Quick Links
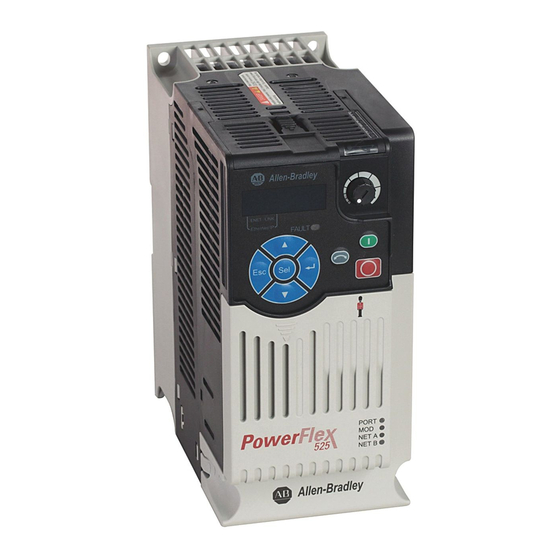
- 1 Lab 1: Configuring the Powerflex 525 Ac Drive
- 2 Part 1: Using the Him Keypad and Display
- 3 Lab 2: Configuring the Powerflex 755 Ac Drive
- 4 Part 1: Using the Him Keypad and Display
- 5 Part 2: Utilizing Ethernet/Ip™ and Connected Components Workbench™ Software
- Download this manual
See also:
Configuration Manual
Advertisement
Table of Contents

Related Manuals for Rockwell Automation PowerFlex 755


Summary of Contents for Rockwell Automation PowerFlex 755
- Page 1 PowerFlex® Drives Configuration & Programming PowerFlex 525 & PowerFlex 755 AC Drives For Classroom Use Only!
- Page 2 In no event will Rockwell Automation, Inc., or any of its affiliate or subsidiary companies (hereinafter “Rockwell Automation”) be responsible or liable for any indirect or consequential damages resulting from the use or application of the Products described in this Documentation.
-
Page 3: Table Of Contents
Part 1: Using the HIM Keypad and Display ............................. 10 Part 2: Utilizing EtherNet/IP™ and Connected Components Workbench™ Software ..............17 Lab 2: Configuring the PowerFlex 755 AC Drive ........................38 Part 1: Using the HIM Keypad and Display ............................. 38 Part 2: Utilizing EtherNet/IP™... - Page 4 Appendix: Overview of the DMAT ............................. 121 Machine/Application/Device Module Relationship ........................122 Module Routine Overview ................................123 Machine Module .................................... 124 Machine States ..................................... 124 Machine State Diagram ................................125 Default Machine States ................................. 126 Default Machine Commands ................................. 126 Machine Control Module Tags ..............................
-
Page 5: Before You Begin
Please review the following information before starting this lab. About this lab Learn the basics of drive configuration and programming using the PowerFlex 525 compact AC drive and the PowerFlex 755 AC Drive. Attendees will configure these drives using the Human Interface Module (HIM), Connected Components Workbench software and Studio 5000™... -
Page 6: Tools & Prerequisites
CompactLogix 5370 Controller (1769-L18ERM-BB1B) – v28.011.20 1738-ETAP PowerFlex 525 AC Drive (25B-V2P5N104) – v4.001, with 25-COMM-E2P Option module PowerFlex 755 DHQ Demo Box (PN-39023) • PowerFlex 755 AC Drive (20G11-N-B-DM1AA6K32V8) – v12.001 Ethernet patch cables • Files required PowerFlex_Lab.ACD •... -
Page 7: Network Setup
ETAP Port 2 (rear) PF525, 25-COMM-E2P Ethernet Port 1 ETAP Device Port (front) PF755, Embedded Ethernet Port Set IP Address of PowerFlex 755 to 192.168.1.30 by setting the IP address switches. Hundreds – 0 Tens – 3 Ones – 0 The PowerFlex 525 Network Option module IP address will be set using the Keypad in Lab 1. -
Page 8: About The Powerflex 525 Demo Box
About the PowerFlex 525 Demo Box 8 of 136... -
Page 9: About The Powerflex 755 Dhq Demo Box
About the PowerFlex 755 DHQ Demo Box 9 of 136... -
Page 10: Lab 1: Configuring The Powerflex 525 Ac Drive
Lab 1: Configuring the PowerFlex 525 AC Drive Part 1: Using the HIM Keypad and Display In this section you will perform the following: Review key information about the HIM keypad and display of the PowerFlex 525 drive Reset the PowerFlex 525 drive to defaults ... - Page 11 Display and Control Keys AppView: Dedicated sets of parameters grouped together for the following applications Conveyor Mixer Compressor Centrifugal Pump Blower Extruder Positioning Textile / Fiber CustomView: Parameter Groups can be customized specifically for your application ...
- Page 12 Control and Navigation Keys 12 of 136...
- Page 13 Viewing and Editing Parameters The following is an example of basic integral keypad and display functions. This example provides basic navigation instructions and illustrates how to program a parameter. Just read through the following. 13 of 136...
- Page 14 Reset Drive to Defaults This is the beginning of the hands-on portion of the lab. Make sure DI1 is in the Left position 2. Make sure the CompactLogix controller is NOT in Run Mode. If the RUN LED on the controller is lit, move the switch to PROG (bottom/down) position then REM position (middle).
- Page 15 3. Press the Stop button to clear the fault from the drive. 4. Press the Esc button until you see zero speed on the keypad display. 5. Press the Select button and use the Up or Down arrows until you see the Basic Program group on the HIM display.
- Page 16 Press the Enter button to confirm. The drive will fault with a scrolling message of “F048 – Parameters Defaulted”. The picture below shows this. 10. Press the Stop button to clear the fault from the drive. Configuring the 25-COMM-E2P, Dual Port EtherNet option module, IP Address Parameters 1.
-
Page 17: Part 2: Utilizing Ethernet/Ip™ And Connected Components Workbench™ Software
Part 2: Utilizing EtherNet/IP™ and Connected Components Workbench™ Software Connected Components Workbench programming and configuration software supports the Micro800™ controllers, as well as the PowerFlex 4-class drives and PanelView™ Component graphic terminals for your small machine applications. In this section you will perform the following: ... - Page 18 2. The main screen for the Connected Components Workbench software is shown below. You may need to maximize the software to make viewing easier. 3. There are many features in the Connected Components Workbench software. Mainly, we will be using the software to go online with the PowerFlex 525 drive.
- Page 19 5. The lab’s preconfigured RSLinx driver will appear. Click on the [+] to expand the topic AB_ETH-1, Ethernet. Click to highlight the “192.168.1.20, PowerFlex 525 1P 110V .50HP” device. 6. Press the “OK” button to initiate the connection process. For a quick moment, you might see a connection status window.
- Page 20 Exploring Drive Parameters through Standard Parameter Groupings 1. Some useful tools for the PowerFlex 525 drive are included in the Connected Components Workbench software, as shown below. Take some time to explore them. 2. Select the ‘0 - PowerFlex 525’ tab, then click on the “Parameters” icon to view the PowerFlex 525 drive parameters as seen below.
- Page 21 3. Make sure “All Parameters” is selected within the Group dropdown selection box and then click the “Show Non-Defaults” button as shown below. A progress window showing the upload will appear. 4. Once the upload has completed you will see the parameters window update to just show only the non- default parameters.
- Page 22 Select the ‘0 - PowerFlex 525’ tab, then click ‘Parameters’. To make viewing and editing parameters even simpler, you can enter a word or abbreviation into the filter value entry box. For example, type “Motor” into the Filter Value entry box. Notice that it filters and only shows the parameters that have the word motor in their parameter names.
- Page 23 10. Under the Group dropdown selection box, you can scroll through the different drive parameter groups, AppView groups and the CustomView group. 11. Select “Basic Program” from the Group dropdown menu and explore the parameters shown below. These are the most simplistic parameters that are needed to start up/commission a PowerFlex 525 drive. Take some time to explore some of the other parameter groupings such as “Terminals”, “Communications”...
- Page 24 Exploring Drive Parameters with AppView™ and CustomView™ Groupings The PowerFlex 525 drive has several AppView groupings that are tailored for a specific application to make the drive startup and commissioning simpler. This reduces guesswork about which parameters you need to change, and all of the drive parameters for that application are all in one convenient location.
- Page 25 4. Find the following parameters in the list and add them to “ABC’s Group”: Parameter 30 - Language Parameter 43 - Minimum Freq Parameter 31 - Motor NP Volts Parameter 44 - Maximum Freq Parameter 32 - Motor NP Hertz Parameter 45 - Stop Mode Parameter 33 - Motor OL Current Parameter 46 - Start Source 1...
- Page 26 5. Notice how the parameter entries from above are all now in the ABC’s Group CustomView for easy viewing and editing of the parameters. Close the ‘Parameters’ dialog box by clicking the in the top right corner of the window. PowerFlex 525 Drive Start-Up Wizard 1.
- Page 27 3. Click the “Next >” button to proceed with exploring the startup wizard. 4. Below is the Reset Parameters page. Here you have a few different options. Reset all settings to factory defaults but retain the custom parameter group. Reset all settings to factory defaults (including the custom parameter group).
- Page 28 5. When the Confirmation window appears, verify that you made the correct choice and click the “Yes” button. The drive may make a noise as it resets to defaults, and then will display the “F048 – Params Defaulted” fault on the HIM. After you see the following indicator on the Startup Wizard, continue by clicking the “Next >”...
- Page 29 7. On the next three pages, verify and if needed, modify the parameters according to the following screenshots. At the end of each page, remember to click the “Next >” button to proceed to the next page. Motor Control Page ...
- Page 30 8. The next page is for the Direction Test. If desired, you may skip the Direction Test by clicking the “Next >” button and move onto the next numbered step in this manual. To continue with the Direction Test, follow the steps below.
- Page 31 9. The next page is for the AutoTune. If desired, you may skip the AutoTune by clicking the “Next >” button and move onto the next numbered step in this manual. To continue with the AutoTune, follow the steps below. Click on the “Rotate Tune”...
- Page 32 10. On the next several pages, verify and if needed, modify the parameters according to the following screenshots. At the end of each page, remember to click the “Next >” button to proceed to the next page. Ramp Rates / Speed Limits ...
- Page 33 Digital Inputs (changes required) We want to demonstrate control of the drive using the Keypad or from switches in the demo box wired to the PowerFlex 525 terminal block. The demo box switches will be assigned to Start Source 2 and enabled using switch DI1. ...
- Page 34 Relay Outputs (changes required) Opto Outputs • Analog Outputs 34 of 136...
- Page 35 After stepping through the previous pages to the Pending Changes page, you can review a summary of the planned programming changes you have made to the PowerFlex 525 drive. Make sure all the pages have the check mark ( ) to the left of the page name / icon. Click the “Finish >>”...
- Page 36 The main PowerFlex 525 drive window will be present. Click the “Reset” button for all of the new parameter settings to take effect. Some settings require a drive reset to be implemented. A window will appear confirming that you would like to reset the device. Click the “OK”...
- Page 37 You should start with the selector switches in the following position: DI1 in this position will select the drive Keypad to control the drive. With the buttons on the PF525: use to start the drive, varies the speed, and stops the drive. Move selector switch DI1 to the right position to enable Start Source 2, previously configured to use the PF525 DRIVE demo box switches.
-
Page 38: Lab 2: Configuring The Powerflex 755 Ac Drive
Please familiarize yourself with these keys (buttons) One of the ways to perform an Assisted Startup on the PowerFlex 755 is using the Startup routine in the H.I.M. The following... - Page 39 Access the Status screen which is displayed on HIM PowerUp. Press STOP button to clear fault Press the ‘Folders’ button on the HIM keypad. The button is located on the bottom row of the HIM Keypad (shown circled in the left image below).Pressing the ‘Folders’ button changes the HIM screen display to the Folders screen, shown below to the right.
- Page 40 Use the down arrow key to highlight ‘Set Defaults’ if necessary and press the Enter key located in the center of the HIM keypad to make this your selection. The screen which follows after completion of the previous step is shown. Use the down arrow key to highlight ‘This Port Only’.
- Page 41 11. The startup routine starts with an Introduction screen. Press the ‘ENTER’ soft key to continue. The ‘ENTER’ soft key is located on the top row of the HIM keypad. PowerFlex 755 Startup Start-Up consists of several steps to configure the drive.
- Page 42 For this lab session, we will choose ‘General Startup’. This is highlighted by default. Press the ‘ENTER’ soft key located on the top row of the HIM keypad to make this your selection. PowerFlex 755 Startup General Startup...
- Page 43 15. Pressing the ‘ENTER’ soft key in the previous step leads you to a screen which lists the available motor control modes in the PowerFlex 755. For this lab session, we will choose the Sensorless Vect mode. Use the scroll down arrow soft keys to select ‘Sensorless Vect’.
- Page 44 (0.025 kW) or 0.033 HP. Notice that there are no designated buttons on the HIM keypad for entering a decimal point. The PowerFlex 755 HIM keypad uses a soft key to provide a ‘decimal point’ button. This ‘decimal point’ soft key is activated when the first digit in the numeric value is entered.
- Page 45 Startup Startup Motor Data Entry Motor Data Entry Edit Motor NP Power Edit Motor NP Power 1.00 HP 0.03 HP 0.01 0.01 2000.00 2000.00 1.00 Max 1.00 Max 20. You will now be required to input the Motor Nameplate (NP) Amperes. The Motor in the demo is rated for 0.22 amps. Use the ‘decimal point’...
- Page 46 Startup Reference Selection Edit Speed Units Setting the Speed Feedback Device 26. With the completion of the previous step, you have finished inputting the Motor Nameplate data and other information required in the ‘Motor Data’ section. Pressing the ‘ENTER’ soft key in the previous step has directed you to the Main Menu and the item ‘Feedback’...
- Page 47 Setting the Speed Limits 28. The previous step was the last step in configuring your feedback device. You should now have been directed back to the General Startup Main Menu. Configuring the limits is the next step in the Startup routine. Press the ‘ENTER’ soft key to access ‘Limits’...
- Page 48 32. The next screen asks the question ‘Is the direction of rotation forward?’ To demonstrate the ability of the PowerFlex 755 to electronically swap motor leads to change motor direction, let us choose ‘No’ as the answer to this question. Use the down arrow key to select and highlight ‘No’...
- Page 49 35. Follow the direction on the next screen which asks you to ‘START’ the drive. You can start the drive and by using the START key. 36. The next screen asks the question ‘Is the direction of rotation forward?’ and requires confirmation that the changes to direction are acceptable.
- Page 50 43. As directed by the HIM screen information, press the START key to start the ‘Auto tune’ Test. Notice the changing information on the HIM (as the different parts of the Auto tune tests are completed).Wait till the test is completed.
- Page 51 50. Use the down arrow and up arrow keys, if necessary, to highlight ‘Par 0050 Anlg In0 Value’. Use the Enter key to make this your selection. Press the ‘ENTER’ soft key to confirm and save your selection. 51. The next few steps will configure the Analog Input you chose as Speed Reference. For this lab session we will use the 0-10V potentiometer (labeled 0-10VDC IN 0) on the demo as our Analog Input speed reference.
- Page 52 63. Select ‘3 wire’ as your choice for the question ‘Enter Choice for the control method’. 64. In the ‘Select Port To Use’ window use the up and down arrow keys to highlight ‘Port 07 I/O Module 24V’ Press the ‘ENTER’...
-
Page 53: Part 2: Utilizing Ethernet/Ip™ And Connected Components Workbench™ Software
Safety Relay device, PanelView™ Component graphic terminals, and serial and network connectivity options. In this section you will perform the following: Connect to the PowerFlex 755 drive through the embedded EtherNet/IP via Connected Components Workbench software Explore the different parameter groupings ... - Page 54 9. There are many features in the Connected Components Workbench software. Mainly, we will be using the software to go online with the PowerFlex 755 drive. Click the [+] next to Discover within the Device Toolbox. 10. Click the “Browse Connections” button to launch the RSWho connection browser.
- Page 55 12. Press the “OK” button to initiate the connection process. For a quick moment, you might see a connection status window. Otherwise, once the connection process is complete, you will see the following main screen with a green highlighted “Connected” for the PowerFlex 755 drive within the Connected Components Workbench software. 55 of 136...
- Page 56 Exploring Drive Parameters through Standard Parameter Groupings 13. Some useful tools for the PowerFlex 755 drive are included in the Connected Components Workbench software, as shown below. Take some time to explore them. 14. Select the Process Display The Process Display allows you to view parameter values in an easy to read graphical display.
- Page 57 17. You can display the status view for any peripheral (e.g. the DeviceLogix adaptor or 20-HIM-x6) by selecting the peripheral’s tab. If your demo box does not include the stated cards, use the available tabs and explore the peripherals on your demo. 18. After checking peripherals 0, 1, and 7; return to peripheral ‘0-PowerFlex 755’. 57 of 136...
- Page 58 PowerFlex 755 drive parameters as seen below. The PowerFlex 755 drive’s parameters window displays both read-only and writeable parameters. You can double click on any of these parameters to view Value and Attributes. You can scroll down to Parameter 11 [DC Bus Volts]. Double-click on this parameter to view it.
- Page 59 OK. In this case though, click Cancel. Similar to PowerFlex 525, the PowerFlex 755’s Add-On Profile has a time saving feature with Connected Components Workbench software that will show the non-default parameters. This makes it easy for users to view which parameters were changed from their default setting.
- Page 60 Take a look, you will notice that the parameters you changed in Part 1 appear in this list. 22. Click the “Show All” button to return to viewing all of the PowerFlex 755 drive parameters. 60 of 136...
- Page 61 To make viewing and editing parameters even simpler, you can enter a word or abbreviation into the filter value entry box. For example, type “motor” into the Filter Value entry box. Notice that it filters and only shows the parameters that have the word motor in their parameter names. Try some other examples such as “inp”, “torque”, or “535”...
- Page 62 25. Select “Speed Ramp Rates” from the “Speed Control” Group dropdown menu and explore the parameters shown below. You’ve just seen some of the parameters needed to start up/commission a PowerFlex 755 drive. Take some time to explore some of the other parameter groupings such as “Feedback & I/O”, “Applications”, “Communication” and “Diagnostics.”...
- Page 63 Wizard Browser and display the available wizards. The PowerFlex 755 Startup Wizard is similar to performing the HIM Assisted Startup. Configuration parameters that are common to most applications are displayed in text / graphic forms and presented in a sequential step-by-step process.
- Page 64 28. Select the PowerFlex 755 Startup Wizard and click Select. The wizard will first upload the parameters for each of the wizard pages. 29. The first step in the wizard is the Welcome page. It explains the wizard and gives hints and tips for using the wizard.
- Page 65 Click Next > to continue viewing the System Time and Ethernet Port settings. Continuing to click Next > until you read the Motor Control step of the wizard. 31. Perform the Motor Control step of the PowerFlex 755 Startup Wizard. Make the selections shown. Motor Control Mode: Induction Sensorless Vector ...
- Page 66 Click Next to get to the Motor Data step of the wizard. 32. The Motor Data step is next. This step assists in entering the data from your motor’s nameplate into the drive. Change the parameters to the following: Power Units: HP ...
- Page 67 Click Next > to the Stop Mode step of the wizard. 33. The Stop Mode step is next. This step assists in selecting the drive’s stop mode and dynamic brake (DB) resistor type. No selections need to be changed in this step; keep the default selections. Click Next >...
- Page 68 34. The Direction Test step is next. It helps you determine if the motor is rotating in the proper direction for your application. No selections need to be change on this screen. Note: If the drive is faulted, click on to clear the fault.
- Page 69 Click Next > to the AutoTune step of the wizard. 35. The AutoTune step is next. This step is where you can use the automatic tuning algorithms (AutoTune). When running these algorithms, the drive energizes the motor and makes measurements, which are used to make parameter settings.
- Page 70 36. The Ramp Rates / Speed Limits step is next. Set the following values: Max Forward Speed: 60 Hz Min Forward Speed: 0 Hz Min Reverse Speed: 0 Hz Max Reverse Speed: -60 Hz Adjust the S-Curve values and see how that changes the shape of the ramps. Set it back to zero before moving on. Click Next >...
- Page 71 38. Now select the reference to be from Port 7: Parameter 50 [Anlg In0 Value], observe how the wizard shows the pertinent parameters for this analog input. 71 of 136...
- Page 72 Click Next > to continue, viewing the sequential process, continue to click Next > until you reach the Start / Stop step of the wizard. 39. The Start / Stop step of the drive is next. Make the selections below: DI Start: Port 7 [I/O Module 24 V] Parameter 1 [Dig In Sts] Bit 1 [Input 1] ...
- Page 73 Click Next > to the Other Digital Inputs step of the wizard. 40. The Other Digital Inputs step is next. No changes need to be made here. Click Next > to continue to ‘Analog Output Port 7’ ‘Analog Out 0’ Note: There are other digital inputs available to the user;...
- Page 74 43. The Pending Changes step is next, and last. The purpose of this step is to verify all of the changes you made in the wizard, and then apply the changes to the drive. The below screen is for your reference, and there may be some differences between your actual screen and the one shown.
- Page 75 Using the Control Bar Tool 45. Change Parameter 301 [Access Level] to Expert to allow all of the parameters to be visible. 46. Click on the button in the tool bar at the top of the window. 47. Read the Caution Advisory window and click OK. 48.
- Page 76 The speed reference was selected earlier to be Port 7 [I/O Module 24V] Parameter 50 [Anlg In0]. To allow the control bar to have control of the speed reference, change Port 0 Parameter 545 [Sped Ref A Sel] while the drive is not running. Stop the drive, and change it to Port 0 Parameter 877 [Port 13 Reference].
- Page 77 Take note of the name and remember where you save this file, it will be needed later. 51. In the Properties window, select Export to upload all the parameters from the PowerFlex 755 drive 52. Select the ‘Upload Entire Device’ to save data from the drive 53.
- Page 78 55. Disconnect from the drive and select No when ask to upload values from online to project. 56. You should notice that your saved file has an .iuux extension. Downloading a saved Configuration CCW file to a Drive 57. After your file is saved and you have disconnected from the drive, using what you learned previously set the drive to defaults using the HIM.
- Page 79 62. Wait as CCW gathers port information. 63. Select the Error Check Download check box to get detailed information on any download errors and click the Advanced button to specify which ports to download. 64. If you have all peripherals on your demo box, uncheck Port 6 Safe Speed Montr . 65.
- Page 80 During the Download process you may receive warning messages. If you see this “Data Out of Range” message, Click the Blue Magnifying Glass button… …A dialog box similar to this one (it may contain more detailed error information) will appear. Click Ignore to continue the Download.
-
Page 81: Lab 3: Powerflex Drives Add-On Profile With Drives And Motion Accelerator Toolkit
This section will provide a preview of the PowerFlex Drives Add-On Profiles as well as the Drives and Motion Accelerator Toolkit Add-On Instructions and Faceplates for the PowerFlex 525 and PowerFlex 755 drives. About Integrated Drive Profiles and Premier Integration Integrated Drive Profiles are designed to save system development time and to make systems easier to maintain. -
Page 82: Exploring The Add-On Profile For The Powerflex 525 Drive
Exploring the Add-On Profile for the PowerFlex 525 Drive 1. Start the program. Double-click the Studio 5000 software icon on the desktop. You will see the following splash screen. 2. A pre-configured Studio 5000 Logix Designer software project has already been created for your convenience. - Page 83 Lab files are located within the “C:\Users\labuser\Desktop\Lab Files\PF525 and PF755 - Basic HIM, CCW, PI\Lab Files” folder. The file will be opened in the Logix Designer software after a few moments. In the Controller Organizer, scroll down to the I/O Configuration section shown in the graphic below. Open the Module Properties window for the drive by double-clicking on the “PowerFlex 525-E2P PF525_Drive”.
- Page 84 The Add-On Profile for the PowerFlex 525 drive in the Logix Designer software provides a common look-and-feel to the Connected Components Workbench software. This provides the same ability to upload, download, view, and compare drive parameters, as well as access the Wizards. One additional feature in Logix Designer is for setting up Automatic Device Configuration (ADC) the drive.
- Page 85 = Reset device data to factory defaults = Print If you forget each button’s purpose, hold your cursor over them to display a tooltip with their function. Click on the “Communications” tab. The following screenshot is for the PowerFlex 525 Embedded Ethernet communication. For this lab we are using the 25-COMM-E2P module in Port 2 for communication.
- Page 86 9. Click on the [X] in the upper right hand corner to close the Properties window. 10. Now let’s look at the PowerFlex 755. In the Controller Organizer, double-click on the “PowerFlex 755- EENET PF755_Drive”. 11. From the Module Properties window, click on the “Drive” tab.
- Page 87 13. Observe the multiple tabs available for each optional peripheral in the drive. These tabs indicate the function of each module and display important information such as: port, voltage and amp ratings, series, and revision. Click on each port peripheral to review. NOTE: Your window may be different from pictured image as demo boxes vary.
- Page 88 15. Close the PowerFlex 755 Module Properties window and reopen the PowerFlex 525 Module Properties window. Navigate to the Drive tab. 16. Click on the “Parameters” button. This should look familiar- just like the Connected Components Workbench software! Just as you did earlier in the lab, you can go online with the drive, view and modify parameters with the Parameter, AppView and CustomView groups.
- Page 89 18. Within the Module Definition section of the General tab, click the “Change…” button to open the Module Definition window. Within the Module Definition window, you can perform the following actions: Select the Drive Rating, set the Revision of the drive firmware, and set the Electronic Keying ...
- Page 90 19. To configure the datalinks, you would select the parameters from the dropdown selection list. No parameters need to be added for this lab, but take some time to scroll through the available parameters that can be assigned as Input and Output Datalinks. Click on the [X] in the upper right hand corner to close the Module Definition window and then close the Module Properties window.
-
Page 91: Taking Advantage Of Having The Drive In The Controller Organizer
When your application requires more than one drive, you can save time with Studio 5000 for configuration. Within the Controller Organizer, you can duplicate the PowerFlex 525 drive or the PowerFlex 755 drive on the Ethernet network as many times as needed by using the Copy and Paste features. - Page 92 In addition to storing the configuration data in the controller, the controller manages the communications to the drive with convenient tag-based addressing. Double-click on the “Controller Tags” icon under the “Controller PowerFlex_Lab” folder. The Monitor Tags window will appear. 5. Find the tag for “PF525_Drive:I” and expand it by clicking on the [+] next to the name. It may help to change the width of the “Name”...
- Page 93 6. Now expand the “PF525_Drive:O” tag to view the output tag names. Descriptive tag names have been created for the drive again. The Logic Command bits (BOOLs) are clearly defined as well as the “FreqCommand” value for applying a reference to the drive. The proper data types are automatically used for every tag.
-
Page 94: Downloading The Project
Downloading the Project 1. Open the PowerFlex_Lab project. Click the “Open” icon illustrated below. 2. Select the “PowerFlex_Lab.ACD” file and click the “Open” button. Open the drive Module Properties window by double-clicking on the “PowerFlex 525-E2P PF525_Drive” node in the I/O Configuration folder. The Module Properties window will appear. - Page 95 4. Click on the “Drive” tab. 5. Click the “Download” button. The Connection Browser window will appear. 6. Expand the “AB_ETH-1” Ethernet driver and select the “192.168.1.20, PowerFlex 525” node. Click the “OK” button You will be asked to confirm with the window shown below. Click the button to “Download Entire Device”. 95 of 136...
- Page 96 For a brief moment, you will see a downloading progress bar while the parameter settings are being sent to the drive. 9. If you see this “Data Out of Range” message, Click the Blue button… …and Click Ignore 10. If you see this “Data Out of Range” message, Click the Blue button… …and Click Ignore You may hear the drive reset, which is normal.
- Page 97 11. Click the “OK” button to close the Module Properties window, 12. Open the drive Module Properties window by double-clicking on the “PowerFlex 755-EENET PF755_Drive” node in the I/O Configuration folder. 13. Click on the “Drive” tab. 14. Click the “Download” button.
- Page 98 16. Click “OK”. 17. You will be asked to select a device to download. Please select ALL devices. If you get this error screen: Just click OK and continue. That is due to the Safety Card which is not used in this lab. 18.
- Page 99 21. Verify that the node labeled “192.168.1.10, 1769-L18ERM LOGIX5318ERM” via the AB_ETHIP-1 Ethernet driver is selected and click the “Download” button. The Download window will appear. 22. When the confirmation window appears, click the “Download” button again. You will see a progress bar 99 of 136...
- Page 100 23. Put the controller in “Run” mode. One way to do this is by clicking on the mode drop-down arrow and select “Run Mode”. 24. When prompted to confirm switching the controller mode to “Remote Run”, click the “Yes” button. 25.
-
Page 101: About Drives And Motion Accelerator Toolkit (Dmat)
You can also download these same supporting files from the Rockwell Automation Integrated Architecture Tools website, http://www.ab.com/go/iatools on the Beyond Getting Started tab. -
Page 102: Switch To The Hmi Application
Switch to the HMI Application 1. Minimize Studio 5000 Logix Designer so that the HMI screen on the desktop can be seen. If the HMI Application is not running in the background, contact your instructor. 2. If the warning screen is displayed, click the blue “OK” button to load the Startup screen. 3. - Page 103 The State Diagram faceplate can be accessed by pressing the “State Diagram” button. While in Program mode, the state diagram illustrates the machine operational model: The states with a dashed outline indicate a transitional state; while the solid line indicates an end state. Depending on your current machine state, use the following commands to transition between states: ABORTED –...
- Page 104 Run the Machine Follow these steps to start and stop the system while in Program mode. 1. If the machine is currently in the ABORTED state, press the “Clear Faults” button. After a few moments the state machine should transition to the STOPPED state. 2.
- Page 105 Continue to the next section. Using the PowerFlex 525 Drive & PowerFlex 755 Drive Faceplates The steps below also apply to both the PowerFlex 755. The faceplate screen is consistent between “PF525” and the “PF755”. 1. Press the “PF525” button from the Startup screen.
- Page 106 2. Click on the outlined numeric entry to display keypad to change the speed reference of the drive. The numeric box performs a dual purpose. It displays the drive feedback, but can also be used to enter information. After you click the “Enter” button the value is stored but not displayed. Once the motor is spinning, the value will be updated.
- Page 107 6. Press the “Faults” button. The Faults faceplate will come up. It may look different than the screenshot below, since it will display the last fault. If a fault condition exists, the Faults icon flashes red. This faceplate determines the fault information from the drive and displays the fault type, code and description.
- Page 108 9. Press the arrows to switch between screens. You can clear faults from the Startup screen or, if in Operator mode, from the Fault display. The Alarm History screen logs fault information from all of the devices. 10. When you are finished, pull out the red “Safe Off” button and press the “Clear Faults” button on the Startup screen to clear the fault in the drive and the state machine.
- Page 109 12. Press the “Trend” button. The Trend screen lets you view Speed Feedback and any other pens are setup up. 13. Press the “Trend Configuration” button. The Trend Configuration button is only visible from the Trend screen. The Trend Configuration screen lets you adjust the trend scales. 14.
- Page 110 The Alarm History Faceplate The Alarm History faceplate provides a summary of current and past alarms for all of the configured devices or drives configured in the application. The faceplate receives fault information directly from each of the device modules and applies a timestamp based on the order in which it was received.
- Page 111 The Equipment Status Faceplate The Equipment Status faceplate lets you quickly load and configure a summary display of preconfigured status and diagnostic displays (faceplates). The Equipment Status faceplate works in conjunction with individual device faceplates and provides a single summary display of all the devices that may be configured for an application. 1.
-
Page 112: Bonus Lab Exercise: Automatic Device Configuration (Adc) With The Powerflex Ac Drives
PowerFlex 525 via Embedded Ethernet (EENET) and Dual Port Ethernet (E2P) PowerFlex 523 via Dual Port Ethernet (E2P) PowerFlex 755 (Version 4.001 and up) via Embedded Ethernet (EENET) and Dual Port Ethernet (ENETR) PowerFlex 753 (version 7.001 and up) via Dual Port Ethernet (ENETR) ADC can also work in tandem with Firmware Supervisor. -
Page 113: Exploring The Setup Of Automatic Device Configuration (Adc)
Exploring the Setup of Automatic Device Configuration (ADC) 1. From the “File” menu, select “Open…” to select an existing project. 2. Select the “PowerFlex_Lab_ADC.ACD” file and click the “Open” button. Lab files are located within the “C:\Users\labuser\Desktop\Lab Files\PF525 and PF755 - Basic HIM, CCW, PI\Lab Files”... - Page 114 3. In the Controller Organizer, scroll down to the I/O Configuration section shown in the graphic below. Open the Module Properties window for the drive by double-clicking on the “PowerFlex 525-E2P PF525_Drive”. The Module Properties window will appear. 4. Click on the tab labeled “Drive”. The Drive tab will appear.
- Page 115 8. Click the “OK” button to close the Module Properties window. 9. Repeat steps 3-8 for the “PowerFlex 755-EENET PF755_Drive”. Note: When enabling ADC for the PowerFlex 755 drive and its peripherals, uncheck the checkbox for Port 6: 20-750-S1 Safe Speed Monitoring to disable ADC for the Safety peripheral card.
- Page 116 11. Verify that the node labeled “192.168.1.10, 1769-L18ERM LOGIX5318ERM” via the AB_ETH-1 Ethernet driver is selected and click the “Download” button. The Download window will appear. 12. When the confirmation window appears, click the “Download” button again. If you reach this step in the lab but do not end up completing the entire ADC exercise, please notify an instructor as you leave so that the controller may be reset for the next session.
- Page 117 13. When prompted to confirm switching the controller back to “Remove Run”, click the “Yes” button. 14. Automatic Device Configuration (ADC) may cause the transition to run to be longer. If the following window appears, click the “OK” button to acknowledge the delay. Continue to the next section to see ADC in action.
-
Page 118: Demonstrating Automatic Device Configuration
Demonstrating Automatic Device Configuration In this section, you will generate a configuration mismatch by changing a parameter on the drive and then reconnecting it. This will cause the ADC feature to activate and restore the drive to its programmed configuration. 1. - Page 119 7. Minimize Logix Designer so that the HMI is visible. On the Startup screen of the HMI, there is a multistate indicator which shows the connection status of the PowerFlex 525 drive. It will take about a minute for the PowerFlex 525 drive to be configured. 8.
-
Page 120: Reset The System
9. If the machine is currently in the ABORTED state, press the “Clear Faults” button. After a few moments the state machine should transition to the STOPPED state. 10. Press the “Program/Operator” button until “Program” is displayed. Program mode (AUTO) is now the active control mode. -
Page 121: Appendix: Overview Of The Dmat
Appendix: Overview of the DMAT The Drives and Motion Accelerator Toolkit DVD, publication IASIMP-SP017, was developed around a modular concept. Modularity lets you decide which components to incorporate into your machine, providing greater flexibility and a custom fit. The preconfigured logic is specifically designed around this modular concept and consists of three main logic module types. Logic Module Overview Machine •... -
Page 122: Machine/Application/Device Module Relationship
Machine/Application/Device Module Relationship The machine module monitors the current state of the overall machine and based on the state and/or requests from the HMI terminal, broadcasts out commands to both the application and device modules. The individual modules perform a predefined task based on the command. -
Page 123: Module Routine Overview
Module Routine Overview Each module is broken down into routines that contain logic for a specific function. Each module contains a monitor and control routine that provides a common interface between the machine and the application / device modules. Each of the routines main functions are listed below: 123 of 136... -
Page 124: Machine Module
Machine Module The machine module contains the high level control for the entire machine. The machine module was built around a simple state machine that you can customize to fit most applications. The machine module broadcasts out commands and receives feedback information from each of the application and device modules. -
Page 125: Machine State Diagram
Machine State Diagram The machine module uses the Transitional States to move between Permanent States. Typically, the machine only remains on a Transitional State for brief period of time. If the machine module detects an error during a Transitional State or if the application or device modules fail to transition within an allotted time (10 seconds by default), the machine module issues an ABORT command. -
Page 126: Default Machine States
Default Machine States Default Machine Commands 126 of 136... -
Page 127: Machine Control Module Tags
Machine Control Module Tags The machine control data type, UDT_MachCtrl, comprises the overall machine control and status, including the state machine. The user-defined data type consists of these components. Machine Tags Device and Application Status Rungs and Logix The device and application status rungs provide feedback information to the machine module and consist of these components. 127 of 136... - Page 128 Device Module Status Application Module Status The status bits are set in the Monitor routine of the corresponding modules. These status bits are vital to the machine module, as they are used to determine the overall status of the machine. They help the machine transition between states or detect a fault and respond accordingly.
- Page 129 DMAT Device Status Rungs 129 of 136...
- Page 130 DMAT Application Status Rungs 130 of 136...
-
Page 131: Application Modules
Application Modules The application modules contain all of the application specific code. This is where a majority of the customizing is expected to occur and is essentially a programming space where you spend a significant portion of your efforts to develop proprietary logic specific to your application. - Page 132 132 of 136...
- Page 133 Device Modules Device modules contain all of the logic to control the essential functions required by the device. For this DMAT example, we are using the PowerFlex 753 / 755 HMI faceplate and AOI instruction which has preprogrammed start, stop, speed reference, Accel and Decel times.
- Page 134 CIP Motion UDT_ServoCtrl Tag Listing UDT_ServoCtrl Tag The user-defined type for the Kinetix 300 drives and the add-on defined data type for the PowerFlex drives serve similar function as the UDT_ServoCtrl data type, however their layouts differ. Refer to the specific data types for more information. 134 of 136...
-
Page 135: Device Module Control Logic
Device Module Control Logic In this example, the R03_Control routine for the P04_PF755_Drive device module initiates and/or clears the Reset and Abort sequences. It is the same for the R03_Control routine for the P03_PF525_Drive device module. 135 of 136... -
Page 136: Notes
Notes Publication CE-DM253-EN-P — Sept 2015 Copyright© 2014 Rockwell Automation, Inc. All rights reserved. 136 of 136...
Need help?
Do you have a question about the PowerFlex 755 and is the answer not in the manual?
Questions and answers