Bowflex PR1000 Assembly And Owner's Manual
Hide thumbs
Also See for PR1000:
- Quick start manual ,
- Owner's manual (36 pages) ,
- Assembly manual (28 pages)
Table of Contents
Advertisement
Quick Links
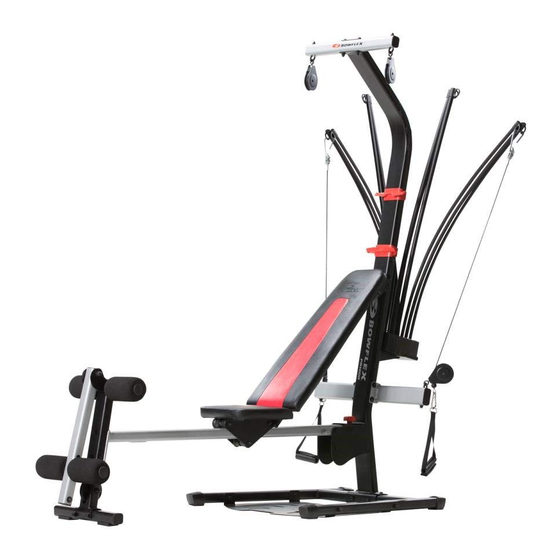
PR1000
Go to www.pr1000workouts.com
for workout training videos, tips and fitness guidance!
To get the most out of your home gym, be sure to use the
trainer designed workout programs provided with your
Bowflex
PR1000 home gym:
®
- 20 Minute Better Body
- Advanced General Conditioning
- 20 Minute Upper/Lower Body
- Body Building
- Circuit Trainer - Anaerobic/Cardiovascular
- True Aerobic Circuit Training
- Strength Training
A SSE MB LY / O WN E R'S M AN UAL
Manual en Español
Latino Americano:
www.support.nautilus.com
Advertisement
Table of Contents

Related Manuals for Bowflex PR1000


Summary of Contents for Bowflex PR1000
- Page 1 To get the most out of your home gym, be sure to use the trainer designed workout programs provided with your Bowflex PR1000 home gym: ® - 20 Minute Better Body - Advanced General Conditioning...
-
Page 2: Table Of Contents
U.S. www.nautilusinternational.com | Printed in China | © 2017 Nautilus, Inc. | ® indicates trademarks registered in the United States. These marks may be registered in other nations or otherwise protected by common law. Bowflex, the B logo, Power Rod, Nautilus, Schwinn, and Universal are trademarks owned by or licensed to Nautilus, Inc. -
Page 3: Assembly Manual
• Do not try to change the design or functionality of this machine. This could compromise the safety and can void the warranty. • If replacement parts are necessary use only genuine Nautilus replacement parts and hardware. Failure to use genuine replacement parts can cause a risk to users, keep the machine from operating correctly or void the warranty. -
Page 4: Safety Warning Labels And Serial Number / Specifications
Safety Warning Labels and Serial Number / Specifications WARNING! • Keep children and pets away from this machine at all times. • Prior to use, read and understand the User’s Guide, including all Warnings which may or may not be present on this machine. -
Page 5: Parts
Parts Item Description Item Description Top Cross Bar Short Roller Tube Upper Lat Tower Leg Extension Base Rod Pack Base Platform Rod Box End Plate Cable, Rod to Chest Cross Bar Pulley Chest Cross Bar Belt, Leg Press Media Tray Handgrip Lower Lat Tower Rod Strap, Binding... -
Page 6: Hardware / Tools / Before Assembly
4. You may fi nd the use of a utility knife or scissors benefi cial during the unpacking and assembly process. 5. Carefully lift pieces when attaching. Look through the bolt holes to help guide bolt placement. 6. Assembly requires 2 people. NOTICE: Leave all of the cables wrapped and bagged until the Bowflex home gym is completely assembled. ®... -
Page 7: Assembly
Assembly 1. Attach the Lower Lat Tower to the Base Assembly Note: Insert the upper hardware fi rst to secure the Lower Lat Tower ( Assembly Manual... -
Page 8: Assembly Manual
2. Attach the Seat and Rubber Pad to the Seat Rail Assembly Assembly Manual... -
Page 9: Assembly Manual
3. Attach the Leg Extension to the Leg Extension Tube Note: Do not unwrap the cable from the pulley until the machine is fully assembled. 4. Attach the Seat Rail Assembly to the Leg Extension Assembly Assembly Manual... -
Page 10: Assembly Manual
5. Attach the Seat Rail Assembly to the Frame Assembly, and Secure it with the Seat Rail Securing Knob. Assembly Manual... -
Page 11: Assembly Manual
6. Attach the Top Cross Bar to the Upper Lat Tower Note: Do not unwrap the cables from the pulleys until the machine is fully assembled. Assembly Manual... -
Page 12: Assembly Manual
7. Attach the Media Trays and Upper Lat Tower Assembly to the Frame Assembly Assembly Manual... -
Page 13: Assembly Manual
8. Apply the Upper Cable Clip to the Lat Tower Note: Be sure to use the Cable Clip when the cables are not in use. Assembly Manual... -
Page 14: Assembly Manual
9. Attach the Rod Pack Holder and Rod Pack to the Frame Assembly Note: Fully tighten the hardware. Be sure that the Rod Pack is fully secured. Assembly Manual... -
Page 15: Assembly Manual
10. Attach the Chest Cross Bar to the Frame Assembly Note: Do not unwrap the cables from the pulleys until the machine is fully assembled. Assembly Manual... -
Page 16: Assembly Manual
11. Attach the Leg Extension Rollers to the Frame Assembly Assembly Manual... - Page 17 12. Insert the Bench into the Seat Slider and then Pivot onto the Seat Rail Be sure the end of the Bench sets fi rmly into the hinge on the Seat Slider, and then pivot it downward onto the Seat Rail. If the Bench is not fully engaged with the Seat Slider and Seat Rail, the Bench will be unstable and could disengage and potentially cause injury or harm to the user.
-
Page 18: Adjustments
Adjustments Leveling Your Machine Loosen but do not remove the indicated bolts on the foot plate. Stand on the foot plate until it rests fl at on the fl oor. Re- tighten the bolts. Cable Routing for Chest Cross Bar Use: Assembly Manual... -
Page 19: Cable Routing For Lat Cross Bar Use
Cable Routing for Lat Cross Bar Use: Cable Routing for Leg Extension Use: Assembly Manual... -
Page 20: Features
Features Top Cross Bar Power Rod Unit ® Top Cross Bar Pulley Hand Grip Upper Cable Resistance Cable Media Rack Rod Box Leg Extension Chest Bar Pulley Bench Seat Chest Cross Bar Seat Rail Securing Knob Seat Slider Seat Locking Knob Leg Press Belt Rod Binding Strap Leg Extension Cable... -
Page 21: Operation
"Rod Cap" and at the base of each Rod on the Rod Box. The Bowflex PR1000 home gym comes with 210 units of resistance ® provided by the Rod Pack. The full resistance is divided among a 5, two 10s, a 30, and a 50 unit rod on each side of the machine, for a combined total of 210 units. -
Page 22: The Workout Bench
To get the most of your workouts, find and follow the trainer lead workouts and workout video aids located at www.pr1000workouts.com. Maintenance and Care of Your Bowflex Home Gym ®... -
Page 23: Storing Your Home Gym
Do not try to exercise when the seat rail is in the folded position. Do not move the machine without aid. Injury to you or damage to the machine can occur. If you have any questions regarding your Bowflex home gym, please call the ®... -
Page 24: Equipment And Accessories
Wear the Leg Press Belt around your lower arch of spine and attach the D-rings to cable clips. Belt must remain in slight tension to not fall from arch during exercise. Additional Accessories For additional accessories for your home gym, contact Nautilus at 1-800-NAUTILUS (1-800-628-8458) or www.bowflex.com. Assembly Manual... -
Page 25: Define Your Goals
Define Your Goals It is important to define your goals before you begin your workout routine. The following fitness guidelines will help you define your goals and choose your fitness program. Consult a physician before you start an exercise program. Stop exercising if you feel pain or tightness in your chest, become short of breath, or feel faint. -
Page 26: Design Your Own Program
Design Your Own Program You may want to design your own personal program specifically geared to your goals and lifestyle. Designing a program is easy by following the guidelines below. Understand fitness and its components Improperly designed programs can be dangerous. Take some time to review this manual as well as other fitness guides. Know your current fitness level Before you start any fitness program you should consult a physician who will help you determine your current abilities. - Page 27 Warming Up We recommend that you warm up by doing light stretching and performing light exercises on the Bowflex home gym. ® • Achilles Tendon and Calf: With both hands against a wall, place one foot behind you. Lean in toward the wall while keeping the rear leg straight and your heel on the ground.
-
Page 28: The Programs
The Programs 20 Minute Better Body Workout Frequency: 3 days per week (M-W-F) Time: 20 minutes Start by performing one set of each exercise. Warm up with a light resistance that you can perform easily for 5–10 reps without fatigue. Focus on practicing and learning your technique before increasing the resistance. Then move to a more challenging resistance that you can perform no less than 10 reps and no more than 15 reps. -
Page 29: 20 Minute Upper/Lower Body
Days 2 & 4 Back Seated Lat Rows 10-12 Stiff Arm Pulldowns 10-12 Shoulders Crossover Seated Rear Deltoid 10-12 Arms Standing Biceps Curl 10-12 Triceps Pushdown 10-12 Trunk Trunk Rotation 10-12 Seated Abdominal Crunch 10-12 20 Minute Upper/Lower Body Frequency: 4 days per week (M-T-Th-F) Time: 20 minutes This program provides a quick and effective workout that combines muscle conditioning with some cardiovascular benefits. -
Page 30: Body Building
Body Building Frequency: 6 days on, 1 day off (Day 6) Time: 45-60 minutes Body building requires focused concentration and dedication to training, as well as proper eating habits. Work each muscle group to fatigue before moving on to the next exercise. Do not neglect any muscle group. If needed, include an aerobic activity to increase your caloric expenditure and help to reduce your body fat levels to achieve a defined muscular look. -
Page 31: Circuit Training - Anaerobic/Cardiovascular
Circuit Training - Anaerobic/Cardiovascular Frequency: 6 days on, 1 day off (Day 6) Time: 20-45 minutes Circuit training is a great way to achieve the benefits of strength training and cardiovascular training in one quick, challenging routine. The idea is to move quickly from exercise to exercise, taking only as much rest between sets as it takes to set up the next exercise (less than 20 seconds). -
Page 32: True Aerobic Circuit Training
True Aerobic Circuit Training Frequency: 2-3 times per week Time: 20-60 minutes Circuit training is a great way to achieve the benefits of strength training and cardiovascular training in one quick, challenging routine. By returning to an aerobic exercise between each set you are increasing your aerobic capacity, endurance and burning fat as energy. -
Page 33: Strength Training
Strength Training Frequency: 3 days per week (M-W-F) Time: 45-60 minutes This program is designed to emphasize overall strength development. This is an advanced routine to be used only after you have progressed from the advanced general conditioning routine and only after you have perfected your exercise techniques. Work each set to near exhaustion. -
Page 34: Exercises
When using the machine for standing leg exercises, always hold the Lat Tower of the machine for stability. All exercises in this manual are based on the calibrated resistance and capacity levels of this machine. Only exercises included in this manual or in written materials authorized and supplied by Bowflex are recommended ®... -
Page 35: Chest Exercises
Chest Exercises Bench Press - Shoulder Horizontal Adduction (and elbow extension) Muscles Worked Pectoralis Major, Deltoids, Triceps Machine Set-Up • Adjust the bench to a 45° incline. • Chest Cross Bar pulleys • Handgrips • Attach the clips to the Power Rod resistance rods. -
Page 36: Shoulder Exercises
Incline Bench Press - Shoulder Horizontal Adduction (and elbow extension) Muscles Worked Pectoralis Major, Deltoids, Triceps Machine Set-Up • Adjust the bench to a 45° incline. • Chest Cross Bar pulleys • Handgrips • Attach the clips to the Power Rod resistance rods. - Page 37 Front Shoulder Raise - Shoulder Flexion (elbow stabilized) Muscles Worked Front and Middle Deltoids Machine Set-Up • Adjust to Flat Bench position. • Chest Cross Bar pulleys • Handgrips • Attach the clips to the Power Rod resistance rods. ® Success Tips •...
-
Page 38: Back Exercises
Scapular Retraction Muscles Worked Middle Trapezius, Rhomboids Machine Set-Up • Adjust to Flat Bench position. • Chest Cross Bar pulleys • Handgrips • Attach the clips to the Power Rod resistance rods. ® Success Tips • Do not lose your spinal alignment. •... - Page 39 Stiff Arm Pulldowns Muscles Worked Latissimus Dorsi, Teres Major, Rear Deltoids, Biceps Machine Set-Up • Adjust to Flat Bench position. • Top Cross Bar pulleys • Handgrips • Attach the clips to the Power Rod resistance rods. ® Success Tips •...
- Page 40 Reverse Grip Pulldown Muscles Worked Lower Trapezius Machine Set-Up • Adjust to Flat Bench position. • Top Cross Bar pulleys • Handgrips • Attach the clips to the Power Rod resistance rods. ® Success Tips • Keep your knees bent and your feet flat on the floor. •...
-
Page 41: Arm Exercises
Arm Exercises Triceps Pushdown - Elbow Extension Muscles Worked Triceps Machine Set-Up • Remove the bench. • Top Cross Bar pulleys • Handgrips • Attach the clips to the Power Rod resistance rods. ® Success Tips • Keep your upper arms motionless and your wrists straight. •... - Page 42 Standing Biceps Curl - Elbow Flexion (in supination) Muscles Worked Biceps Machine Set-Up • Remove the bench. • Chest Cross Bar pulleys • Handgrips • Attach the clips to the Power Rod resistance rods. ® Success Tips • Keep your chest lifted, abs tight and a very slight arch in your lower back.
-
Page 43: Abdominal Exercises
Abdominal Exercises Seated (Resisted) Abdominal Crunch - Spinal Flexion Muscles Worked Rectus Abdominus, Obliques Machine Set-Up • Adjust the bench to a 45° incline. • Chest Cross Bar pulleys • Handgrips • Attach the clips to the Power Rod resistance rods. ®... -
Page 44: Leg Exercises
Leg Exercises Leg Extension Muscles Worked Quadriceps Machine Set-Up • Adjust to Flat Bench position. • Use the Leg Extension Seat. • Leg Extension pulleys • Attach the clips to the Power Rod resistance rods. ® Success Tips • Use slow, controlled motion. Do not kick into the extension. - Page 45 Seated Hip Adduction Muscles Worked Adductor Longus, Gluteus Medius Machine Set-Up • Adjust to Flat Bench position • Chest Cross Bar pulleys • Handgrips • Attach the clips to the Power Rod resistance rods ® Success Tips • Do not cross the attached leg in front of the stabilized leg. •...
- Page 46 Standing Leg Kickback - Hip and Knee Extension Muscles Worked Gluteus Maximus Machine Set-Up • Adjust to Flat Bench position. • Chest Cross Bar pulleys • Handgrips • Attach the clips to the Power Rod resistance rods. ® Success Tips •...
-
Page 47: Warranty
Warranty Who Is Covered This warranty is valid only to the original purchaser and is not transferable or applicable to any other person(s). What Is Covered Nautilus, Inc. warrants that this product is free from defects in materials and workmanship, when used for the purpose intended, under normal conditions, and provided it receives proper care and maintenance as described in the Product’s Assembly and Owner’s manual. - Page 48 8014149.060118.C...
Need help?
Do you have a question about the PR1000 and is the answer not in the manual?
Questions and answers