
Related Manuals for Sunny SF-B2640


Summary of Contents for Sunny SF-B2640
-
Page 1: User Manual
AIR BIKE TRAINER SF-B2640 USER MANUAL IMPORTANT! Read all instructions carefully before using this product. Retain owner’s manual for future reference. For customer service, please contact: support@sunnyhealthfitness.com... -
Page 2: Important Safety Information
IMPORTANT SAFETY INFORMATION We thank you for choosing our product. To ensure your safety and health, please use this equipment correctly. It is important to read this entire manual before assembling and using the equipment. Safe and effective use can only be assured if the equipment is assembled, maintained, and used properly. -
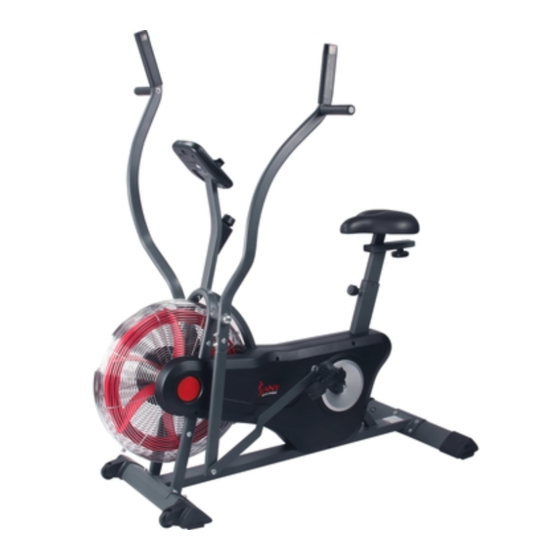
Page 3: Exploded Drawing
EXPLODED DRAWING 6 2 6 3 HARDWARE PACKAGE #78 M6 Washer 2PCS #72 M14 Washer 4PCS #69 M8 Washer 10PCS #65 M6 Arc Washer 8PCS #77 M10 Washer 1PC #95 M14 Wave Washer 4PCS #63 M16 Washer 2PCS... -
Page 5: Parts List
PARTS LIST Description Spec. Description Spec. Main Frame Bearing Snap Washer Left Handrail Arm §20*40 Bearing Nut 7/8-24UNS Right Handrail Arm §20*40 Sensor Wire Lower Handrail Arm §20*40 Sensor Holder Upright □20*40*T1.5 Connection Wire Seat Post □23.5*53.5*T Self-tapping Screw ST4.2×16 Seat Slider Self-tapping Screw ST4.2×25... -
Page 6: Assembly Instructions
ASSEMBLY INSTRUCTIONS STEP 1: INSTALLING UPRIGHT Adjust to limit Lift the Upright (No.5) to the angle shown in Hook Metal Fitting Bracket illustration on the left. Cable End STEP:1 Connect wire of Tension Control Knob (No.25) STEP:2 with Lower Brake Cable (No.60). Then connect Adjust to limit Remove Sensor Wire (No.52) with Connection Wire... - Page 7 STEP 4: INSTALLING HANDRAIL ARM WITH #64 M6x50 4PCS LOWER HANDRAIL ARM #65 M6 Arc Washer 8PCS #64 M6x50 4PCS #66 M6 Lock Nut 4PCS Attach the L Handrail Arm (No.2) to the Lower #67 M6x10 2PCS Handrail Arm (No.4) and secure using 2 #78 M6 Washer 2PCS Screws (No.64), 4 Arc Washers (No.65), 2 #69 M8 Washer 2PCS...
- Page 8 STEP 6: INSTALLING THE LEFT & RIGHT PEDALS #72 M14 Washer 4PCS #74 Right Lock Nut 1PC Read this step all the way through before #75 Left Lock Nut 1PC assembling the pedals. Note: Apply some of the included grease to the #95 M14 Wave Washer 4PCS bolt of Left and Right Foot Pedal (No.14&15) #93 S13, S15, S19...
-
Page 9: Adjustment Guide
MAINTENANCE GUIDE Cleaning The bike can be cleaned with a soft cloth and mild detergent. Do not use abrasives or solvents on plastic parts. Wipe your perspiration off the bike after each use. Be sure that the monitor is not exposed to excessive moisture, as this could potentially cause an electrical hazard and /or electronics to fail. -
Page 10: Specifications
EXERCISE METER Our computerized display console on the Air Bike Trainer allows the user to tailor a personalized workout by monitoring their progress. SPECIFICATIONS TIME 0:00~99:59 (Minute:Second) SPEED 0~999.9 miles per hour FUNCTIONS CALORIES 0.0~999.9~9999 Kcal DISTANCE 0.1~999.9 mile BATTERY TYPE (2)Two AAA or UM-4 OPERATING TEMPERATURE 0°C ~40°C... -
Page 11: Troubleshooting
TROUBLESHOOTING PROBLEM SOLUTION Remove the computer and check the wire that comes from the computer is properly connected to the wire that comes from the upright. When display shows all 0’s, faded Check that the batteries are correctly numbers, incomplete numbers or positioned and are in proper contact blank screen with the battery springs.
Need help?
Do you have a question about the SF-B2640 and is the answer not in the manual?
Questions and answers