
Related Manuals for Sunny SF-B2710


Summary of Contents for Sunny SF-B2710
-
Page 1: User Manual
Total Body Bike SF-B2710 User Manual IMPORTANT! Read all instructions carefully before using this product. Retain owner’s manual for future reference. For customer service, please contact: support@sunnyhealthfitness.com... -
Page 2: Important Safety Information
IMPORTANT SAFETY INFORMATION We thank you for choosing our product. To ensure your safety and health, please use this equipment correctly. It is important to read this entire manual before assembling and using the equipment. Safe and effective use can only be assured if the equipment is assembled, maintained, and used properly. - Page 3 PART DESCRIPTION 55/15/13/79/ Main Frame / Chain Cover / 45/57/58 Crank / Exercise Bands / Release Knob / Pin / Cover Seat Tube Backrest Tube / Bolt / Flat 70/73/50/4 1 Set Washer / Nut 84/89/91/49/ Handlebar / Foam / Hand Pulse End Cap Hand Pulse Wire Rear Stabilizer / Adjustable End...
- Page 4 PART DESCRIPTION M8 Carriage Bolt M8*1.2mm Curved Washer M8 Spring Washer M8 Cap Nut Spring Washer ∅6x∅14 / Screw 88/87 M6X15 Curved Washer ∅6x∅14 / Flat Washer 90/75 ∅6x∅14 Ankle Strap Handles Allen Wrench Spanner Some parts have been pre-assembled on the bike. In these instances, remove the parts from the bike and re-install as required.
-
Page 5: Exploded Drawing
EXPLODED DRAWING... -
Page 6: Parts List
PARTS LIST PART PART Carriage Bolt M8X65 Screw M8x48 Curved Washer ∅8x∅18 End Cap ∅25.4 Spring Washer Flat Washer ∅8x∅14 ∅8x∅18 Cap Nut Adjustable End Press Wheel ∅50 Caps Rear Stabilizer 15x20 ∅50x395mm Front Stabilizer Pear Main Frame ∅50x395mm Front Wheel ∅50 Front Main Frame Screw... -
Page 7: Assembly Instructions
ASSEMBLY INSTRUCTIONS STEP 1 Loosen and pull the Release Knob (45) from the folded Main Frame (54 and 55) and unfold. Attach Rear Stabilizer (6) to the Main Frame using 2 Curved Washers (2), 2 Spring Washer (3), 2 Carriage Bolts (1) and 2 Cap Nuts (4). Attach Front Stabilizer (7) to Main Frame with 2 Curved Washers (2), 2 Spring Washers (3), 2 Carriage Bolts (1) and 2 Cap Nuts (4). - Page 8 STEP 2 The Left Pedal (12) is marked L and the Right Pedal (12) is marked R. The Left Pedal (12) has reversed threading and must be turned counterclockwise to tighten. Attach the Left Pedal (12) to the Left Crank (13), turning counterclockwise to tighten. Attach the Right Pedal (12) to the Right Crank (13), turning clockwise to tighten.
- Page 9 STEP 3 Remove the pre-assembled 3 Nylon Nuts (51) and 3 Flat Washers (50) from the back of the Seat (68). Attach the Seat (68) to the Seat Tube (67) and fasten with 3 Nylon Nuts (51) and 3 Flat Washers (50). Attach the Seat Tube (67) to the main frame.
- Page 10 88 75 STEP 4 Attach Handlebar ( 84 ) to the Main Frame (55) and fasten with 4 Bolts (87), 2 Flat Washers (75) and 2 Curved Washers (90), and 4 Spring Washers (88). Tighten each part. Remove 4 Screws (85) from the back of the Meter (86). Attach Meter (86) to the Main Frame and secure with 4 Screws (85).
-
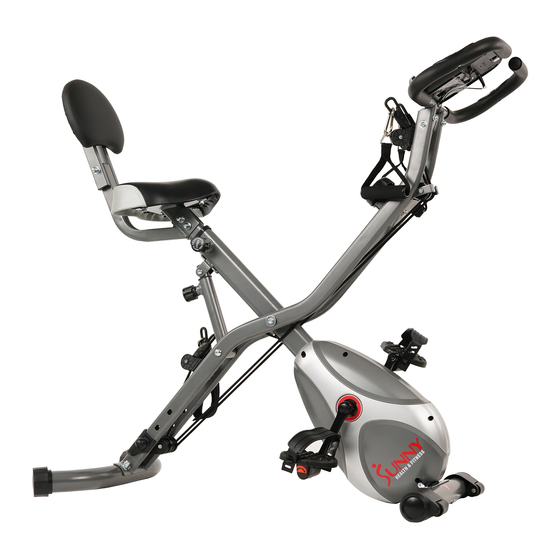
Page 11: Using The Bike
USING THE BIKE Using the Total Body Bike, you can do a variety of exercises. - Page 12 HOW TO ADJUST THE TENSION Tension of the bike is adjusted by turning Tension Knob (80). Tension of the Exercise Bands (79) can be adjusted. Pull out Pin (57), move Cover (58) to the desired setting, insert Pin (57) into one of the three holes.
- Page 13 HOW TO FOLD AND MOVE THE BIKE Loosen and pull the Knob (45), fold the bike, and then engage Knob (45) into one of the preset holes and tighten. When the bike is folded, stand in front of the bike. Hold the Handlebar (84) and tilt the bike forward until the wheels touch the floor.
-
Page 14: Meter Instructions
METER INSTRUCTIONS AUTO ON/OFF: The meter will turn on when you press MODE key. After 4 minutes of inactivity, the meter will shut off automatically. FUNCTION BUTTONS MODE: Press for 2 seconds to turn on meter. SET: During STOP mode, press to increase the value of TIME, DISTANCE or CALORIES.
Need help?
Do you have a question about the SF-B2710 and is the answer not in the manual?
Questions and answers
How do I adjust the seat?
Can i have someone come and assemble my Sunny Health and Fitness SF-B2710 Total Body Bike