Table of Contents
Advertisement
Quick Links
Advertisement
Table of Contents

Related Manuals for Sunny SF-E902


Summary of Contents for Sunny SF-E902
-
Page 1: User Manual
AIR WALKER TRAINER SF-E902 USER MANUAL IMPORTANT! Please retain owner’s manual for maintenance and adjustment instructions. Your satisfaction is very important to us, PLEASE DO NOT RETURN UNTIL YOU HAVE CONTACTED US: support@sunnyhealthfitness.com or 1- 877 - 90SUNNY (877-907-8669). -
Page 2: Important Safety Information
IMPORTANT SAFETY INFORMATION We thank you for choosing our product. To ensure your safety and health, please use this equipment correctly. It is important to read this entire manual before assembling and using the equipment. Safe and effective use can only be achieved if the equipment is assembled, maintained and used properly. - Page 3 EXPLODED DIAGRAM HARDWARE PACKAGE --------A 1pc --------B 1pc...
-
Page 4: Parts List
PARTS LIST No. Description Spec. Qty. Plug Ball Pin Sponge Left Rear Tube Left Front Tube Handlebar ( L&R ) Pedal (R&L) Washer Bolt Washer Screw Bearing Sleeve Bolt Cap Pedal Connector (L&R) Washer Bearing Sleeve Bearing Sleeve Screw Support Tube Pedal Tube Chest Pad Plug... -
Page 5: Assembly Instructions
ASSEMBLY INSTRUCTIONS STEP 1: Unfolding the Air Walker Trainer Pull out the large Ball Pin (No. 26), located half-way through the swing bars, to unlock the swing bars. Pull out Ball Pin (No. 43) located in the hinge where the two support tubes meet, this will unlock the Main Frame (No. - Page 6 STEP 3: Attaching the Handlebars Make sure the square holes on each handlebar are facing outward as shown on the left. Insert two Bolts (No. 6) making sure the square part of the bolts lock into the square holes. Place a Washer (No . 5) and a Nut (No. 4) on each Bolt (No.
-
Page 7: Exercise Computer
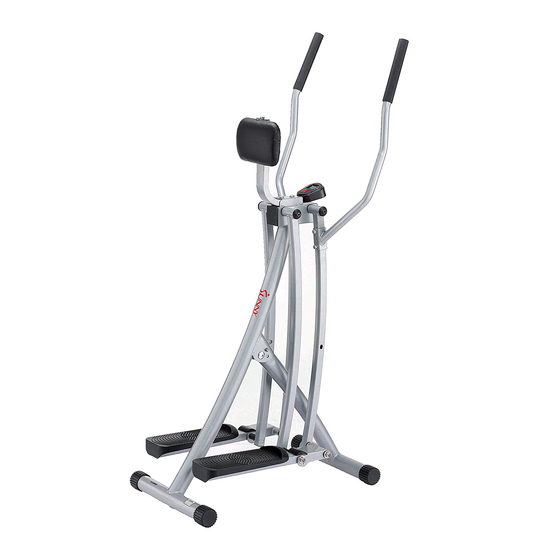
USING THE AIR WALKER TRAINER Placing your feet on the Air Walk Trainer Stand behind the Air Walk Trainer with each hand holding one of the handlebars. Make sure to push and pull each handlebar prior to placing your feet on the foot pedals, in order to feel the tension and motion of the machine.
Need help?
Do you have a question about the SF-E902 and is the answer not in the manual?
Questions and answers