Table of Contents
Advertisement
Quick Links
Item #:PH-S-127
PH-S-126
Model number: H0H1010-T-2
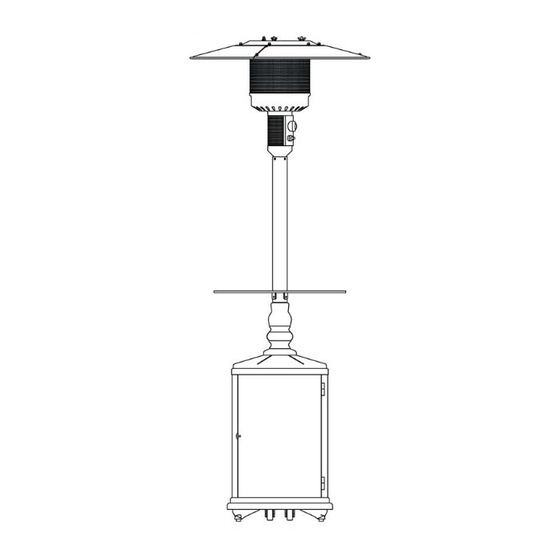
CAST ALUMINUM PATIO HEATER
INSTRUCTION MANUAL
WARNING: For outdoor use only.
FOR YOUR SAFETY
If you smell gas:
1. Shut off gas to the appliance.
2. Extinguish any open flame.
3. If odour continues, immediately
call gas supplier.
FOR YOUR SAFETY
Do not store or use gasoline or
other flammable vapours or liquids
in the vicinity of this or any other
appliance.
For cus tomer service, parts
or warranty issues:
Call 1-800-561-5550
or e-mail parts@jrhome.com
Establishing a burner ignition for
the FIRST time or after changing
the cylinder tank may take up to
2-3 minutes in order for the gas
R
to purge through the feeder lines.
US
FOR OUTDOOR USE ONLY
PLEASE READ INSTRUCTIONS CAREFULLY BEFORE ASSEMBLY
RETAIN THIS MANUAL FOR REFERENCE
e-mail: customercare@jrhome.com
1
Advertisement
Table of Contents

Summary of Contents for Paramount Fitness PH-S-127
- Page 1 Item #:PH-S-127 PH-S-126 Model number: H0H1010-T-2 CAST ALUMINUM PATIO HEATER INSTRUCTION MANUAL WARNING: For outdoor use only. FOR YOUR SAFETY If you smell gas: 1. Shut off gas to the appliance. 2. Extinguish any open flame. 3. If odour continues, immediately call gas supplier.
-
Page 2: Table Of Contents
TABLE OF CONTENTS GENERAL AND SPECIFICATIONS ** WARNING ** Improper operation, installation, adjustment, SECURITY AND CAUTION alteration, servicing or maintenance cause severe TOOLS AND ACCESSORIES REQUIRED property damage and /or serious damage and /or serious injury or death. Please read the installation, 6,7,8 A S S E M B L Y A N D I N S T R U C T I O N S operating and maintenance instructions thoroughly... -
Page 3: Warning
GENERAL DESCRIPTION This appliance is a propane transportable heater. The burner is controlled and adjusted by the gas control knob. Gas supply is controlled by the valve on the gas cylinder. The burner is made of stainless steel Heat diffusion is assisted by the reflector above Technical specification: Operating pressure with gas... -
Page 4: For Your Safety
SECURITY AND CAUTION FOR YOUR SAFETY If you smell gas : Close gas supply at cylinder valve b. Extinguish all open flames c. Proceed to a leak test with a soapy water solution (50% soap/ 50% water) If bubbles are detected, retighten connections. If no leaks are detected, open gas valve at cylinder and verify if you smell gas. -
Page 5: Tools And Accessories Required
TOOLS AND ACCESSORIES CAUTION • DO NOT operate the heater in an explosive environment Keep this appliance away from areas where you have stored gas. or other vapors and flammable liquids. • Before use, verify that no parts are damaged, inspect gas hose. •... -
Page 6: Assembly And Instructions
ASSEMBLY AND INSTRUCTIONS ASSEMBLY INSTRUCTIONS Attach the 3 Screws(M6X30mm) to the screw holes of the C o nnector. (N O T E :T ig h te n all the S c e w s.) Fit the C o n n e c to r to the base by inserting the prefixed Screw s into the three holes using 3 W ashe rs (M6), 3 Spring w a sh e rs (M 6) and 3 Nuts (M 6 ).T ig h te n the nuts . - Page 7 ASSEMBLY AND INSTRUCTIONS Set the table onto the pole . Use the 4 Philips bolts (M6 x 13mm) and 4 Washers (M6). To secure the table Put the Reflector together using the 9 Bolts(M6X8) and the 9 Nuts. Starting with the outer ring Place a steel washer over each bolt on the Top of the burner assembly unit Lay reflector over the burner top bolts...
- Page 8 ASSEMBLY AND INSTRUCTIONS Attach the guard bar to the heating furnace using the clawscrew(M6X12mm). Install a full gas cylinder on the base. Connect the gas regulator hose to the cylinder valve by turning the knob clockwise manually . do not use a tool.
-
Page 9: O Peration
OPERATIONS TO TURN ON THE HEATER A.Turn on the valve on the gas supply cylinder completely. B.Press lightly and turn the variable control knob to PILOT position. C.Press down the variable control knob and hold for 30 seconds. While holding down the variable control knob, press the igniter button several times until the pilot flame lights. - Page 10 OPERATIONS FOR YOUR SAFETY Be careful when attempting to manually ignite this heater. Holding in the control know for more than 10 seconds before igniting the gas will cause a ball of flame upon ignition. When heater is ON: Emitter screen will become bright red due to intense heat. The color is more visible at night.
-
Page 11: Trouble Shooting
TROUBLE SHOOTING TROUBLE SHOOTING GUIDE If you are having this If this condition exists: You will need to do the following: problem Open valve at cylinder. Turn cylinder 1. Cylinder valve may be OFF. valve in counter-clockwise direction. Refill LPG tank 2. -
Page 12: Storage And Maintenance
STORAGE AND MAINTENANCE CUSTOMER SERVICE ATTENTION : Consumer ... Please use the customer information listed below for any questions concerning assembly, care information, warranty issues and/or replacement parts. To ensure your satisfaction and maintain high standards for quality and workmanship, we want to hear from you should you have any questions or comments. - Page 13 IMPORTANT For questions, concerns or problems with our product please email our customer service department: customercare@jrhome.com DATED PROOF OF PURCHASE REQUIRED FOR WARRANTY SERVICE WARRANTY This product is inspected, tested and carefully packaged to minimize the chance of damage during shipment. If a part (excluding light bulbs and fuses*) within one year from the date of purchase proves to be defective in material or fabrication under normal use, the part will be repaired or replaced.


Need help?
Do you have a question about the PH-S-127 and is the answer not in the manual?
Questions and answers