Advertisement
Quick Links
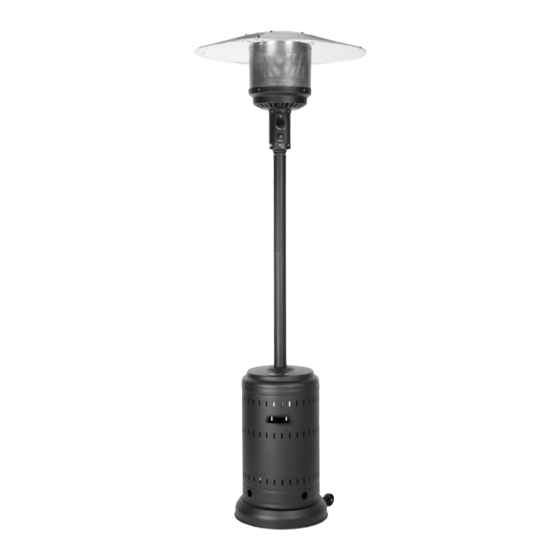
Full Size Grey
Outdoor Patio Heater
Questions, problems, missing parts?
Before returning to your retailer, contact our exceptional customer service.
Contact us by email at customercare@jrhome.com or call us toll-free at
(800) 561-5550, 7:30 a.m. – 4:00 p.m., PST, Monday – Friday .
DANGER
FOR YOUR SAFETY:
If you smell gas:
Shut off gas to the appliance.
If odor continues, keep away from the
appliance and immediately call your gas
DANGER
Failure to comply with the precautions and
instructions provided with this heater can result in
death, serious bodily injury and property loss or
damage from hazards
and/or carbon monoxide poisoning.
Only persons who can understand and follow the
instructions should use or service this heater.
WARNING
Item #: PH-100002
Model #: 63049
+
Requires (1) AAA
Battery
_
(Not Included)
WARNING
Do not store or use gasoline or other
this or any other appliance. An LP-cylinder
not connected for use shall not be stored in
the vicinity of this or any other appliance.
WARNING
Improper installation, adjustment, alteration,
service or maintenance can cause property
damage, injury or death. Read the installation,
operation and maintenance instructions
thoroughly before installing or servicing this
WARNING
ATTACH YOUR
RECEIPT HERE
Keep a copy of your proof of
which will be needed if you
need to contact us about warranty coverage.
Serial No.
Purchase Date
vicinity of
Advertisement

Related Manuals for Paramount Fitness 63049


Summary of Contents for Paramount Fitness 63049
- Page 1 Full Size Grey Item #: PH-100002 Outdoor Patio Heater Model #: 63049 Requires (1) AAA Battery (Not Included) WARNING DANGER Do not store or use gasoline or other FOR YOUR SAFETY: vicinity of If you smell gas: this or any other appliance. An LP-cylinder Shut off gas to the appliance.
- Page 2 www.jrhome.com English Page 3 Français Page Contact us for assistance: customercare@jrhome.com | (800) 561-5550...
-
Page 3: Table Of Contents
BEFORE YOU BEGIN TABLE OF CONTENTS Before You Begin Page Safety Information Page Package Contents Page Hardware Contents Page Assembly Page - Operating Instructions Page Care and Maintenance Page 1 Troubleshooting Page 1 Replacement Parts List Page 1 Warranty Information Page 1 BEFORE YOU BEGIN Monday –... -
Page 4: Safety Information Page
SAFETY INFORMATION DANGER DANGER CAUTION EXPLOSION—FIRE HAZARD CARBON MONOXIDE HAZARD SERVICE SAFETY Keep solid combustibles, such as building This heater is a combustion appliance. materials, paper, or cardboard All combustion appliances produce carbon sure propane cylinder valve outlet is clean. a safe distance away from the heater as monoxide (CO) during the combustion During set up, check all connections and... -
Page 5: Package Contents Page
PACKAGE CONTENTS PART DESCRIPTION QUANTITY 4 packed in 2 inner cartons Head Assembly 1 packed in 1 inner carton Tank Housing Gas Hose 1 attached to Head Assembly Upper Post Lower Post Regulator 1 packed with Head Assembly Post Supports 3 packed in 1 inner carton Base with Pre-assembled Waterbox... - Page 6 ASSEMBLY PREPARATION Before beginning assembly of this appliance, make sure all parts are present. Compare all parts with package contents list and hardware contents as listed on page of this manual. If any part is missing or damaged, do not attempt to assemble this product.
- Page 7 ASSEMBLY Attach the Lower Post to the Post Supports . Once you have tightened the bolts holding the Post Supports to the Base , align the holes in the Lower Post with the holes on the tops of the Post Supports and insert a Large Bolt through the hole in the Post Support.
- Page 8 ASSEMBLY Attach Head Assembly to Upper Post . Route Gas Hose down into Upper/Lower Posts align 4 small holes on the Head Assembly with 4 Small holes in the Upper Post . [HINT: Control knob should be above decal on post.] Insert the 4 Small Bolts with Lock Washers through the aligned 4 holes and tighten securely with the Wrench...
- Page 9 ASSEMBLY While supporting heater, tilt the Head Assembly and slide 3 Large Flat Washers over the Hardware Used: 6x Large Flat Washer 3x Wing Nut Connect the hose and regulator to the LP cylinder. The LP cylinder is sold separately. Use a standard / 20 lb propane cylinder only.
-
Page 10: Operating Instructions Page -1
OPERATING INSTRUCTIONS adjustment of propane gas. Storage of this patio heater indoors is permissible only if the cylinder is disconnected and removed from the appliance. A cylinder cylinder under or near this must be stored outdoors in a well-ventilated area out of the reach of children. appliance. - Page 11 OPERATING INSTRUCTIONS BEFORE TURNING GAS SUPPLY ON: LEAK TEST WARNING 1. Make 2-3 oz. of leak test solution 1. Your heater was designed and Perform all leak tests outdoors. approved for OUTDOOR use detergent and three parts water). only. Do NOT use it inside a NEVER leak test when smoking Do not use heater until all connections 2.
- Page 12 OPERATING INSTRUCTIONS LIGHTING NOTE: WARNING minutes to purge air from all gas lines before proceeding. FOR YOUR SAFETY Be careful when attempting to manually PUSH IN ignite this heater. Holding in the control knob for more than 10 seconds before upon ignition.
- Page 13 OPERATING INSTRUCTIONS OPERATION CHECKLIST: WARNING For a safe and pleasurable heating experience, perform this check FOR YOUR SAFETY before each use: Heater will be hot after use. Handle with BEFORE OPERATING: I am familiar with entire owner’s manual and understand all precautions noted.
-
Page 14: Care And Maintenance
CARE AND MAINTENANCE To enjoy years of outstanding performance from your heater, make sure you WARNING perform the following maintenance activities on a regular basis: FOR YOUR SAFETY Do NOT touch or move heater for at least KEEP EXTERIOR SURFACES CLEAN. 45 minutes after use. -
Page 15: Troubleshooting
TROUBLESHOOTING PROBLEM POSSIBLE CAUSE CORRECTIVE ACTION Gas valve may be off Turn gas valve ON Fuel tank may be empty Purge air from lines. Open gas lines and depress control Air in supply system knob for 2-3 minutes. Loose connection Main burner will not light Igniter fails... -
Page 16: Replacement Parts List
REPLACEMENT PARTS LIST PART DESCRIPTION QUANTITY 4 packed in 2 inner cartons Head Assembly 1 packed in 1 inner carton Tank Housing Gas Hose 1 attached to Head Assembly Upper Post Lower Post Regulator 1 packed with Head Assembly Post Supports 3 packed in 1 inner carton Base with Pre-assembled Waterbox... - Page 17 IMPORTANT For questions, concerns or problems with our product please Si vous éprouvez si vous avez des questions ou des email our customer service department: préoccupations, prière de faire parvenir un courriel à notre service à la clientèle customercare@jrhome.com customercare@jrhome.com DATED PROOF OF PURCHASE REQUIRED FOR WARRANTY SERVICE UNE PREUVE D’ACHAT DATÉE EST REQUISE POUR SE PRÉVALOIR DE LA GARANTIE.
- Page 18 Assoyez-vous, relaxez et restez au chaud. No d’article PH-100002 No de modèle : 63049 REMARQUE: Cet appareil de chauffage utilise un a llumage électronique et nécessite l’installation d’une pile AAA (non incluse). Des questions, des problèmes, des pièces manquantes? Avant de retourner l’appareil chez votre détaillant, appeler le service à la clientèle Paramount du lundi au vendredi, de 7 h 30 à...
- Page 19 AVANT DE COMMENCER Interlocuteurs anglophones et hispanophones. Contactez-nous pour assistance: customercare@jrhome.com | (800) 561-5550...
- Page 20 RENSEIGNEMENTS SUR LA SÉCURITÉ AVERTISSEMENT Certains matériaux ou objets placés sous le chauffage pendant son utilisation sont exposés à une chaleur radiante et peuvent être considérablement endommagés. Contactez-nous pour assistance: customercare@jrhome.com | (800) 561-5550...
- Page 21 CONTENU DE L'EMBALLAGE PIÈCE DESCRIPTION QUANTITÉ emballés dans 2 emballé dans 1 emballé avec emballé dans 1 (fixe la bo emballée avec les supports de borne QUINCAILLERIE oujon de Petit boulon Grande rondelle Petit écrou réflecteur Qté : 5 plate à...
- Page 22 ASSEMBLAGE Remarque : La chambre à eau à...
- Page 23 ASSEMBLAGE borne inférieure supports de borne Quincaillerie utilisée : borne supérieure borne inférieure Remarque : 'utilisation de boulons n'est pas nécessaire pour maintenir les bornes en place. boîtier du réservoir bornes supérieure/inférieure supports de borne boîtier du réservoir base goujons de réflecteur Quincaillerie utilisée : Contactez-nous pour assistance: customercare@jrhome.com | (800) 561-5550...
- Page 24 ASSEMBLAGE Quincaillerie utilisée : REMARQUE : DE RÉFLECTEUR BLEU SUR LES RÉFLECTEUR AVANT L'ASSEMBLAGE! Conseil d'assemblage : réflecteur de réflecteur Quincaillerie utilisée : Contactez-nous pour assistance: customercare@jrhome.com | (800) 561-5550...
- Page 25 ASSEMBLAGE grandes rondelles plates goujons de réflecteur grandes rondelles plates goujons de réflecteur ensemble du réflecteur Quincaillerie utilisée : seulement boî ier du ré ervoir supports de borne r gulateur tu au de clé ré ulateur c aî e boî ier du ré ervoir Contactez-nous pour assistance: customercare@jrhome.com | (800) 561-5550...
- Page 26 Contactez-nous pour assistance: customercare@jrhome.com | (800) 561-5550...
- Page 27 Interlocuteurs anglophones et hispanophones. Remarque : si les raccords viennent à être desserrés ou défaits, effectuez une vérification complète. Attention : Contactez-nous pour assistance: customercare@jrhome.com | (800) 561-5550...
- Page 28 REMARQUE : la toute première fois ou après un changement de bouteille, maintenez le bouton de commande enfoncé pendant 2 minutes afin conduites de gaz. APPUYER SUR MAINTENIR ENFONCÉ TOUT EN APPUYANT SUR LE BOUTON Remarque : pour votre sécurité, le bouton de Si vous rencontrez des problèmes commande ne peut pas être d'allumage, consultez la section «...
- Page 29 REMARQUE : après l'utilisation, une certaine décoloration de l'écran de l'émetteur est normale. Contactez-nous pour assistance: customercare@jrhome.com | (800) 561-5550...
- Page 30 É É é è ’ é é Remarque : un environnement salin (près de la mer, par exemple) dans les plus brefs délais. Attention : laissez le foyer refroidir avant de procéder à son entretien. Contactez-nous pour assistance: customercare@jrhome.com | (800) 561-5550...
- Page 31 DÉPANNAGE Contactez-nous pour assistance: customercare@jrhome.com | (800) 561-5550...
- Page 32 LISTE DES PIÈCES DE RECHANGE PIÈCE DESCRIPTION QUANTITÉ Panneau ré ecteur uchon central du ré ecteur du réservoir Tuyau de gaz Borne supérieure Borne inférieure Régulateur Supports de borne Base avec chambre à eau préassemblée 1 emballée avec les supports de borne Des ques ons, des problèmes, des pièces manquantes ou besoin de pièces de rechange? Avant de retourner l’ar cle au détaillant, notre service d’assistance...
- Page 33 IMPORTANT For questions, concerns or problems with our product please Si vous éprouvez si vous avez des questions ou des email our customer service department: préoccupations, prière de faire parvenir un courriel à notre service à la clientèle customercare@jrhome.com customercare@jrhome.com DATED PROOF OF PURCHASE REQUIRED FOR WARRANTY SERVICE UNE PREUVE D’ACHAT DATÉE EST REQUISE POUR SE PRÉVALOIR DE LA GARANTIE.
Need help?
Do you have a question about the 63049 and is the answer not in the manual?
Questions and answers