Table of Contents
Advertisement
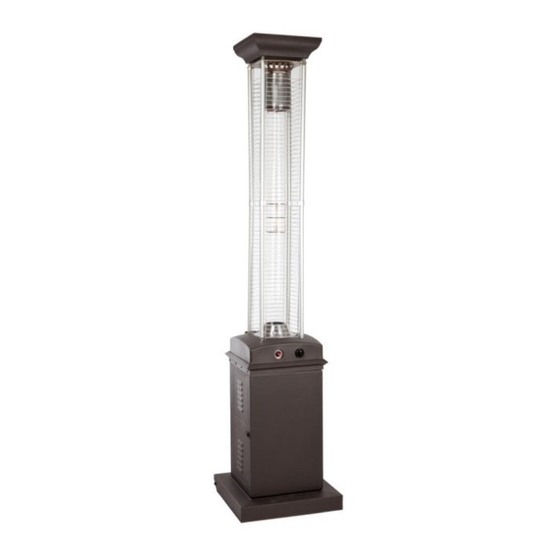
FLAME HEATER
PATIO HEATER INSTRUCTION MANUAL
For cus tomer service, parts
or warranty issues:
Call 1-800-561-5550
or e-mail customercare@jrhome.com
FOR OUTDFOOR USE ONLY | USES PROPANE LPG ONLY
PLEASE READ INSTRUCTIONS CAREFULLY BEFORE ASSEMBLY
RETAIN THIS MANUAL FOR REFERENCE
!
WARNING
HAZARDOUS FIRE OR EXPLOSION MAY RESULT IF
INSTRUCTIONS ARE IGNORED.
It is the consumer's responsibility to see that the
patio heater is properly assembled, installed, and
taken care of. Failure to follow instructions in this
manual could result in bodily injury and/or
property damage.
!
PRECAUTIONS
vapours and liquids in the vicinity of this or any
other appliance.
•Any LP cylinder not connected for use shall not be
stored in the vicinity of this or any other appliance
FOR YOUR SAFETY IF YOU SMELL GAS:
1.T
3.Do not operate any electrical appliances
4.Ventilate the area.
5.Check for leaks as detailed in this manual.
6.If odour persists, contact your dealer or gas
supplier immediately.
Model no. LIP-09A-TGG
Item no.
PH-F-116-MK
Advertisement
Table of Contents

Related Manuals for Paramount Fitness LIP-09A-TGG


Summary of Contents for Paramount Fitness LIP-09A-TGG
- Page 1 Model no. LIP-09A-TGG FLAME HEATER Item no. PH-F-116-MK PATIO HEATER INSTRUCTION MANUAL WARNING HAZARDOUS FIRE OR EXPLOSION MAY RESULT IF INSTRUCTIONS ARE IGNORED. It is the consumer’s responsibility to see that the patio heater is properly assembled, installed, and taken care of. Failure to follow instructions in this manual could result in bodily injury and/or property damage.
-
Page 2: Tools And Parts Needed For Assembly
TOOLS AND PARTS NEEDED FOR ASSEMBLY DANGER CARBON MONOXIDE HAZARD This appliance produce carbon monoxide which has no odor. Using it in an enclosed space can kill you. Never use this appliance in an enclosed space such as a camper, tent, car or home. -
Page 3: Check For Leaks
PRECAUTIONS NOTE: PLEASE READ THE FOLLOWING SAFETY RULES WARNING: This heater must only be used outdoors. Using this product in an enclosed area may cause injury, death or property damage. Only use in a well-ventilated space. Do not use in a building, garage, or any other enclosed area. - Page 4 PRECAUTIONS CHECK THE HEATER IMMEDIATELY IF ANY OF THE FOLLOWING EXIST: 1. The smell of gas in conjunction with extreme yellow colored tips of the burner flames. 2. The heater does not reach temperature. 3. The burner makes a popping noise during use (a slight popping noise is normal when the burner is extinguished after using).
- Page 5 PACKAGE CONTENTS ASSEMBLY PART DESCRIPTION Top Cap Reflector Emitter Upper Supports Lower Supports Mesh Guards Glass Tube Connector Glass Tube 2 pcs Burner *Tank Housing/Base Assembly (with wheels) Regulator/Hose assembly Cylinder Holder...
- Page 6 HARDWARE CONTENTS ASSEMBLY INCLUDED IN PLASTIC BAG WITH INSTRUCTION MANUAL ASSEMBLY PREPARATION Before beginning assembly of this appliance, make sure all parts are present. Compare all parts with package contents list and hardware contents as listed on pages 2 and 3 of this manual. If any part is missing or damaged, do not attempt to assemble this product.
- Page 7 ASSEMBLY 1. Locate 4 pieces of Upper Supports and 4 pieces of Lower Supports. Slide 1 - Mesh Guard Connector over bottom end of Upper Support, then screw Upper Support onto Lower Support (Note: Mesh Guard Connector will remain loose and able to slide on the supports.) Repeat with remaining Upper and Lower Supports and Mesh Guard Connectors until you have 4 assembled Supports.
- Page 8 ASSEMBLY . Fit the Emitter (B) down over the threaded end of the assembled Supports by lining up the holes in the corners of the Emitter with the Supports and sliding the Emitter down over the Supports. Secure the Emitter to the Supports using 4 pieces of B - M8 Spacer. Tighten with an open end wrench.
- Page 9 ASSEMBLY 5. Attach Reflector (A) to top of Supports. Align holes in bottom of Reflector with Supports and slide Reflector down over Supports. 6. Secure Reflector to Supports with 4 pieces A - M8 Nut. Tighten with an open end wrench. : 4 x A, M8 Nut Hardware Used 7.
- Page 10 ASSEMBLY 10. Attach Mesh Guards to Supports. Hint: It is best to begin with bottom pieces of Mesh Guards. Locate one Mesh Guard. Slide the Mesh Guard Connectors up the Support and hold them in the center of the Support. Then insert the longer tabs at the bottom of the Mesh Guard into the holes on Tank Housing/Base.
- Page 11 OPERATING INSTRUCTIONS A minimum supply pressure of .5 psi is required for the purpose of input adjustment of propane gas. Storage of an appliance indoors is permissible only if the cylinder is disconnected and removed from the appliance. A cylinder must be stored outdoors in a well-ventilated area out of the reach of children. A disconnected cylinder must have dust caps tightly installed and must not be stored in a building, garage, or any other enclosed area.
-
Page 12: Before Turning Gas Supply On
OPERATING INSTRUCTIONS Caution: Do not attempt to operate this appliance until you have read and understand all Safety Information in this manual and all assembly is complete and leak checks have been performed. WARNING CONCERNING THE GLASS TUBE: ●NEVER use this heater when it is raining. The glass tube will break when it comes in contact with water. ●NEVER splash any liquid on the glass tube while the heater is in operation. - Page 13 OPERATING INSTRUCTIONS When Heater is ON: Emitter screen will become bright red due to intense heat. The color is more visible at night. Burner will display tongues of blue and yellow flame. These flames should not be yellow or produce thick black smoke, indicating an obstruction of airflow through the burners.
-
Page 14: Care And Maintenance
CARE AND MAINTENANCE After Operation: 1. Gas control knob is in OFF position. 2. Gas tank valve is OFF. 3. Disconnect gas line. To enjoy years of outstanding performance from your heater, make sure you perform the following maintenance activities on a regular basis: Keep exterior surfaces clean. -
Page 15: Troubleshooting
TROUBLESHOOTING PROBLEM POSSIBLE CAUSE CORRECTIVE ACTION Gas valve may be off Turn gas valve ON Fuel tank may be empty Refill LPG tank Orifice blocked Clean or replace orifice Purge air from lines. Open gas Air in supply system lines and depress control knob for 2-3 mins. -
Page 16: Warranty
IMPORTANT For questions, concerns or problems with our product please email our customer service department: customercare@jrhome.com or call 1-800-561-5550. DATED PROOF OF PURCHASE REQUIRED FOR WARRANTY SERVICE. WARRANTY This product is inspected, tested and carefully packaged to minimize the chance of damage during shipment.
Need help?
Do you have a question about the LIP-09A-TGG and is the answer not in the manual?
Questions and answers